This project demonstrates how to create, configure, activate, and test a REST-based application integration using Oracle Integration Cloud (OIC) following NexInfo best practices. It provides a structured, end-to-end walkthrough of the integration lifecycle, starting from accessing the Integrations workspace to validating execution results through the Activity Stream.
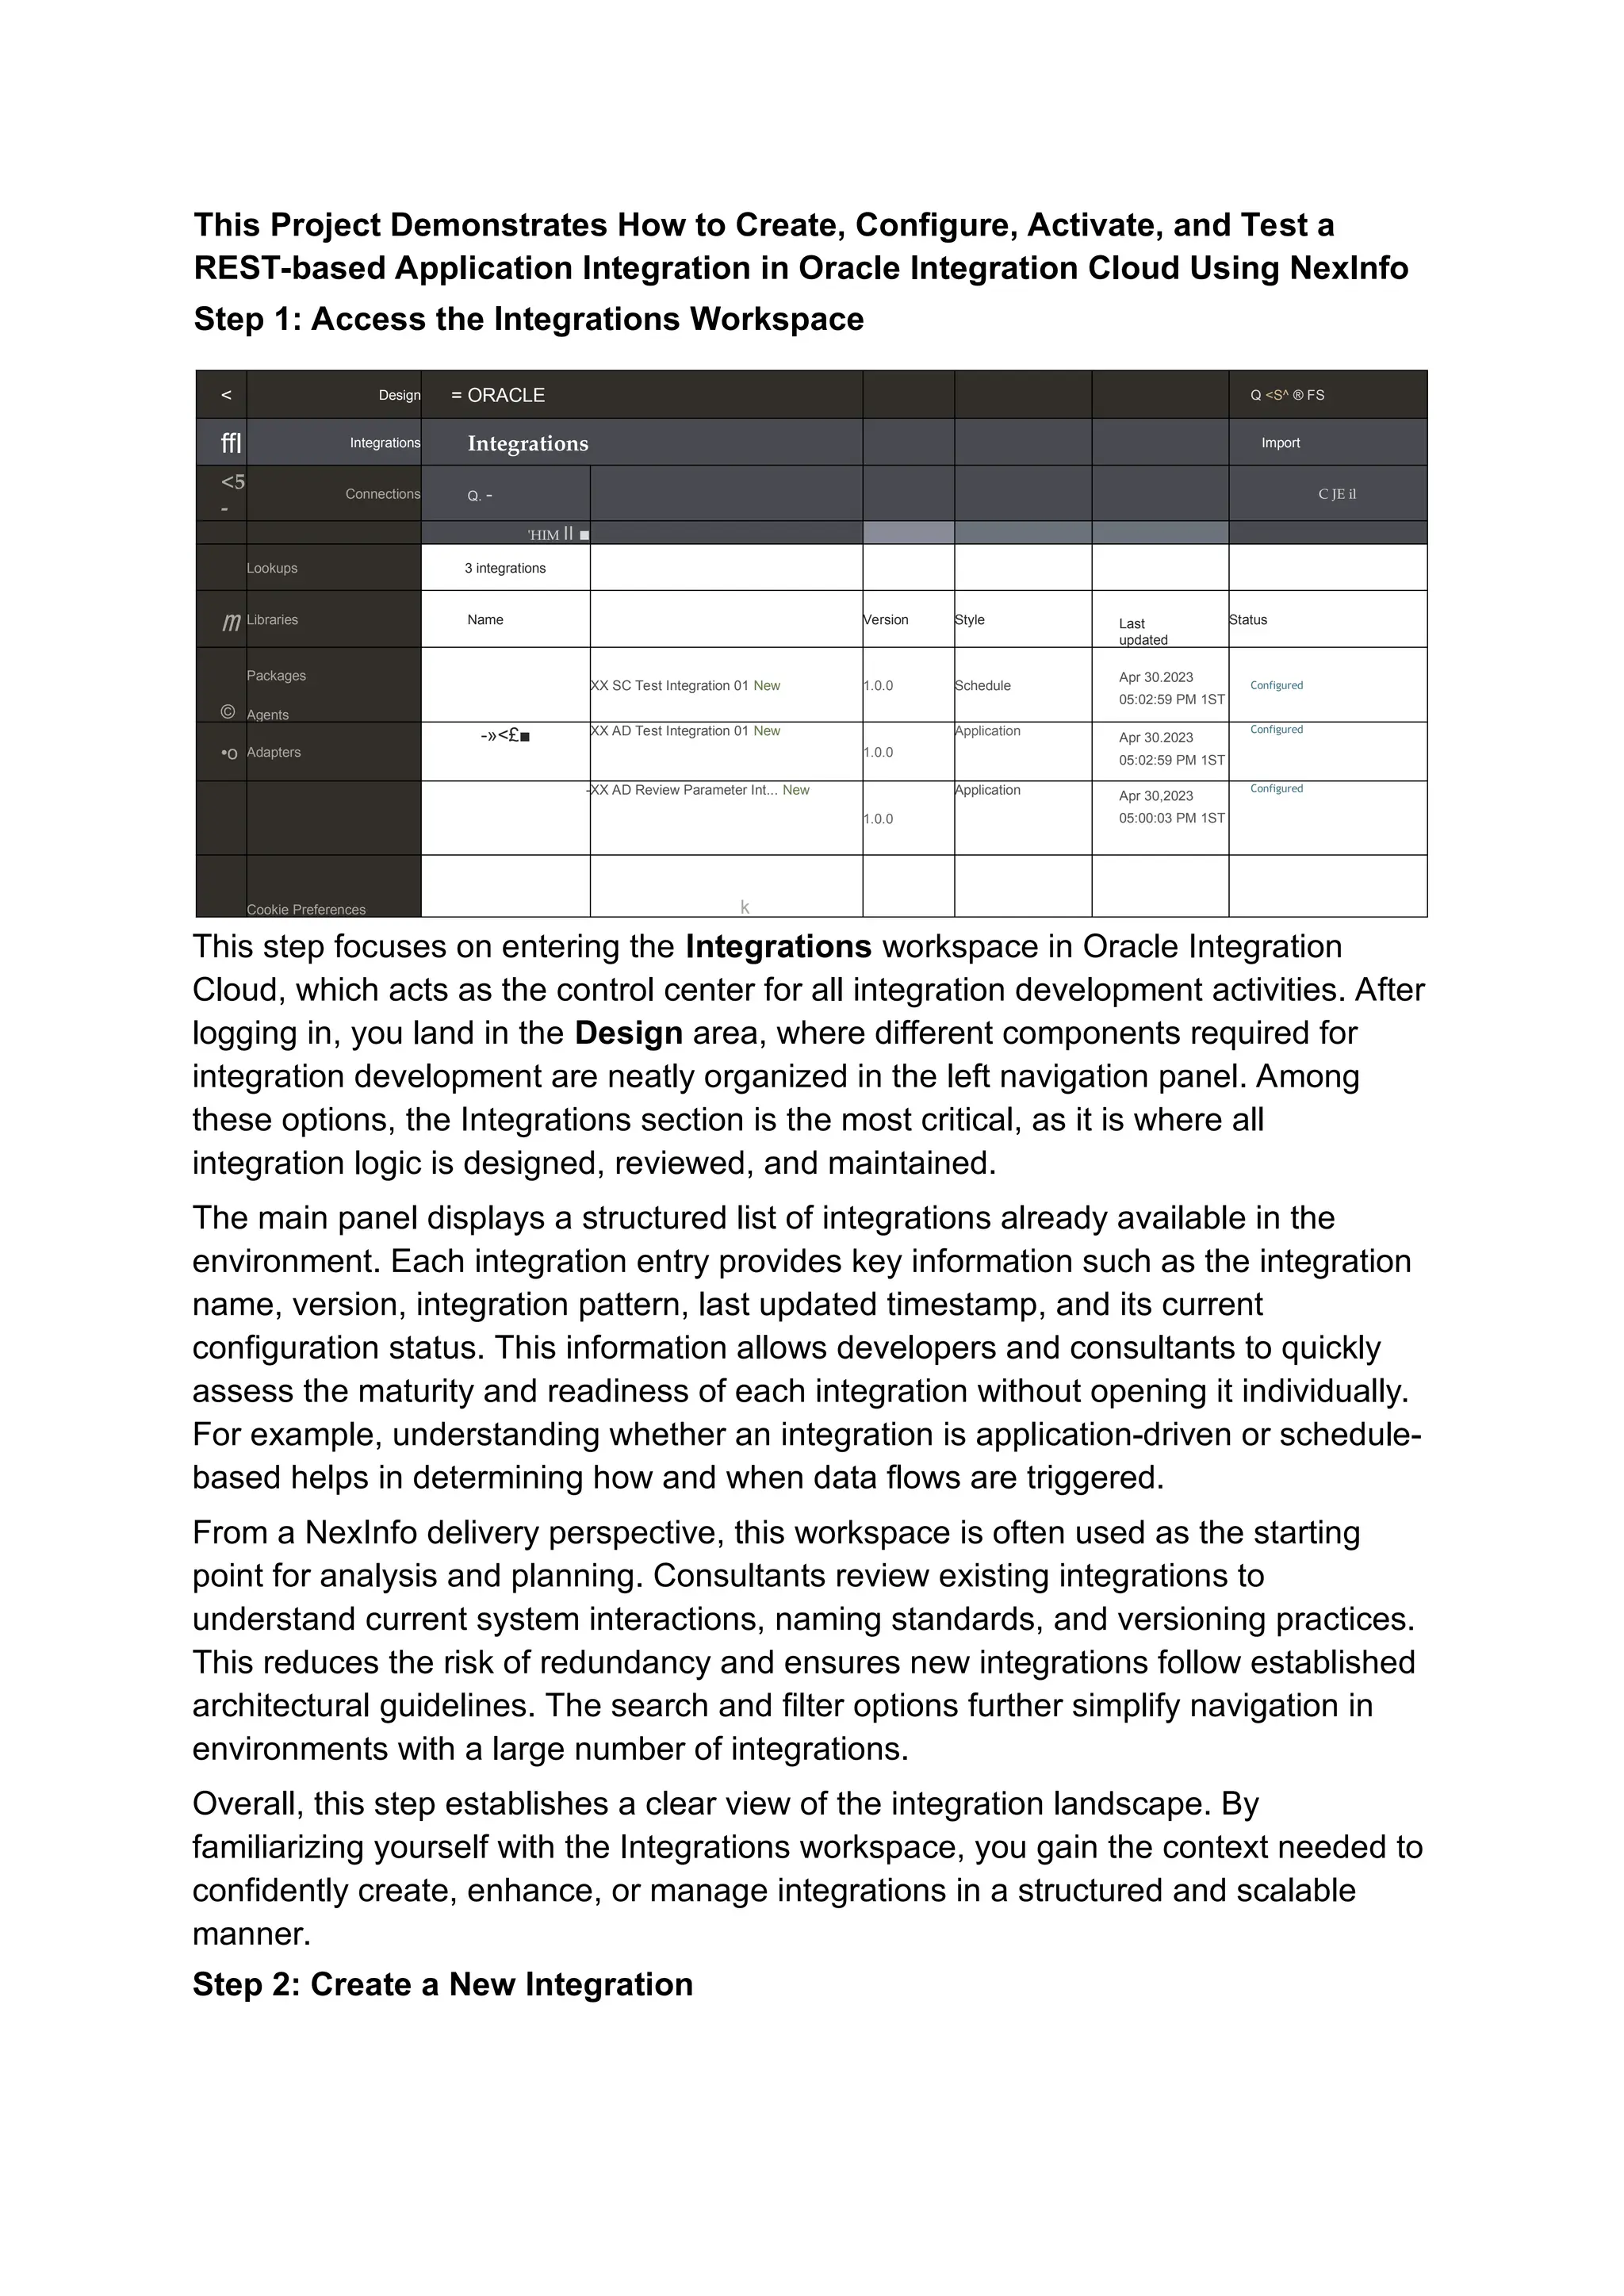
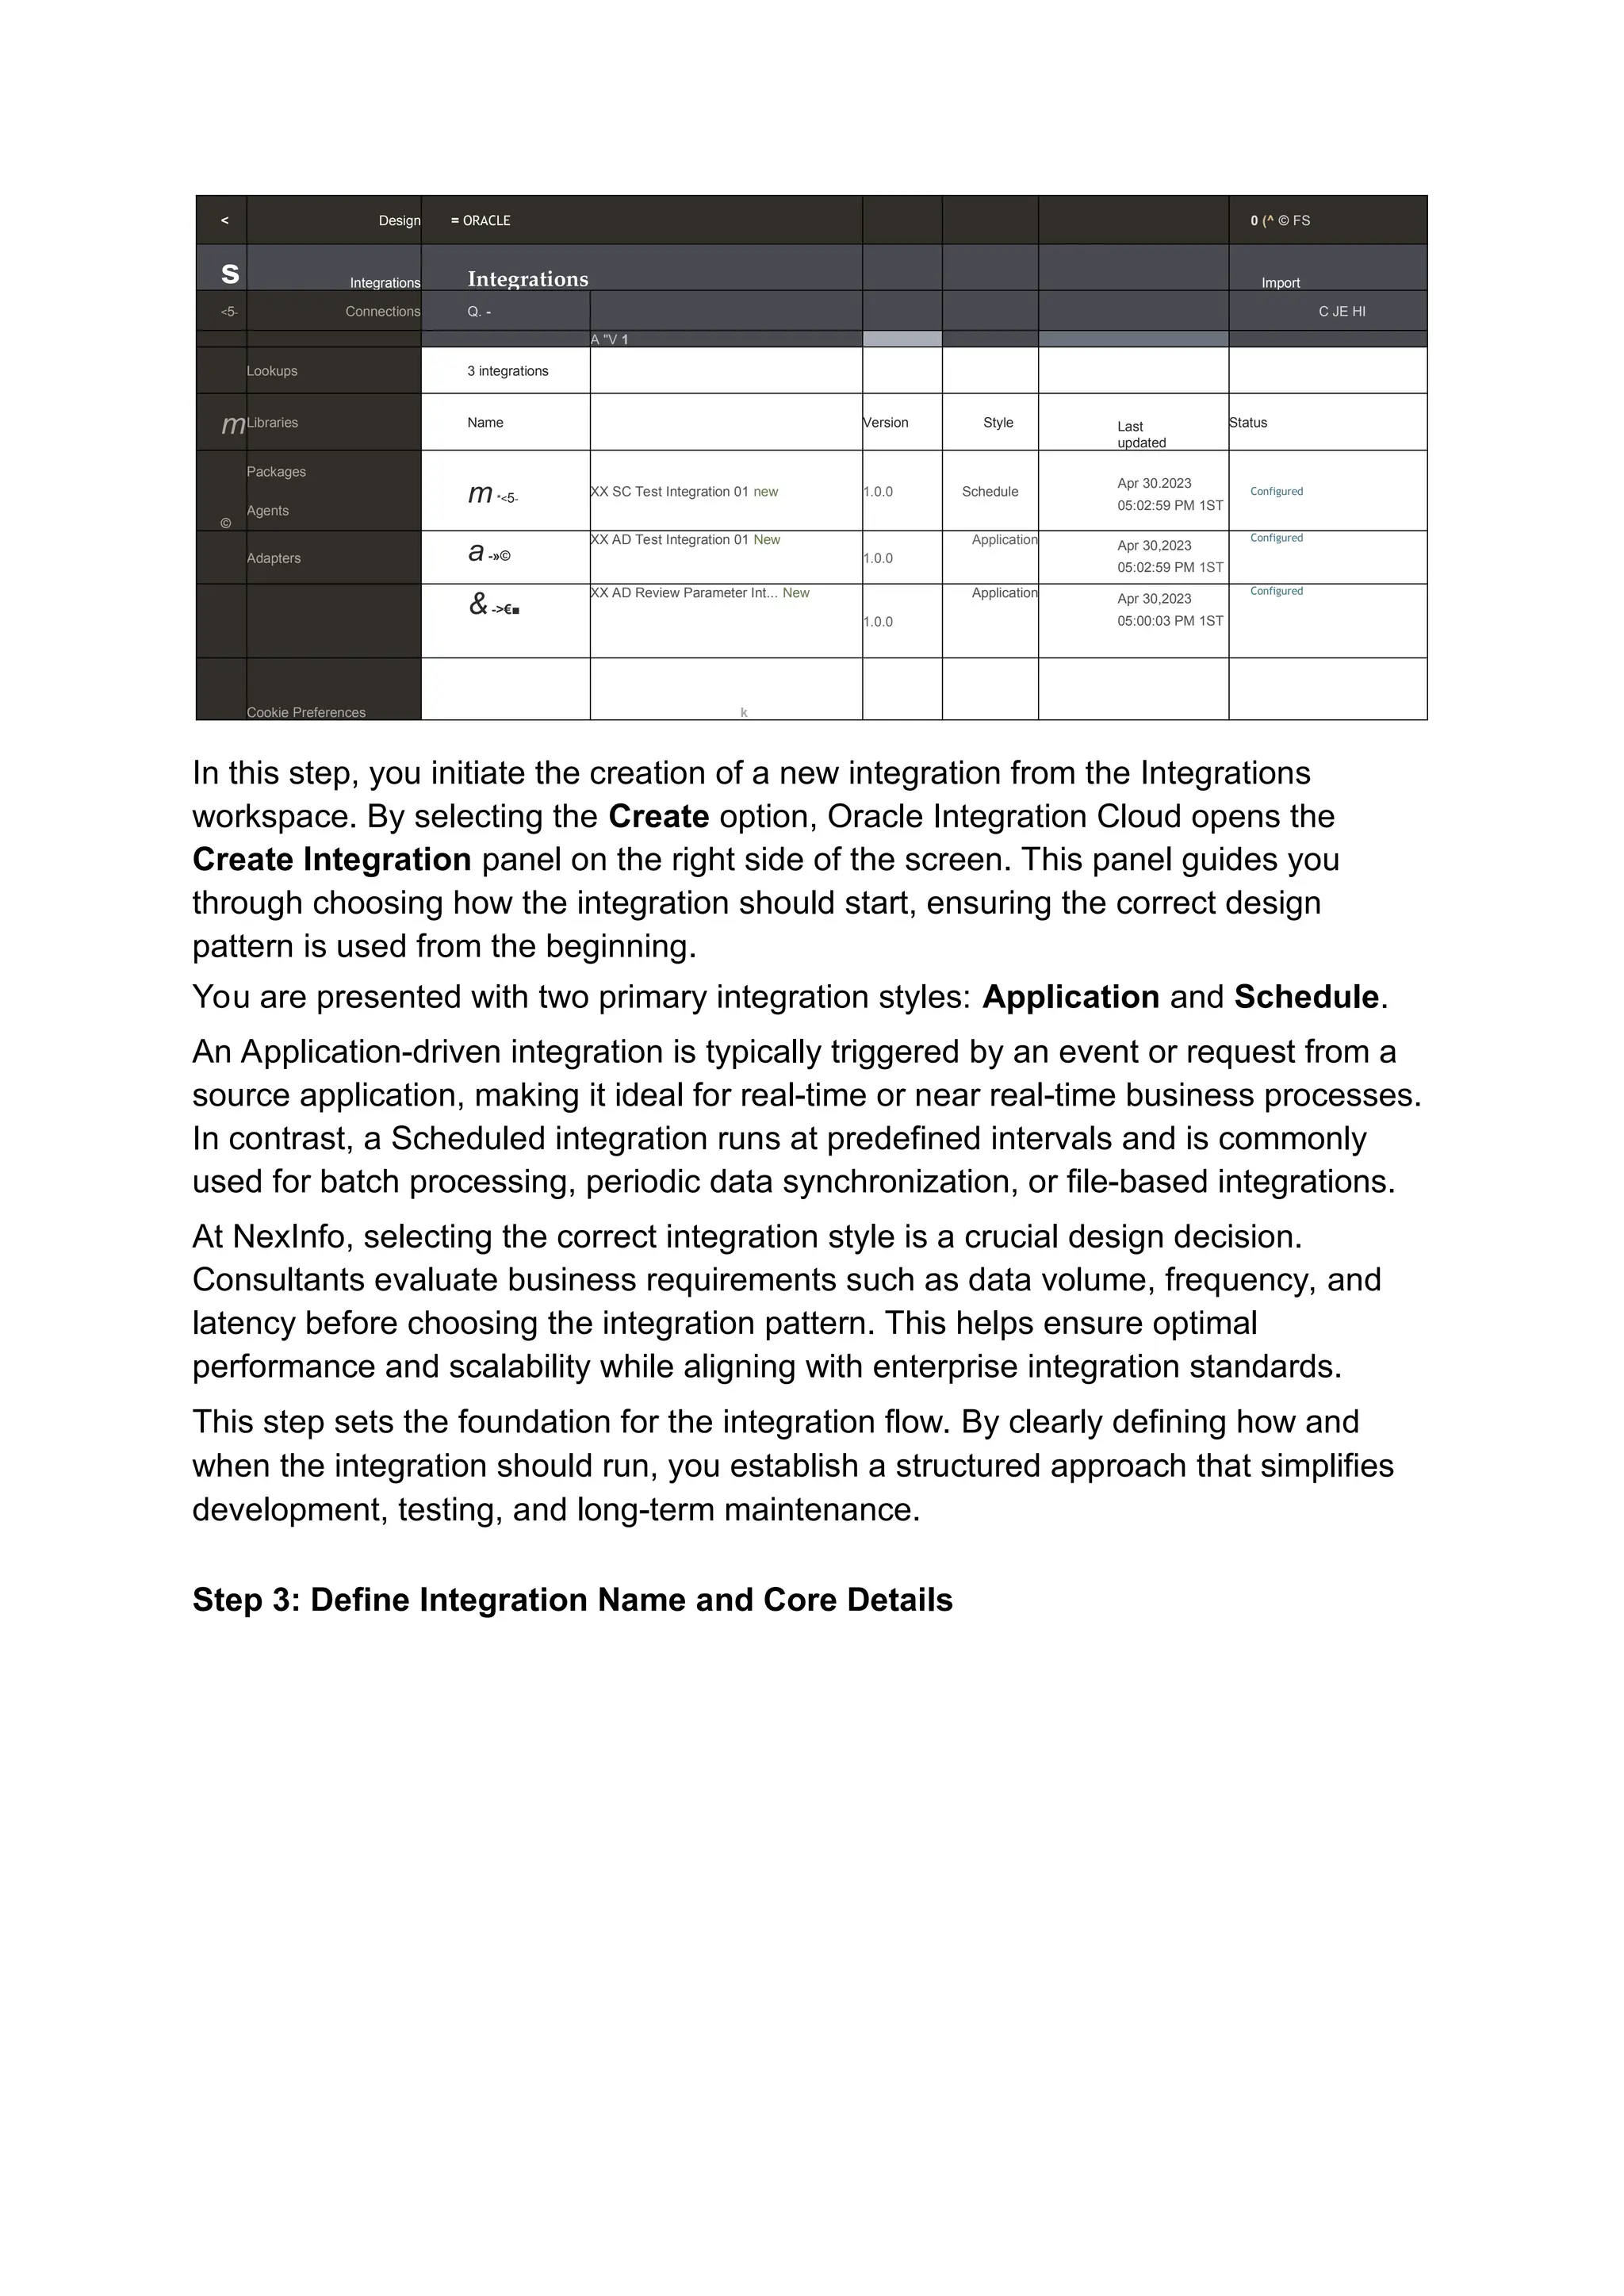
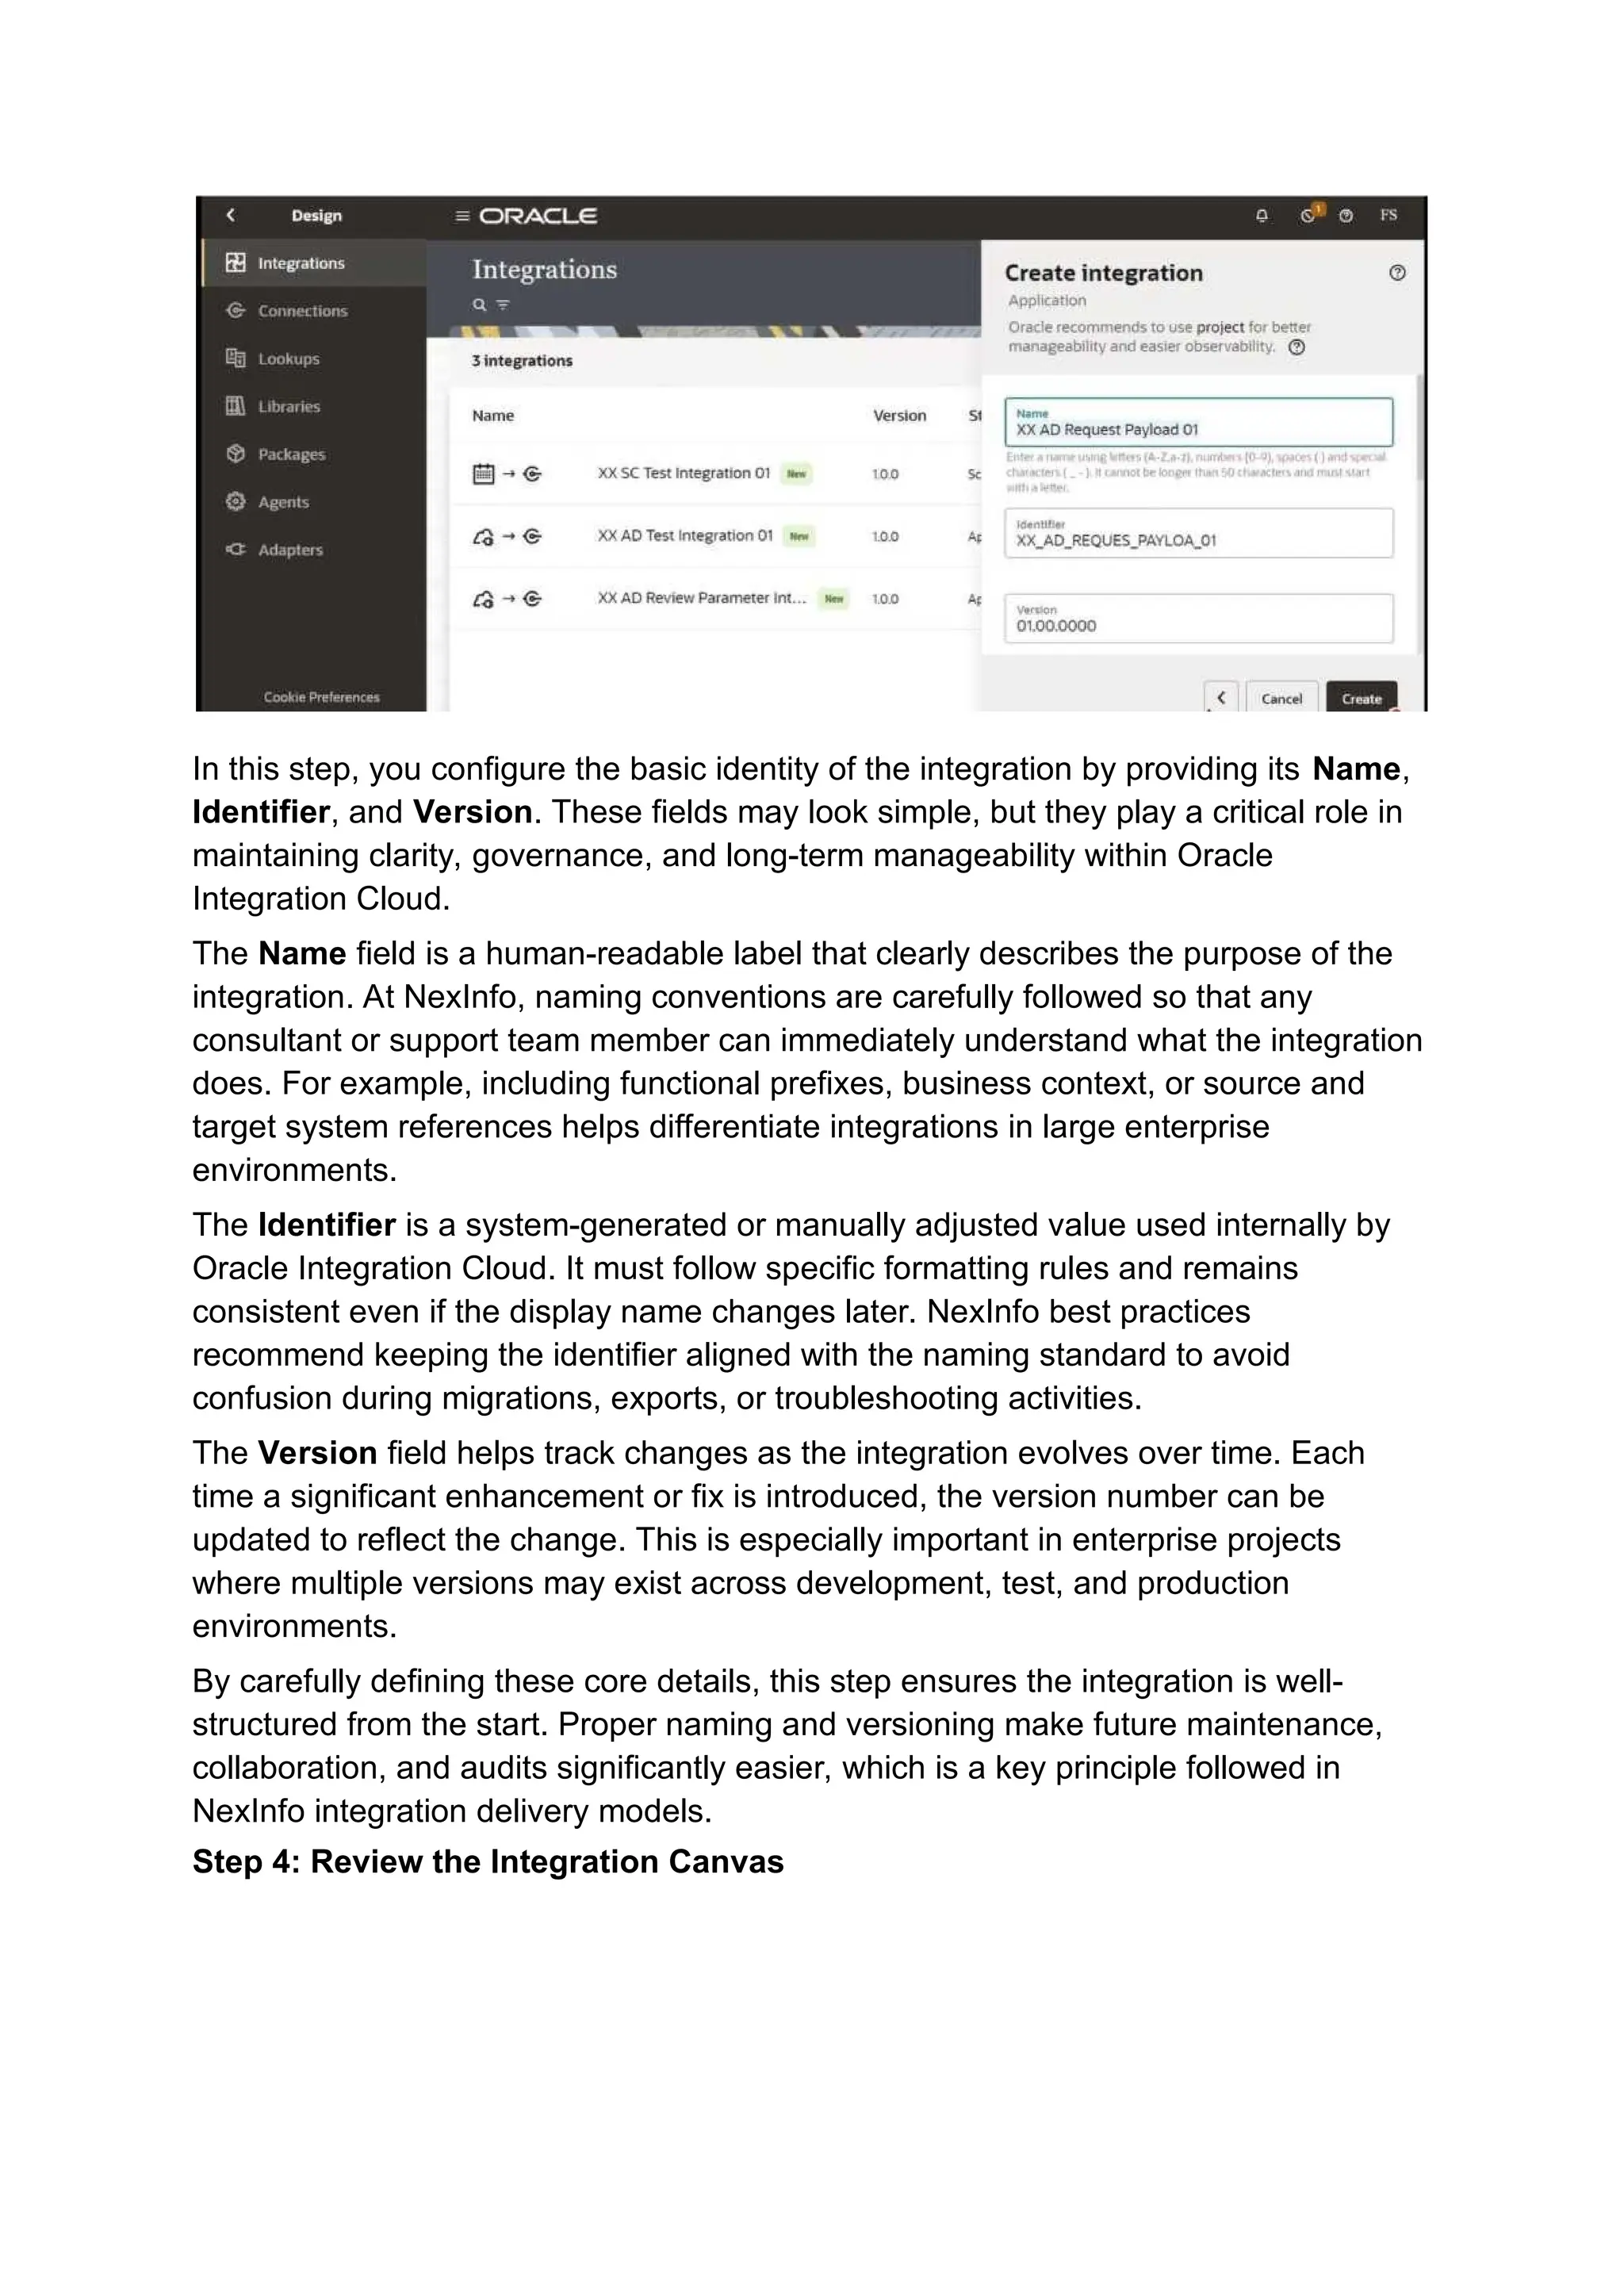
The project begins by familiarizing users with the OIC Integrations workspace, where existing integrations can be reviewed and managed. It then explains how to create a new application-driven integration, select the appropriate integration style, and define core details such as integration name, identifier, and version to ensure governance and maintainability.
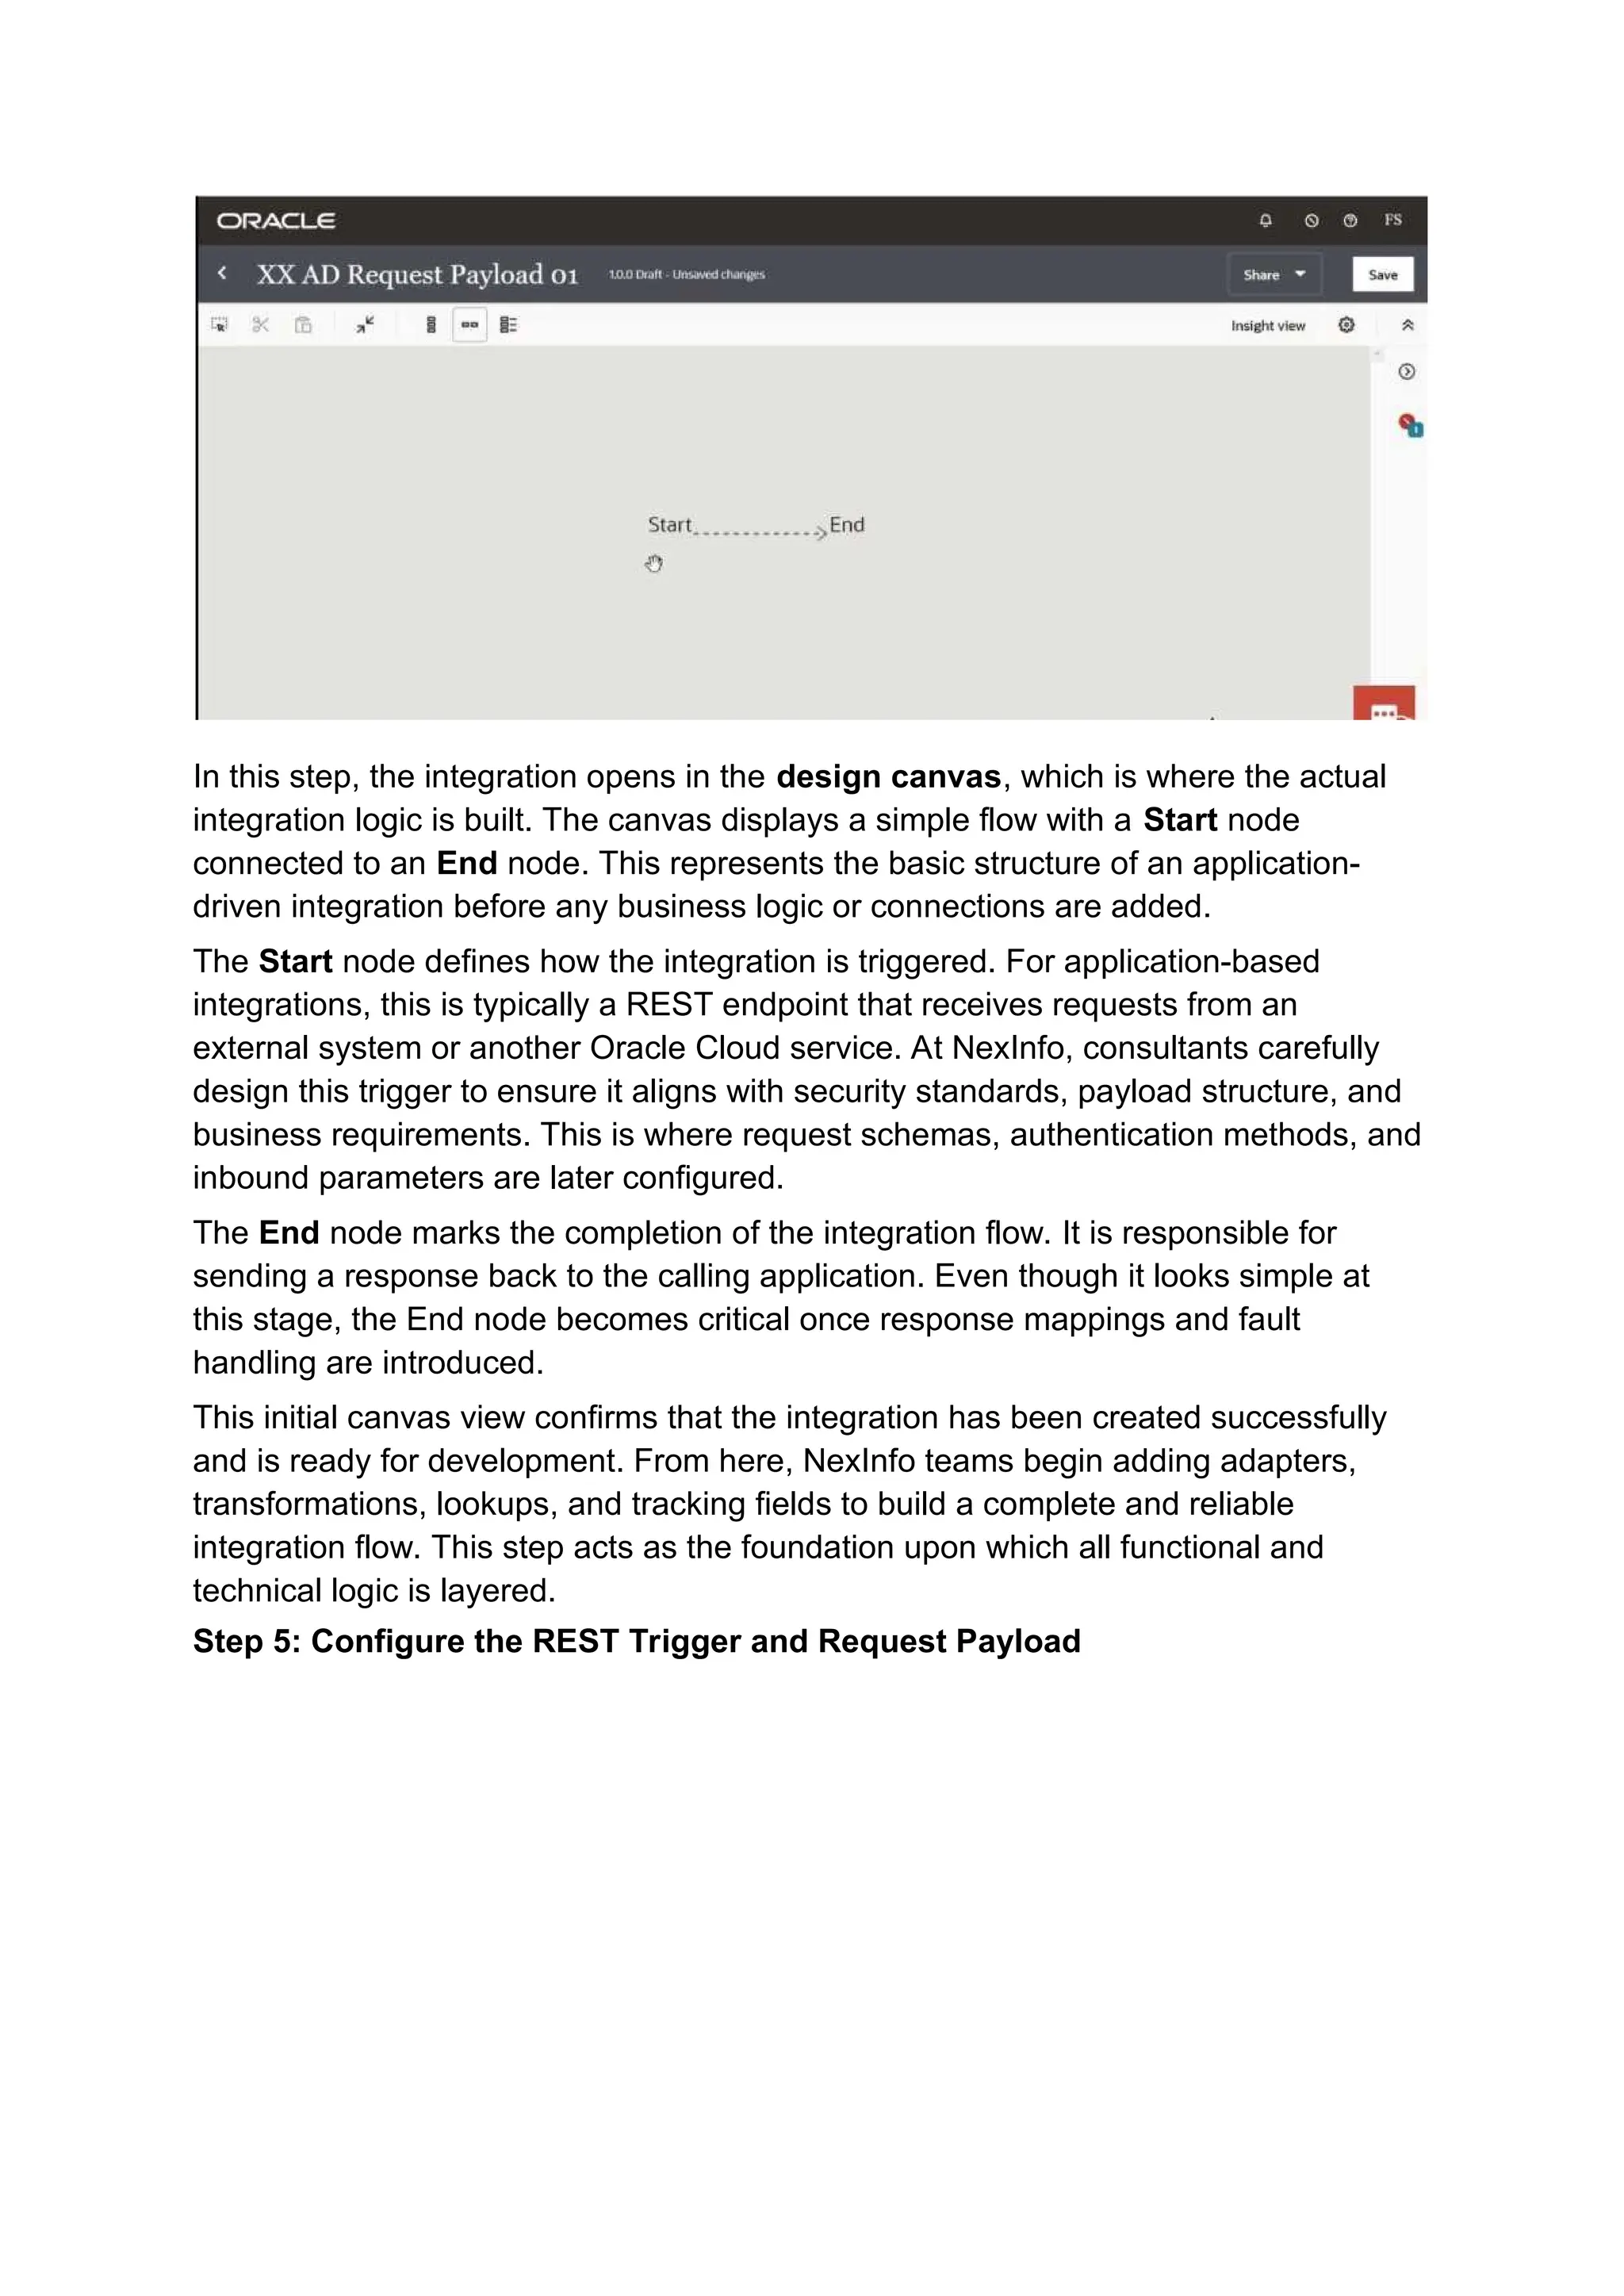
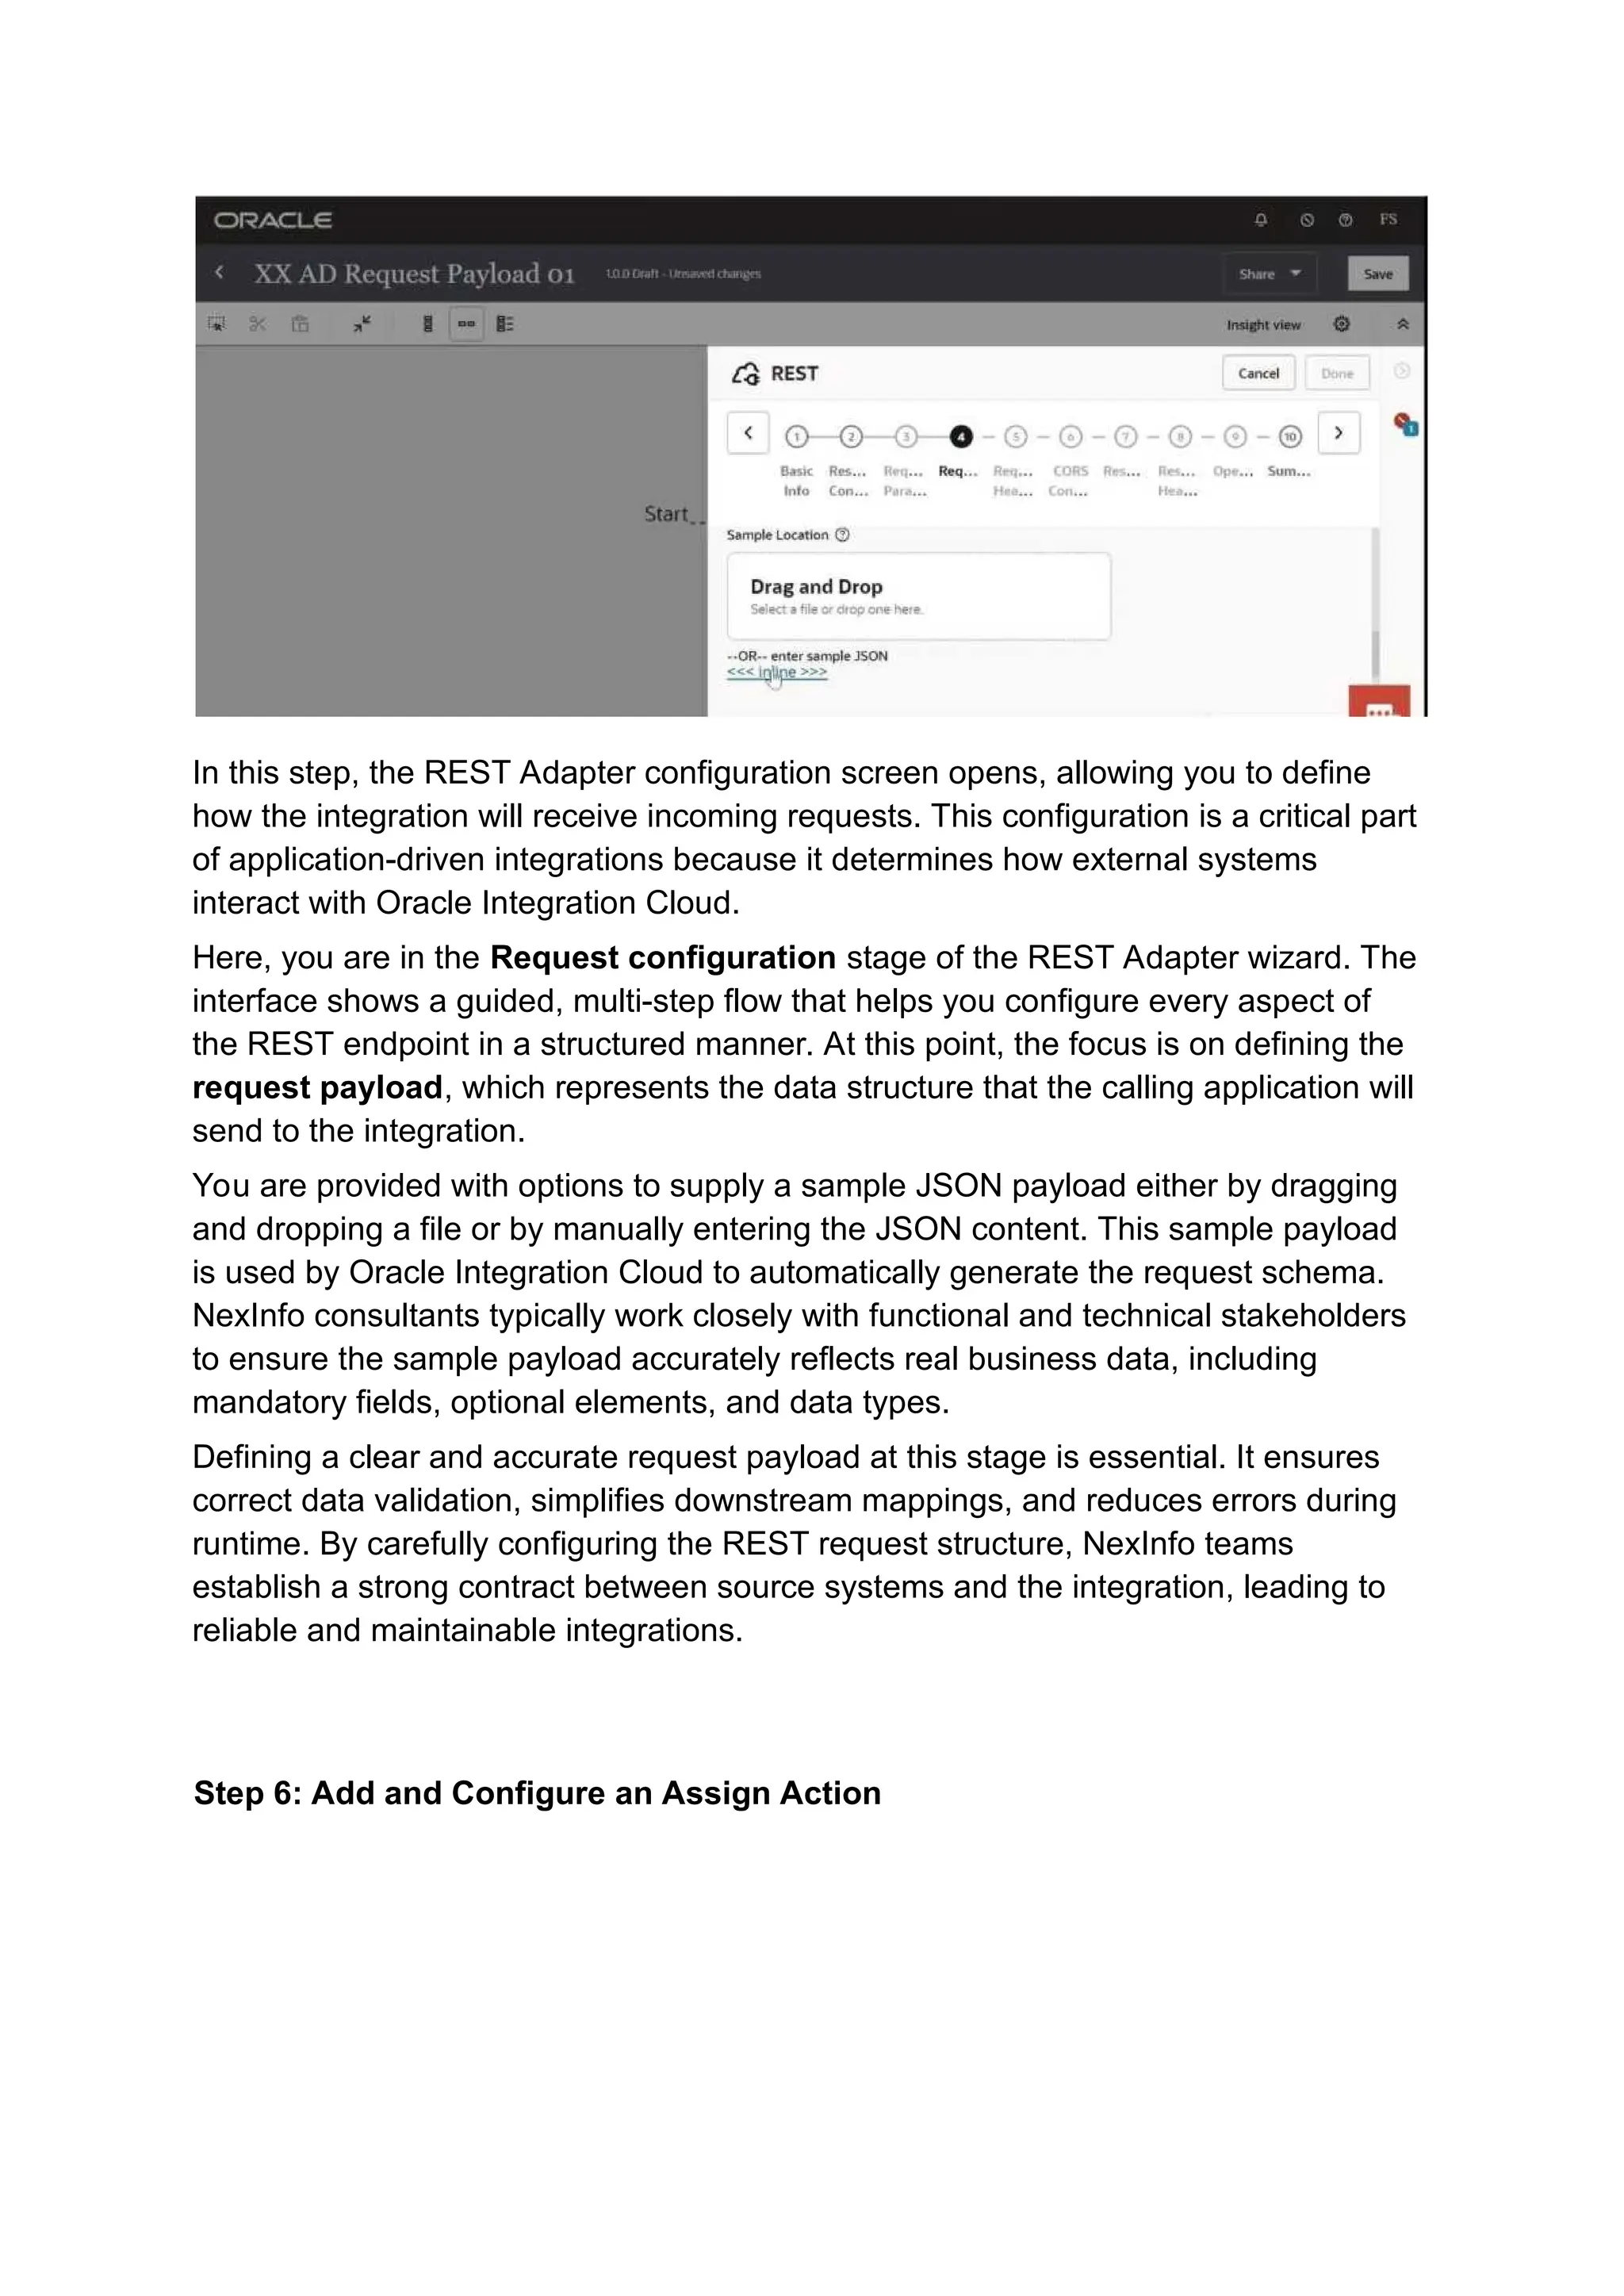
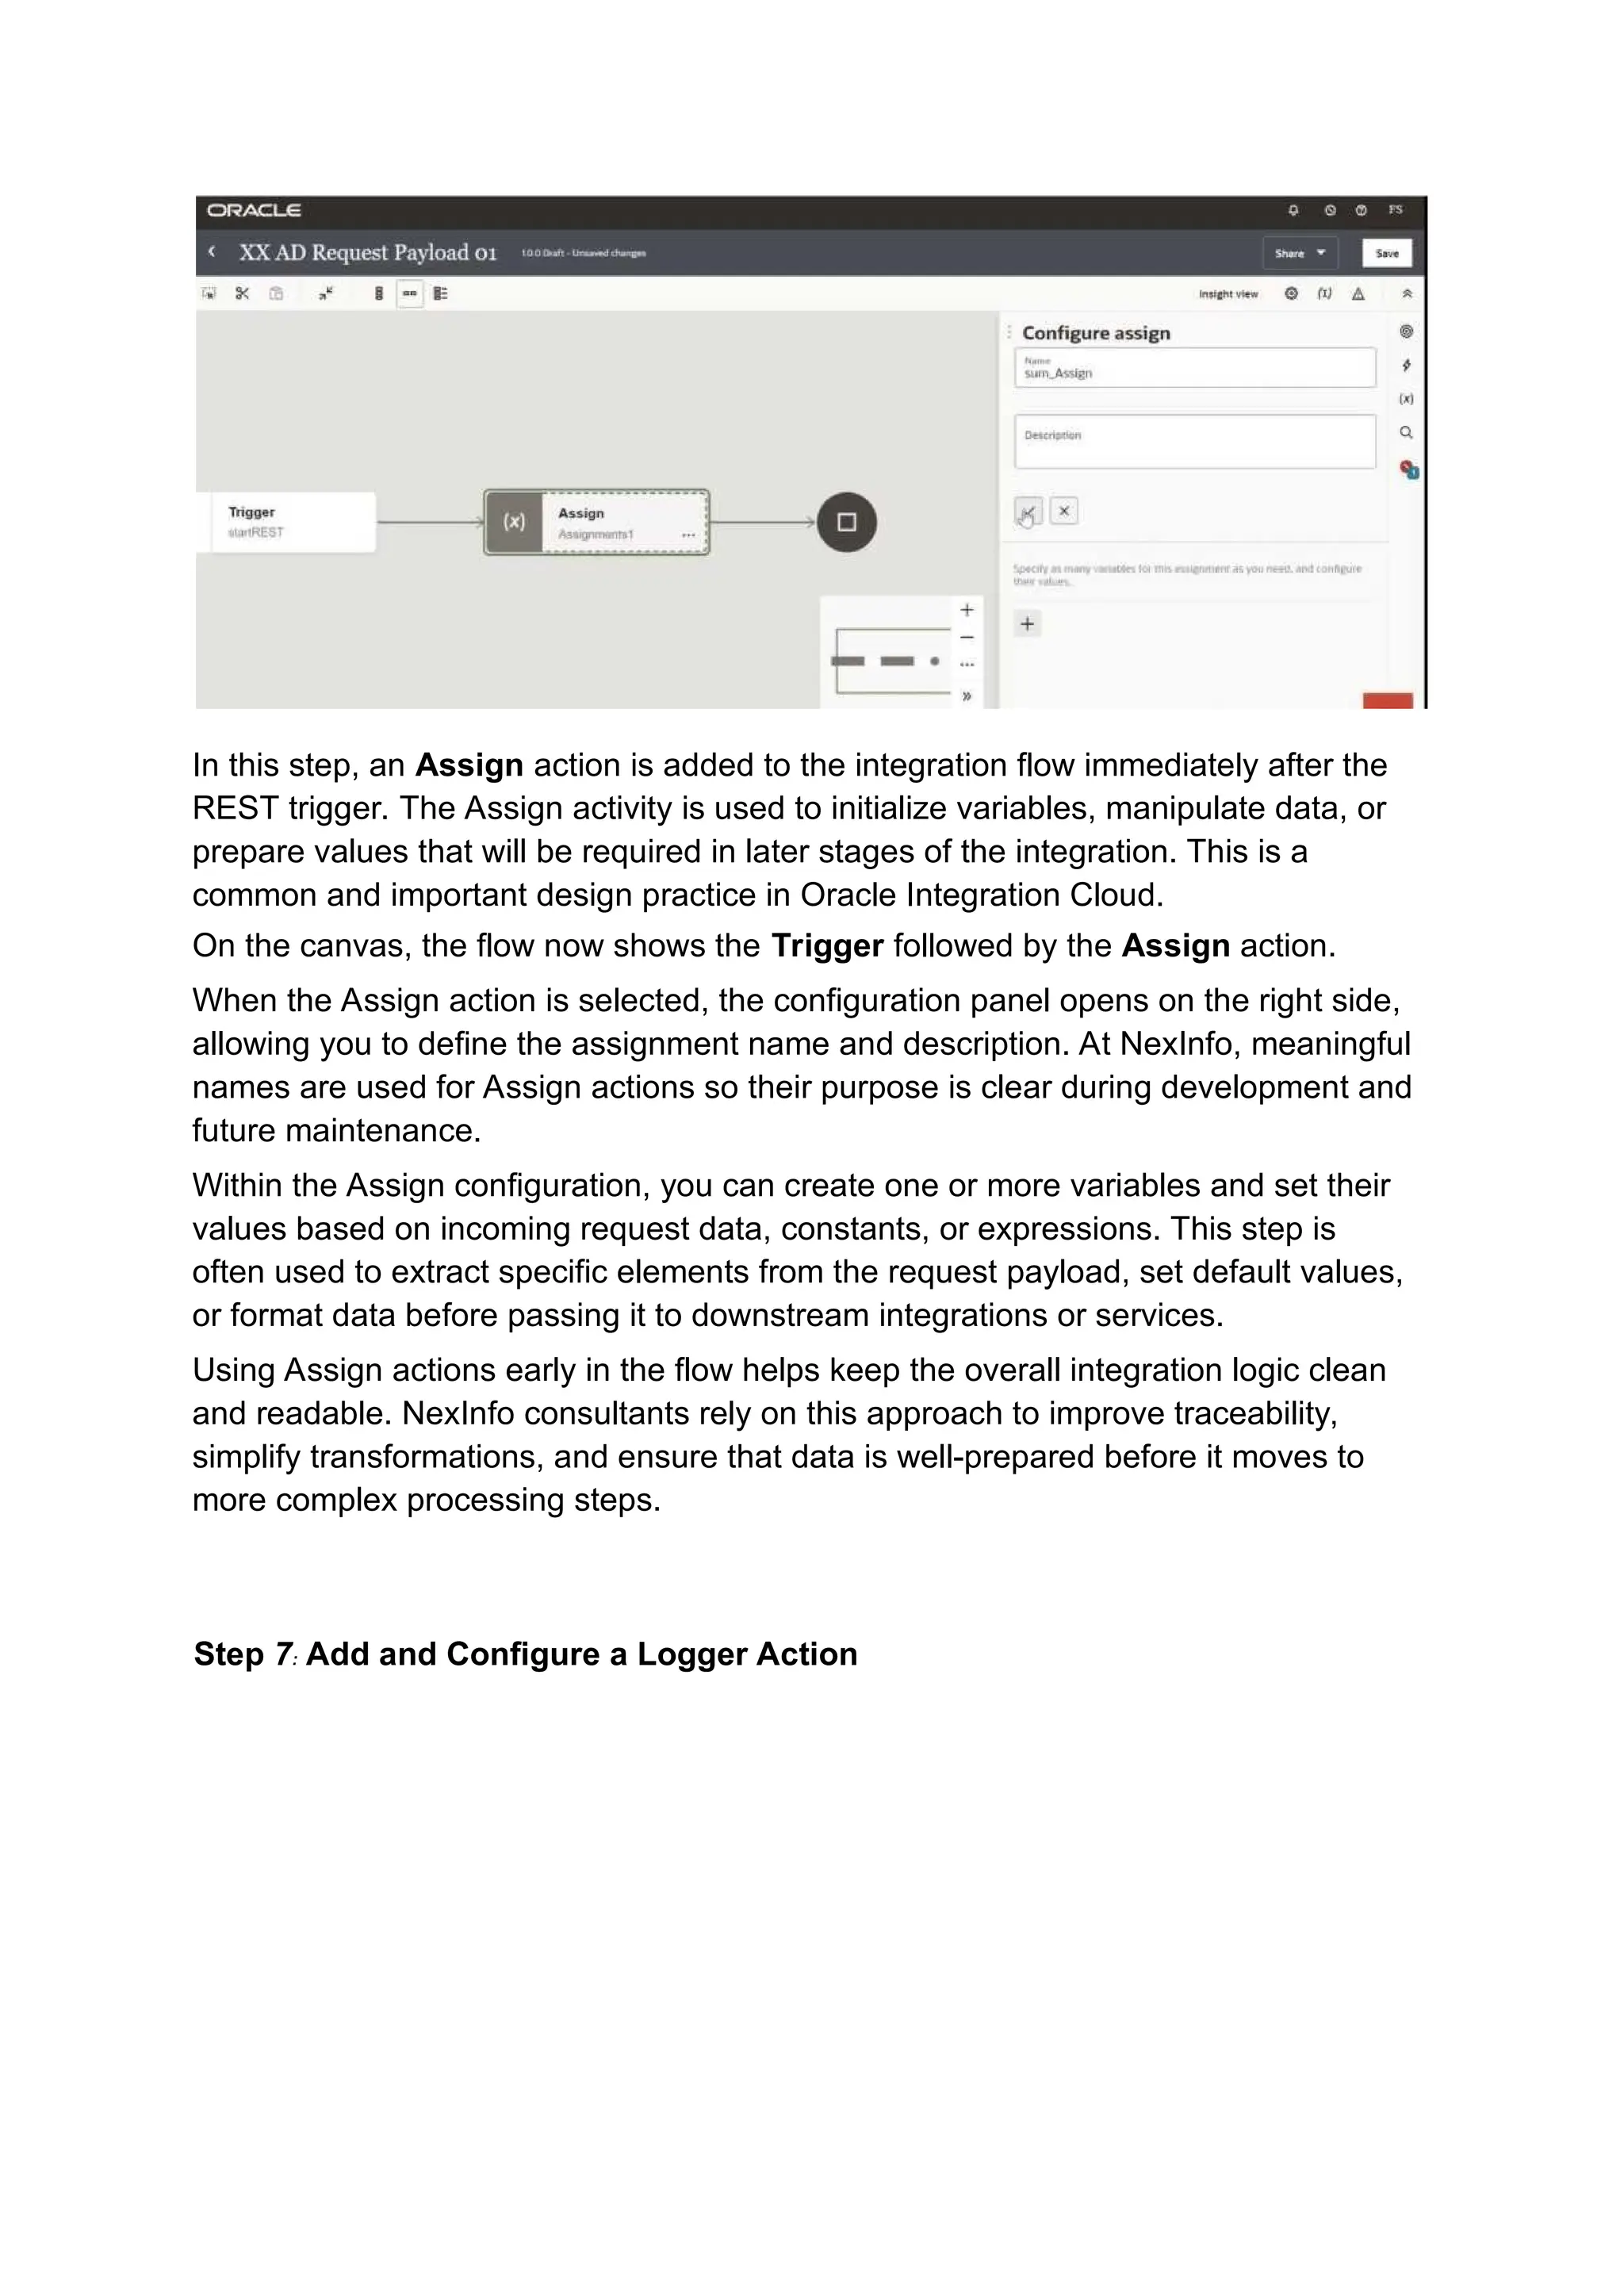
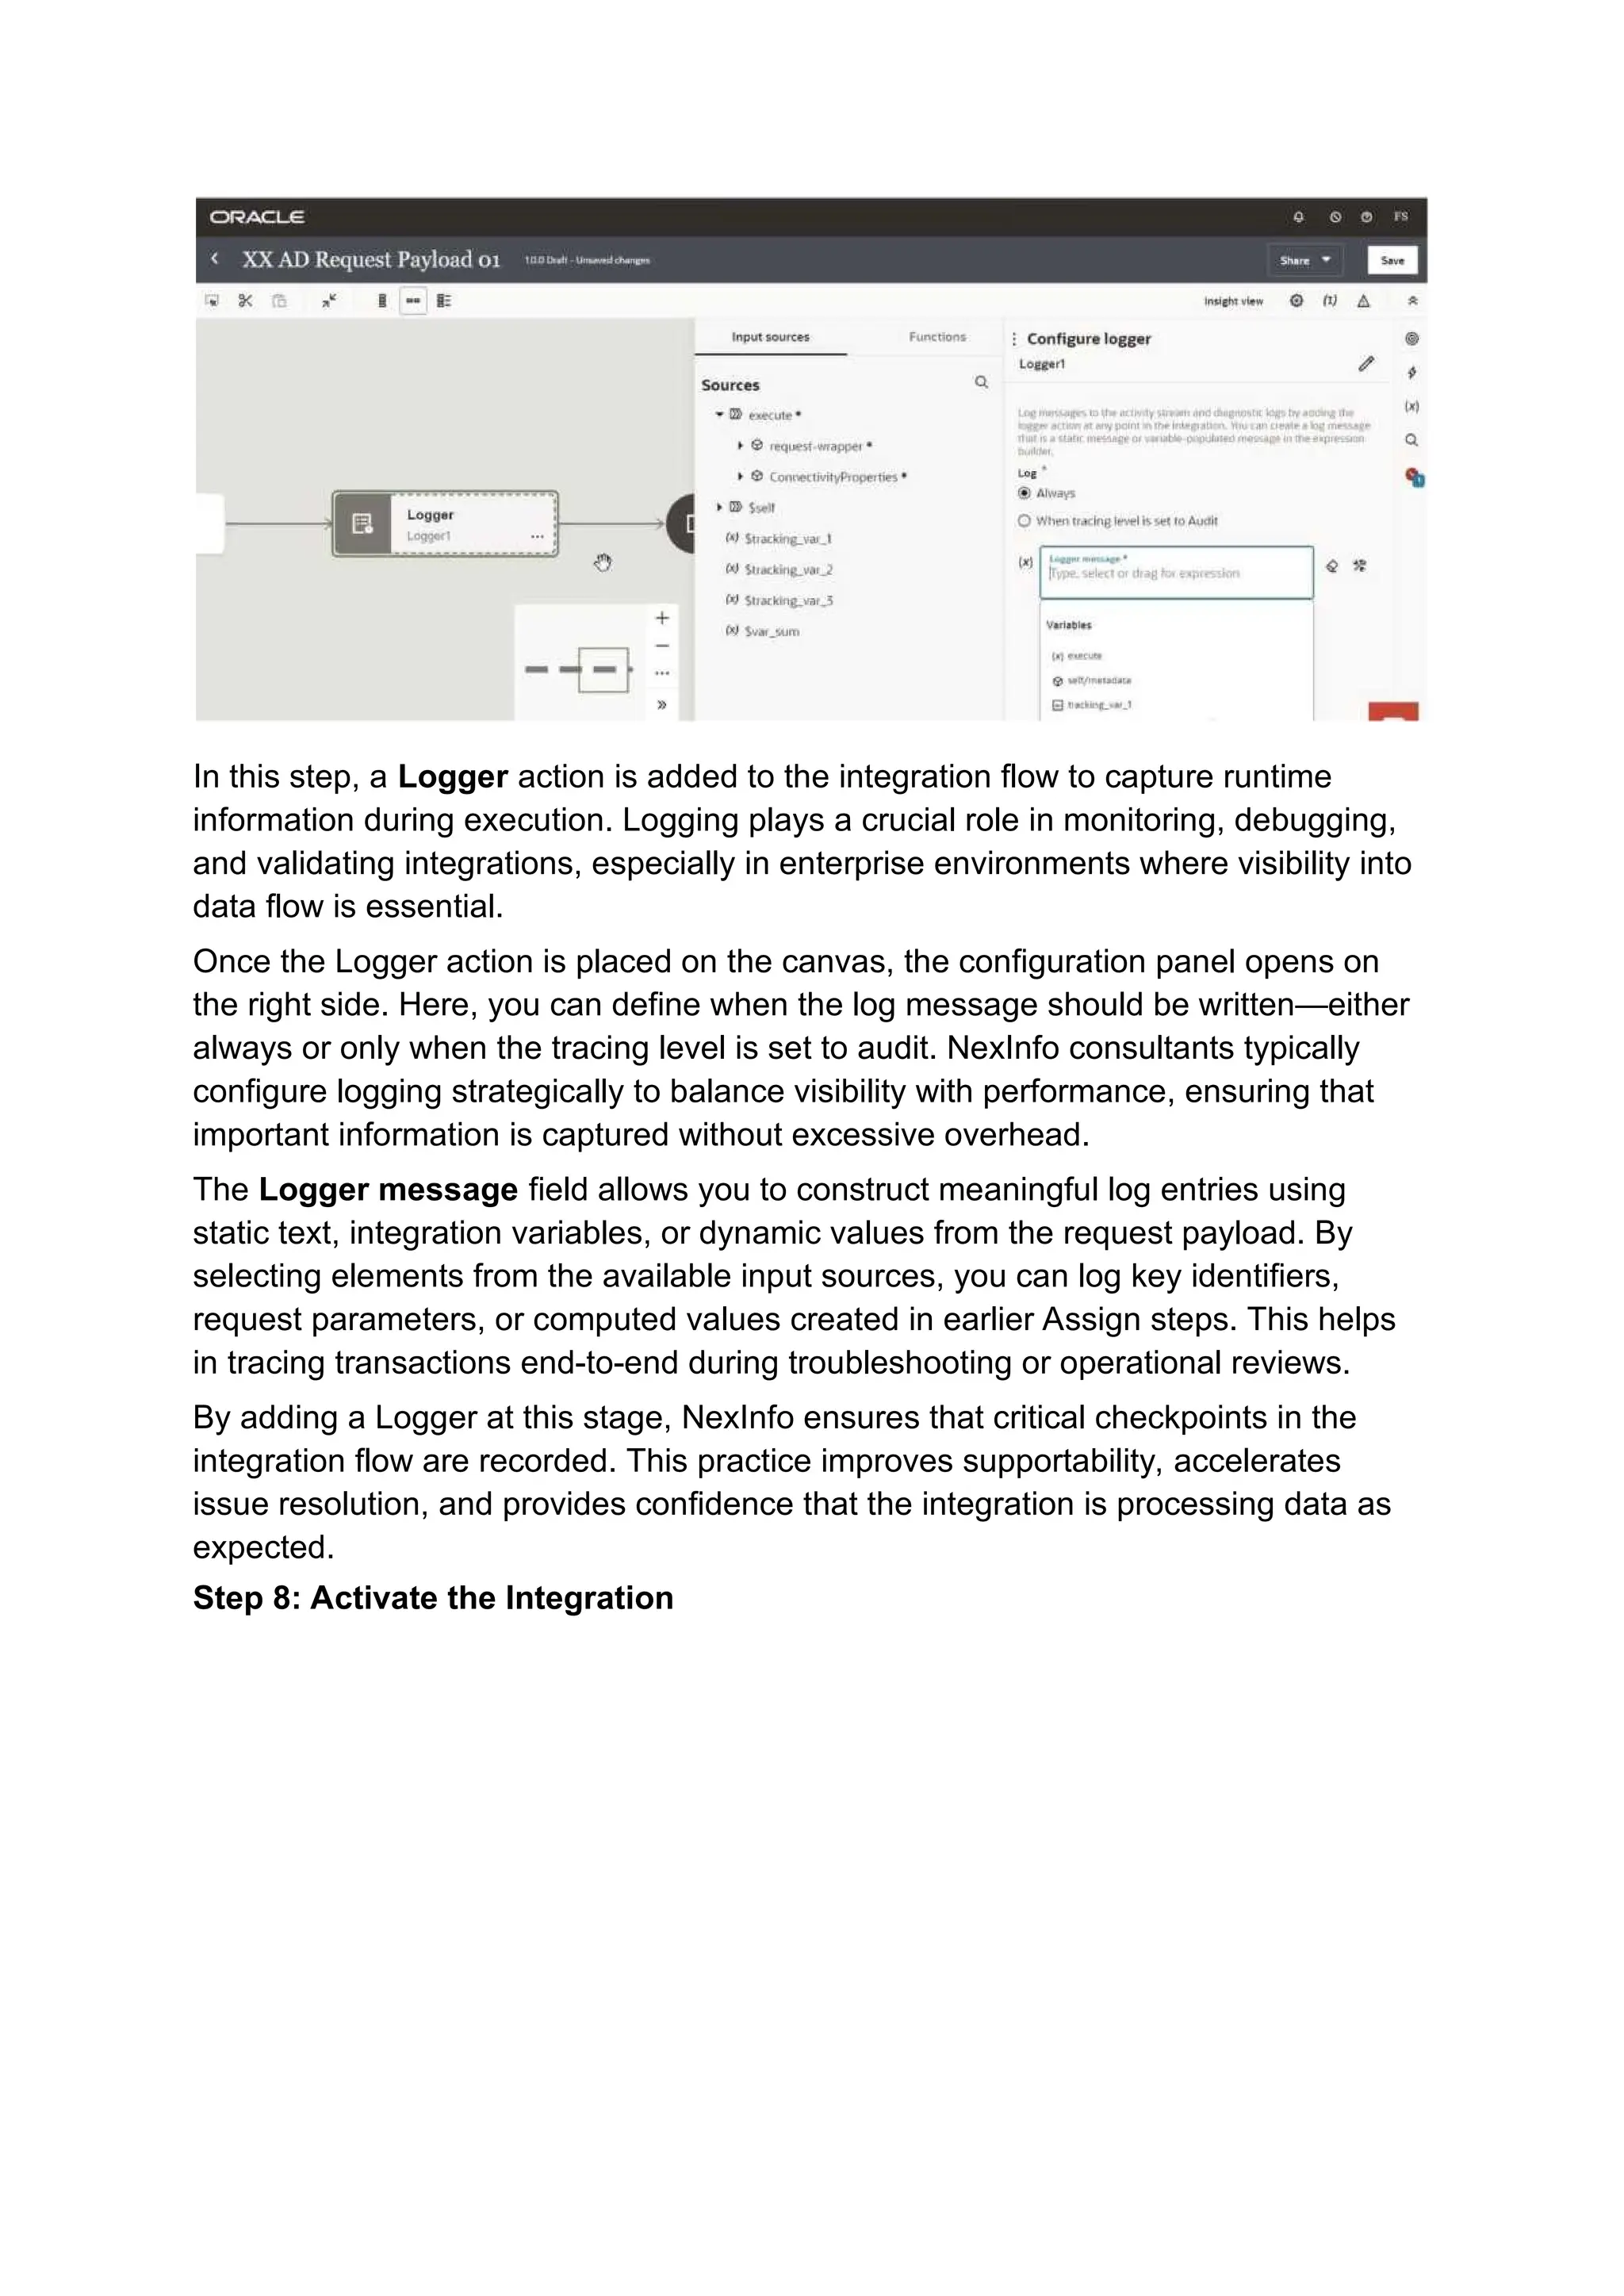
As the integration is developed, the design canvas is explored to show how the REST trigger, Assign actions, and Logger activities are configured. Special focus is given to defining the REST request payload using sample JSON, initializing variables for downstream processing, and implementing logging for runtime visibility and troubleshooting.
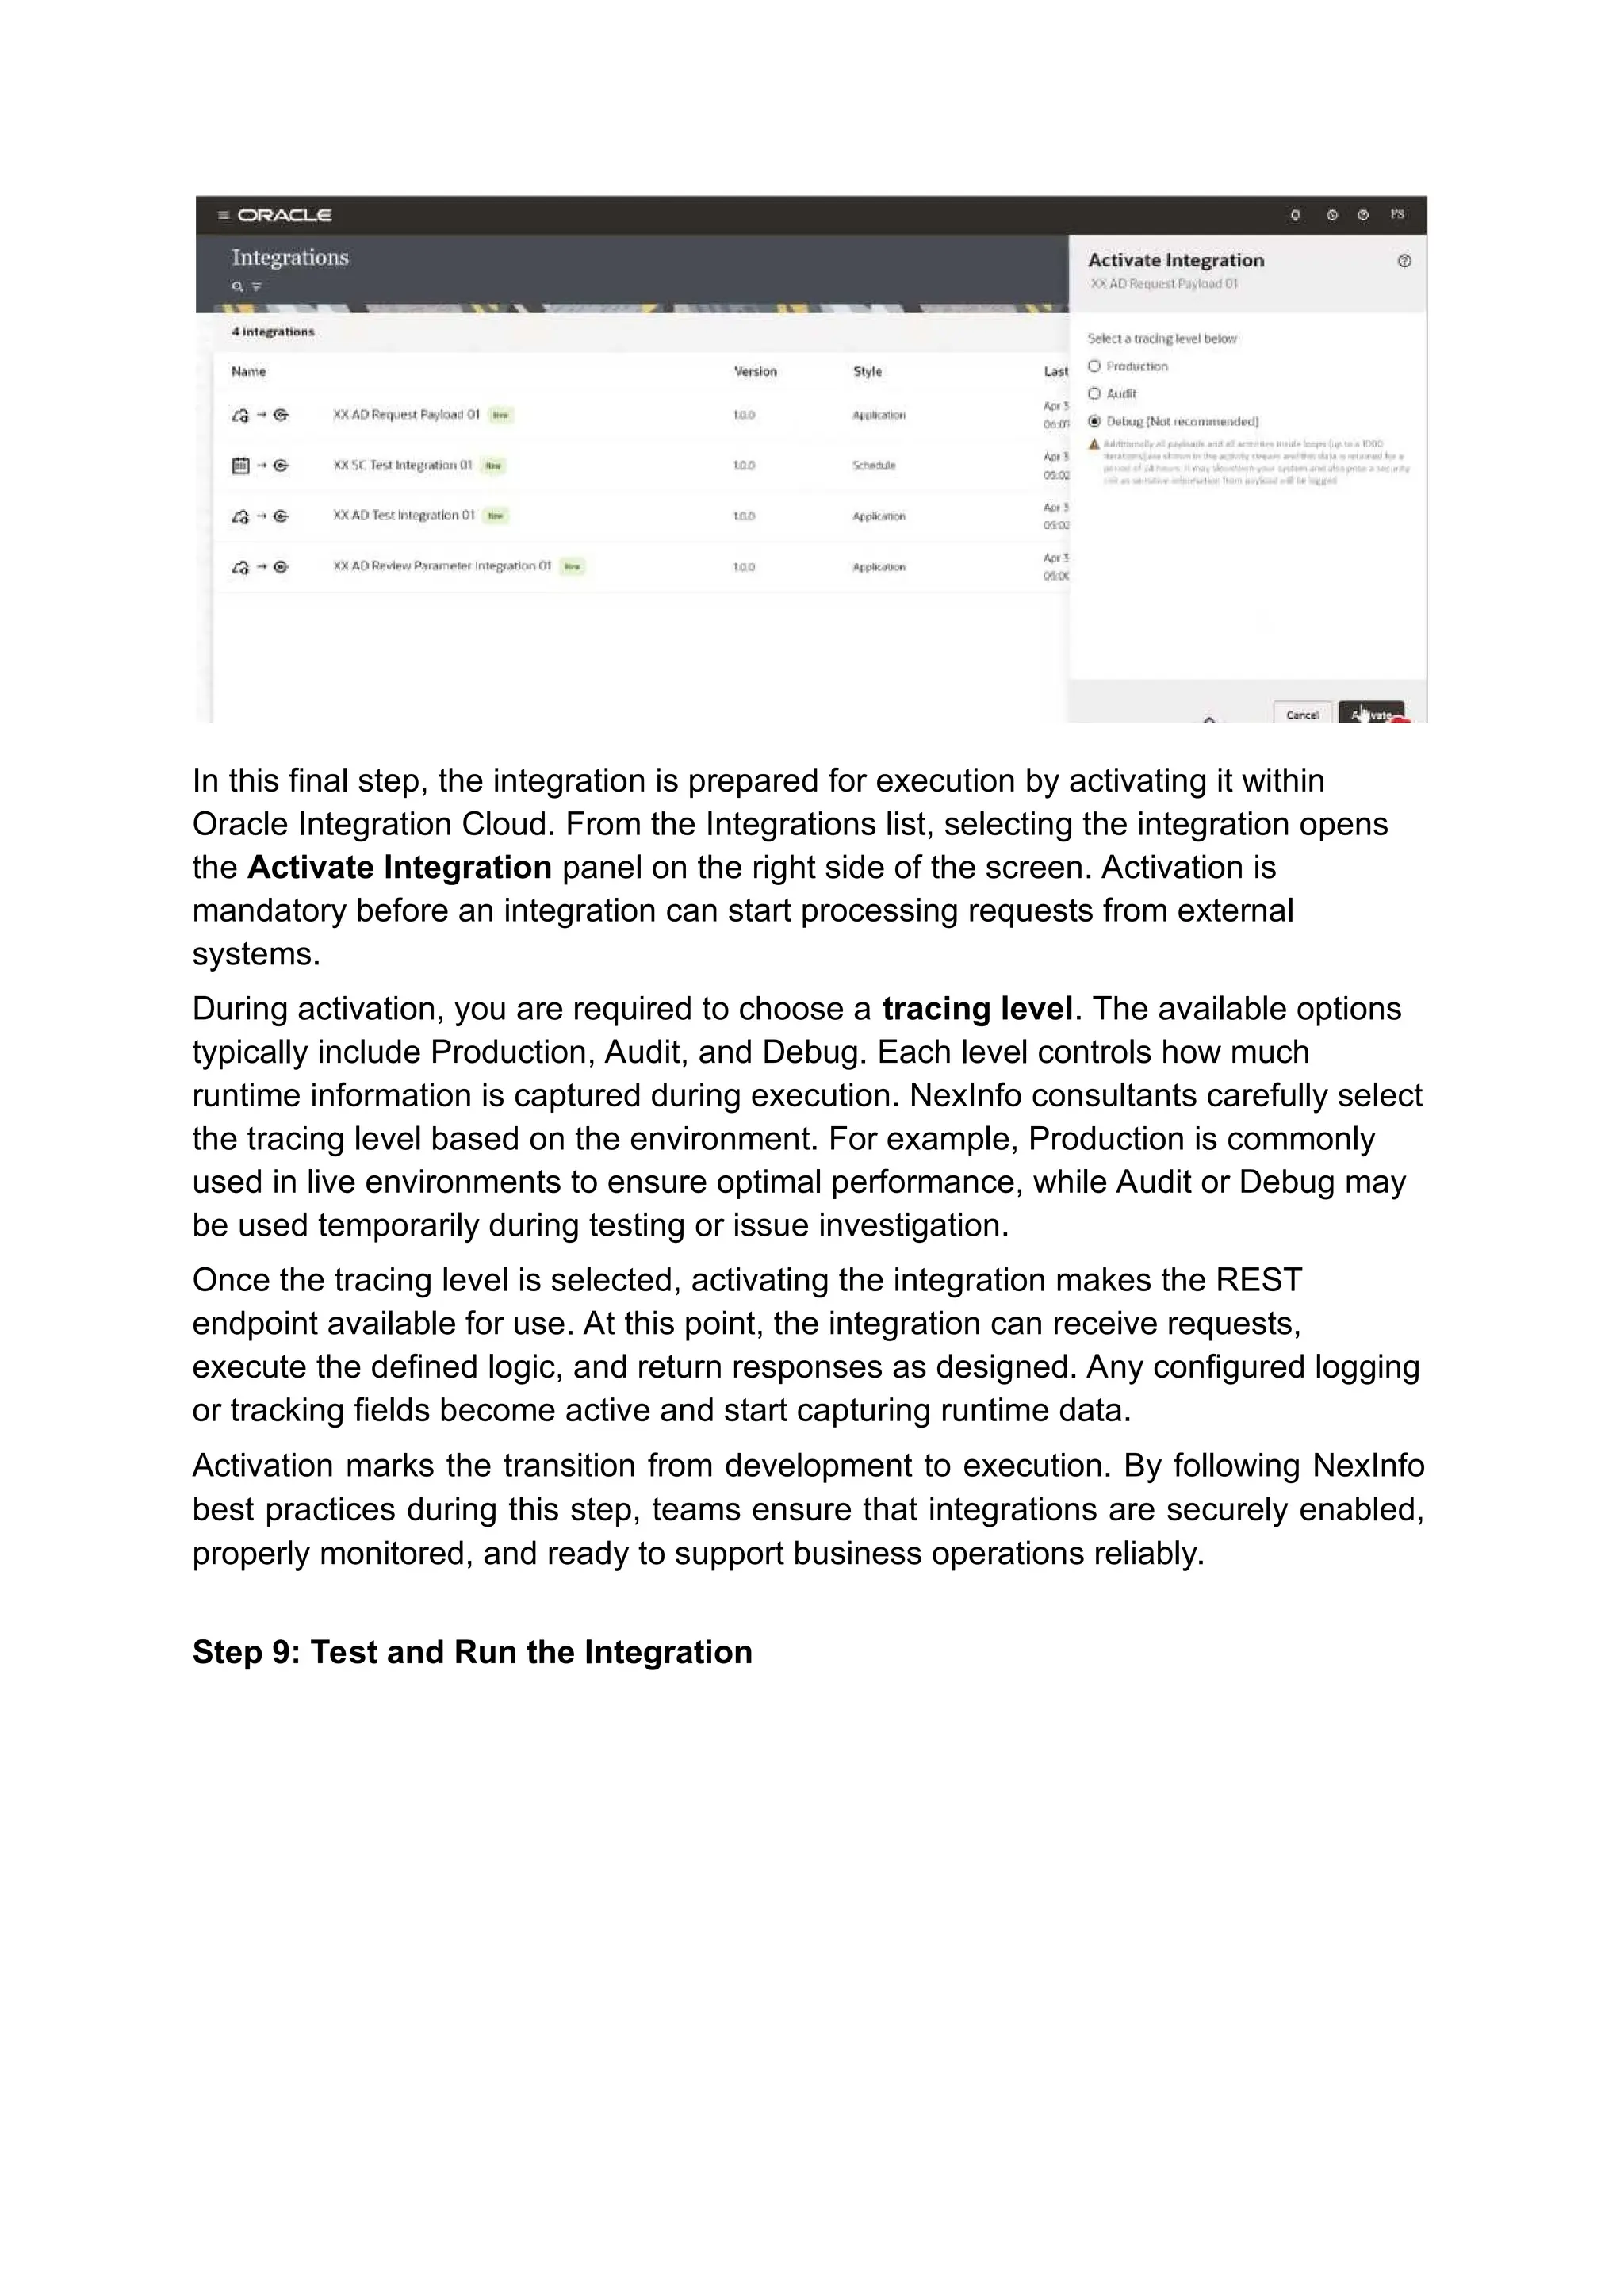
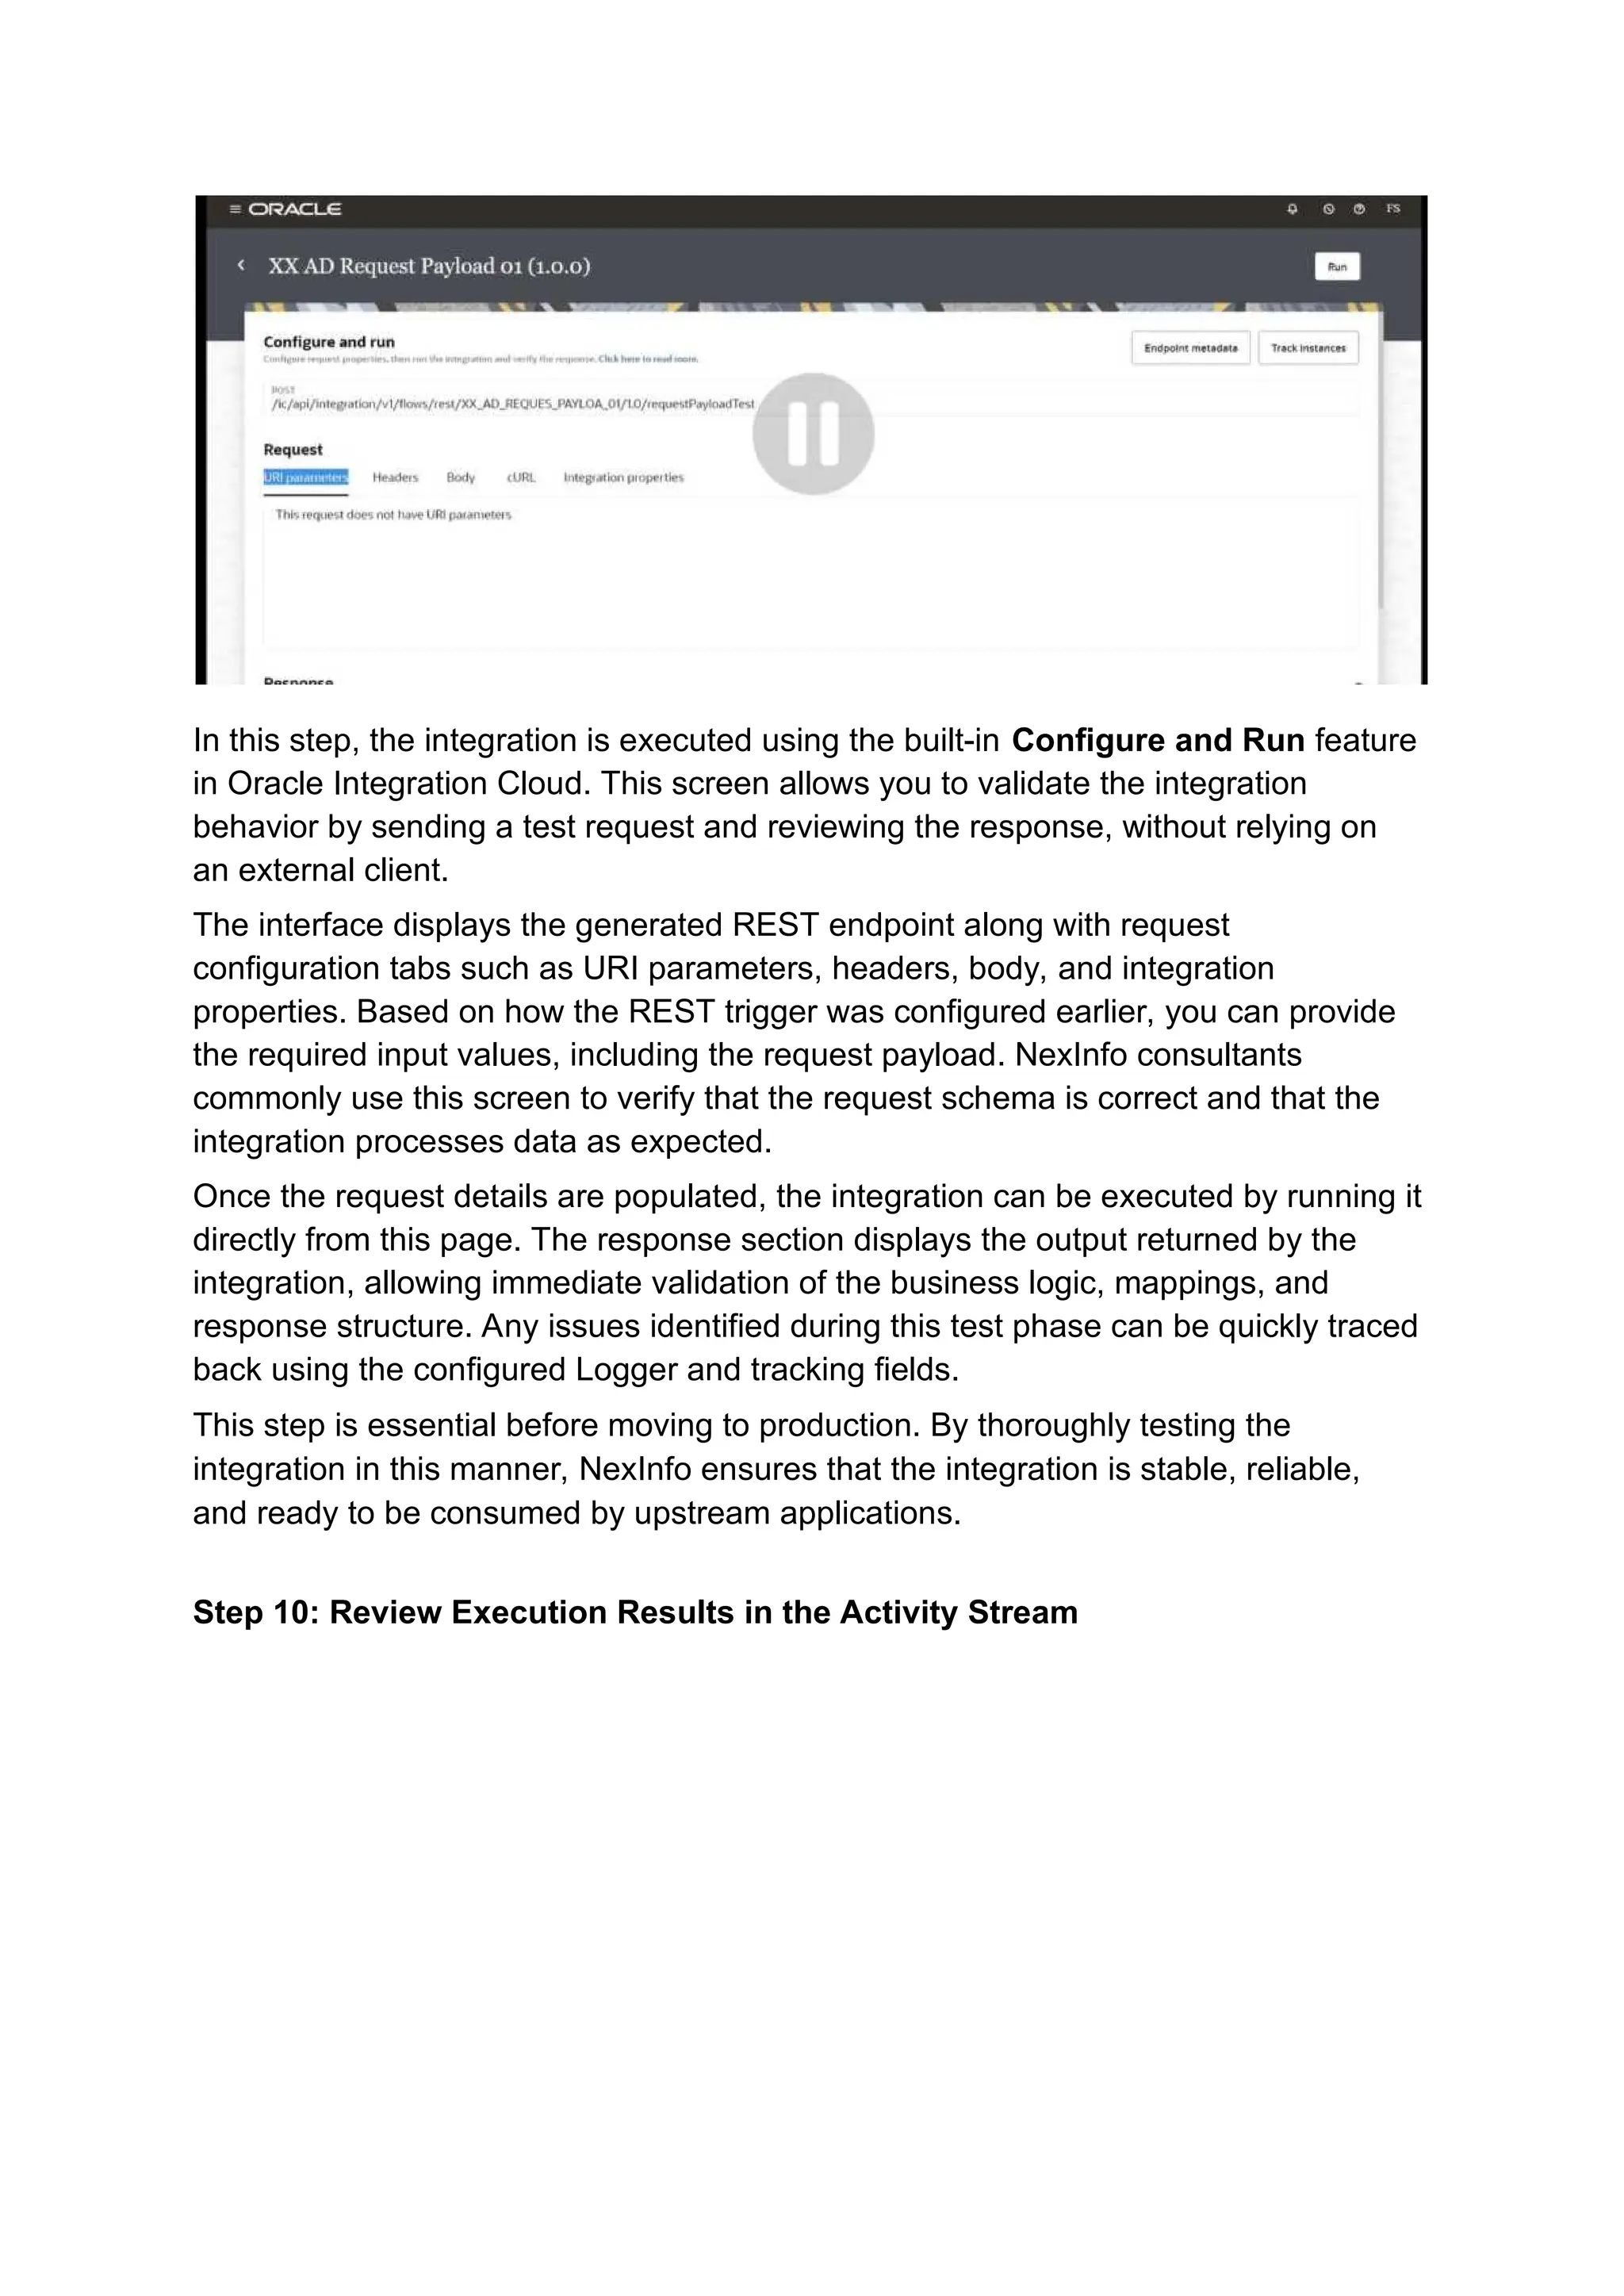
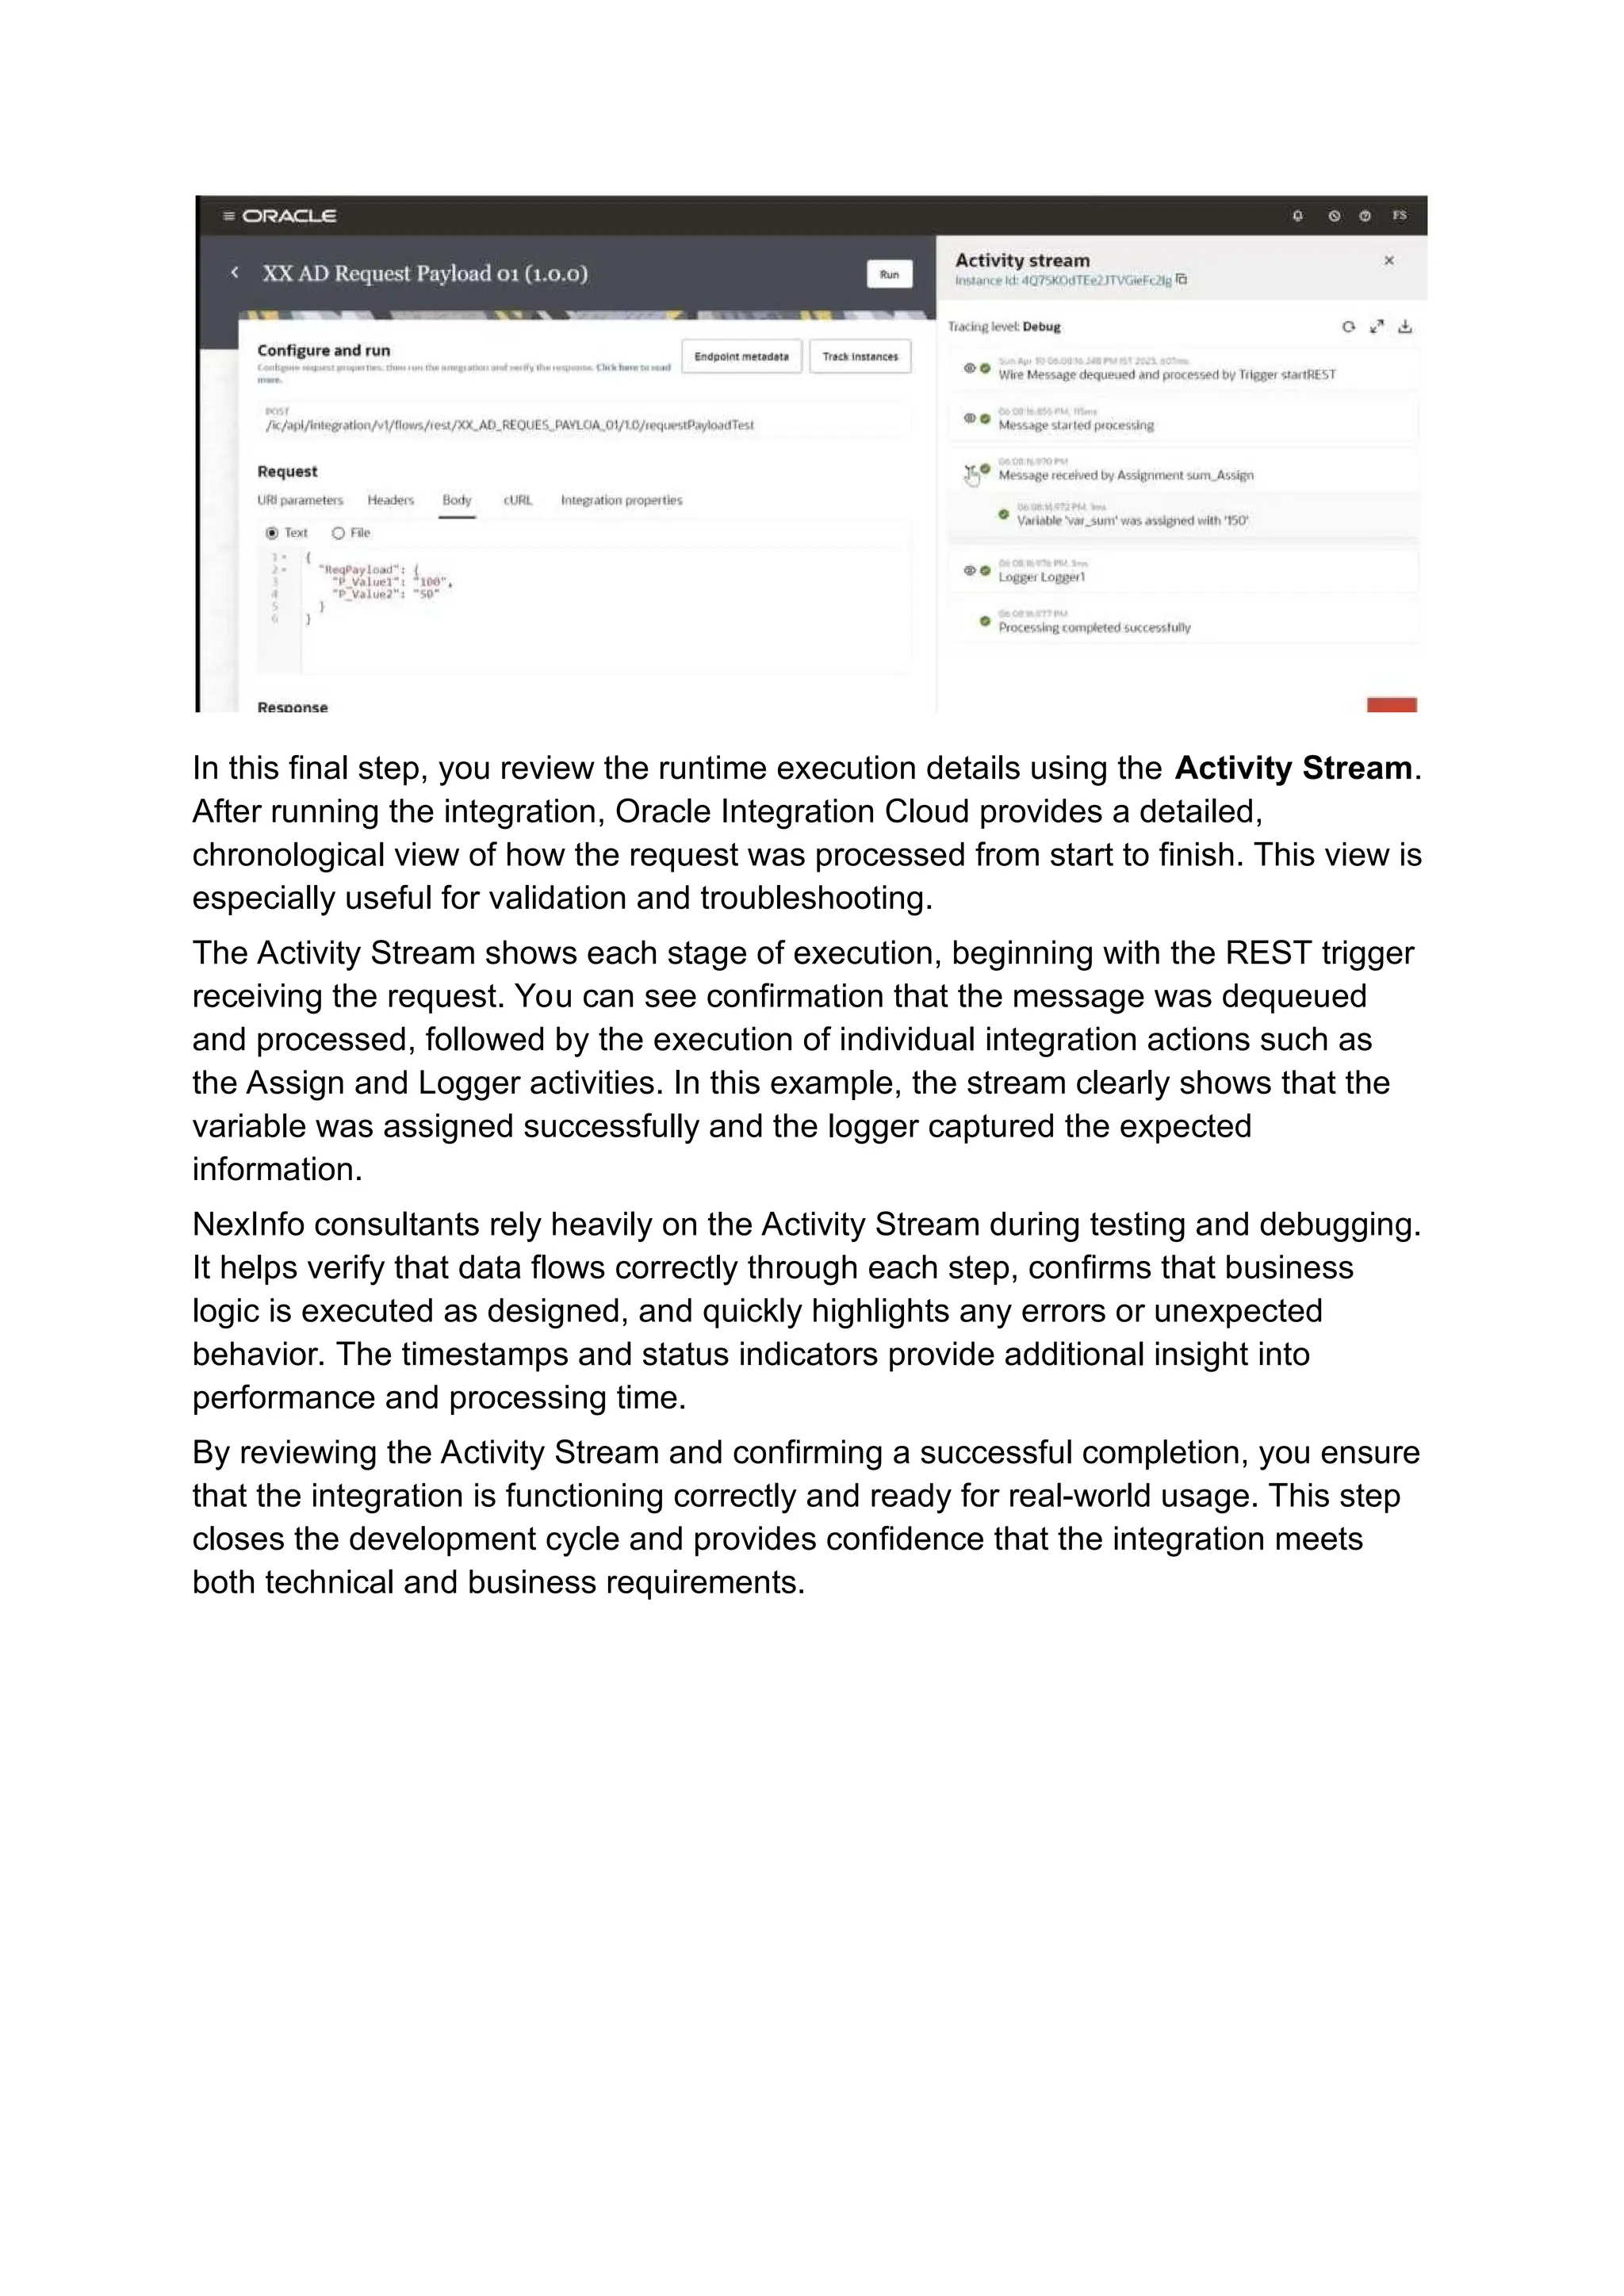
The project also covers activation and testing of the integration, including selecting the correct tracing level and validating requests using the built-in Run feature. Finally, it explains how to review execution details in the Activity Stream to confirm successful processing and diagnose issues if needed.
Overall, this project serves as a practical reference for consultants and developers to understand real-time REST integrations in Oracle Integration Cloud, ensuring scalable, secure, and supportable integrations delivered using NexInfo’s integration delivery standards.
To learn more : https://nexinfo.com/