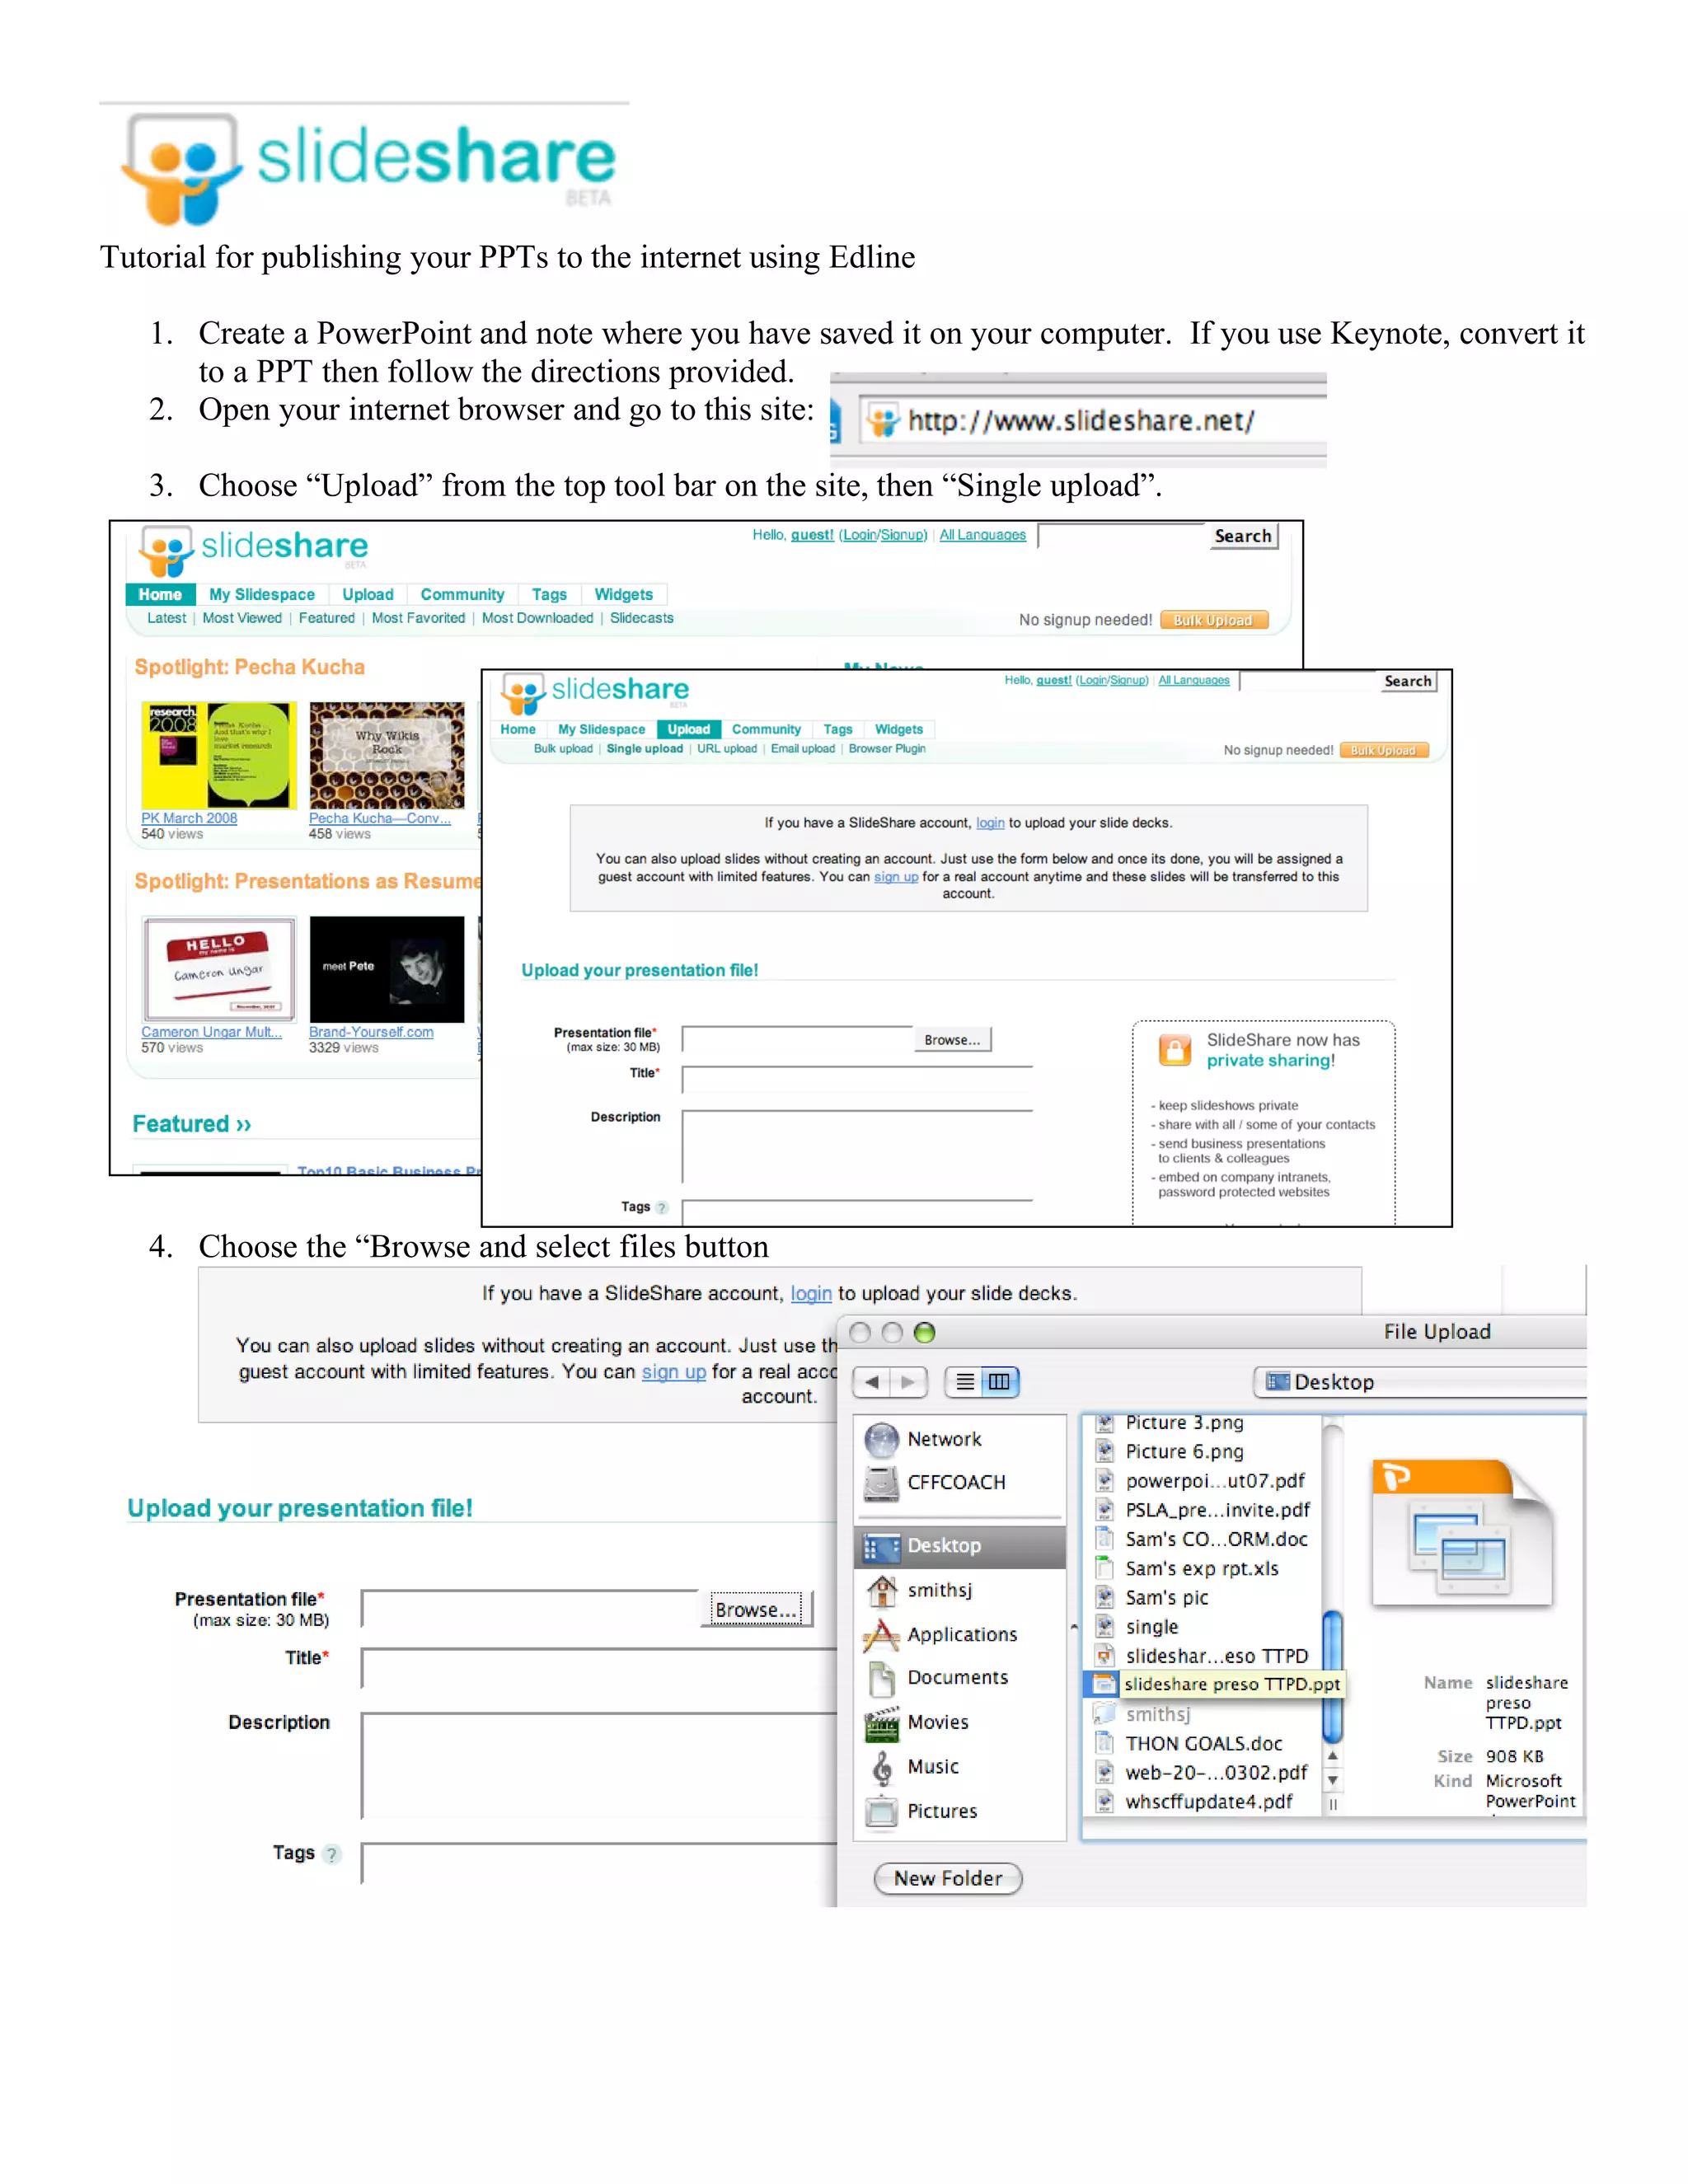
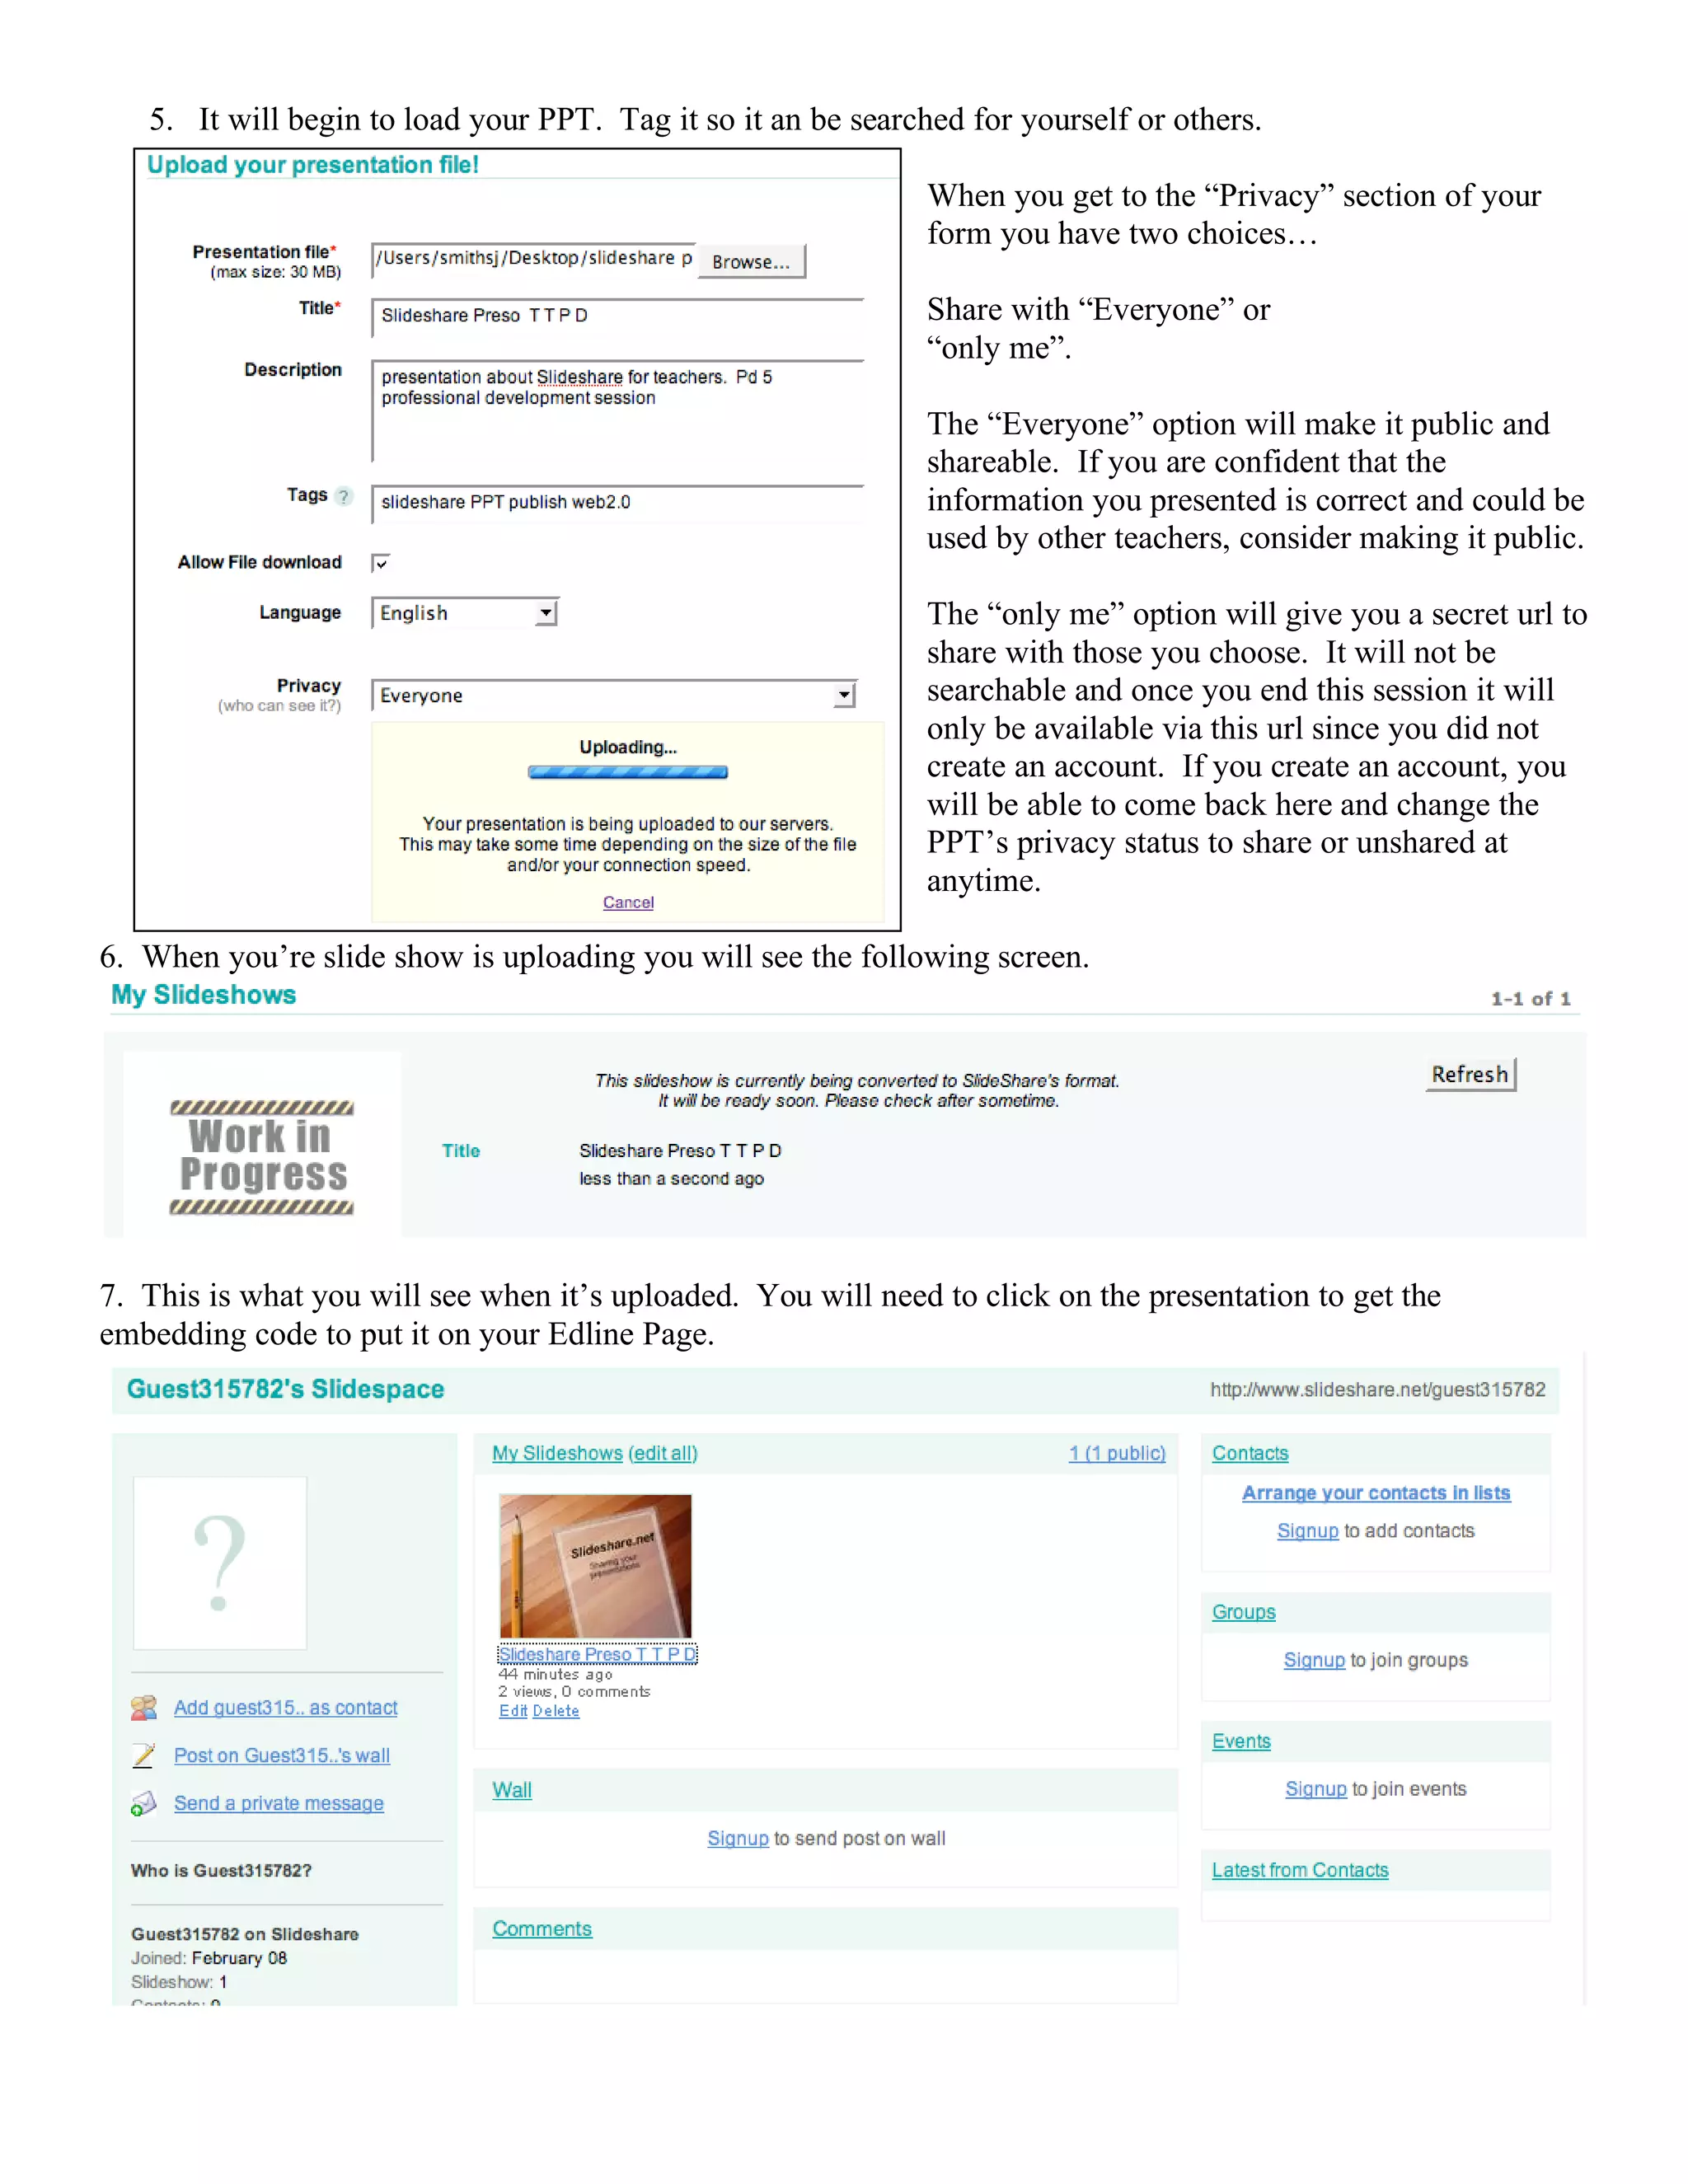
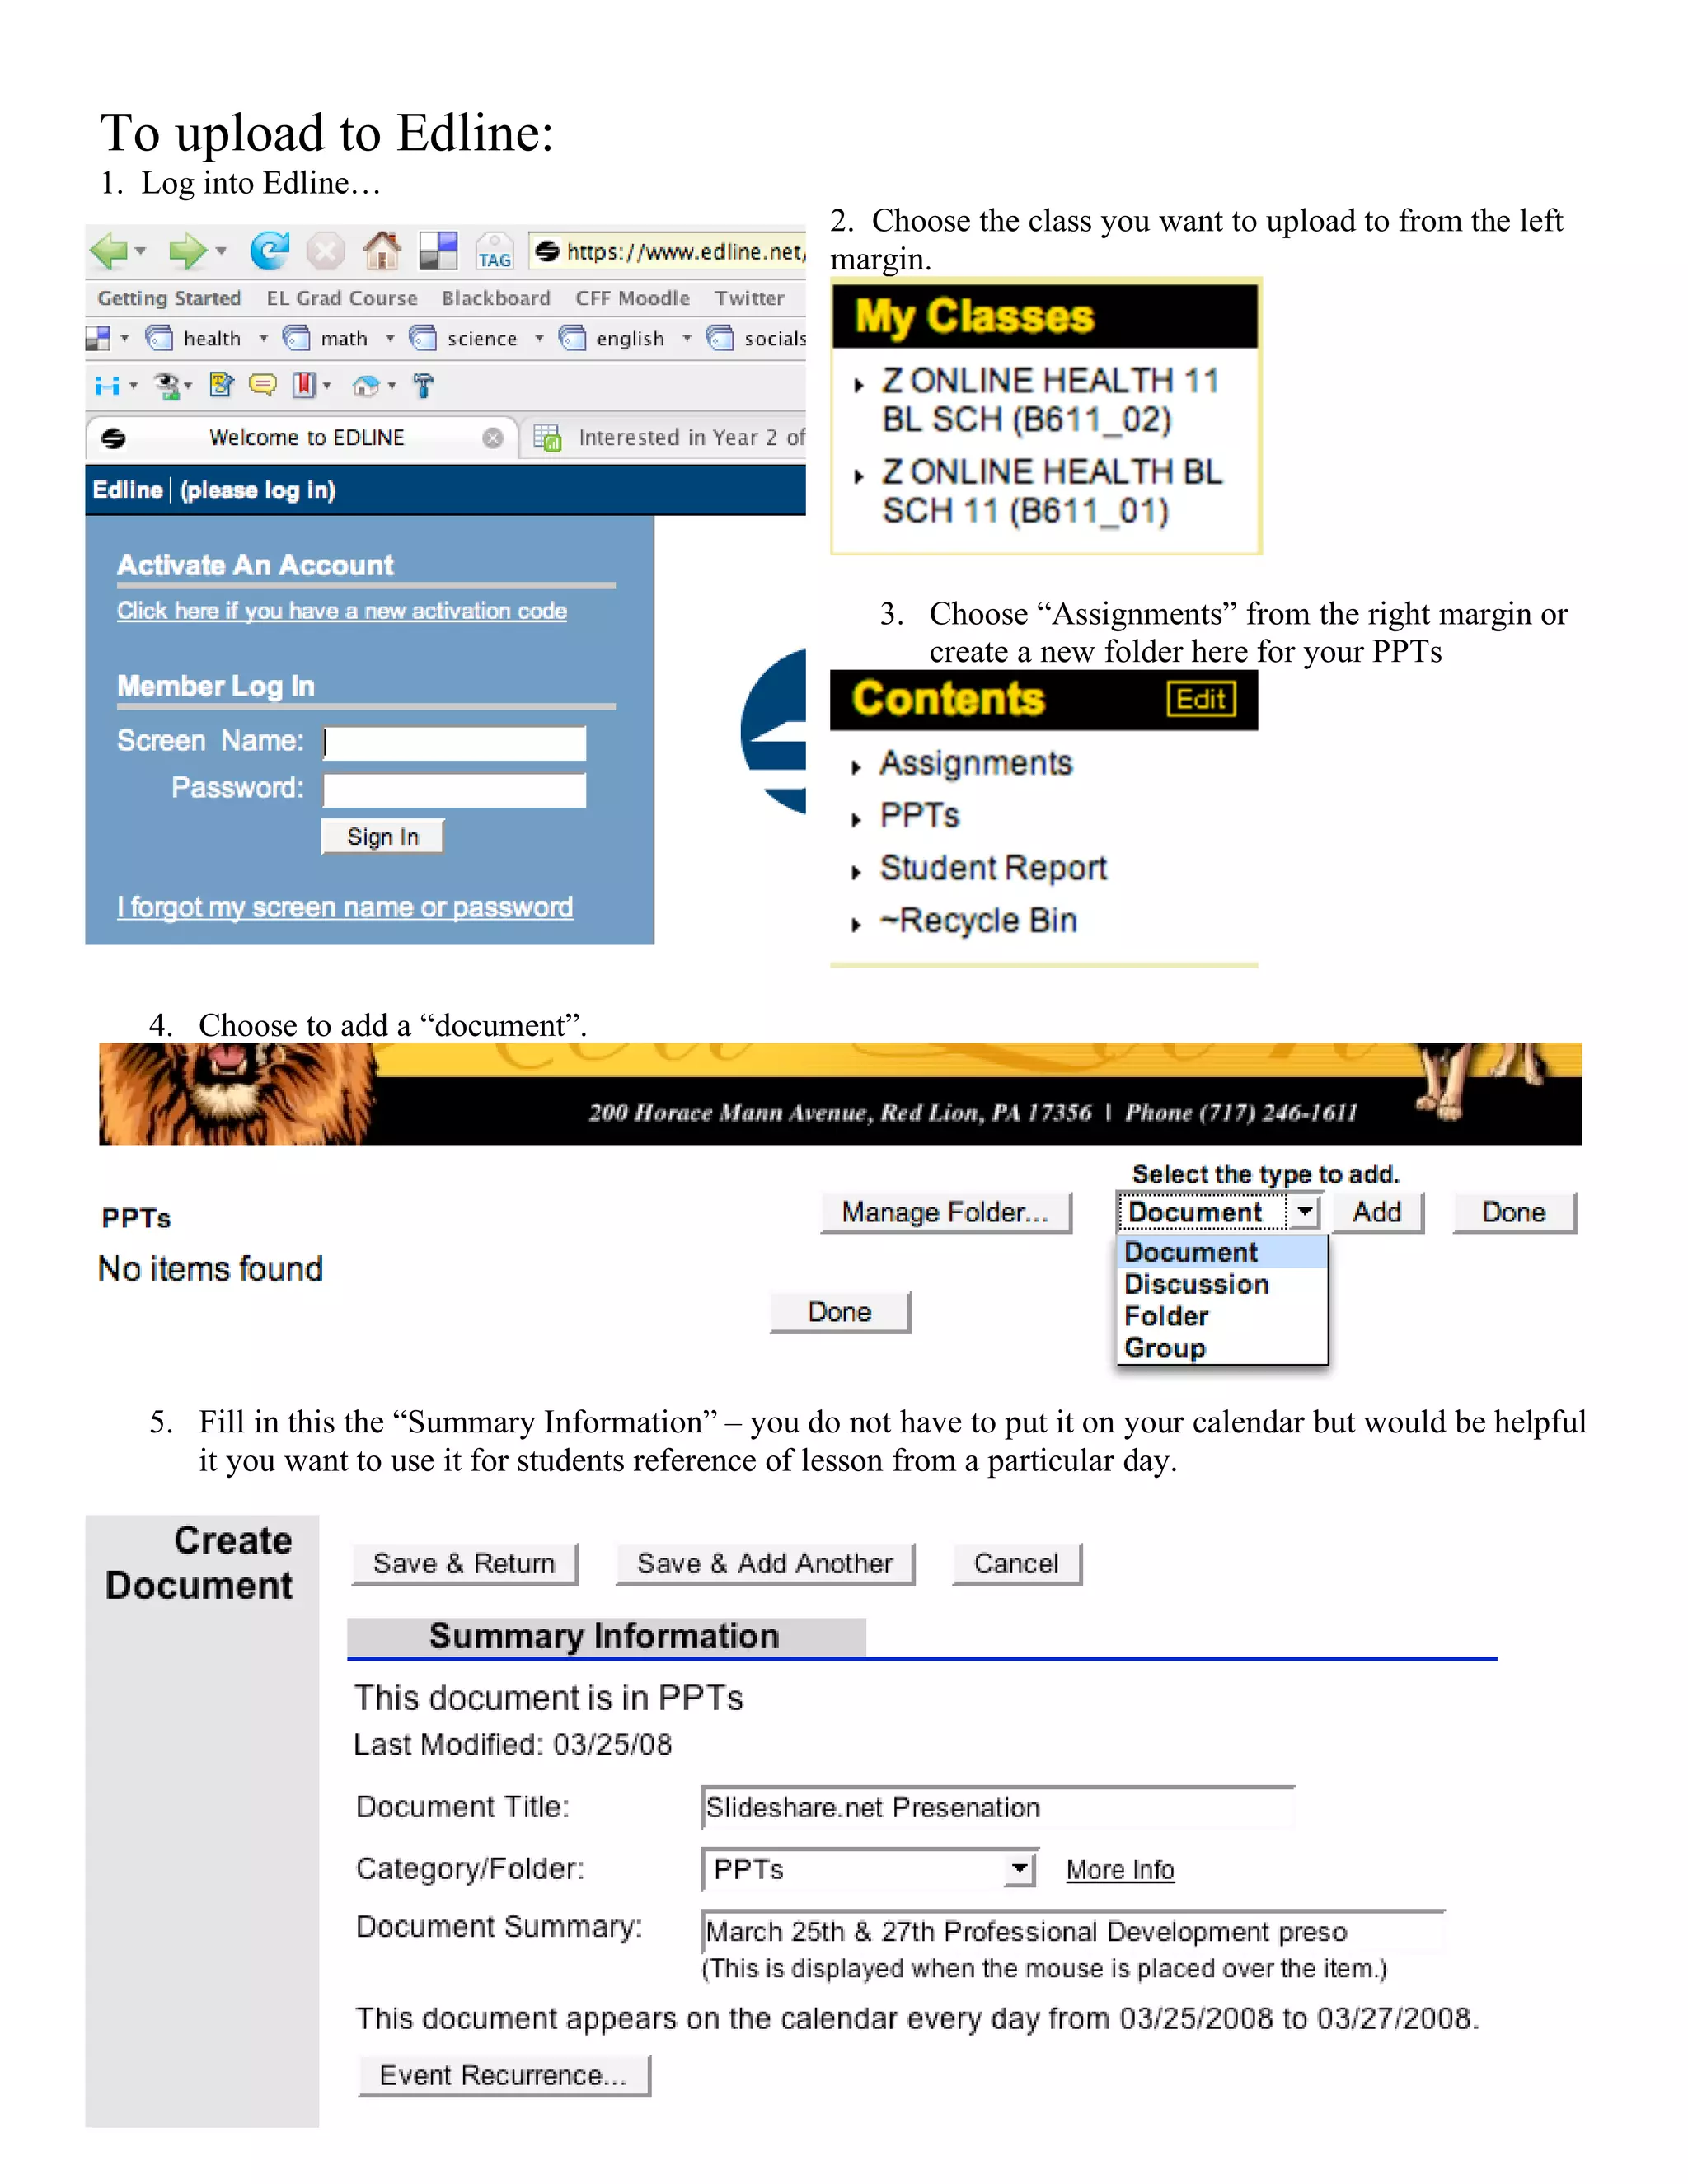
Tutorial for publishing your PPTs to the internet using Edline

   1. Create a PowerPoint and note where you have saved it on your computer. If you use Keynote, convert it
      to a PPT then follow the directions provided.
   2. Open your internet browser and go to this site:

   3. Choose “Upload” from the top tool bar on the site, then “Single upload”.


   4. Choose the “Browse and select files button
5. It will begin to load your PPT. Tag it so it an be searched for yourself or others.

                                                               When you get to the “Privacy” section of your
                                                               form you have two choices…

                                                               Share with “Everyone” or
                                                               “only me”.

                                                               The “Everyone” option will make it public and
                                                               shareable. If you are confident that the
                                                               information you presented is correct and could be
                                                               used by other teachers, consider making it public.

                                                               The “only me” option will give you a secret url to
                                                               share with those you choose. It will not be
                                                               searchable and once you end this session it will
                                                               only be available via this url since you did not
                                                               create an account. If you create an account, you
                                                               will be able to come back here and change the
                                                               PPT’s privacy status to share or unshared at
                                                               anytime.

6. When you’re slide show is uploading you will see the following screen.


7. This is what you will see when it’s uploaded. You will need to click on the presentation to get the
embedding code to put it on your Edline Page.
To upload to Edline:
1. Log into Edline…
                                                     2. Choose the class you want to upload to from the left
                                                     margin.


                                                         3. Choose “Assignments” from the right margin or
                                                            create a new folder here for your PPTs


   4. Choose to add a “document”.


   5. Fill in this the “Summary Information” – you do not have to put it on your calendar but would be helpful
      it you want to use it for students reference of lesson from a particular day.
6. Choose “Enter Text by Hand” and the “HTML” button on the tool bar of the text box. This will open
                                                                                another window to paste the
                                                                                embedding code from
                                                                                slideshare.net. (HTML
                                                                                Source Editor) Once you
                                                                                have pasted the code in
                                                                                from slideshare click on
                                                                                “update”.


                                                                         You can also add the actual url
                                                                         here to link to it or the url to your
                                                                         webpage, etc…

                                                                         You can also add an image if you
                                                                         like here.


7.
7. Choose “done”. This will take you back to your homepage.


Once you’re at your home page anyone who choose the date or folder you designated for this file, it will open
and appear like this… They can

Slideshare Tutorial

  • 1.
    Tutorial for publishingyour PPTs to the internet using Edline 1. Create a PowerPoint and note where you have saved it on your computer. If you use Keynote, convert it to a PPT then follow the directions provided. 2. Open your internet browser and go to this site: 3. Choose “Upload” from the top tool bar on the site, then “Single upload”. 4. Choose the “Browse and select files button
  • 2.
    5. It willbegin to load your PPT. Tag it so it an be searched for yourself or others. When you get to the “Privacy” section of your form you have two choices… Share with “Everyone” or “only me”. The “Everyone” option will make it public and shareable. If you are confident that the information you presented is correct and could be used by other teachers, consider making it public. The “only me” option will give you a secret url to share with those you choose. It will not be searchable and once you end this session it will only be available via this url since you did not create an account. If you create an account, you will be able to come back here and change the PPT’s privacy status to share or unshared at anytime. 6. When you’re slide show is uploading you will see the following screen. 7. This is what you will see when it’s uploaded. You will need to click on the presentation to get the embedding code to put it on your Edline Page.
  • 3.
    To upload toEdline: 1. Log into Edline… 2. Choose the class you want to upload to from the left margin. 3. Choose “Assignments” from the right margin or create a new folder here for your PPTs 4. Choose to add a “document”. 5. Fill in this the “Summary Information” – you do not have to put it on your calendar but would be helpful it you want to use it for students reference of lesson from a particular day.
  • 4.
    6. Choose “EnterText by Hand” and the “HTML” button on the tool bar of the text box. This will open another window to paste the embedding code from slideshare.net. (HTML Source Editor) Once you have pasted the code in from slideshare click on “update”. You can also add the actual url here to link to it or the url to your webpage, etc… You can also add an image if you like here. 7.
  • 5.
    7. Choose “done”.This will take you back to your homepage. Once you’re at your home page anyone who choose the date or folder you designated for this file, it will open and appear like this… They can