Download to read offline


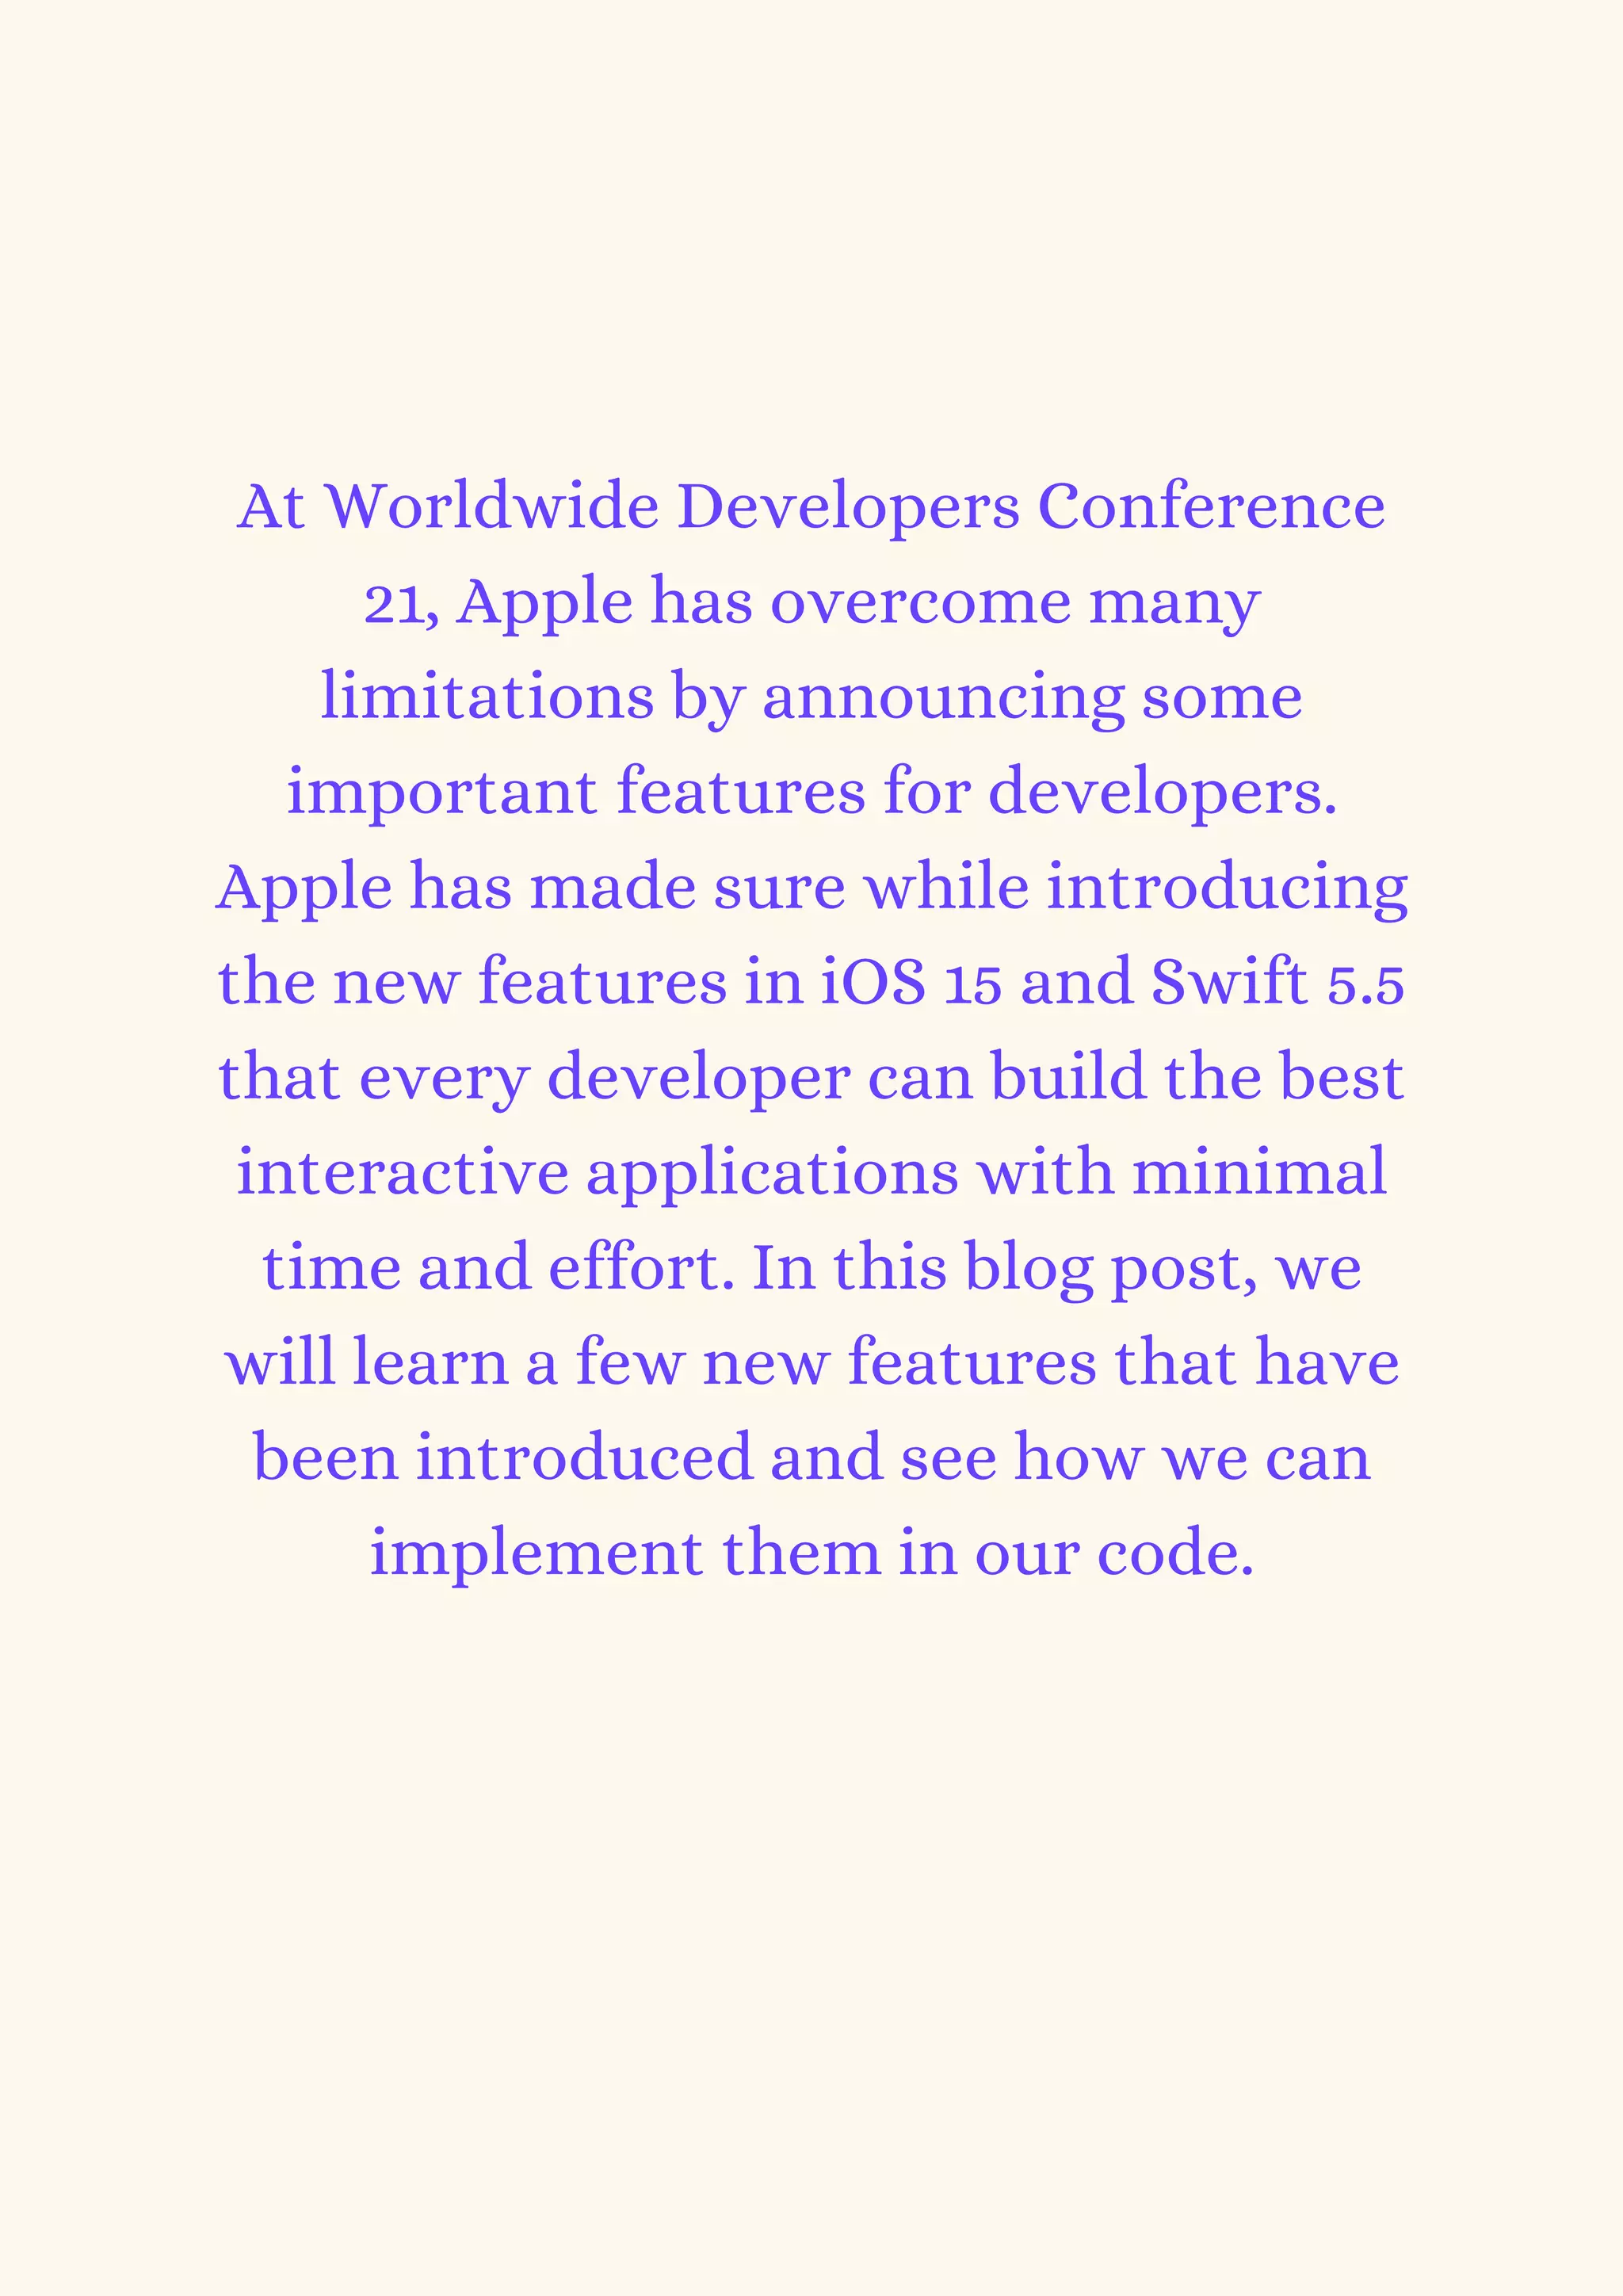


![@IBAction func openSheetAction(_
sender : UIButton) {
if let bSheet =
bottomSheet.sheetPresentationController
{
bSheet.detents = [.medium(),
.large()]
bSheet.prefersGrabberVisible = true
bSheet.largestUndimmedDetentIdentifie
r = .medium
bSheet.prefersScrollingExpandsWhenScr
olledToEdge = false
bSheet.preferredCornerRadius = 30.0
}
present(bottomSheet, animated: true,
completion: nil)
}](https://image.slidesharecdn.com/newfeaturesinios15andswift5-220421095752/75/New-Features-in-iOS-15-and-Swift-5-5-pdf-7-2048.jpg)
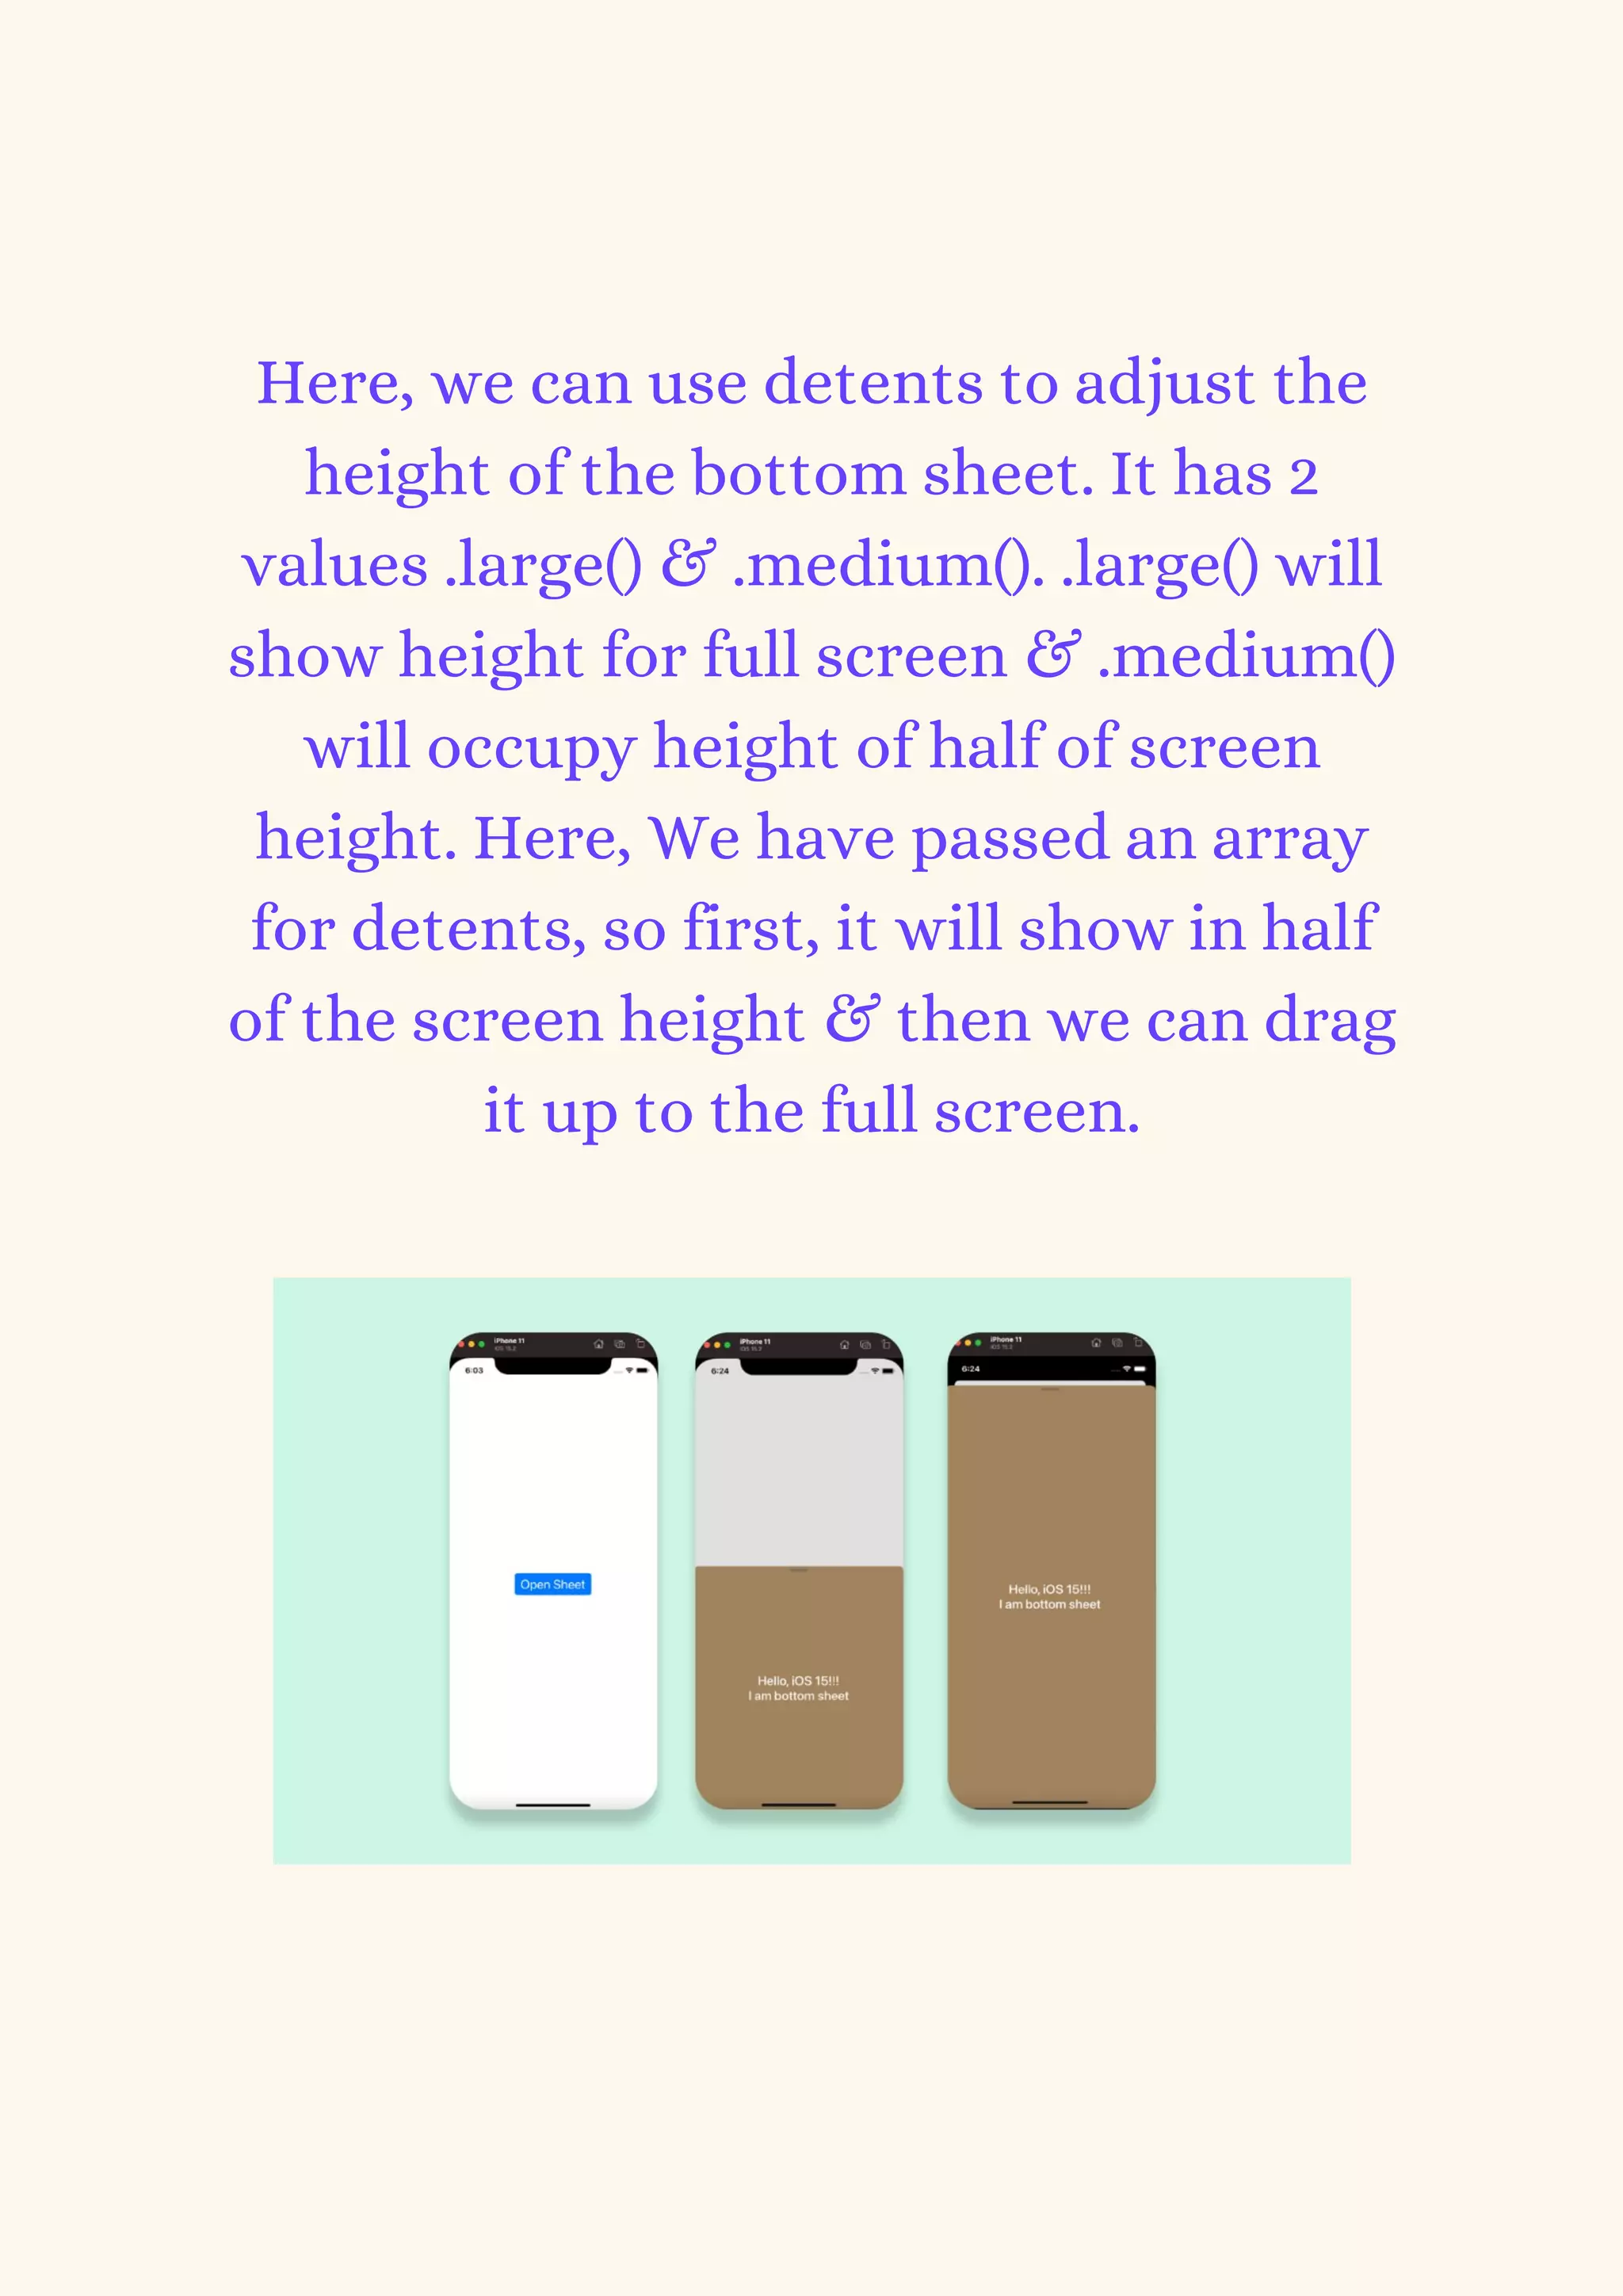


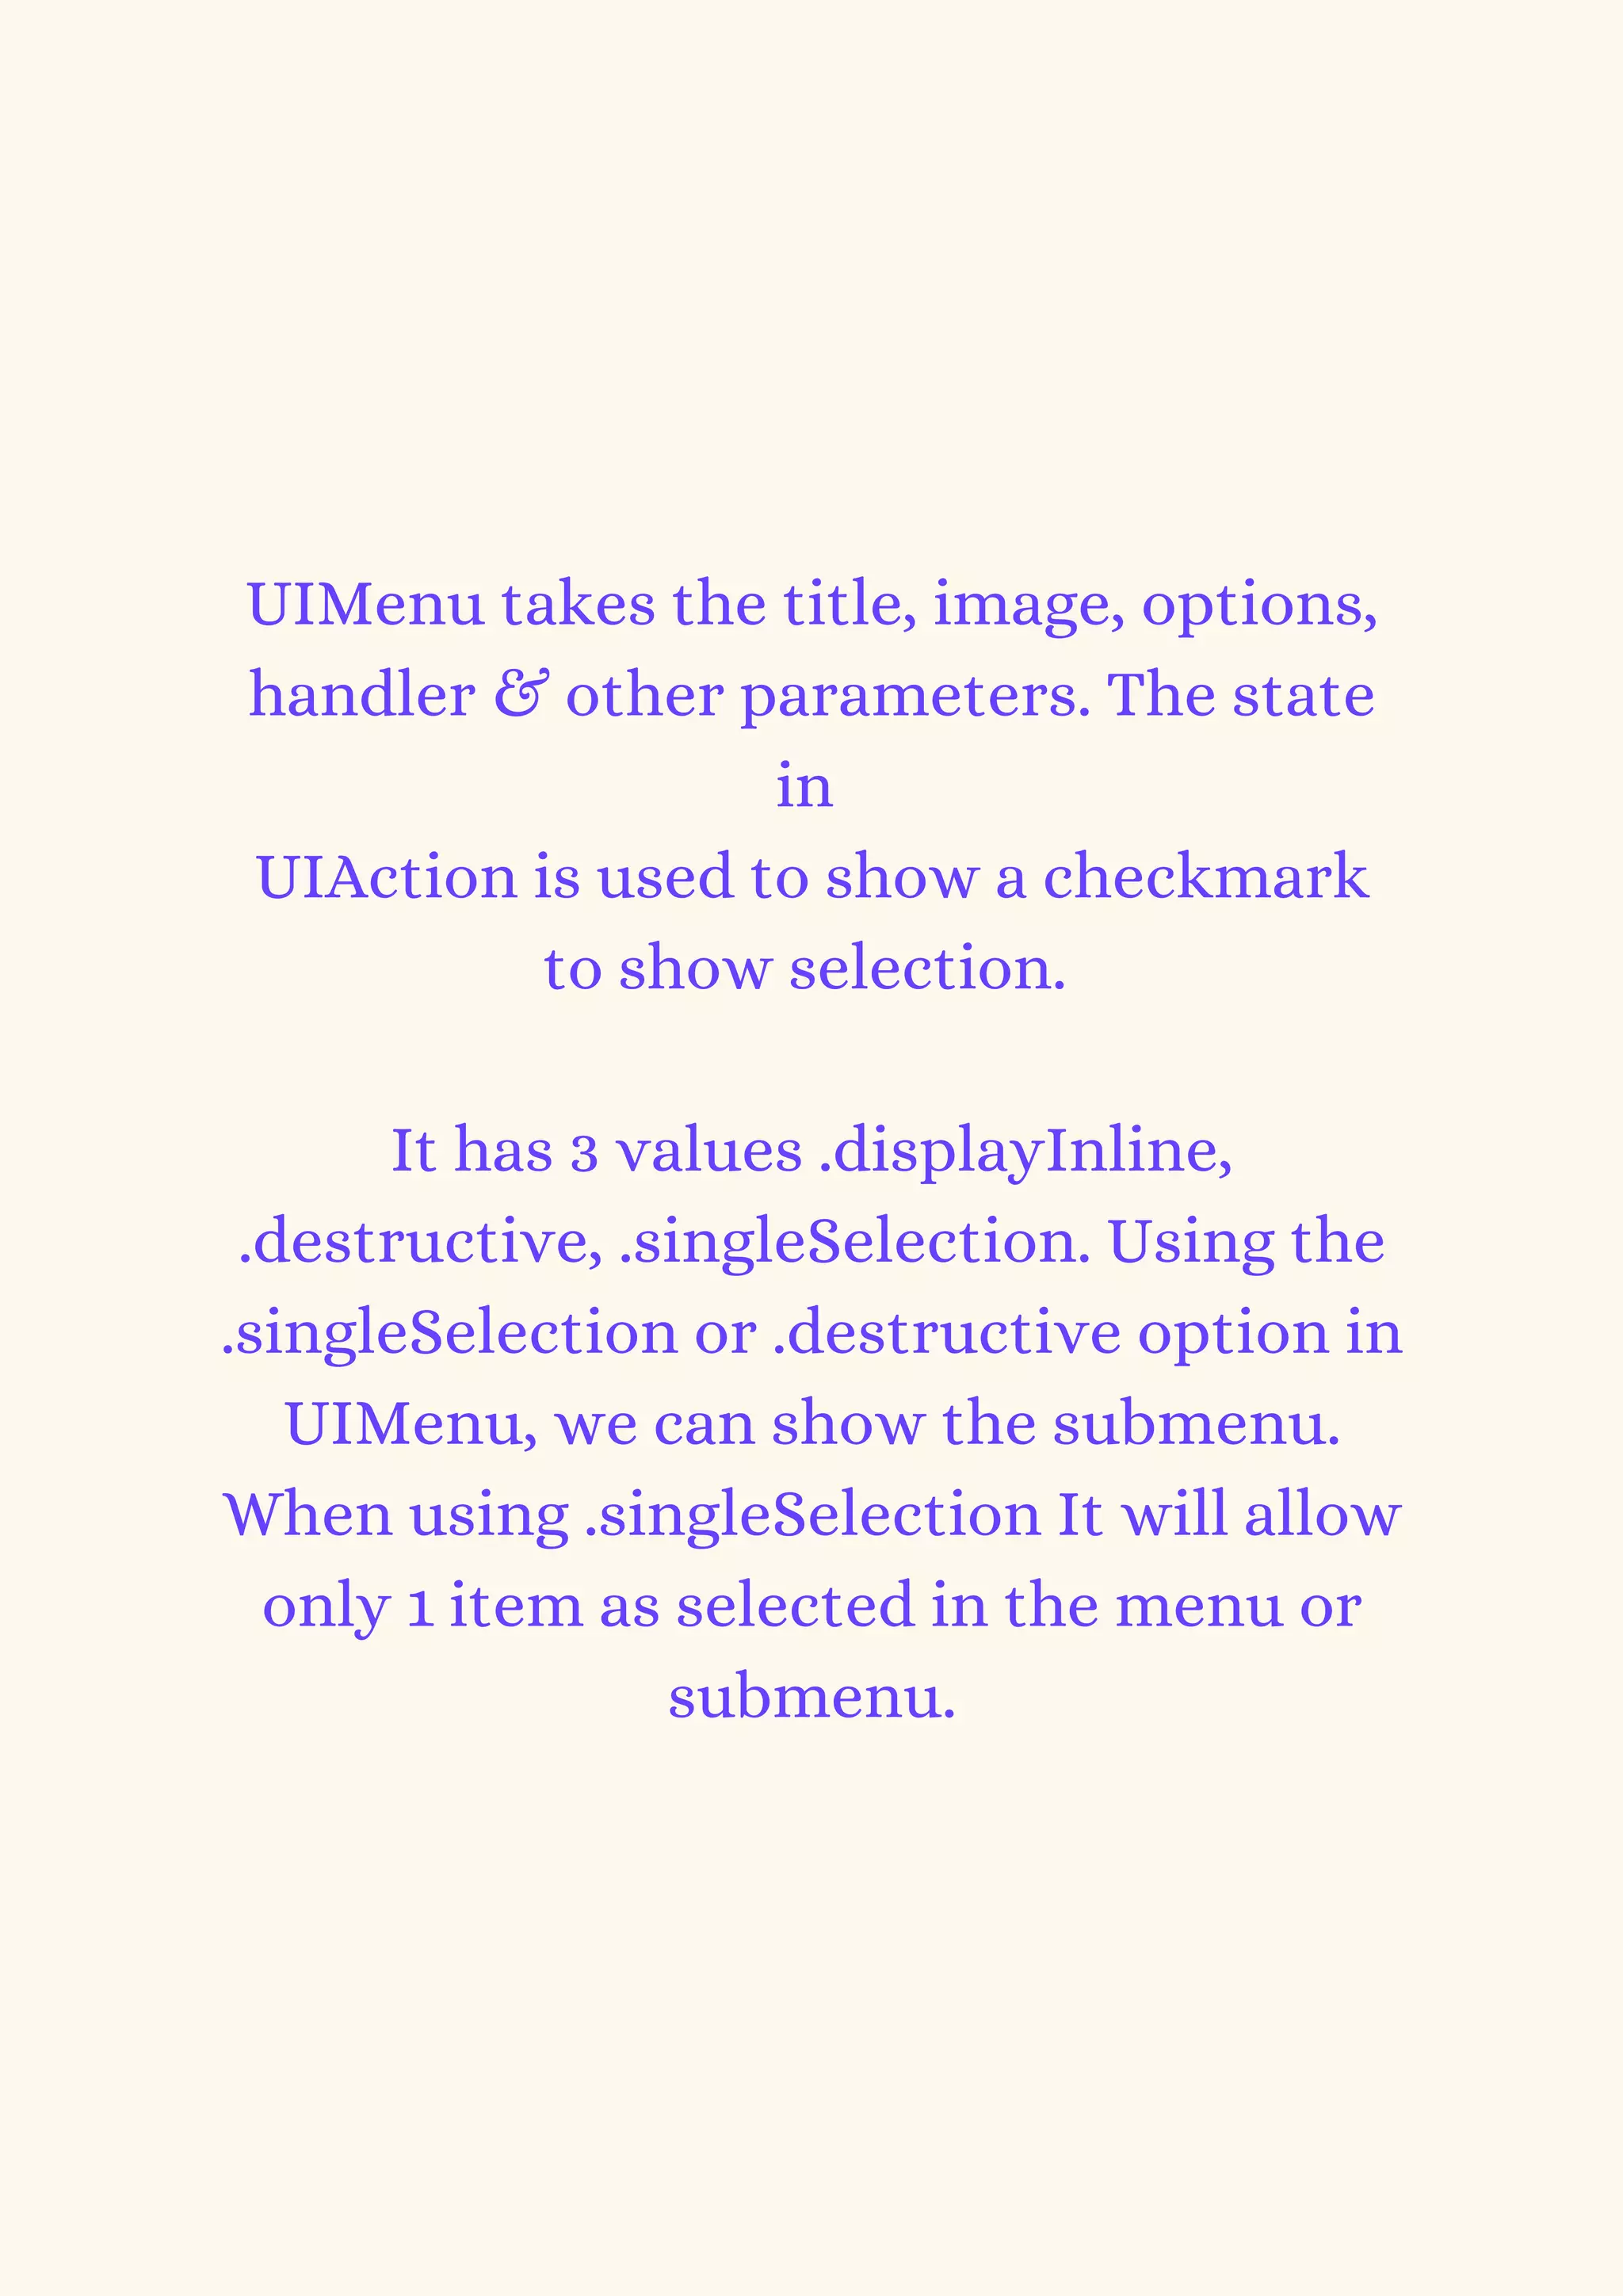
![@IBAction func menuAction(_ sender
: UIButton) {
let more = UIMenu(title: "More",
image: UIImage(systemName:
"ellipsis"), options: .singleSelection,
children: [
UIAction(title: "Share", image:
UIImage(systemName:
"square.and.arrow.up"), handler: { _ in
}),
UIAction(title: "Save", image:
UIImage(systemName: "folder"),
handler: { _ in }),
UIAction(title: "Edit", image:
UIImage(systemName: "pencil"),
state: .on, handler: { _ in })
])](https://image.slidesharecdn.com/newfeaturesinios15andswift5-220421095752/75/New-Features-in-iOS-15-and-Swift-5-5-pdf-14-2048.jpg)
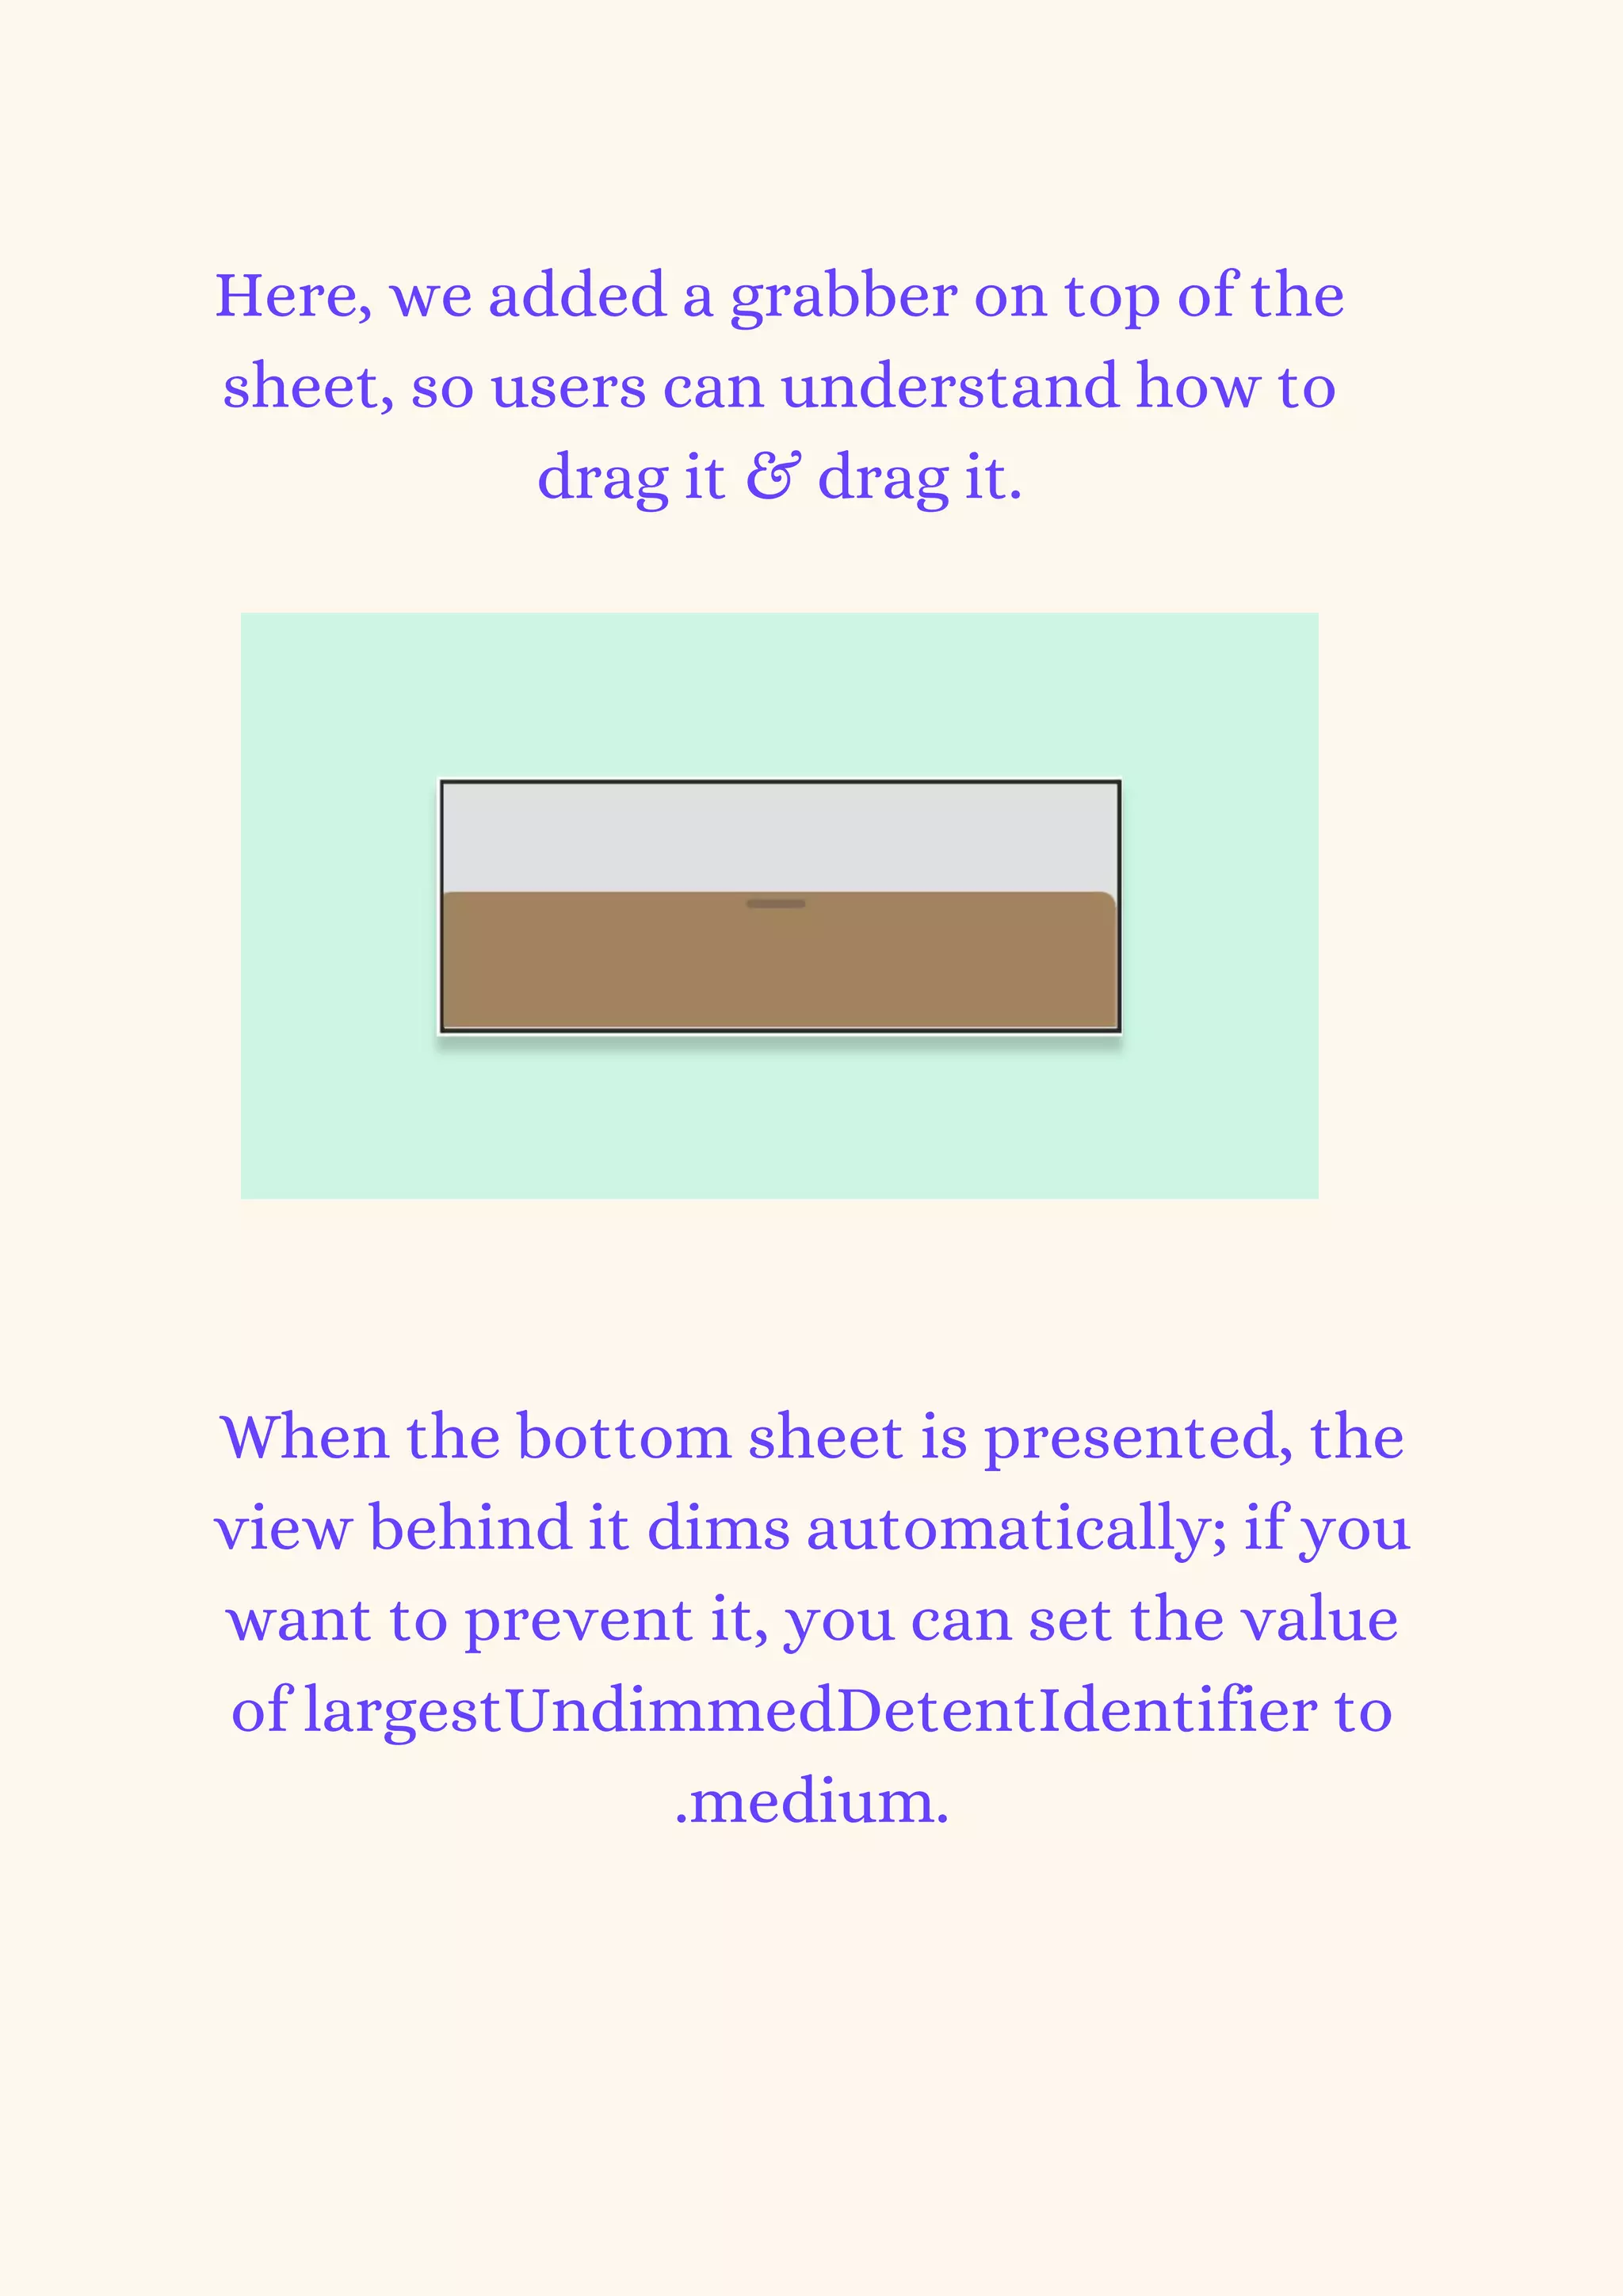
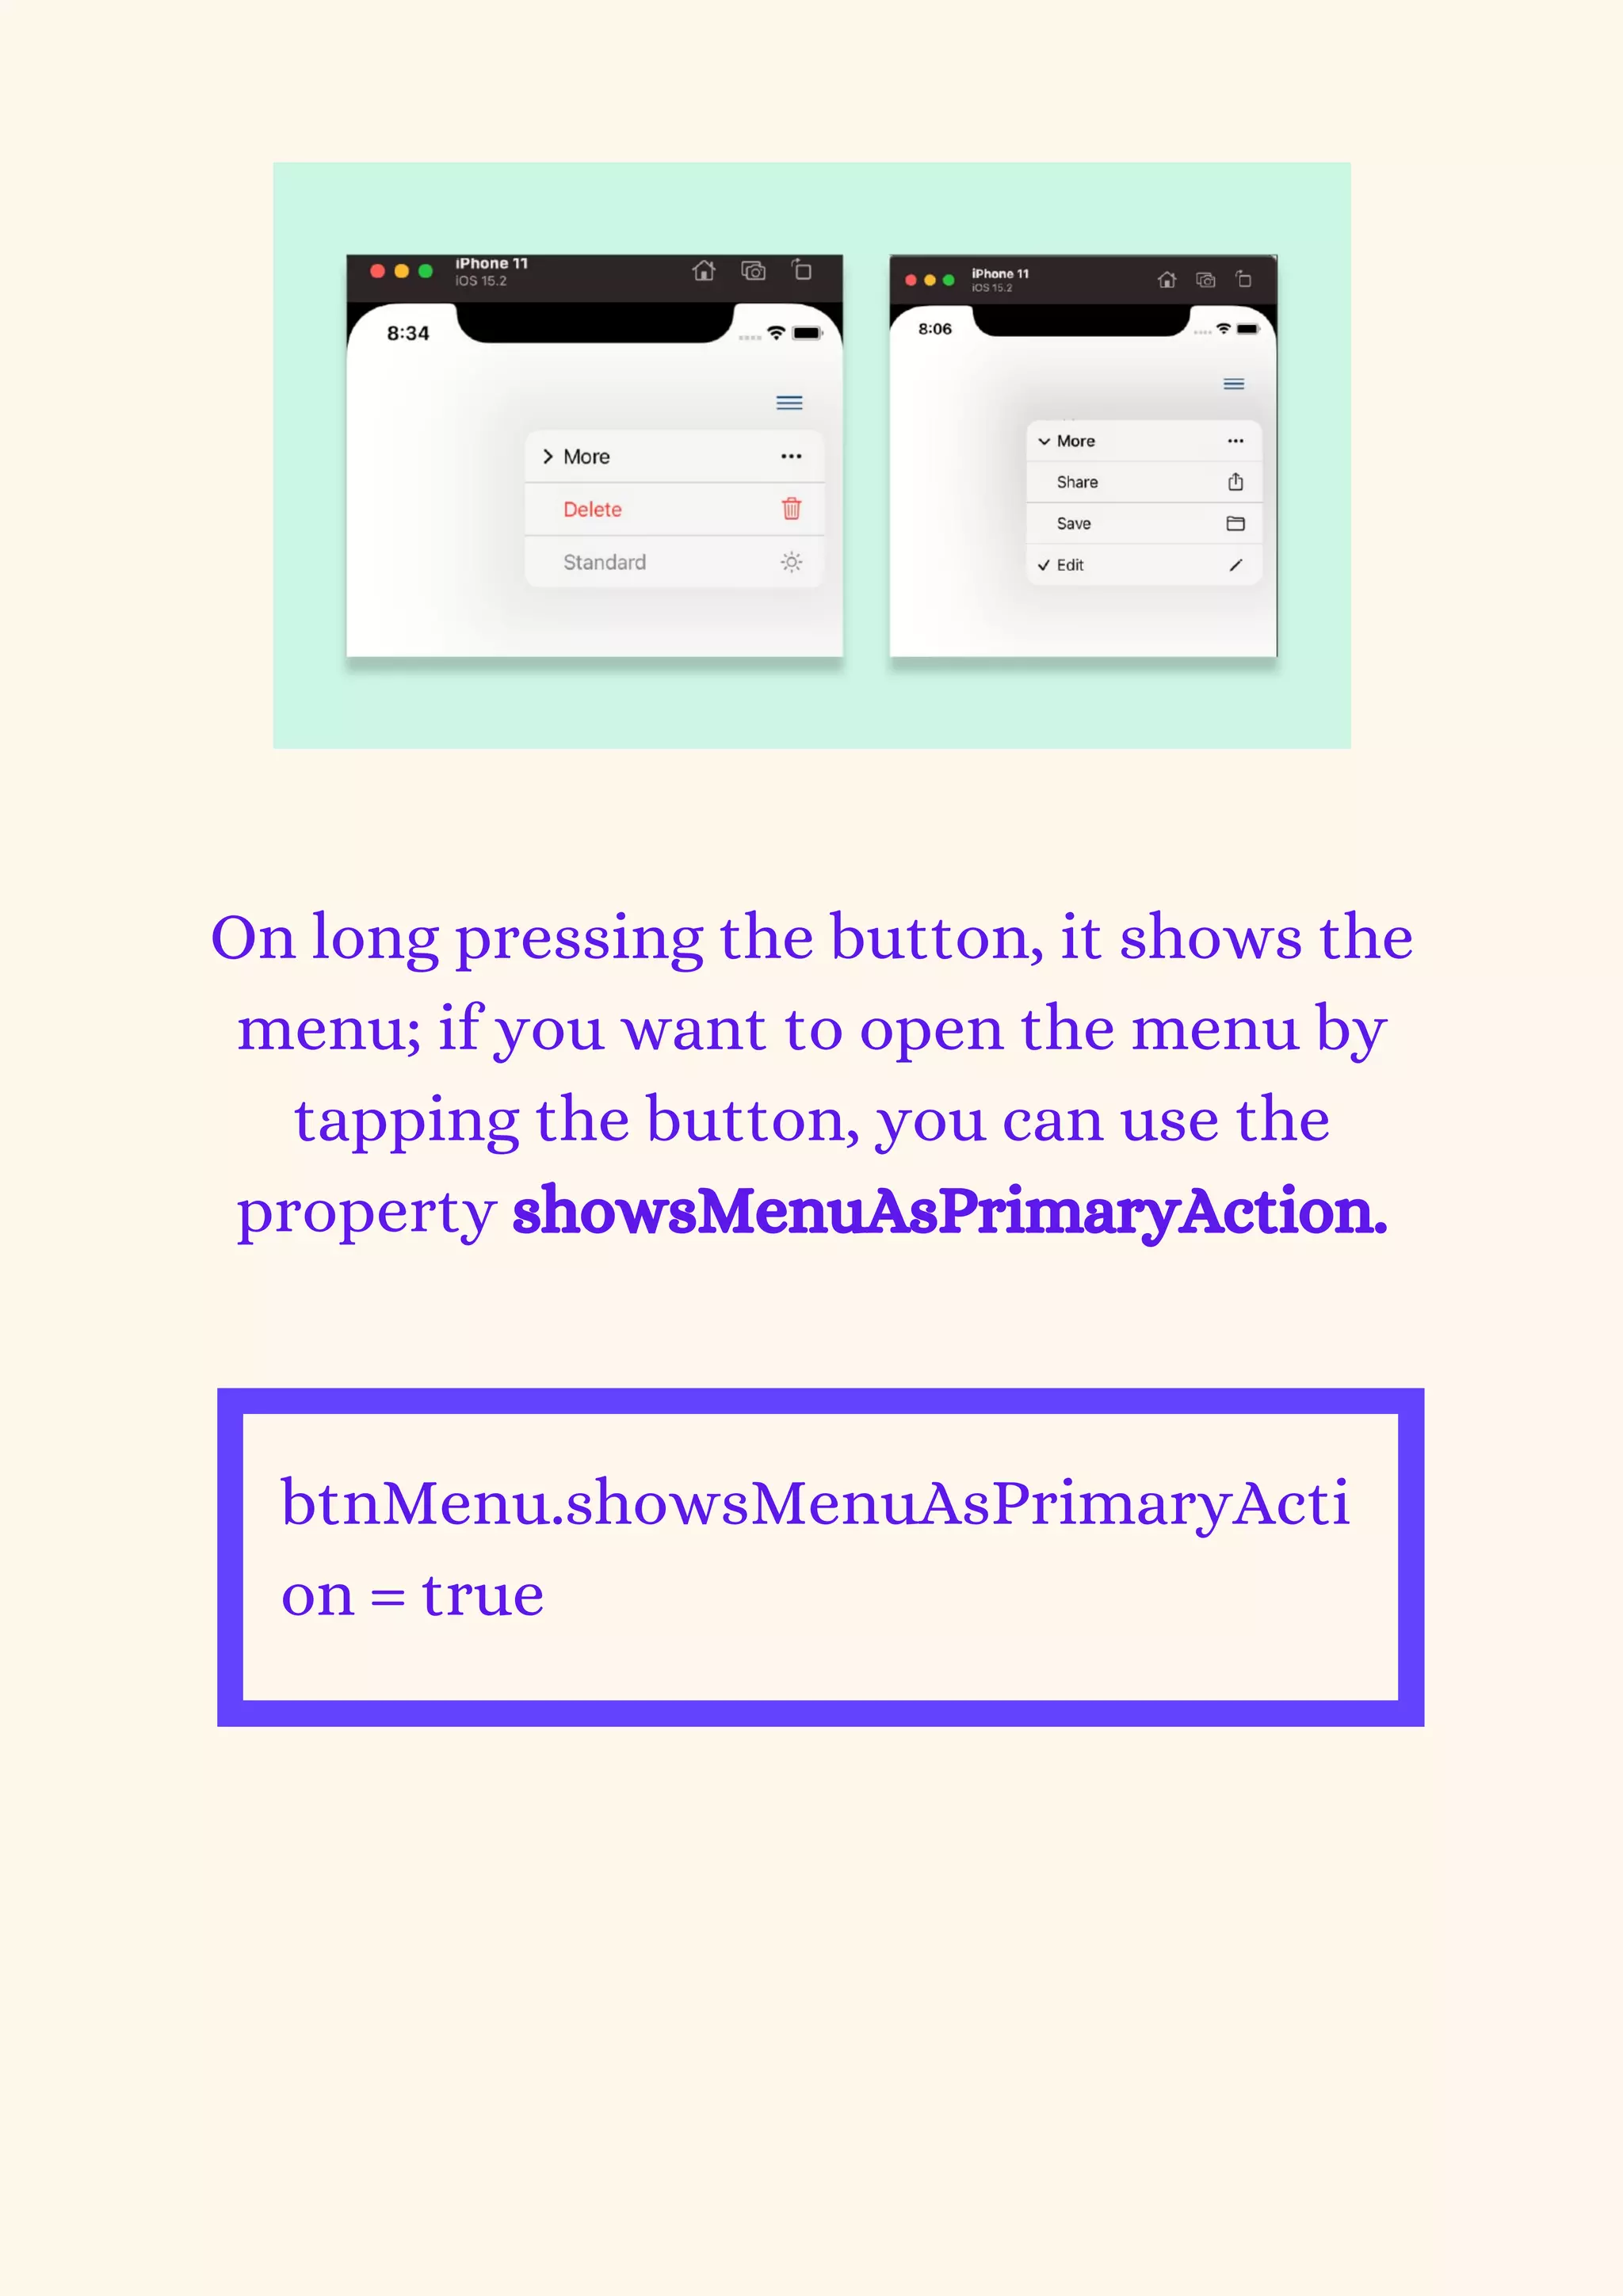
![let destruct = UIAction(title: "Delete",
image: UIImage(systemName:
"trash"), attributes: .destructive) { _
in }
let disable = UIAction(title:
"Standard", image:
UIImage(systemName: "sun.max"),
attributes: .disabled) { _ in }
btnMenu.menu = UIMenu(title:
"", children: [more, destruct, disable])
}](https://image.slidesharecdn.com/newfeaturesinios15andswift5-220421095752/75/New-Features-in-iOS-15-and-Swift-5-5-pdf-15-2048.jpg)

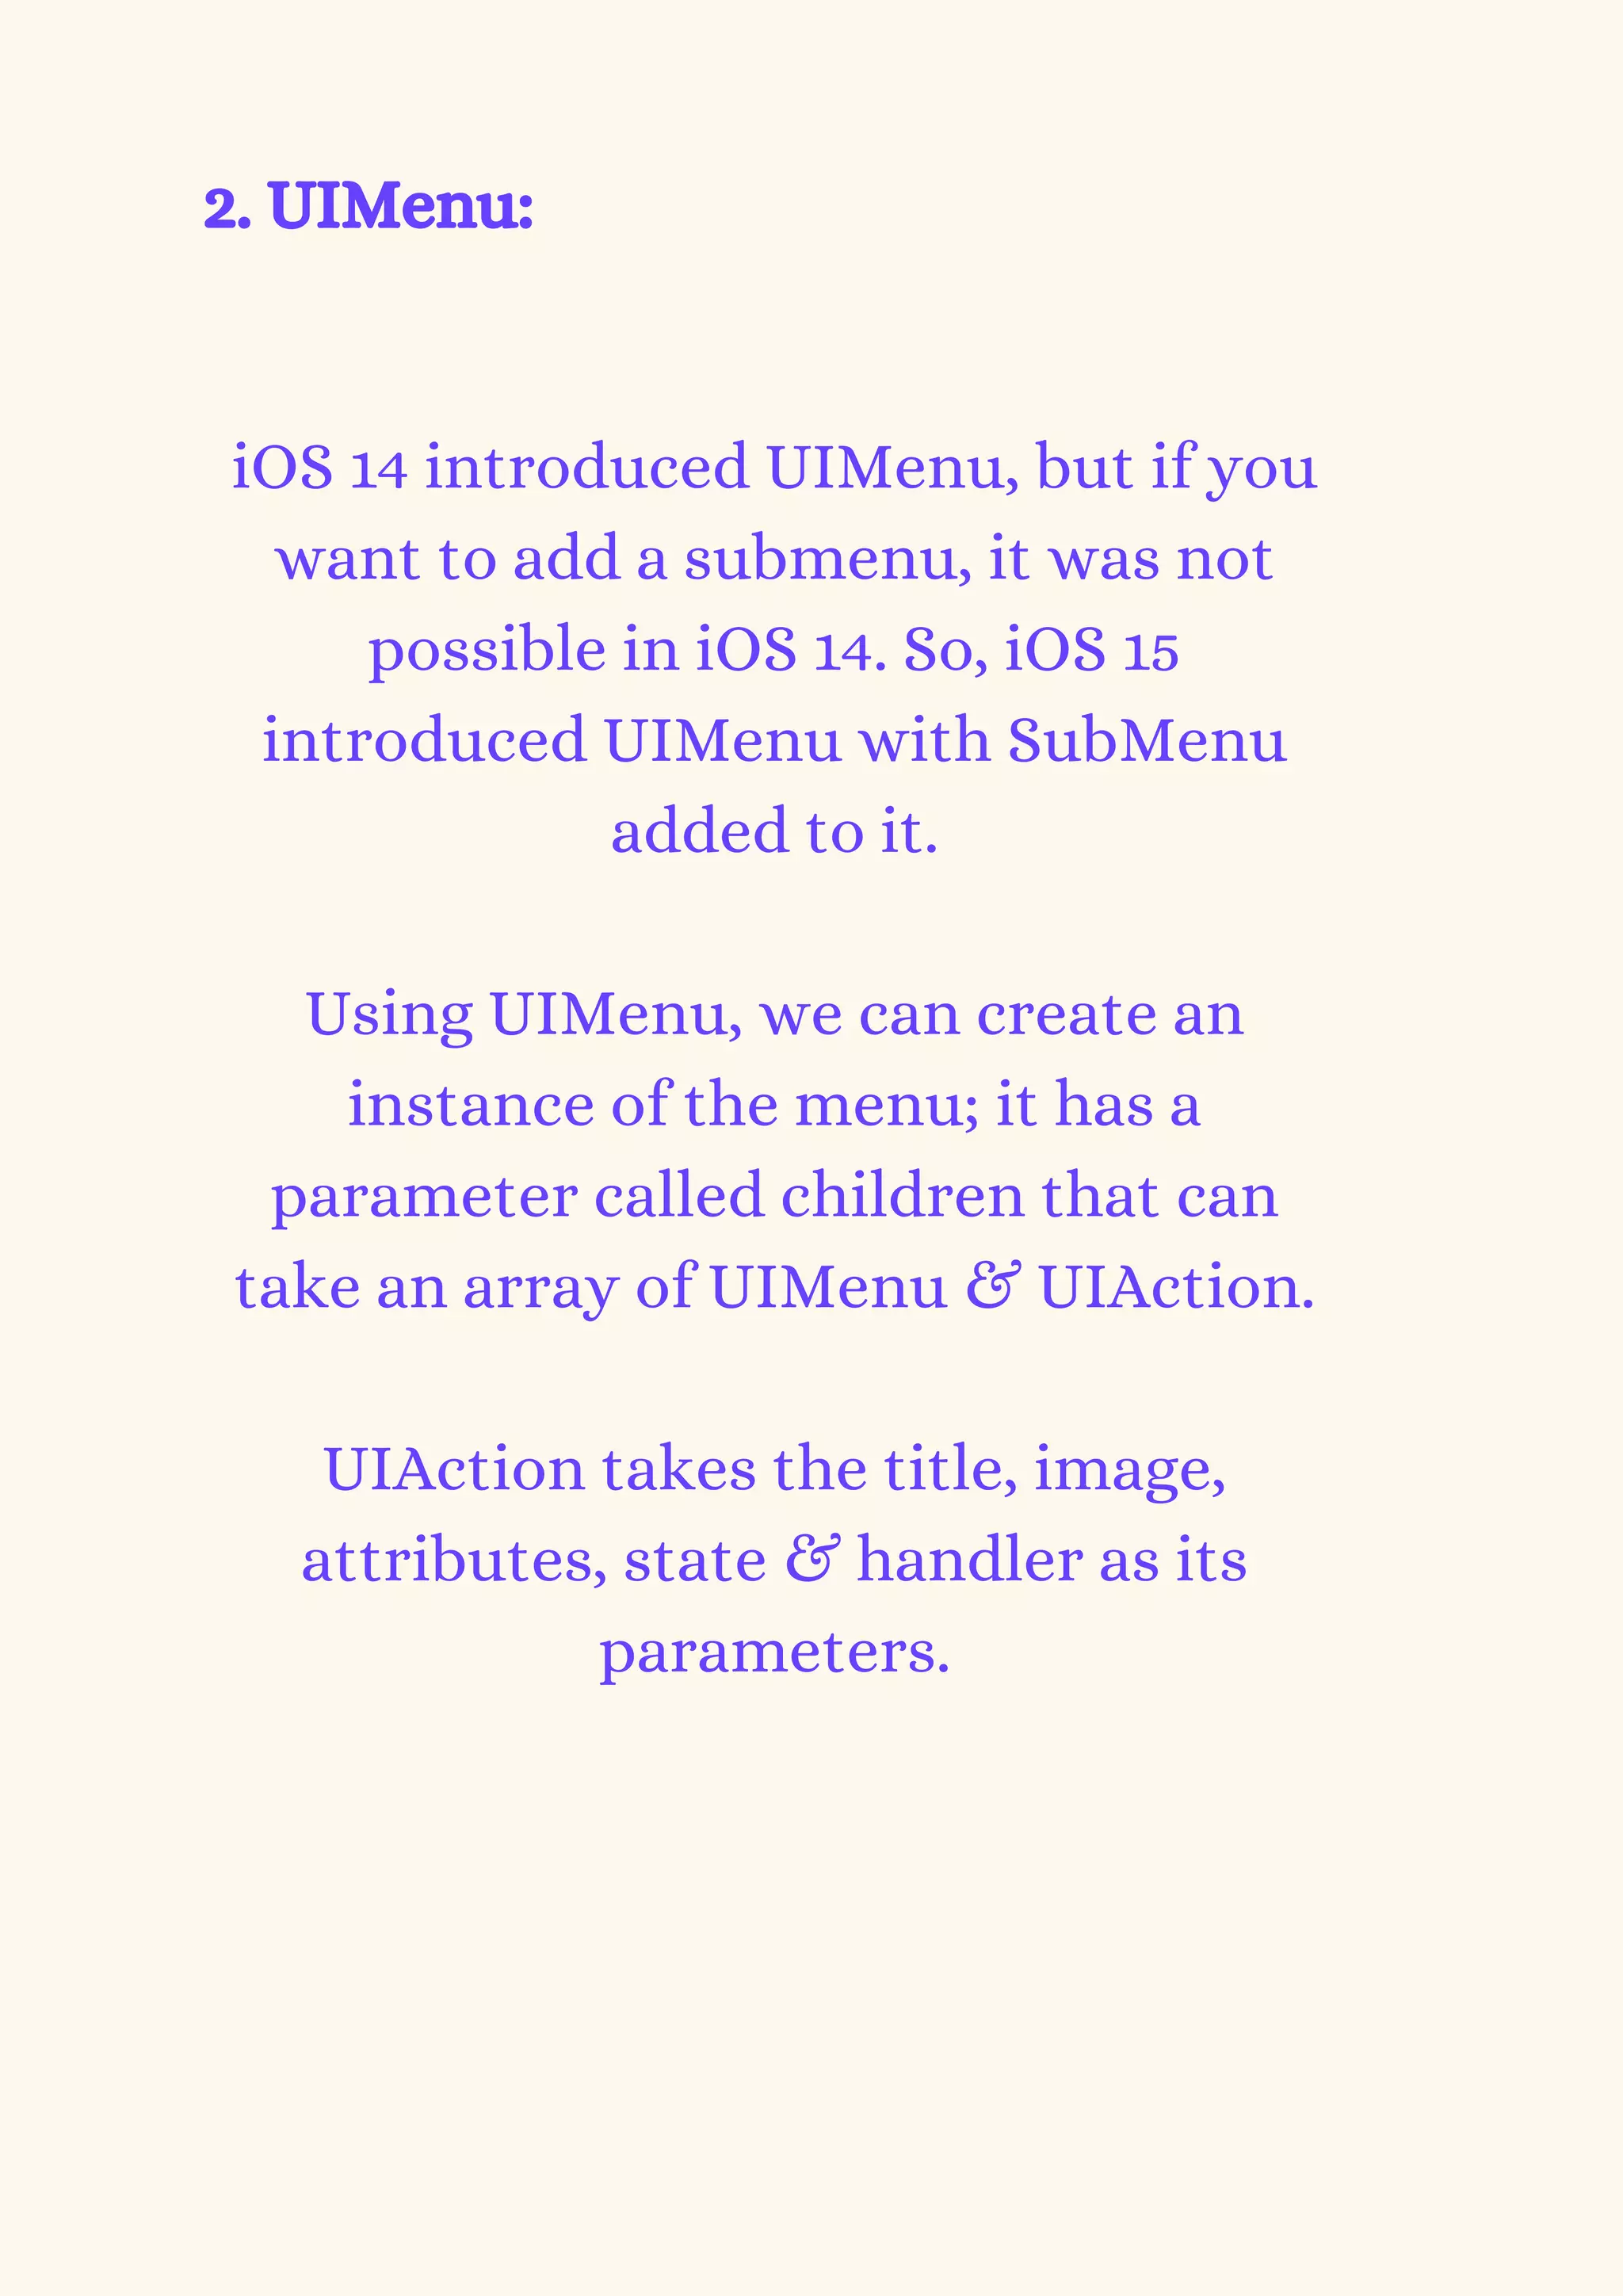
![func generateRandomNumbers()
async -> [Int] {
(1...100).map { _ in
Int.random(in: 1...100)
}
}
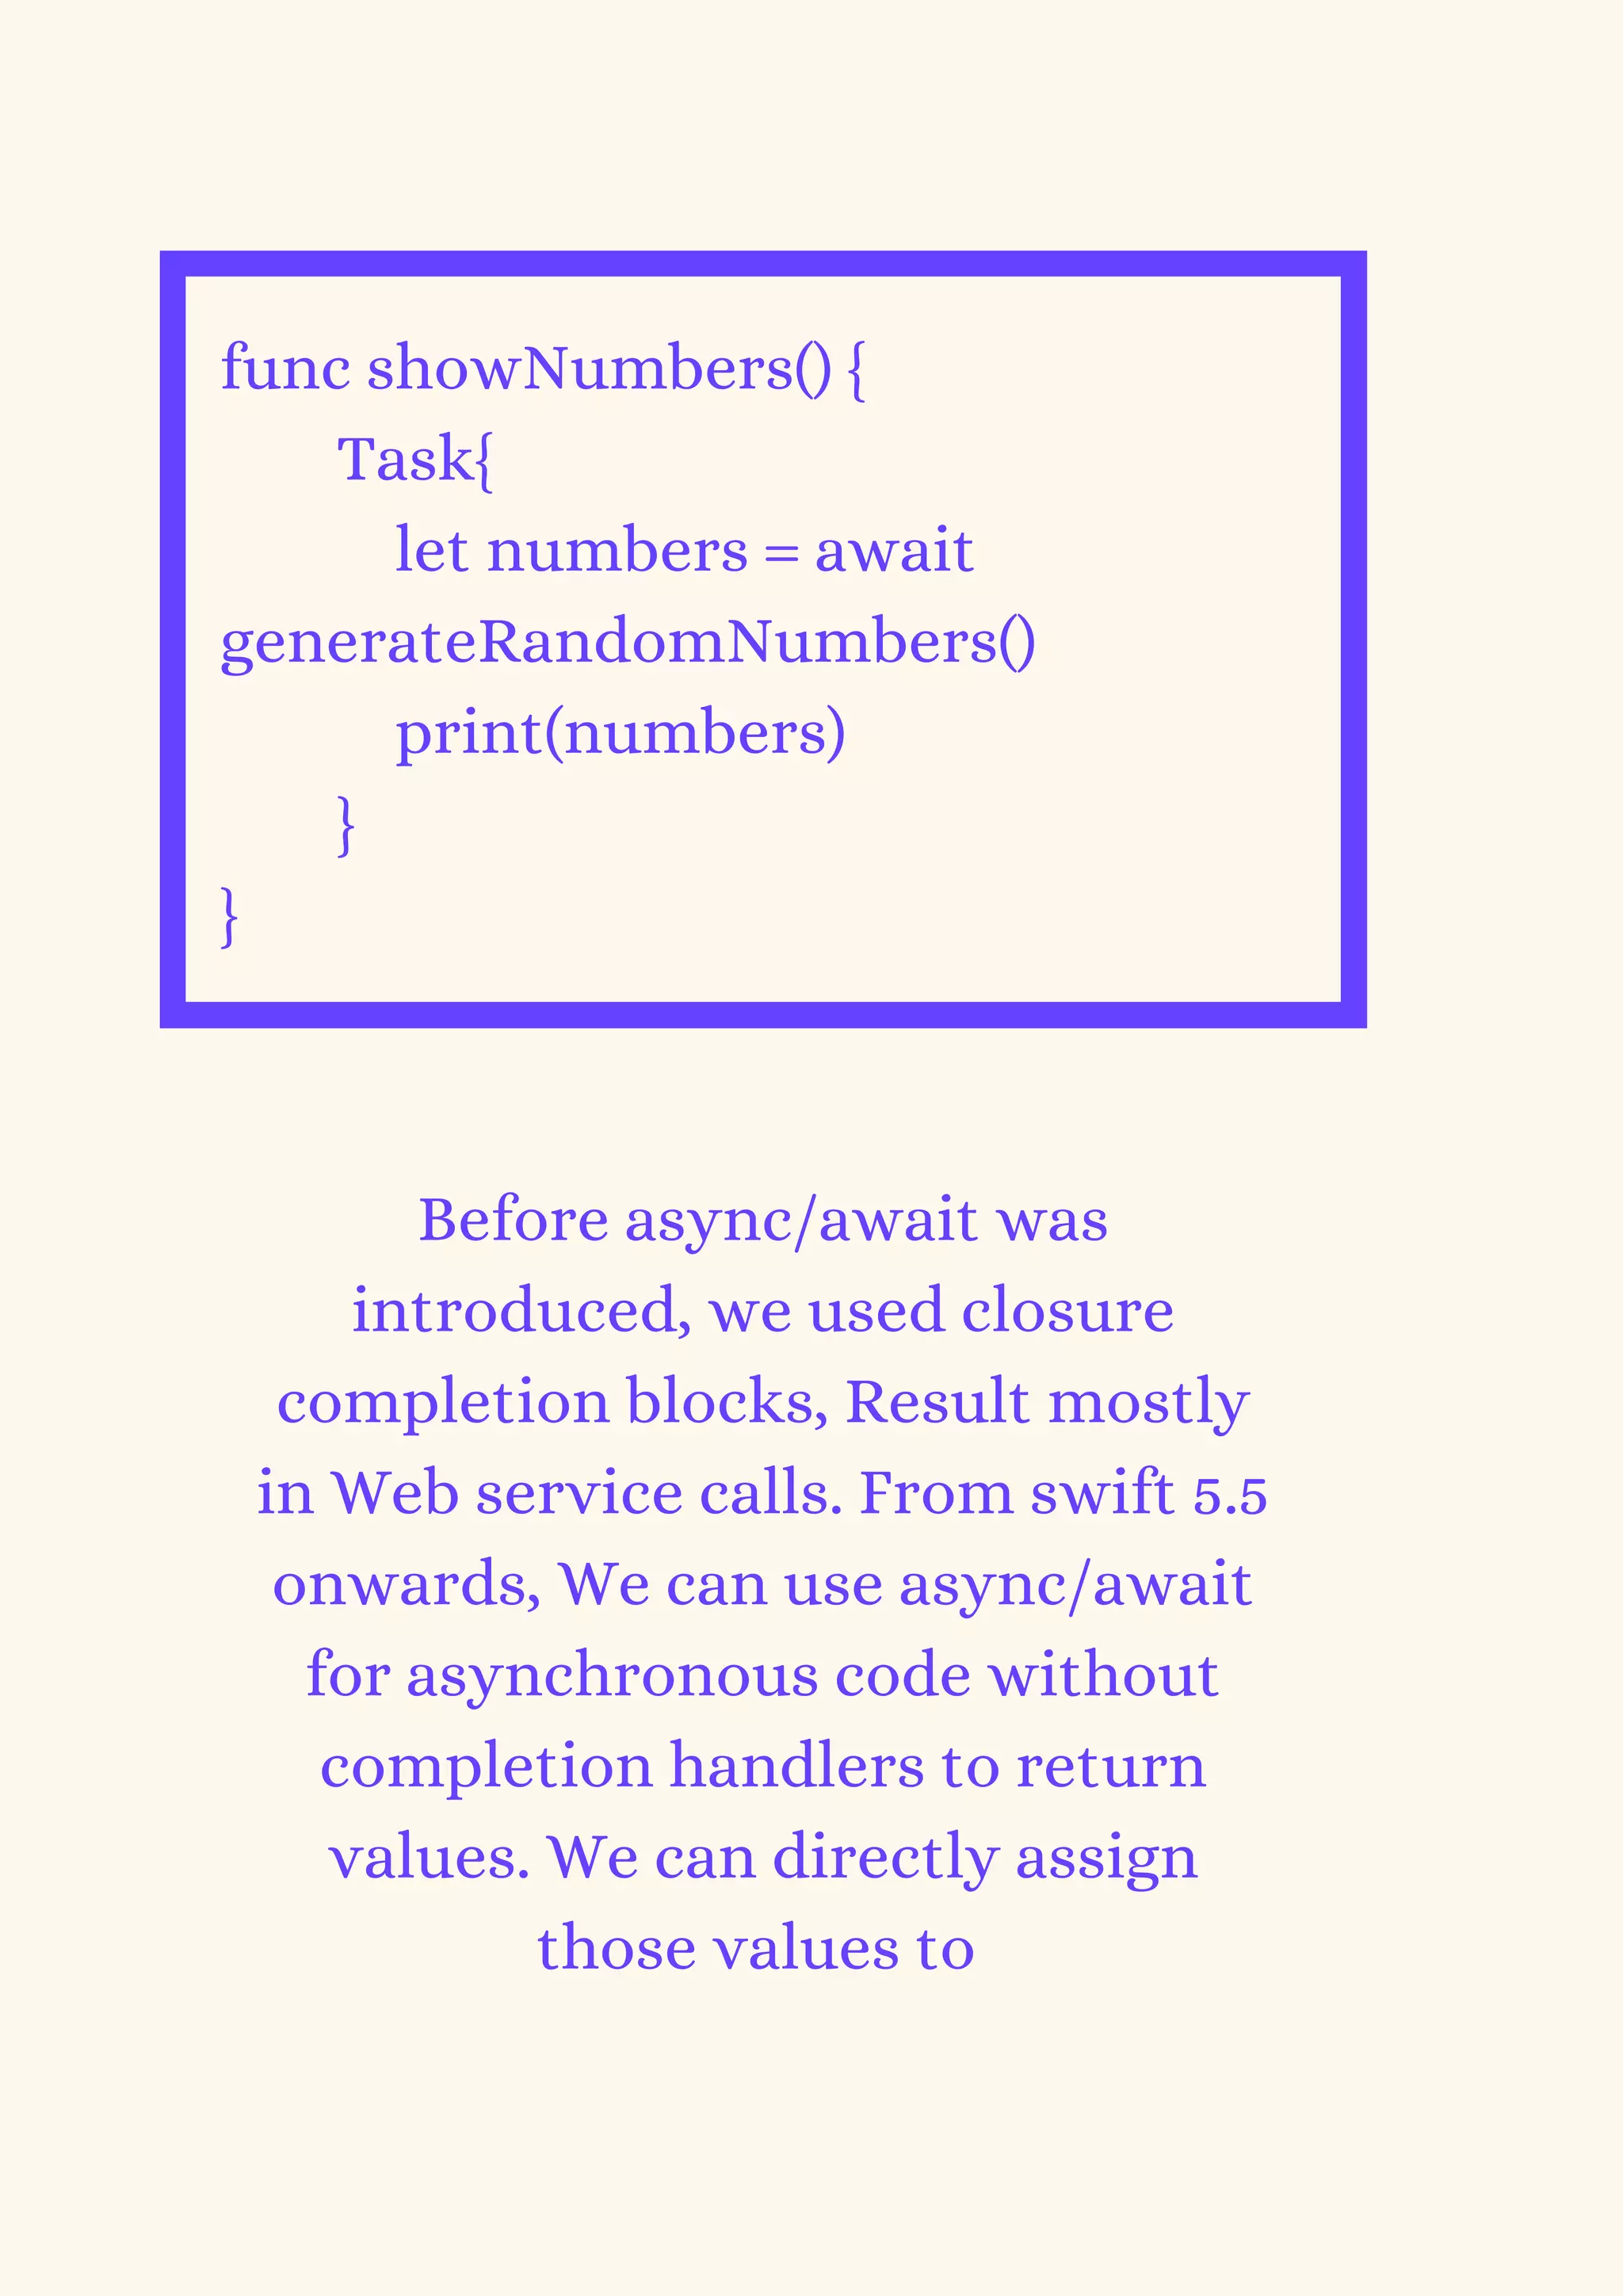
To call this method, we need to use
await keyword ahead of the method call
& add it in an asynchronous context,
Task.](https://image.slidesharecdn.com/newfeaturesinios15andswift5-220421095752/75/New-Features-in-iOS-15-and-Swift-5-5-pdf-20-2048.jpg)
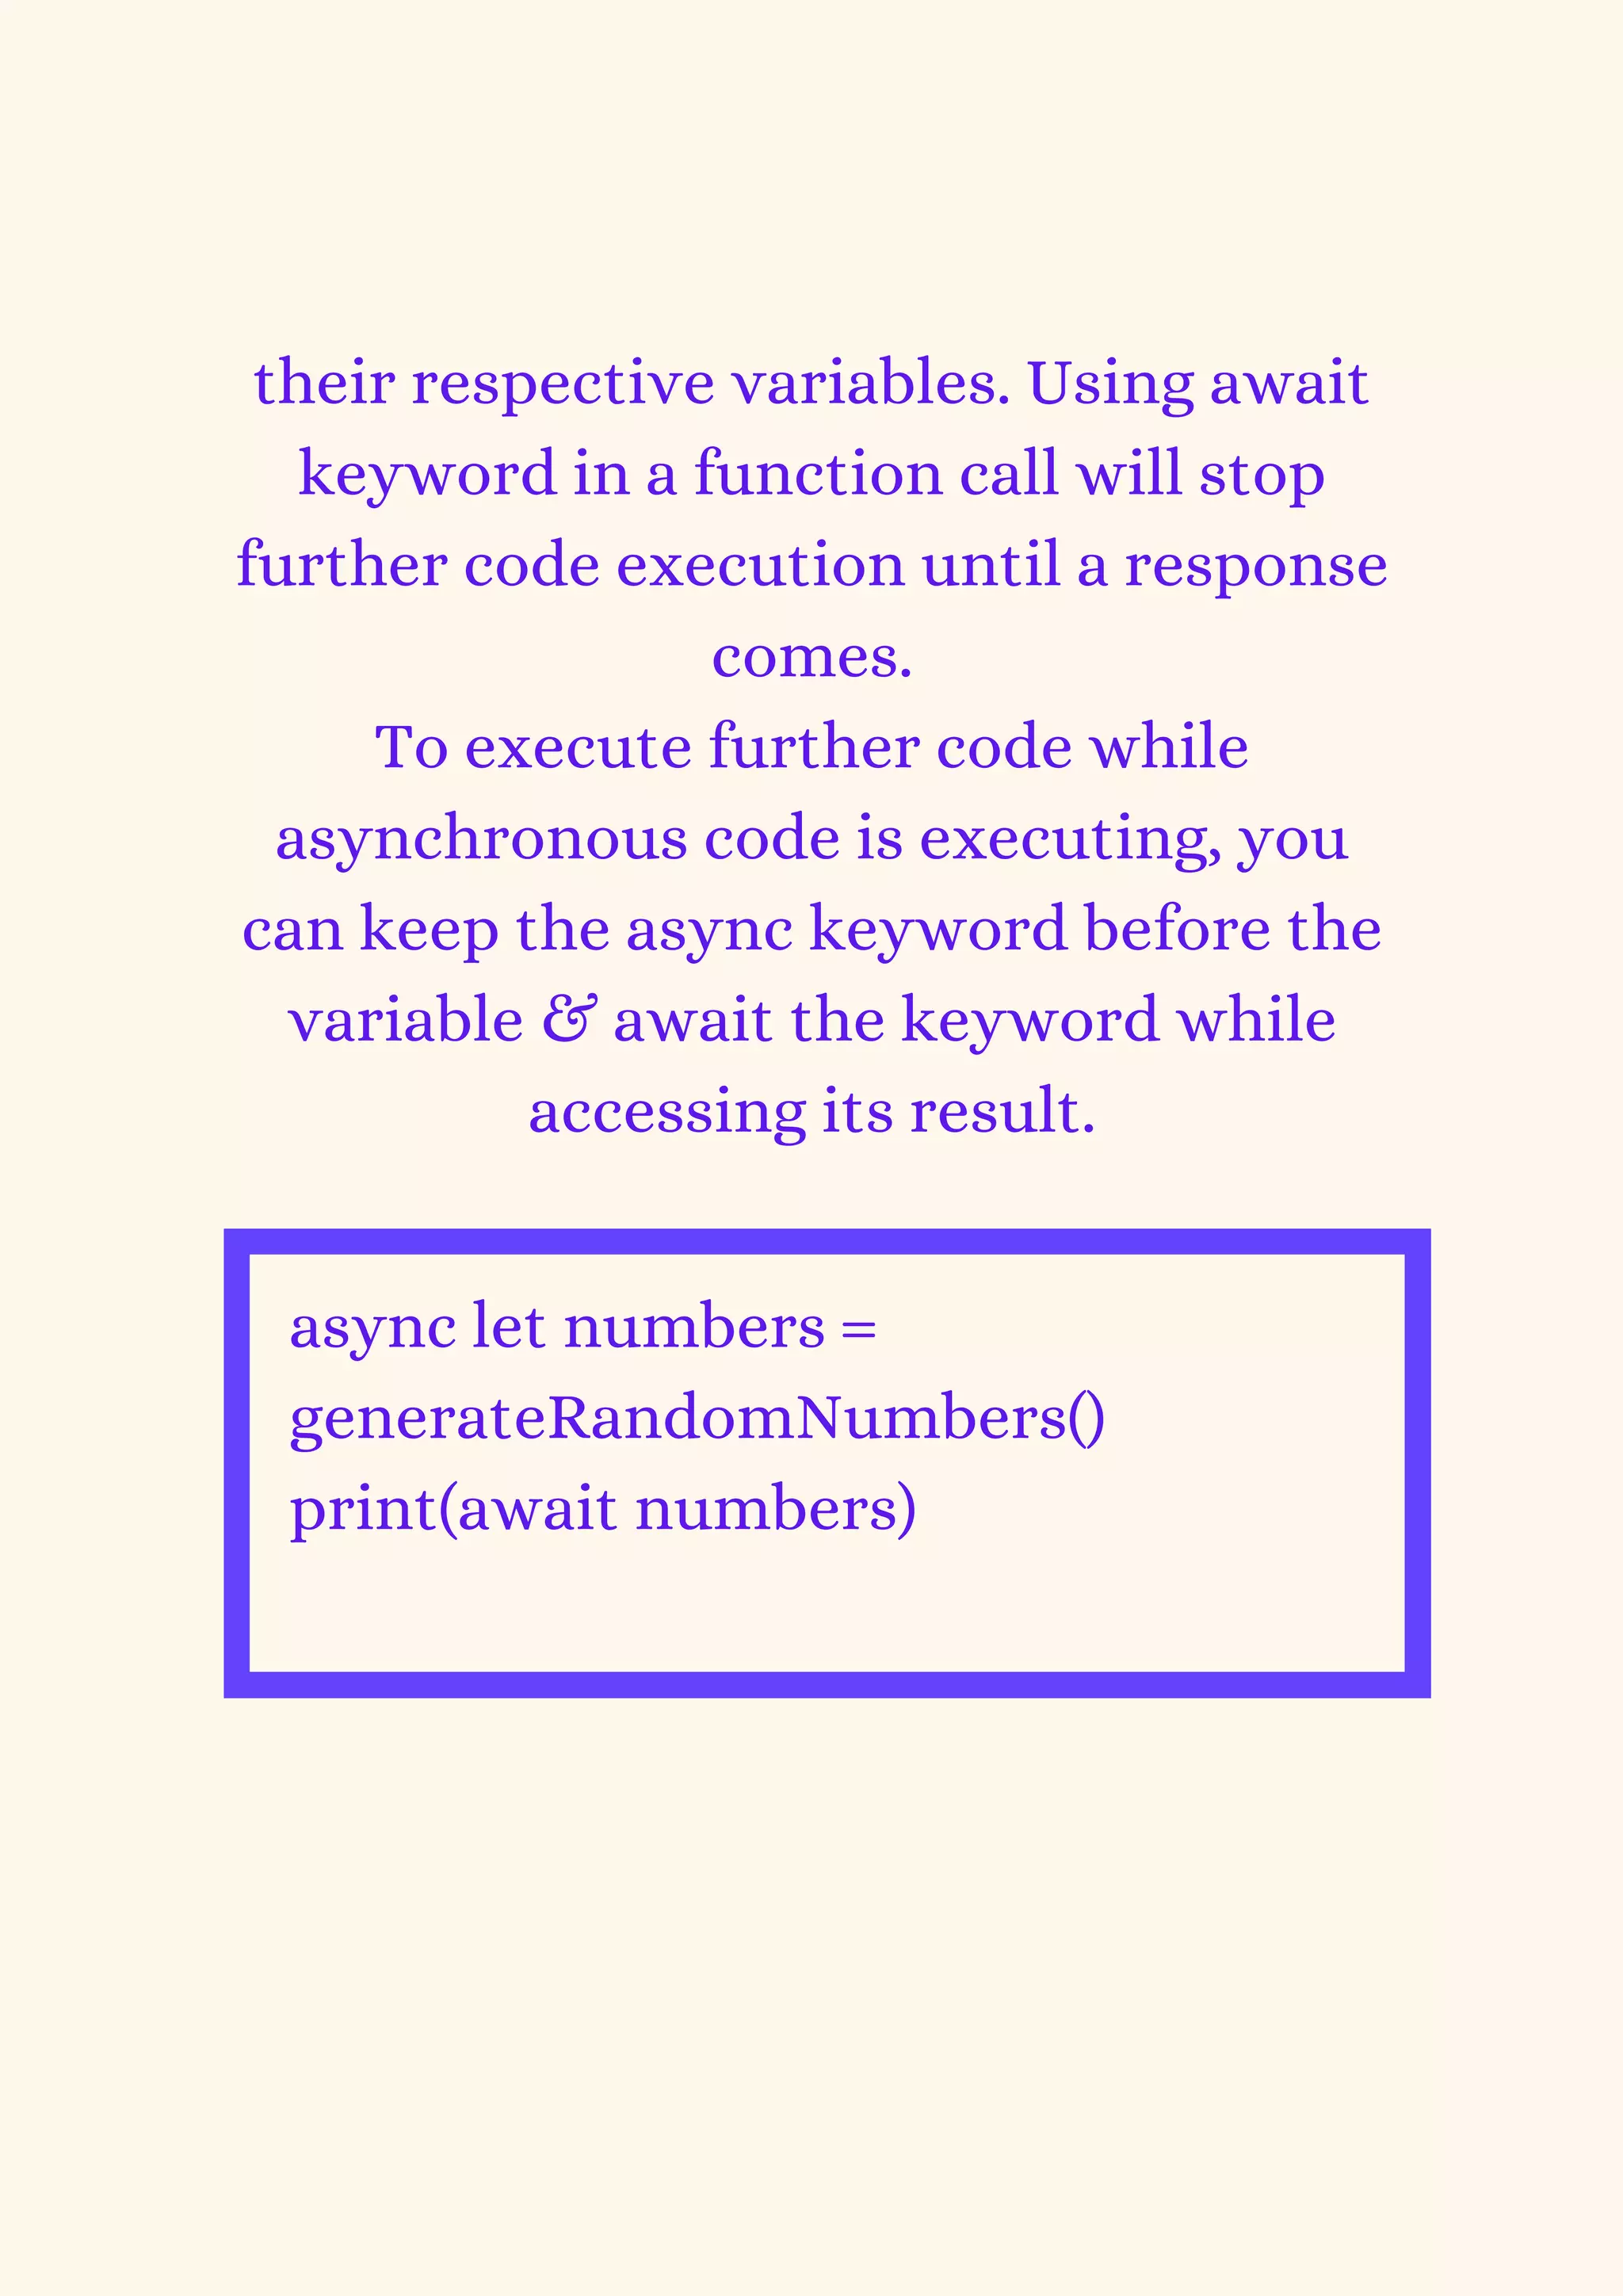
![If we want to call multiple asynchronous
functions parallel, we can also do it with
async/await.
async let numbersInt =
generateRandomNumbersInt()
async let numbersDouble =
generateRandomNumbersDouble()
let numbers = await [numbersInt,
numbersDouble] as [Any]
print(numbers)
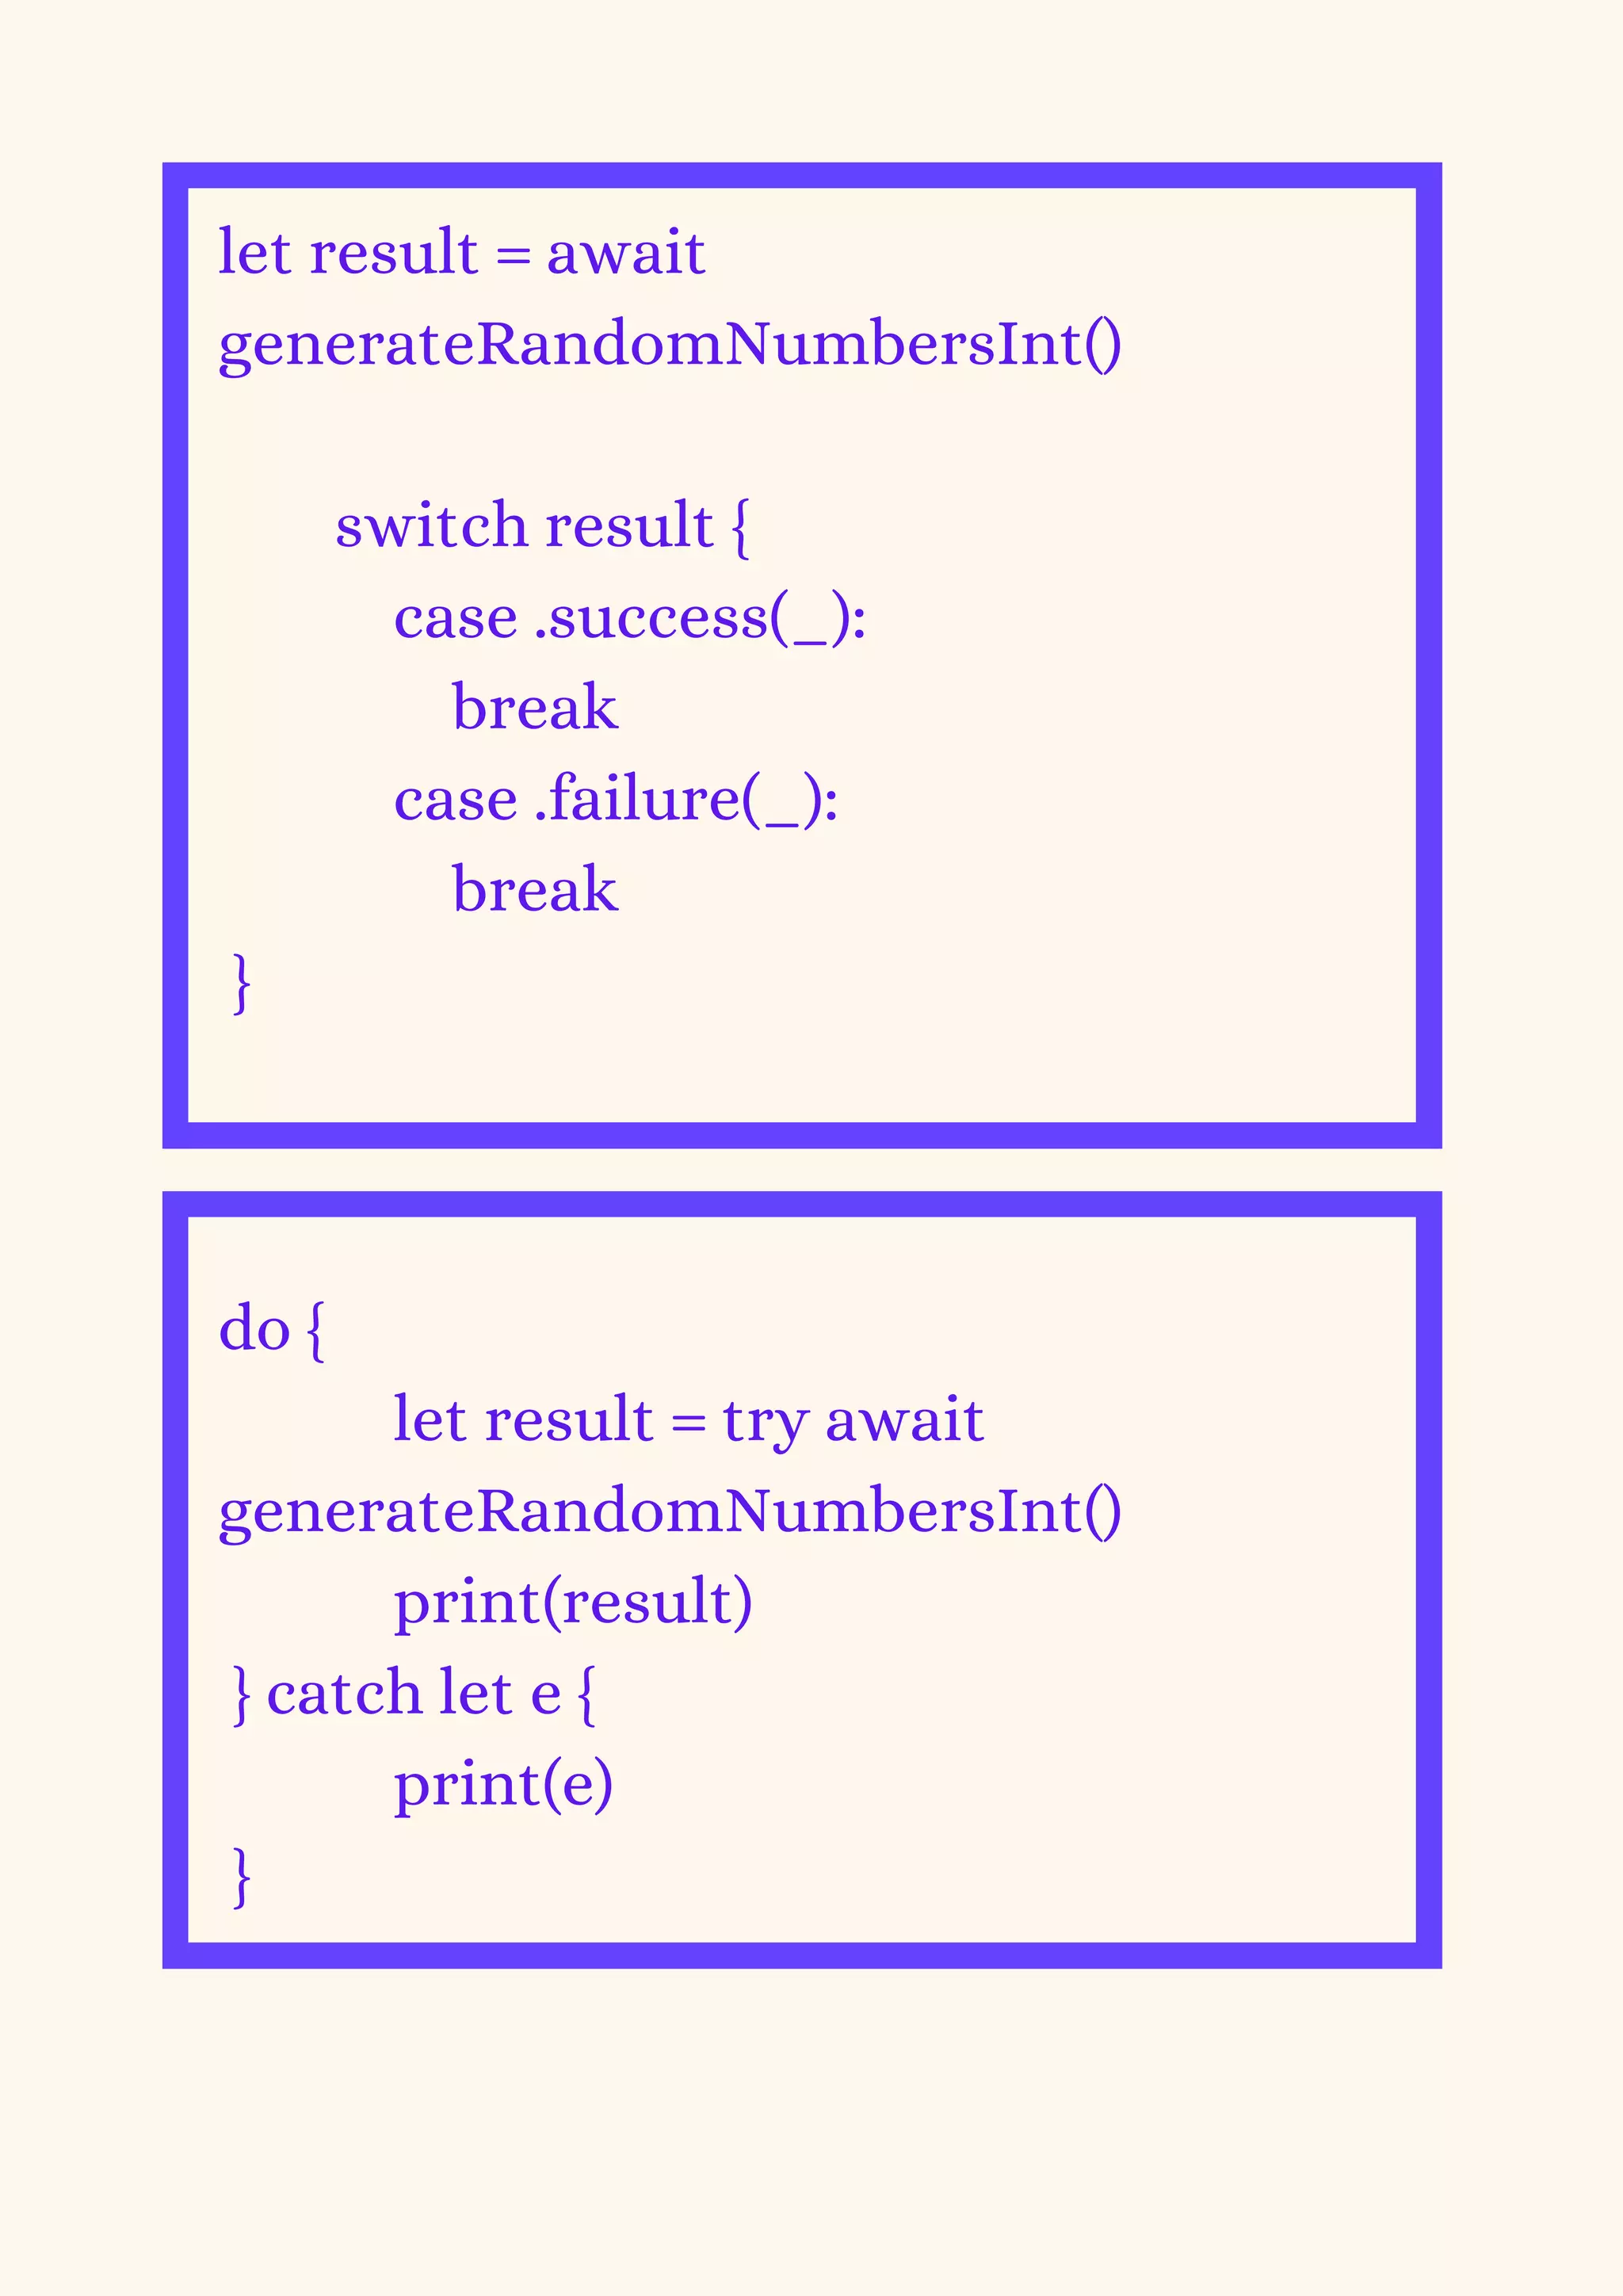
For error handling, in async/await, we
can use Result or try/catch.](https://image.slidesharecdn.com/newfeaturesinios15andswift5-220421095752/75/New-Features-in-iOS-15-and-Swift-5-5-pdf-23-2048.jpg)

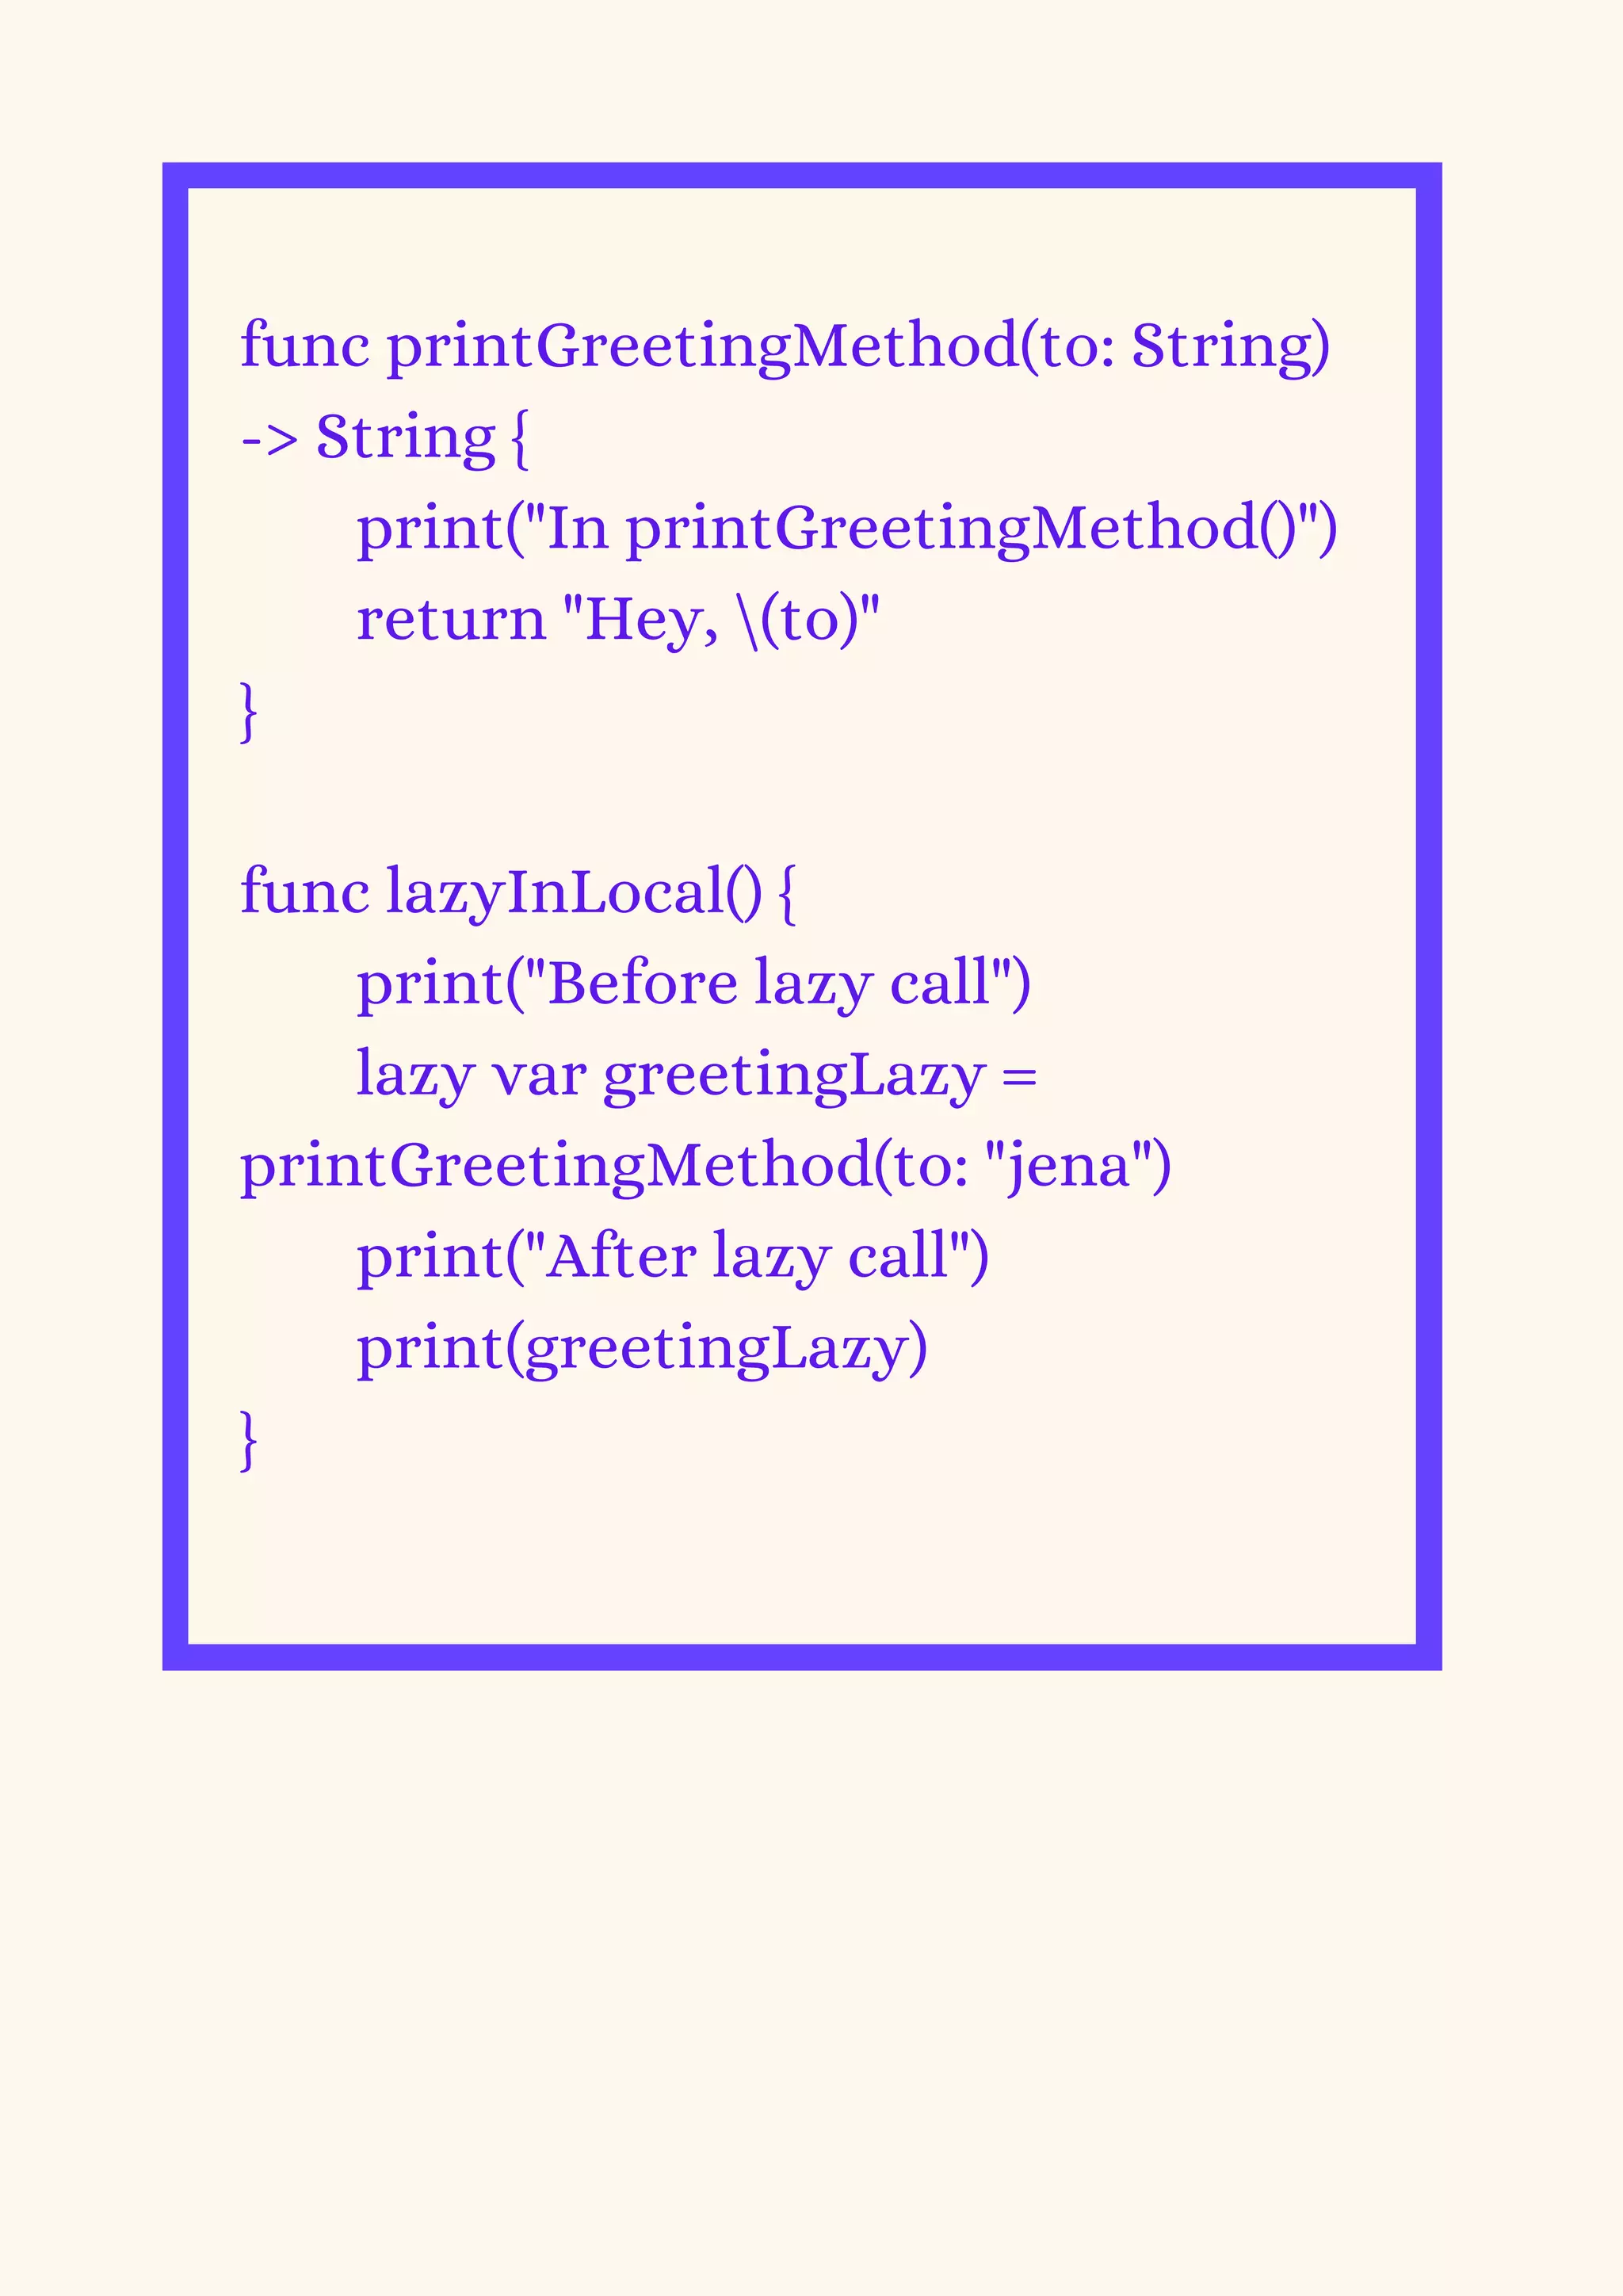
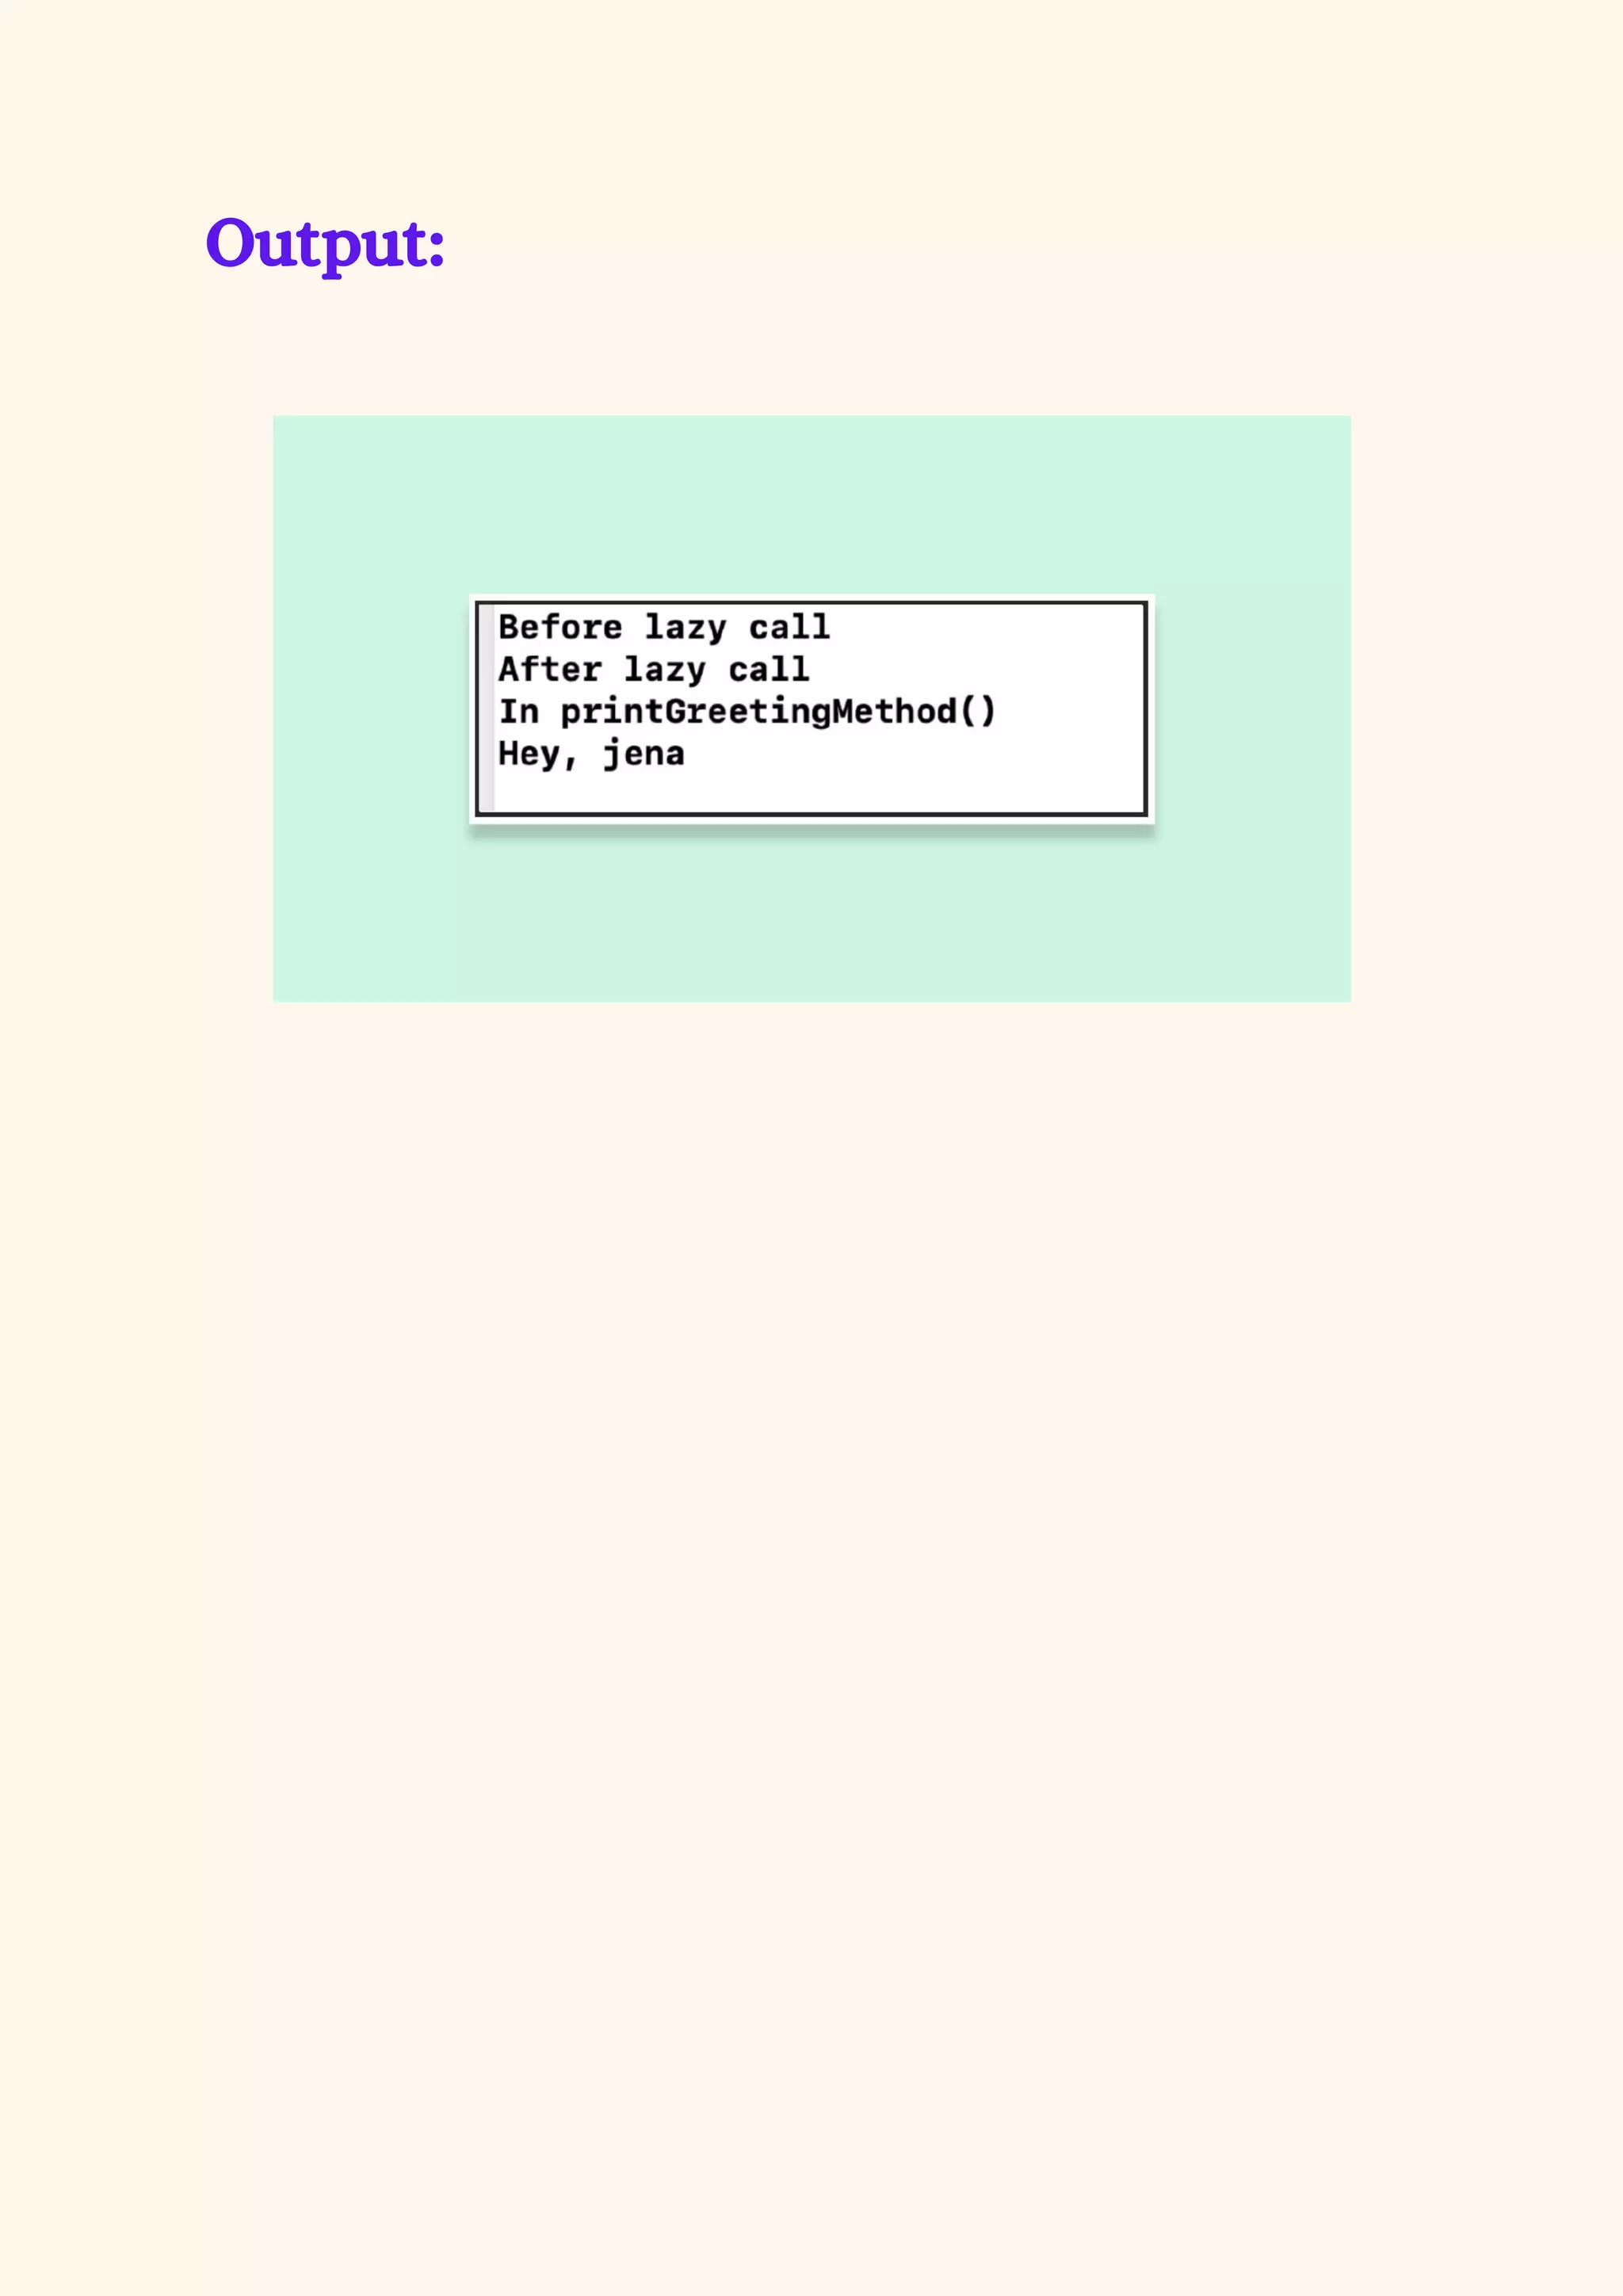


The document discusses new features introduced in iOS 15 and Swift 5.5 including bottom sheet customization with UISheetPresentationController, adding submenus to UIMenu, improved location permission with CLLocationButton, using async/await for asynchronous code, Double and CGFloat being interchangeable types, and using lazy in local contexts. It provides code examples for implementing these new features.


![[BDD 2025 - Mobile Development] Exploring Apple’s On-Device FoundationModels](https://cdn.slidesharecdn.com/ss_thumbnails/md-exploringappleson-devicefoundationmodels-251124030840-d690542c-thumbnail.jpg?width=640&height=640&fit=bounds)