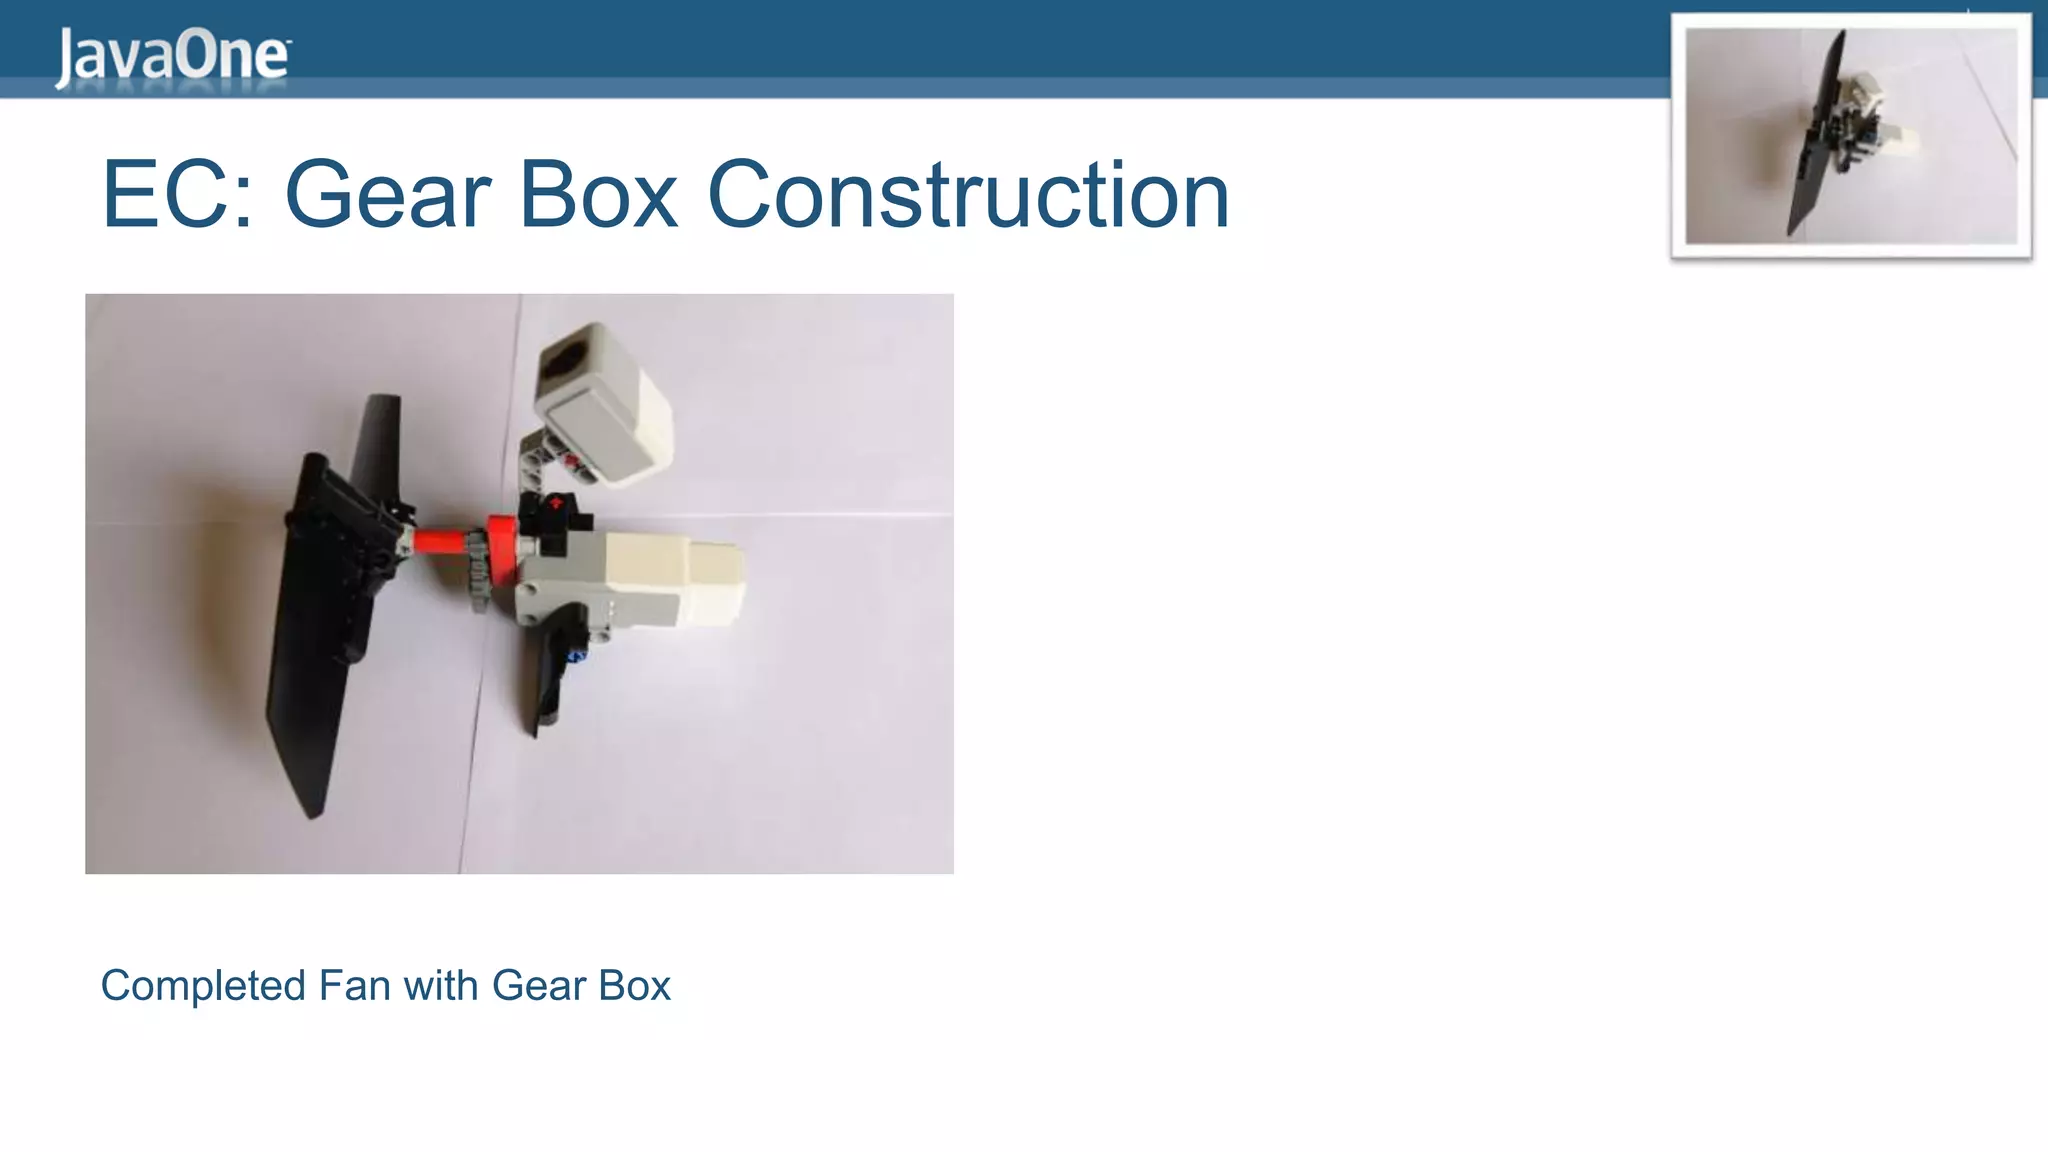
Downloaded 11 times


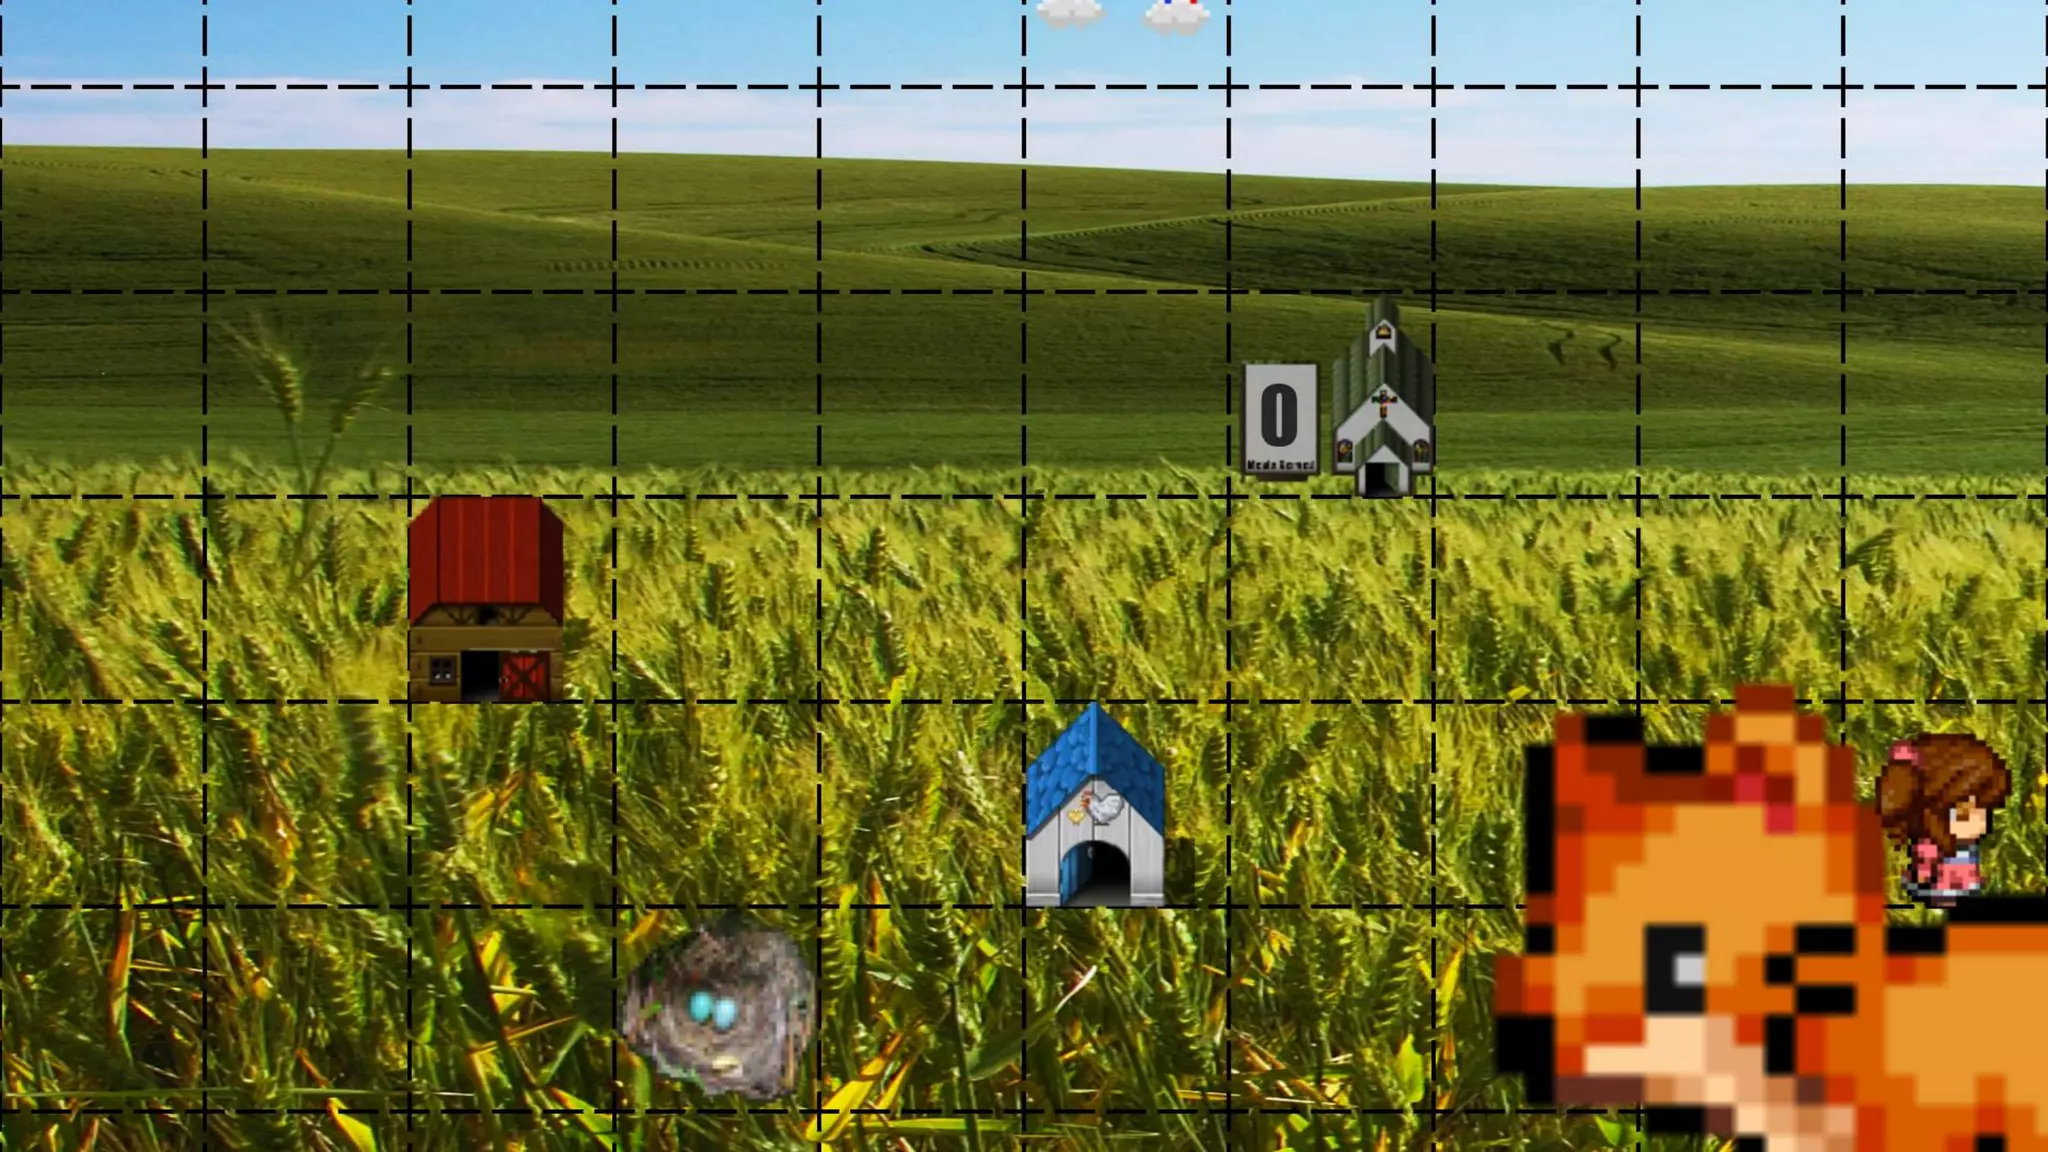


![Simple LeJOS Application
import lejos.nxt.Button;
import lejos.nxt.LCD;
public class EV3FirstProgram {
public static void main(String[] args) {
LCD.clear();
LCD.drawString("First EV3 Program", 0, 5);
Button.waitForAnyPress();
LCD.clear();
LCD.refresh();
}
}](https://image.slidesharecdn.com/jcretejavaworkshop-140829013515-phpapp02/75/JCrete-Embedded-Java-Workshop-44-2048.jpg)


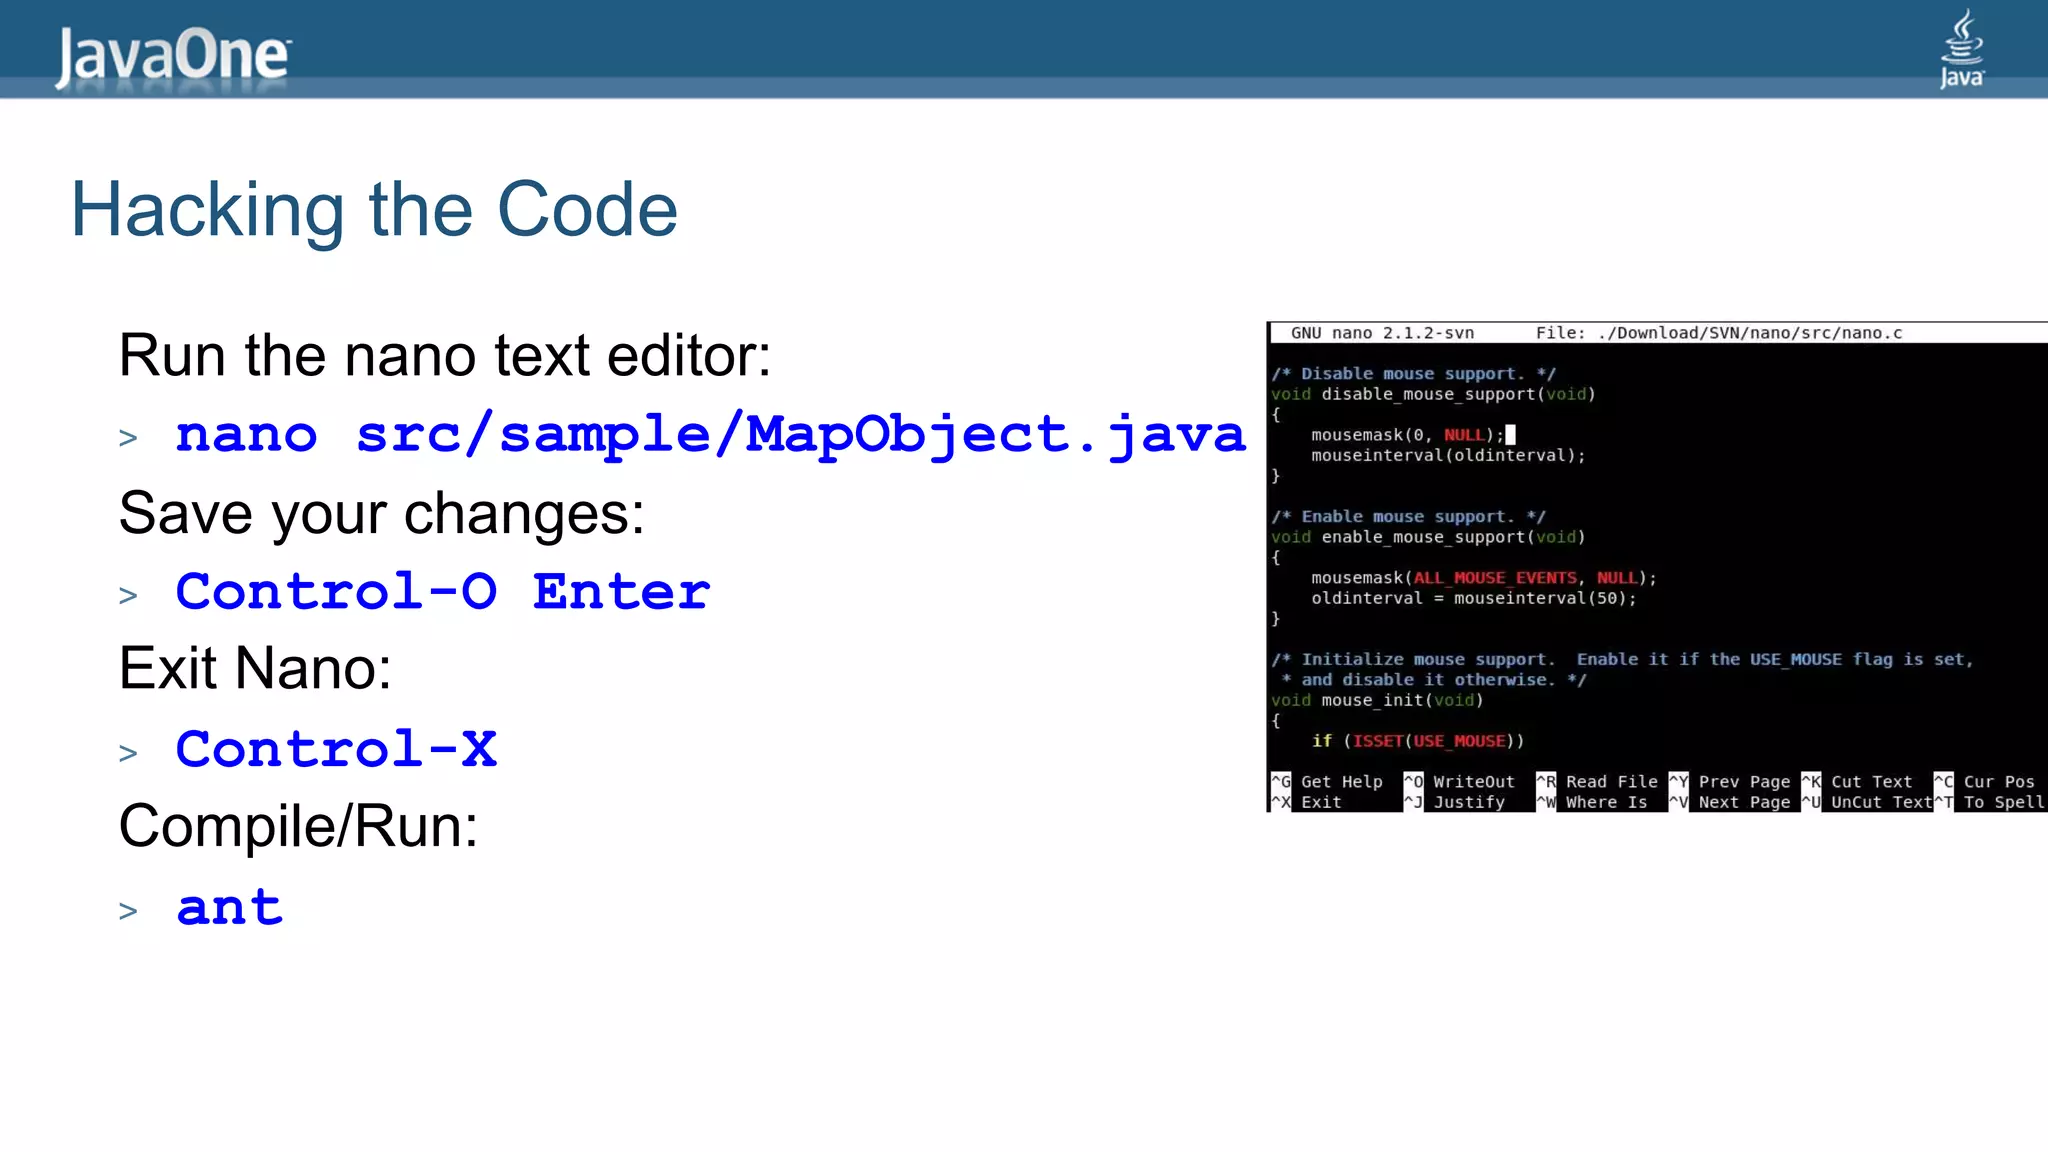
![Making the Wind turbine turn
public class WindTurbine {
public static void main(String[] args) {
EV3MediumRegulatedMotor fan =
new EV3MediumRegulatedMotor(MotorPort.A);
fan.setSpeed(1500);
fan.setAcceleration(150);
fan.backward();
Delay.msDelay(10000);
}
}](https://image.slidesharecdn.com/jcretejavaworkshop-140829013515-phpapp02/75/JCrete-Embedded-Java-Workshop-69-2048.jpg)
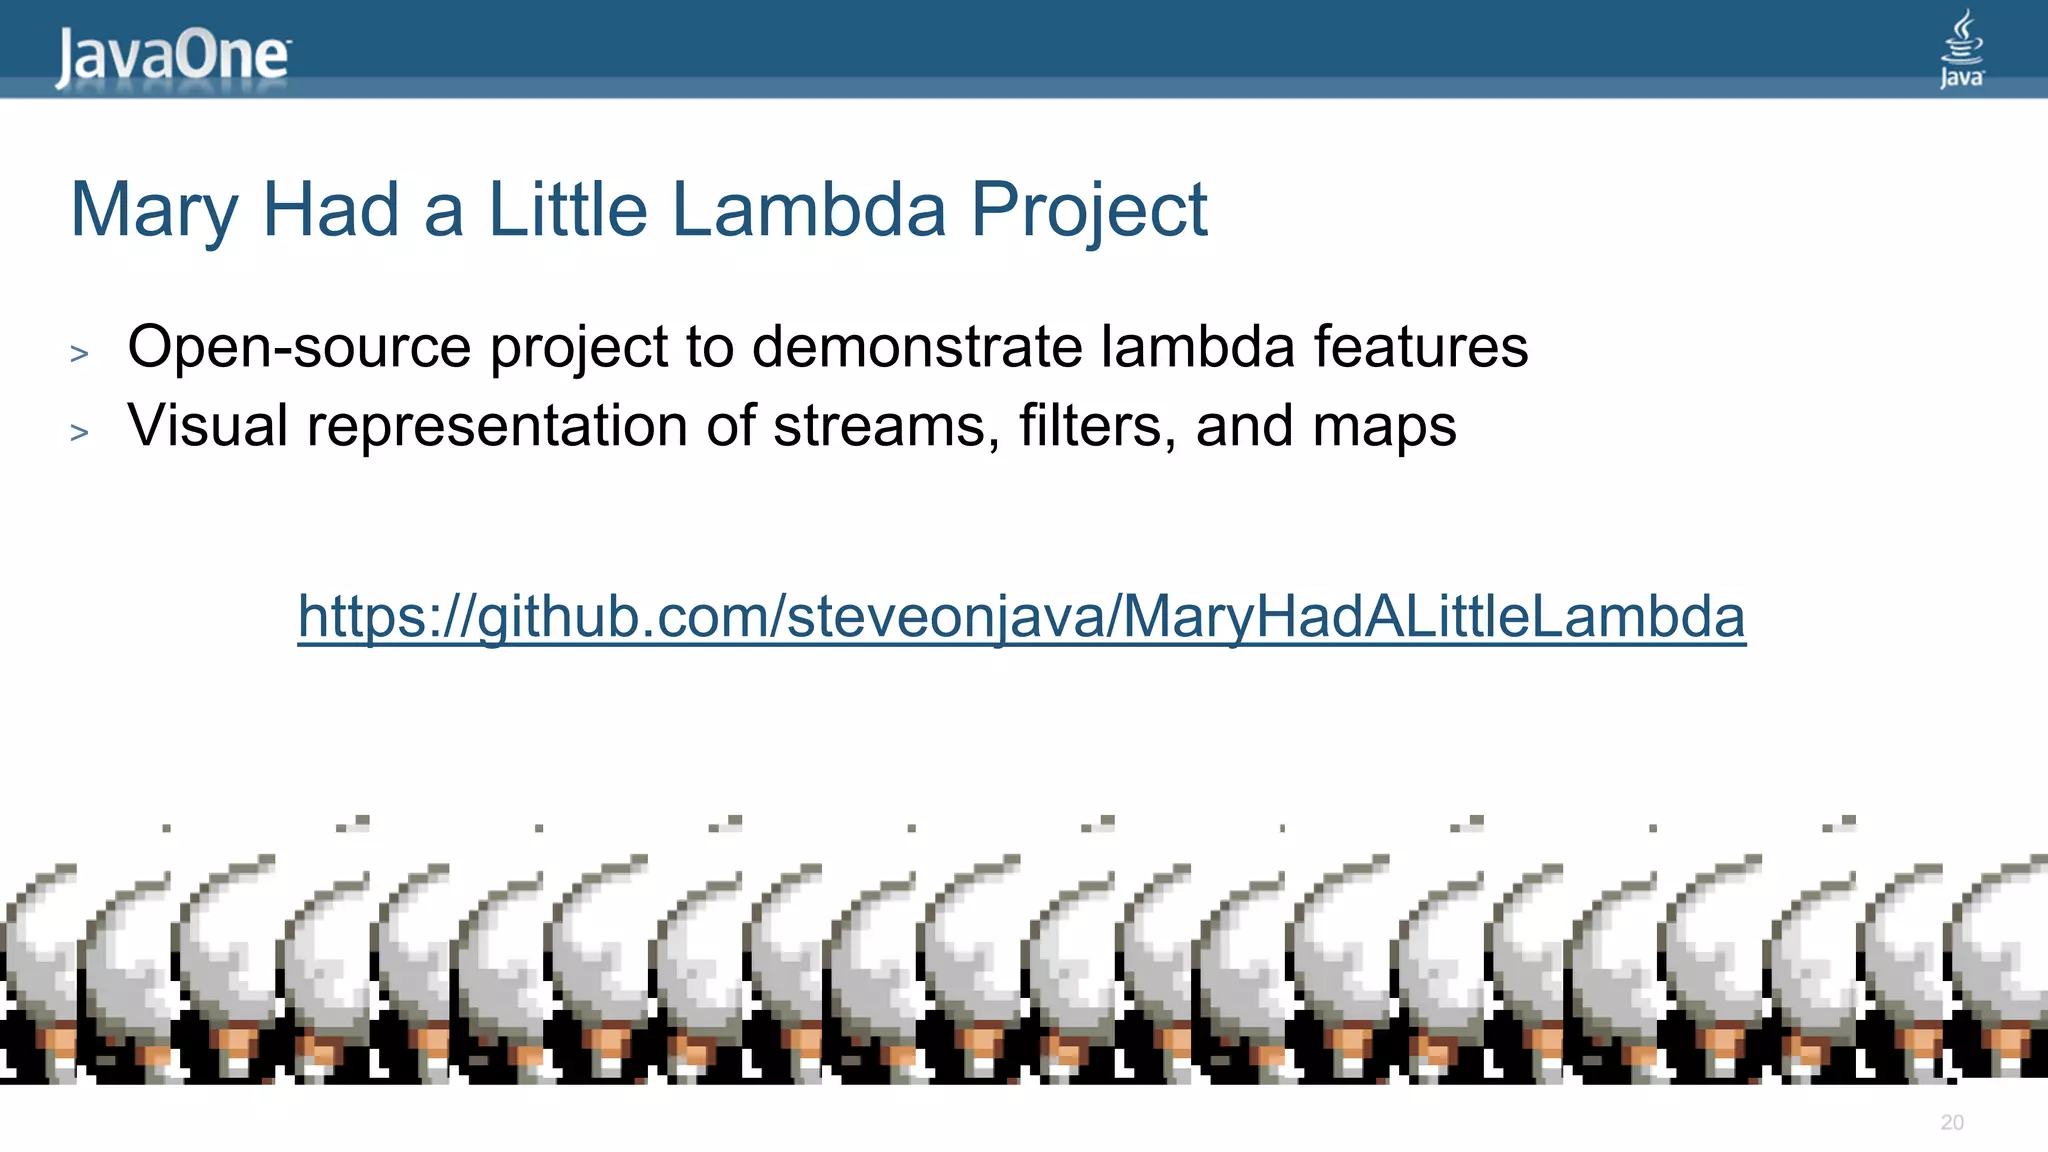
![Making the Tower spin
public class WindTurbine {
public static void main(String[] args) {
EV3LargeRegulatedMotor base =
new EV3LargeRegulatedMotor(MotorPort.B);
base.setSpeed(80);
base.rotateTo(-90);
base.rotateTo(90);
}
}](https://image.slidesharecdn.com/jcretejavaworkshop-140829013515-phpapp02/75/JCrete-Embedded-Java-Workshop-70-2048.jpg)
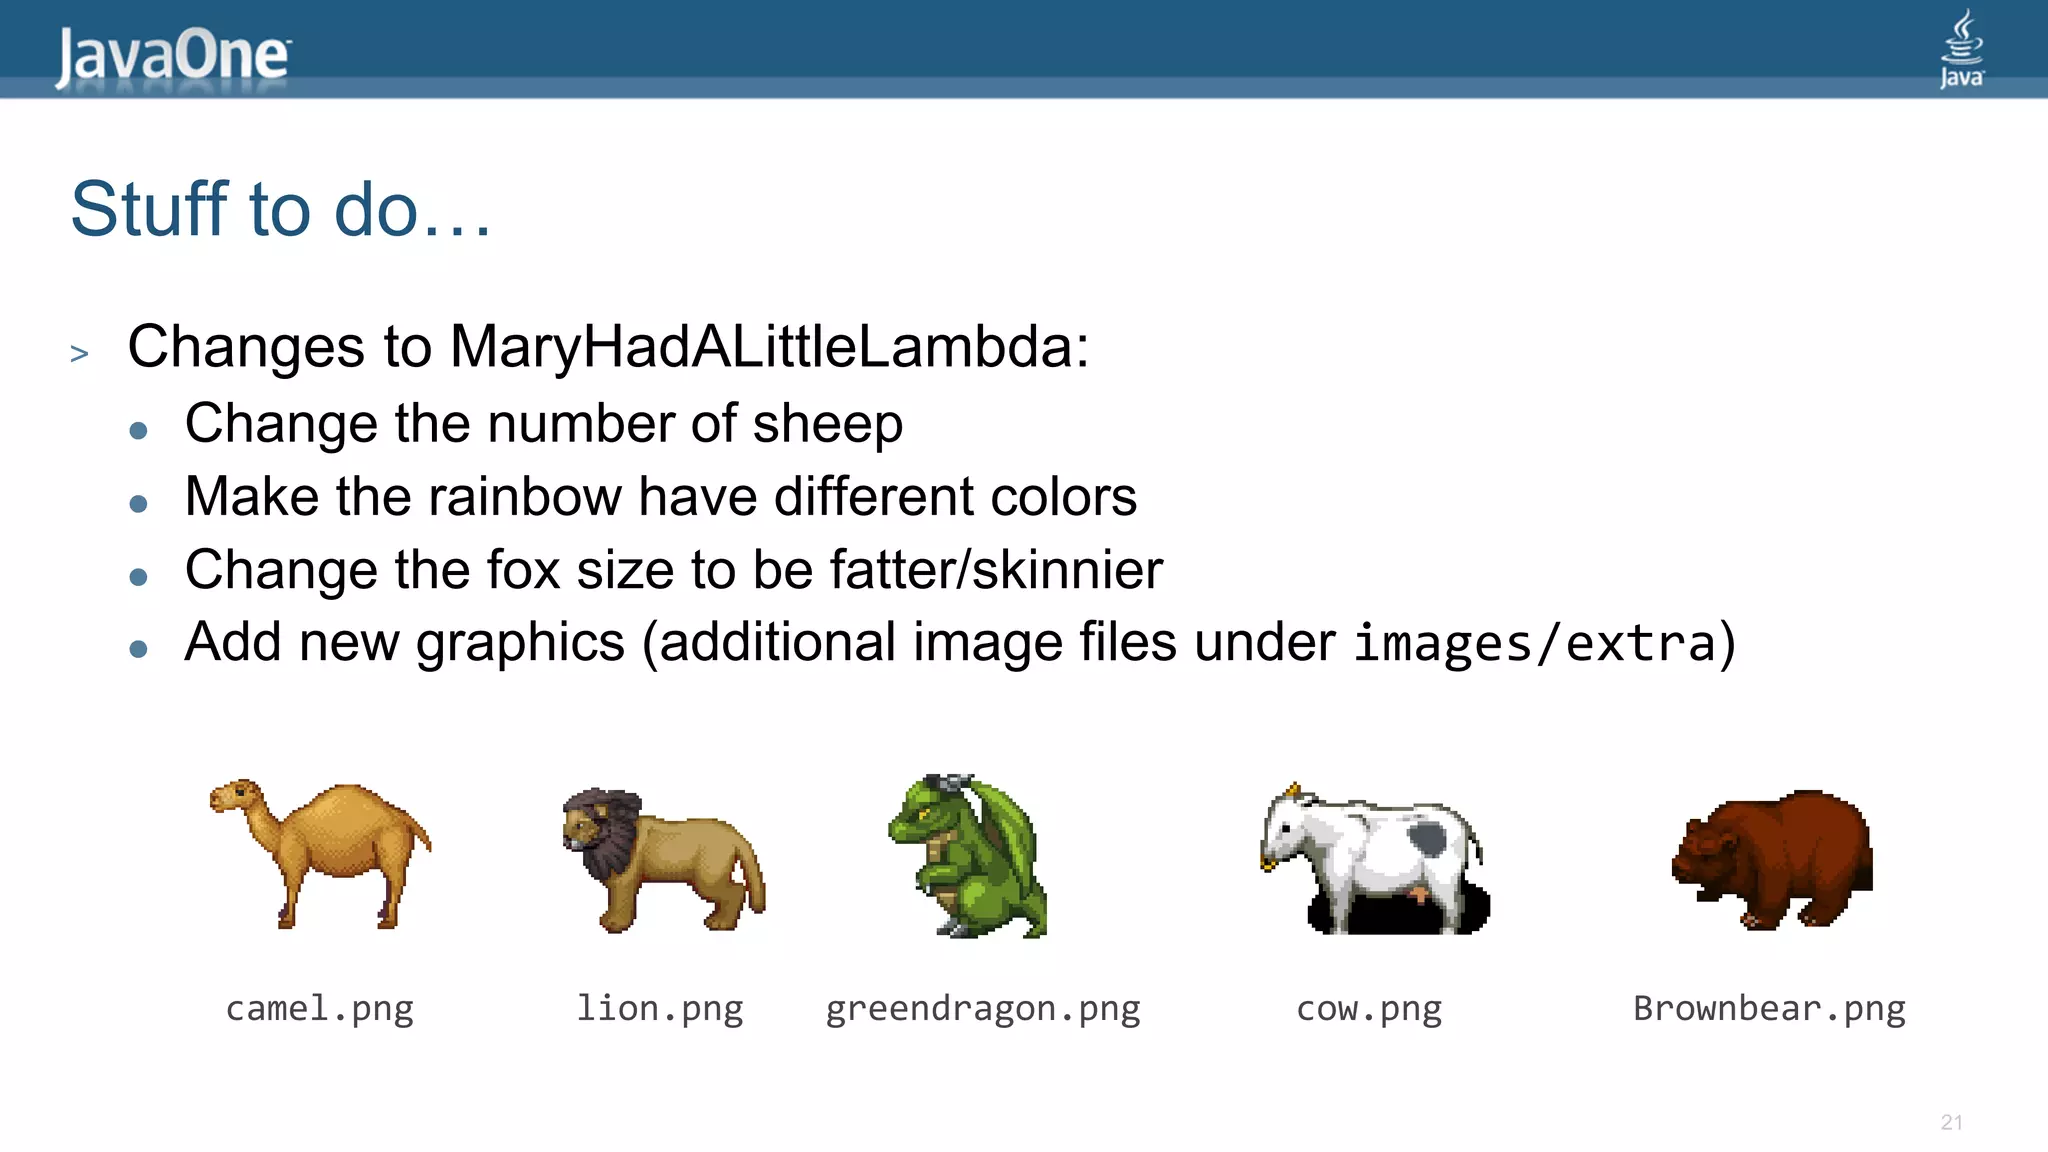
![Checking the Ambient Light
public class WindTurbine {
public static void main(String[] args) {
EV3ColorSensor light =
new EV3ColorSensor(SensorPort.S1);
float[] sample = new float[1];
SensorMode mode = light.getAmbientMode();
mode.fetchSample(sample, 0);
LCD.drawString("Light = " + sample[0], 0, 4);
Delay.msDelay(5000);
}
}](https://image.slidesharecdn.com/jcretejavaworkshop-140829013515-phpapp02/75/JCrete-Embedded-Java-Workshop-71-2048.jpg)

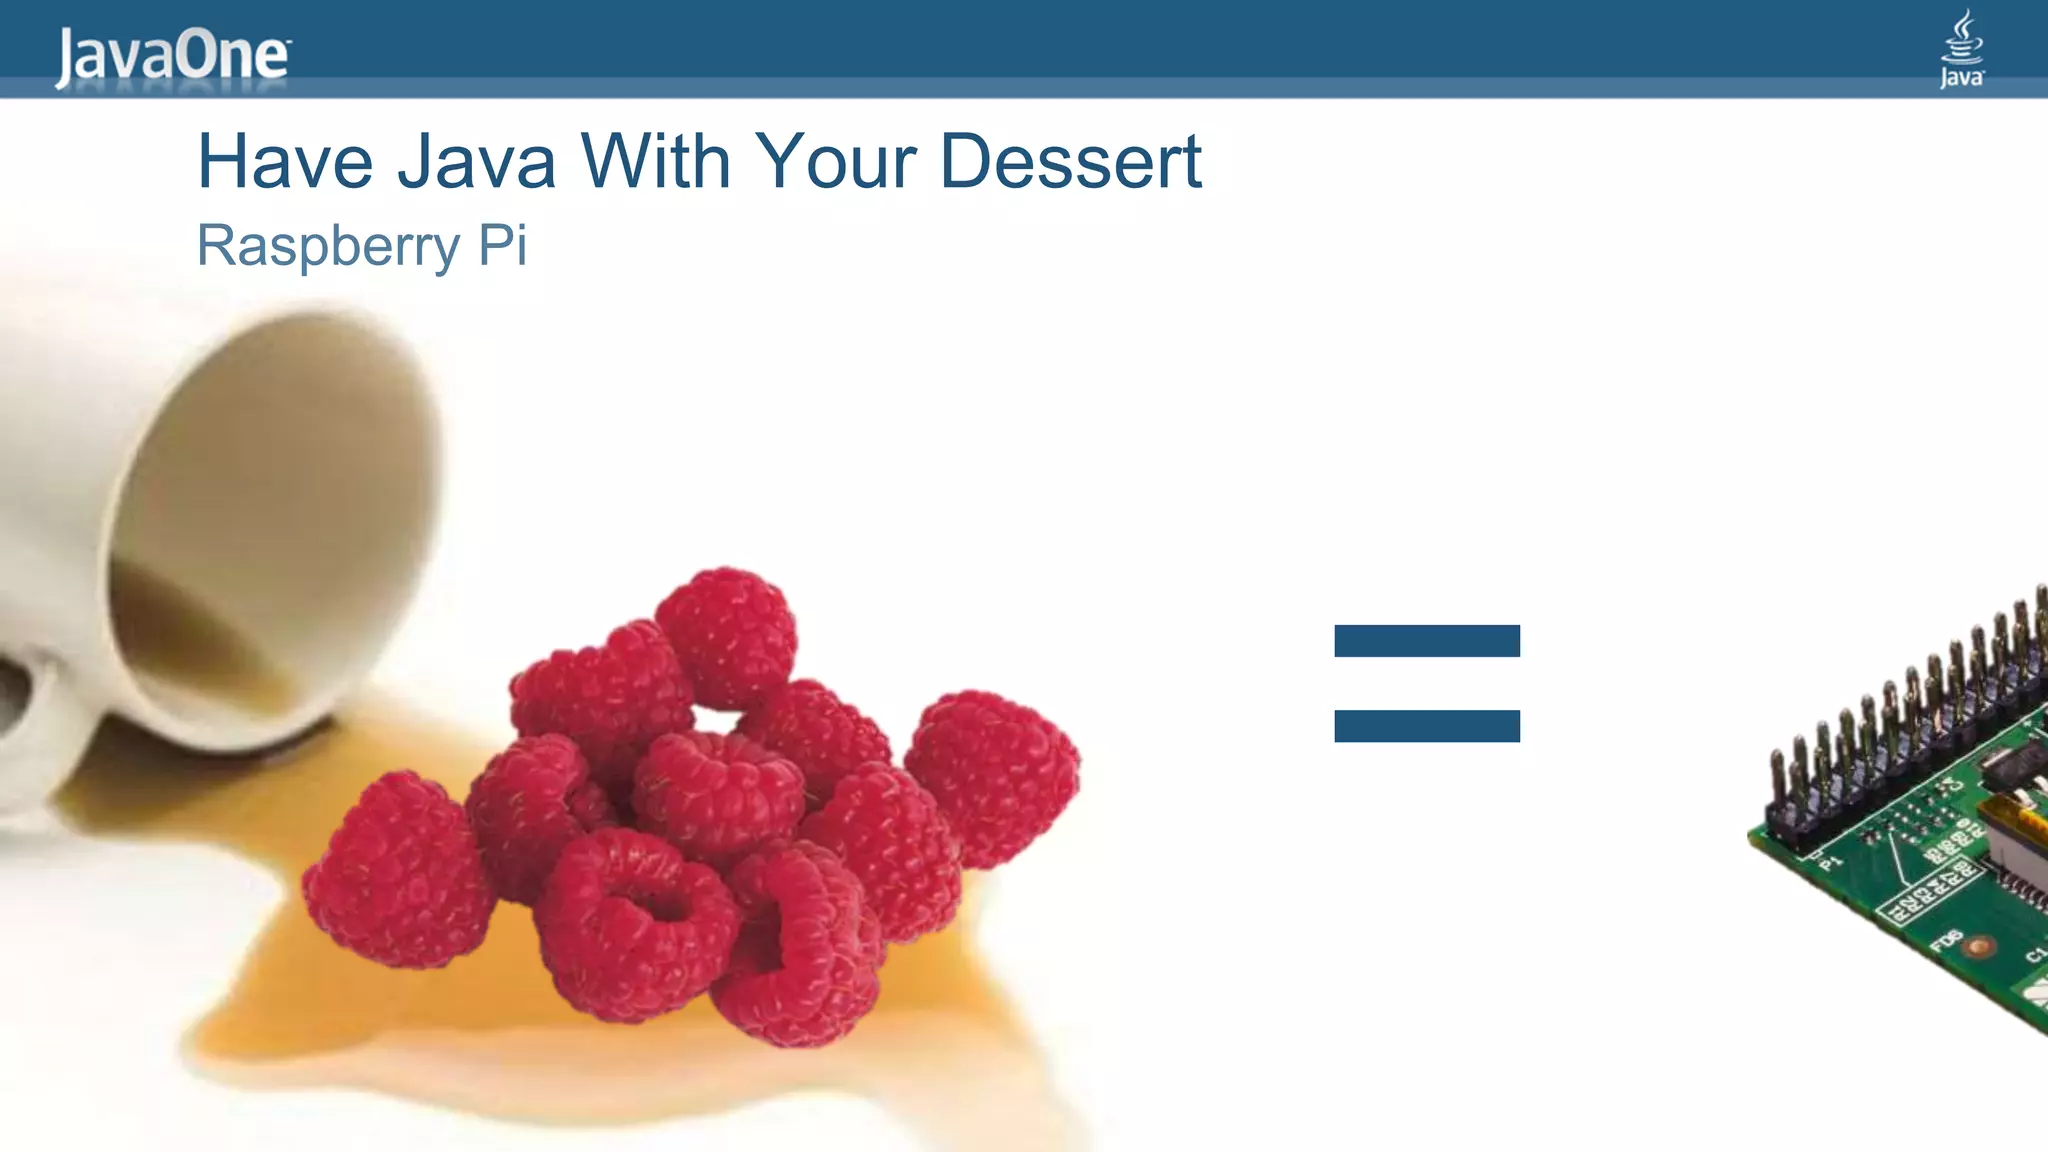
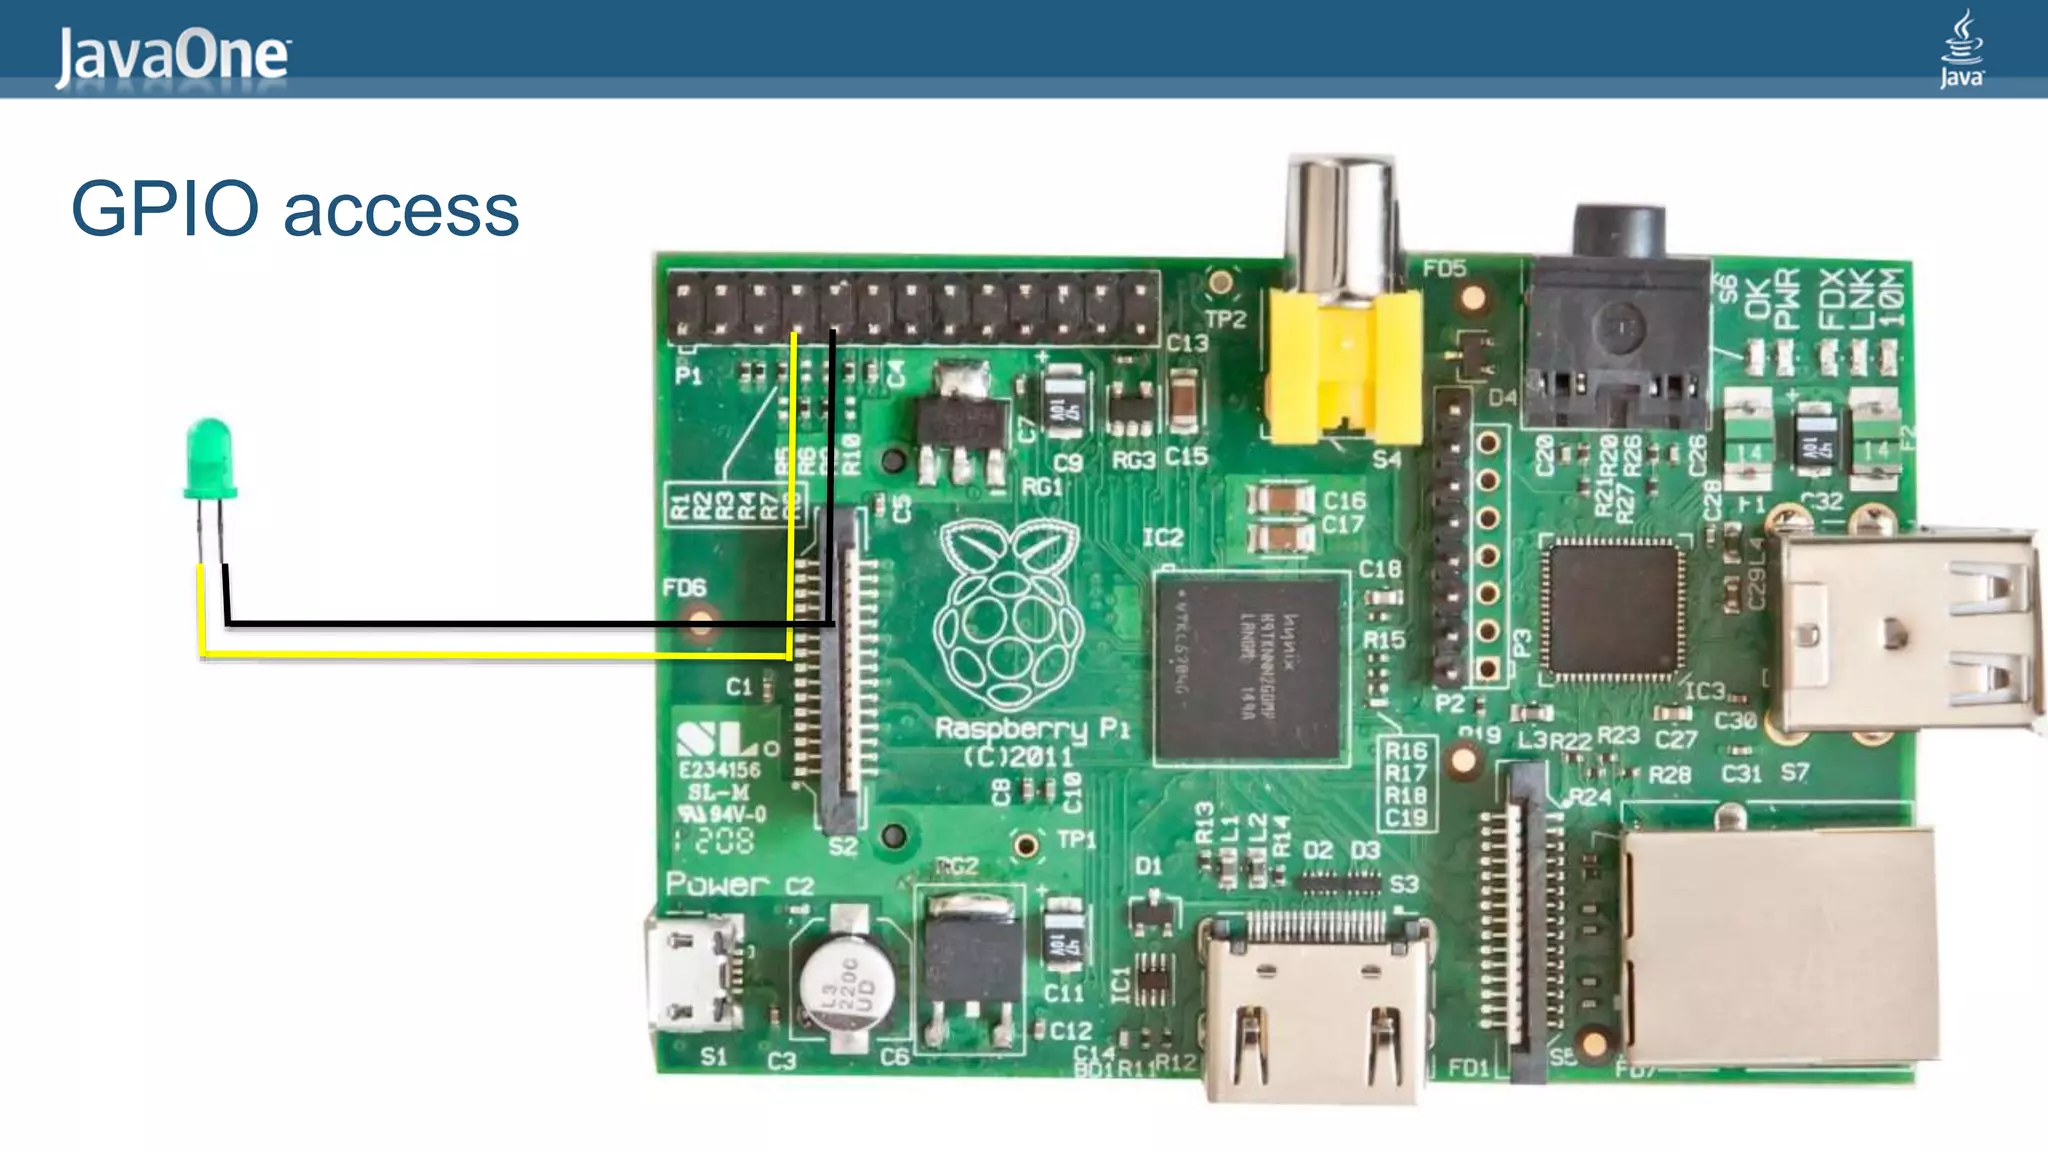
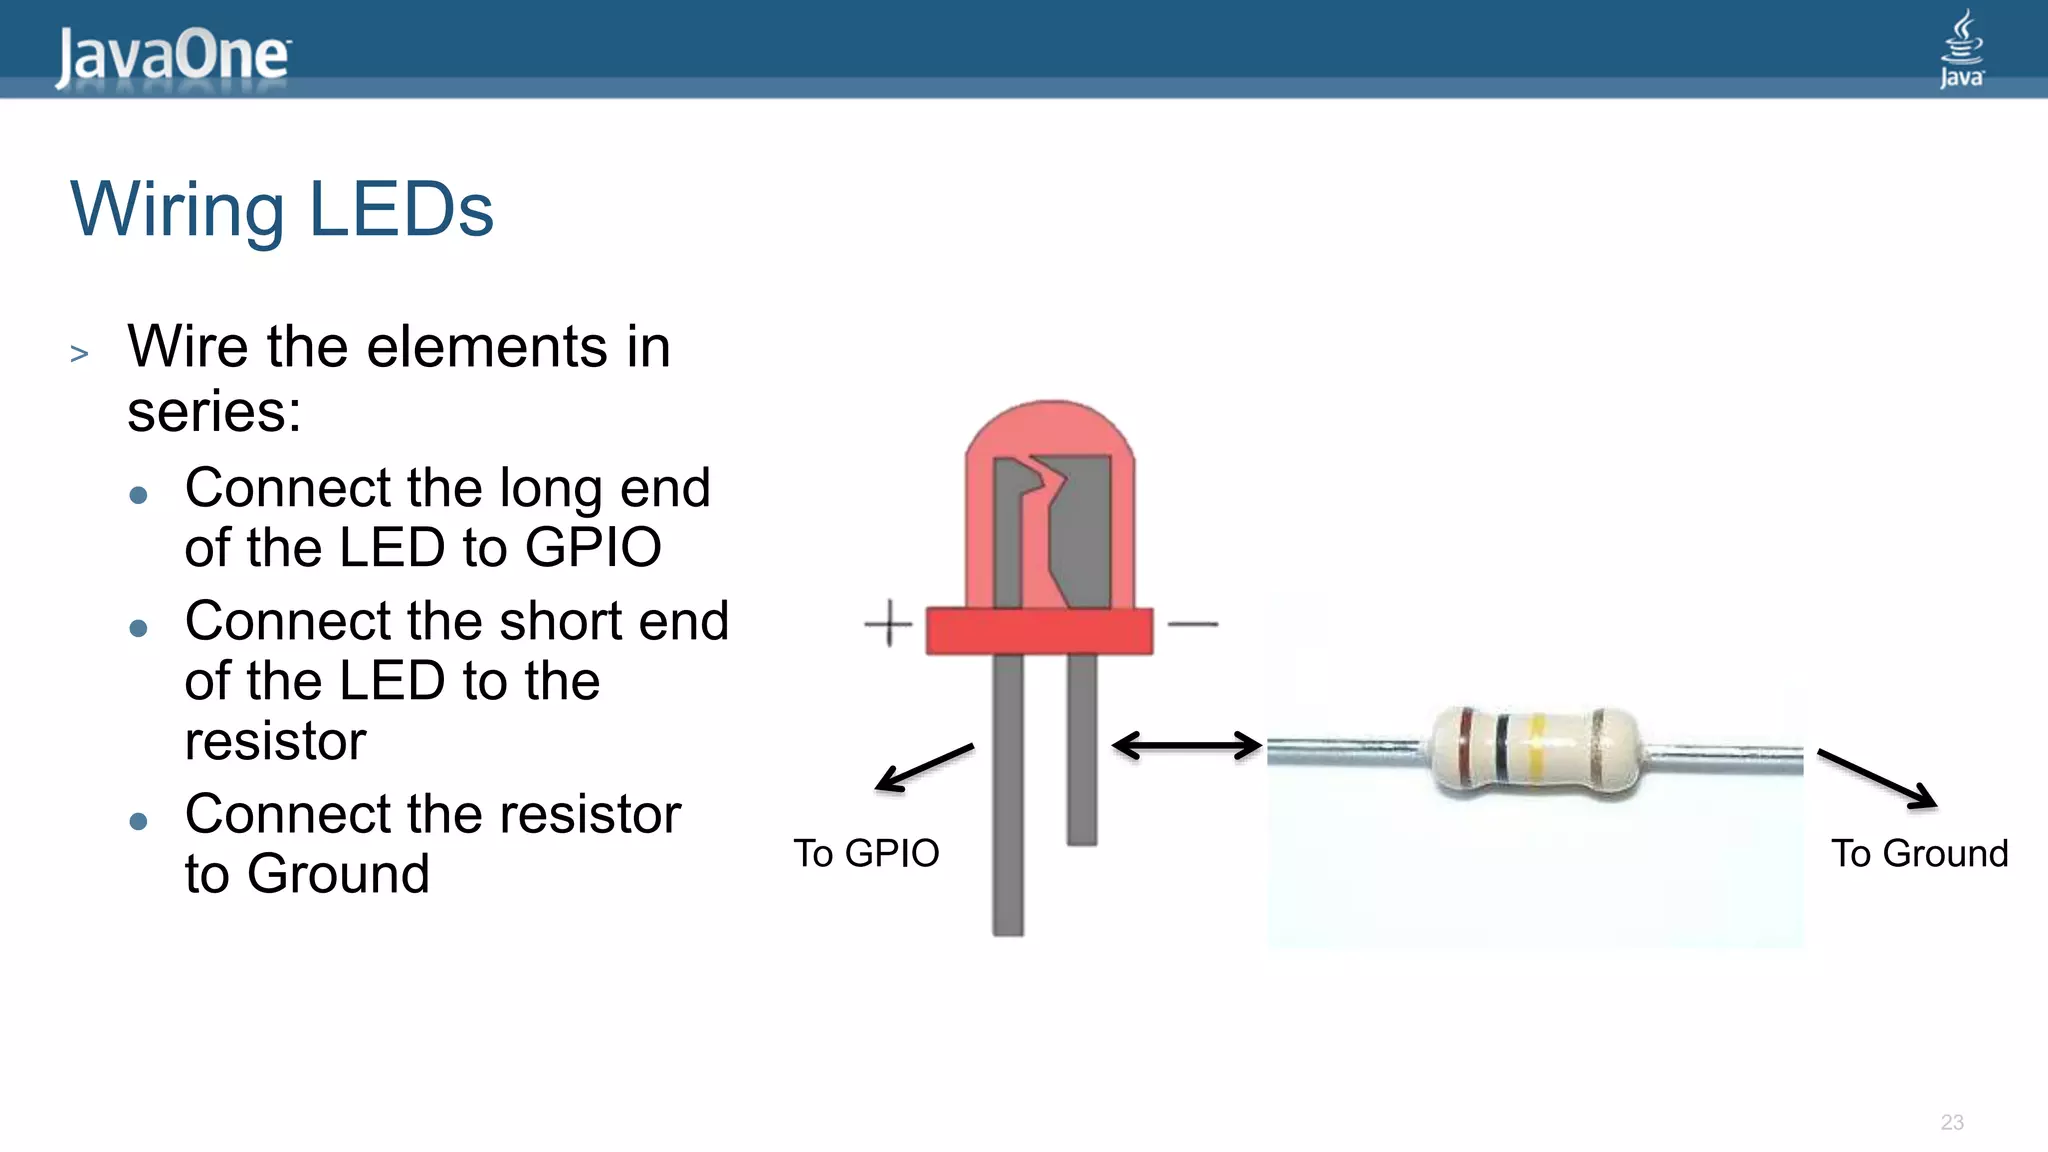
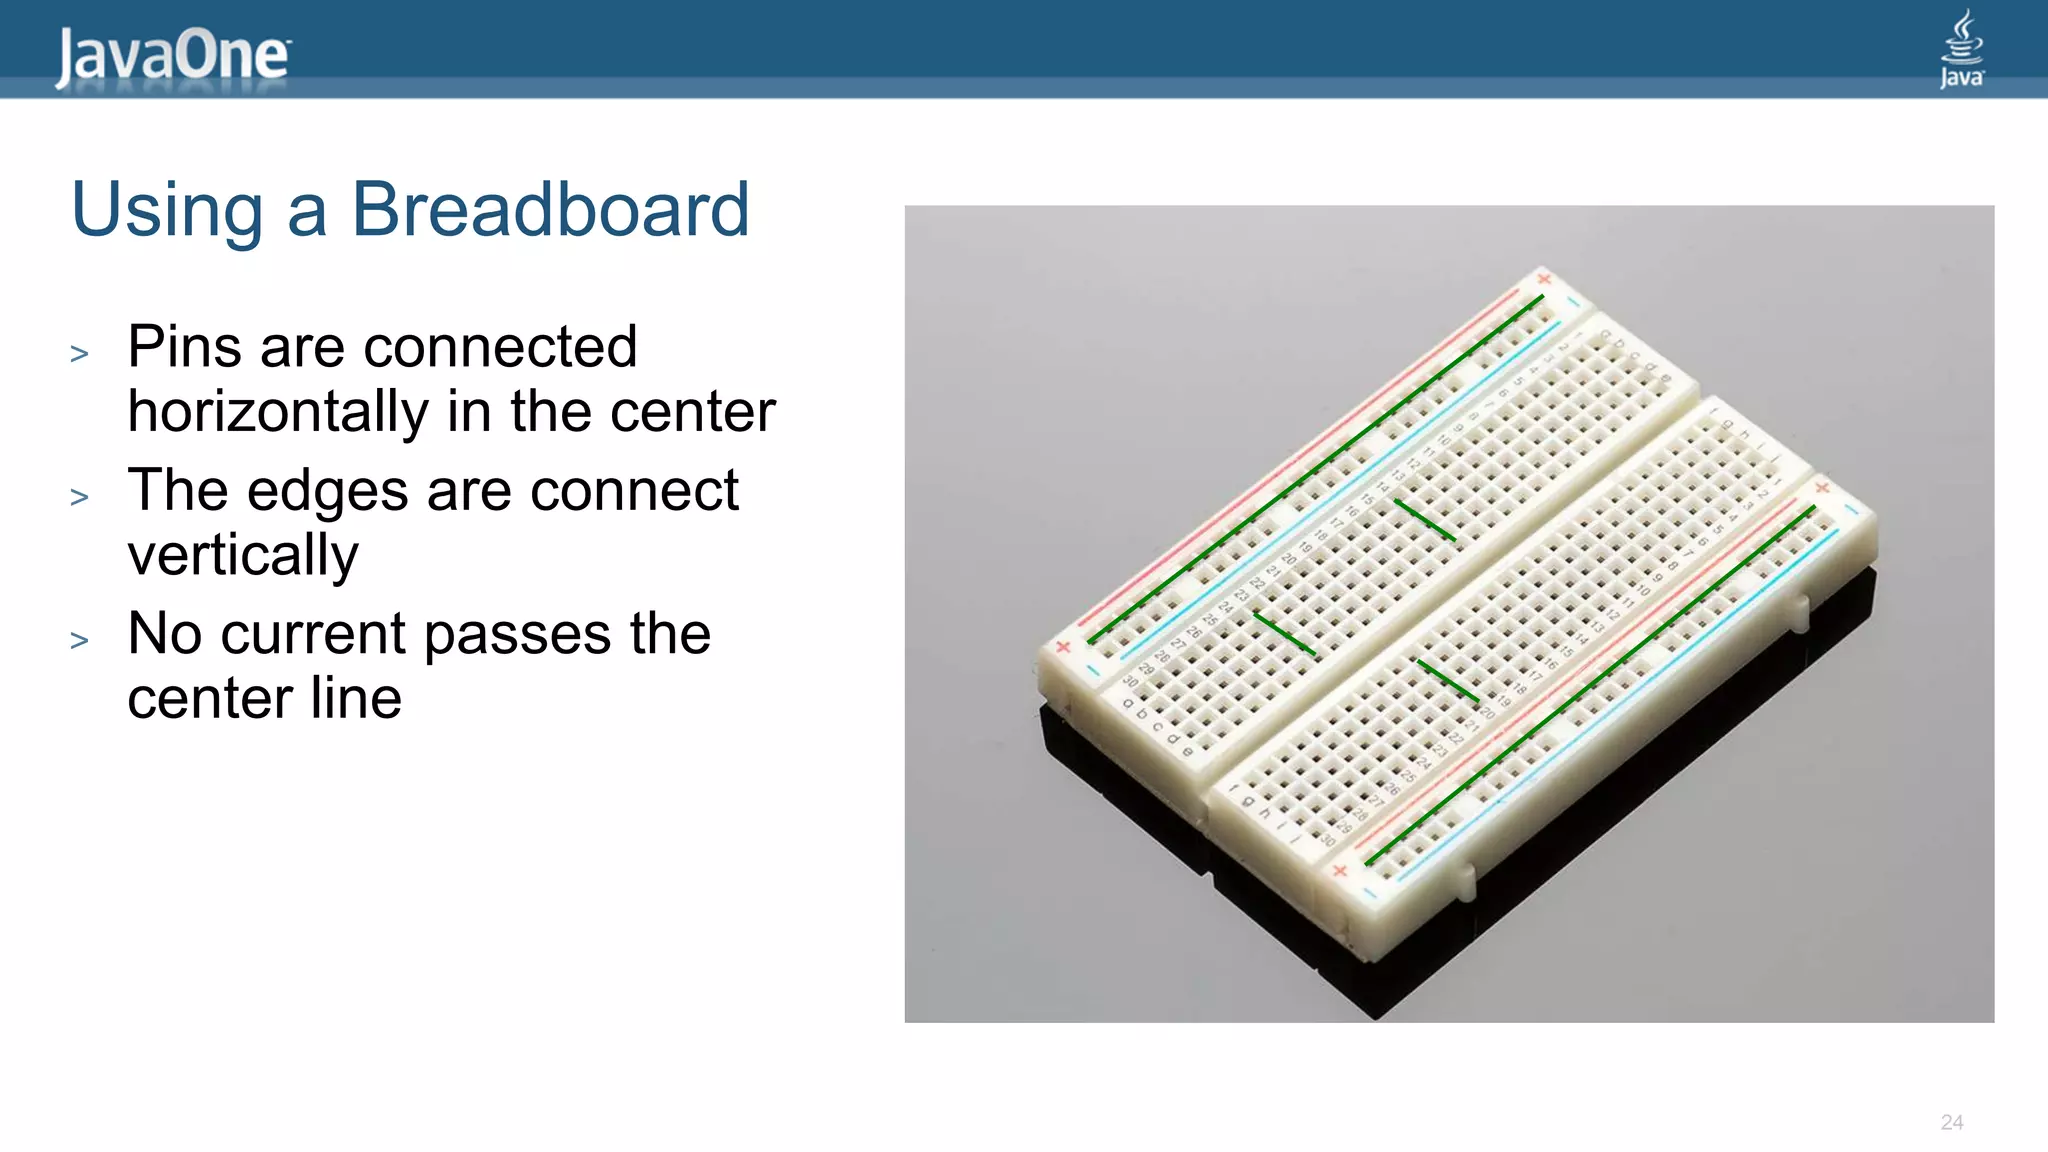
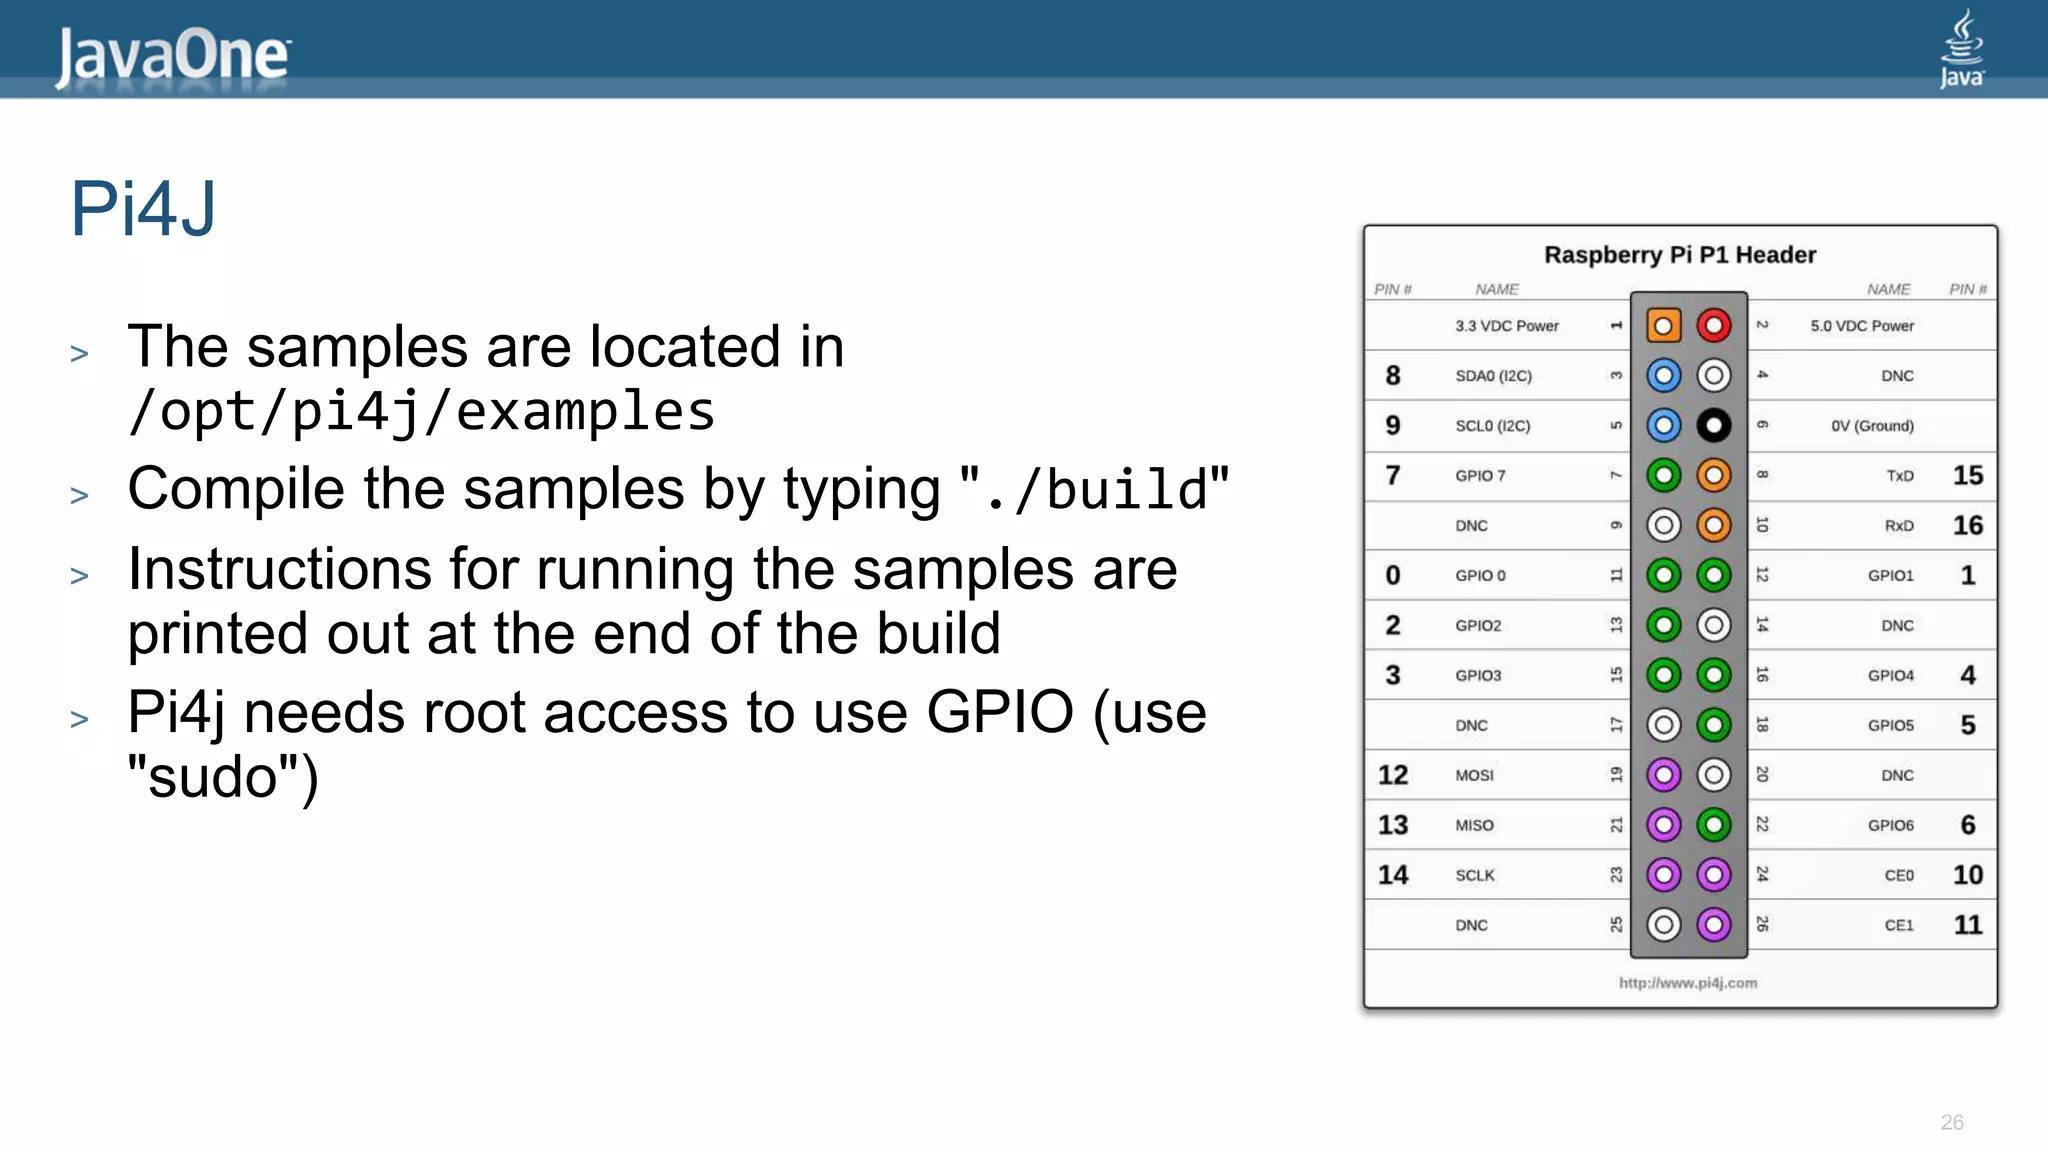
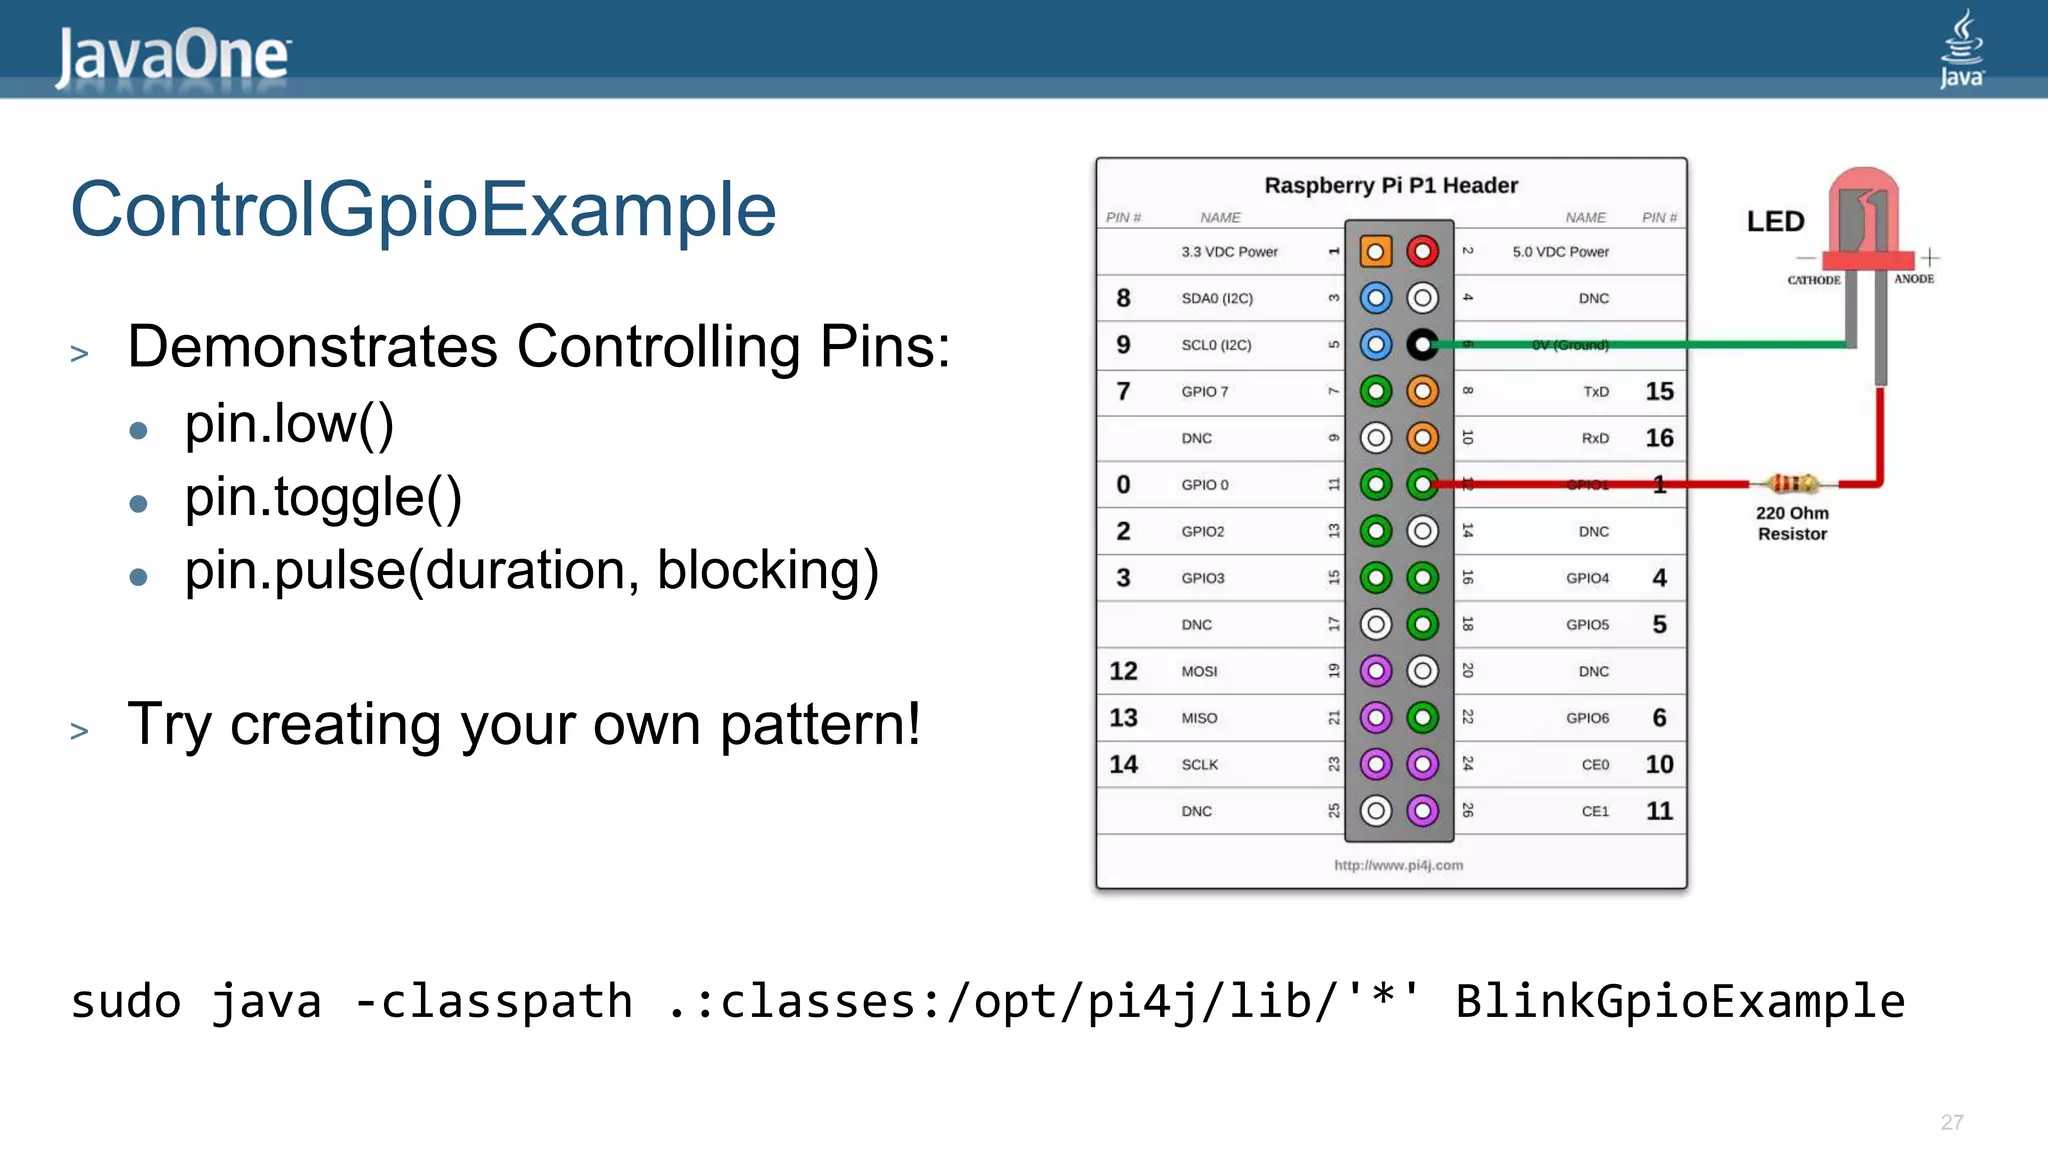
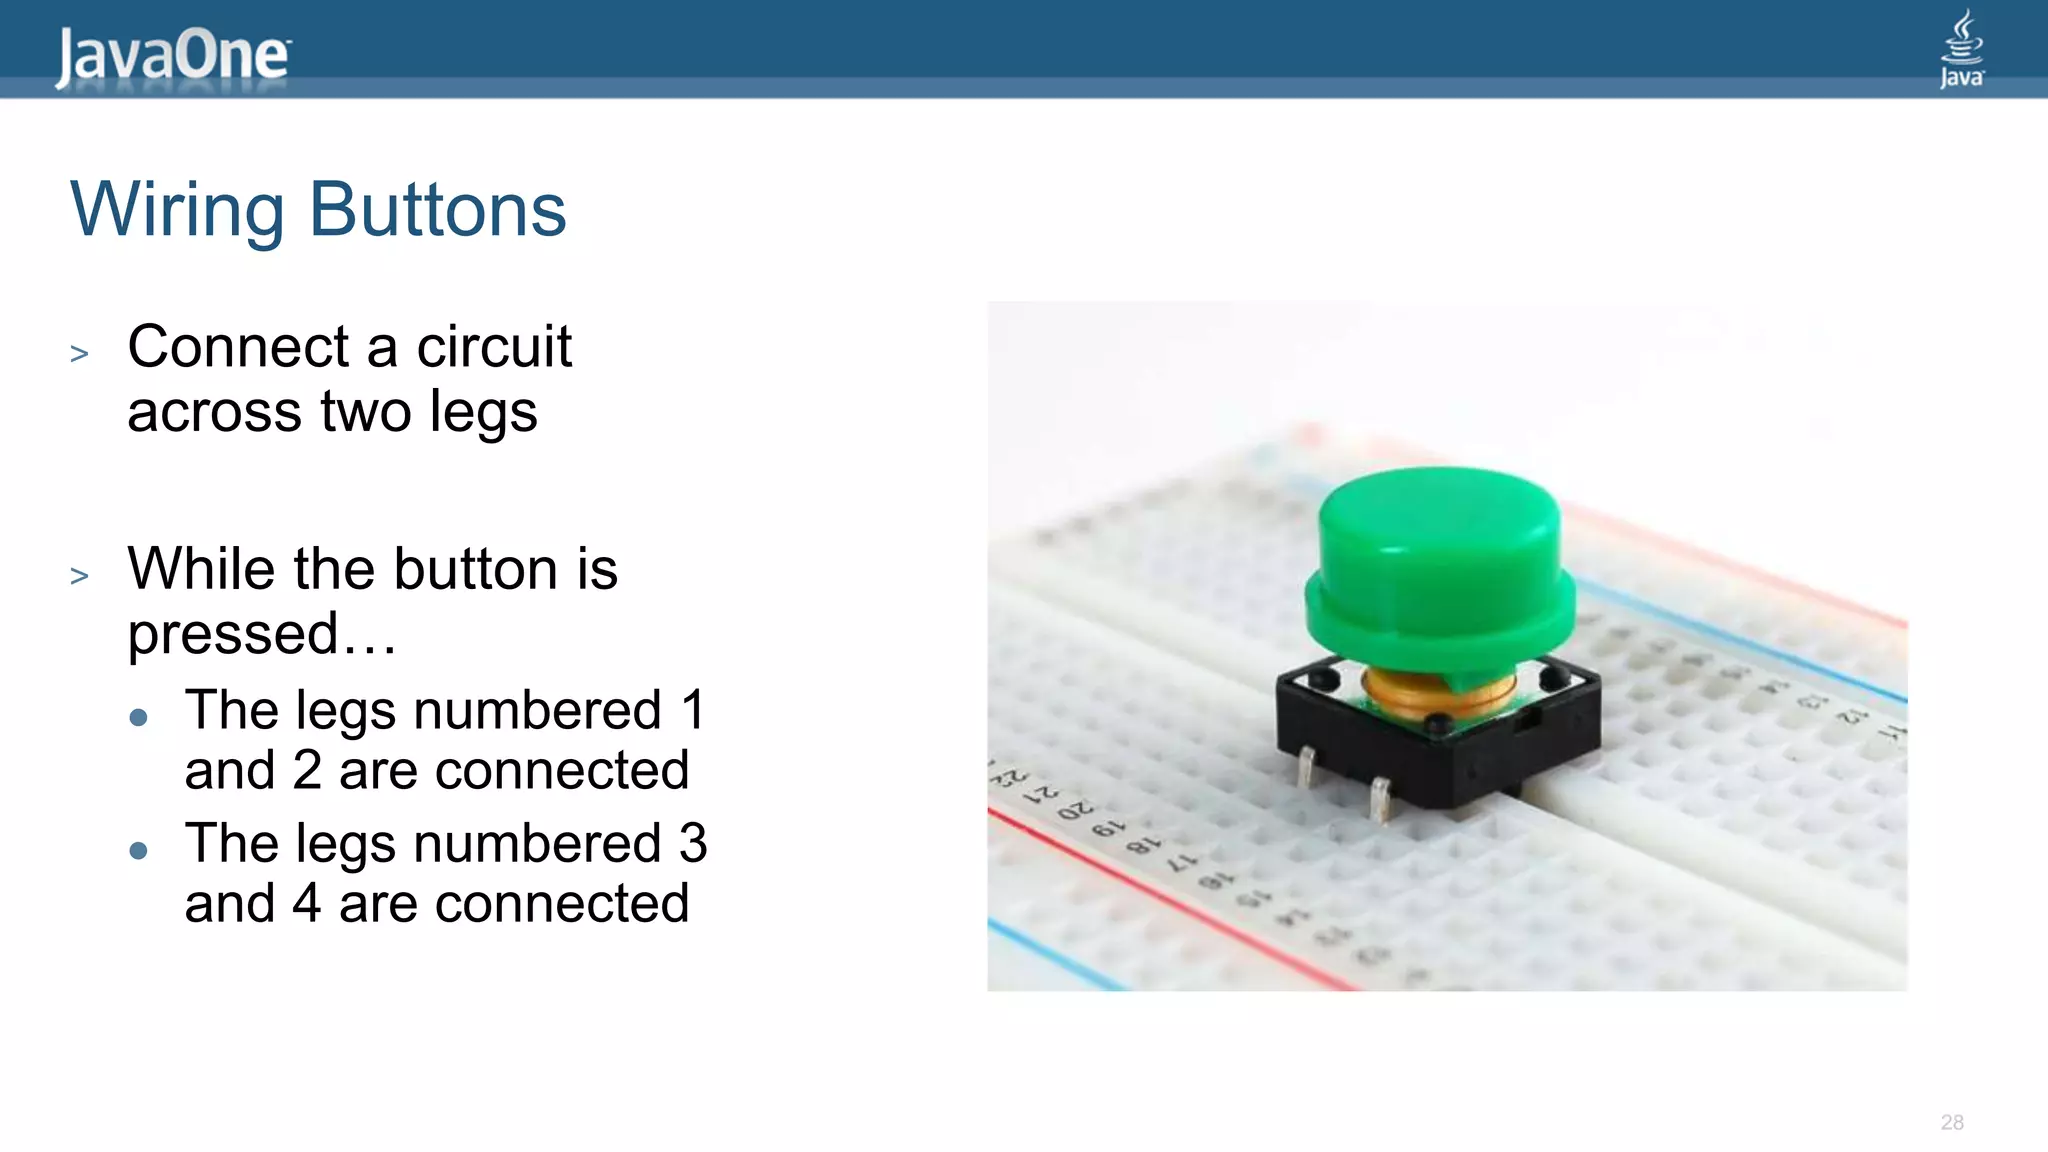
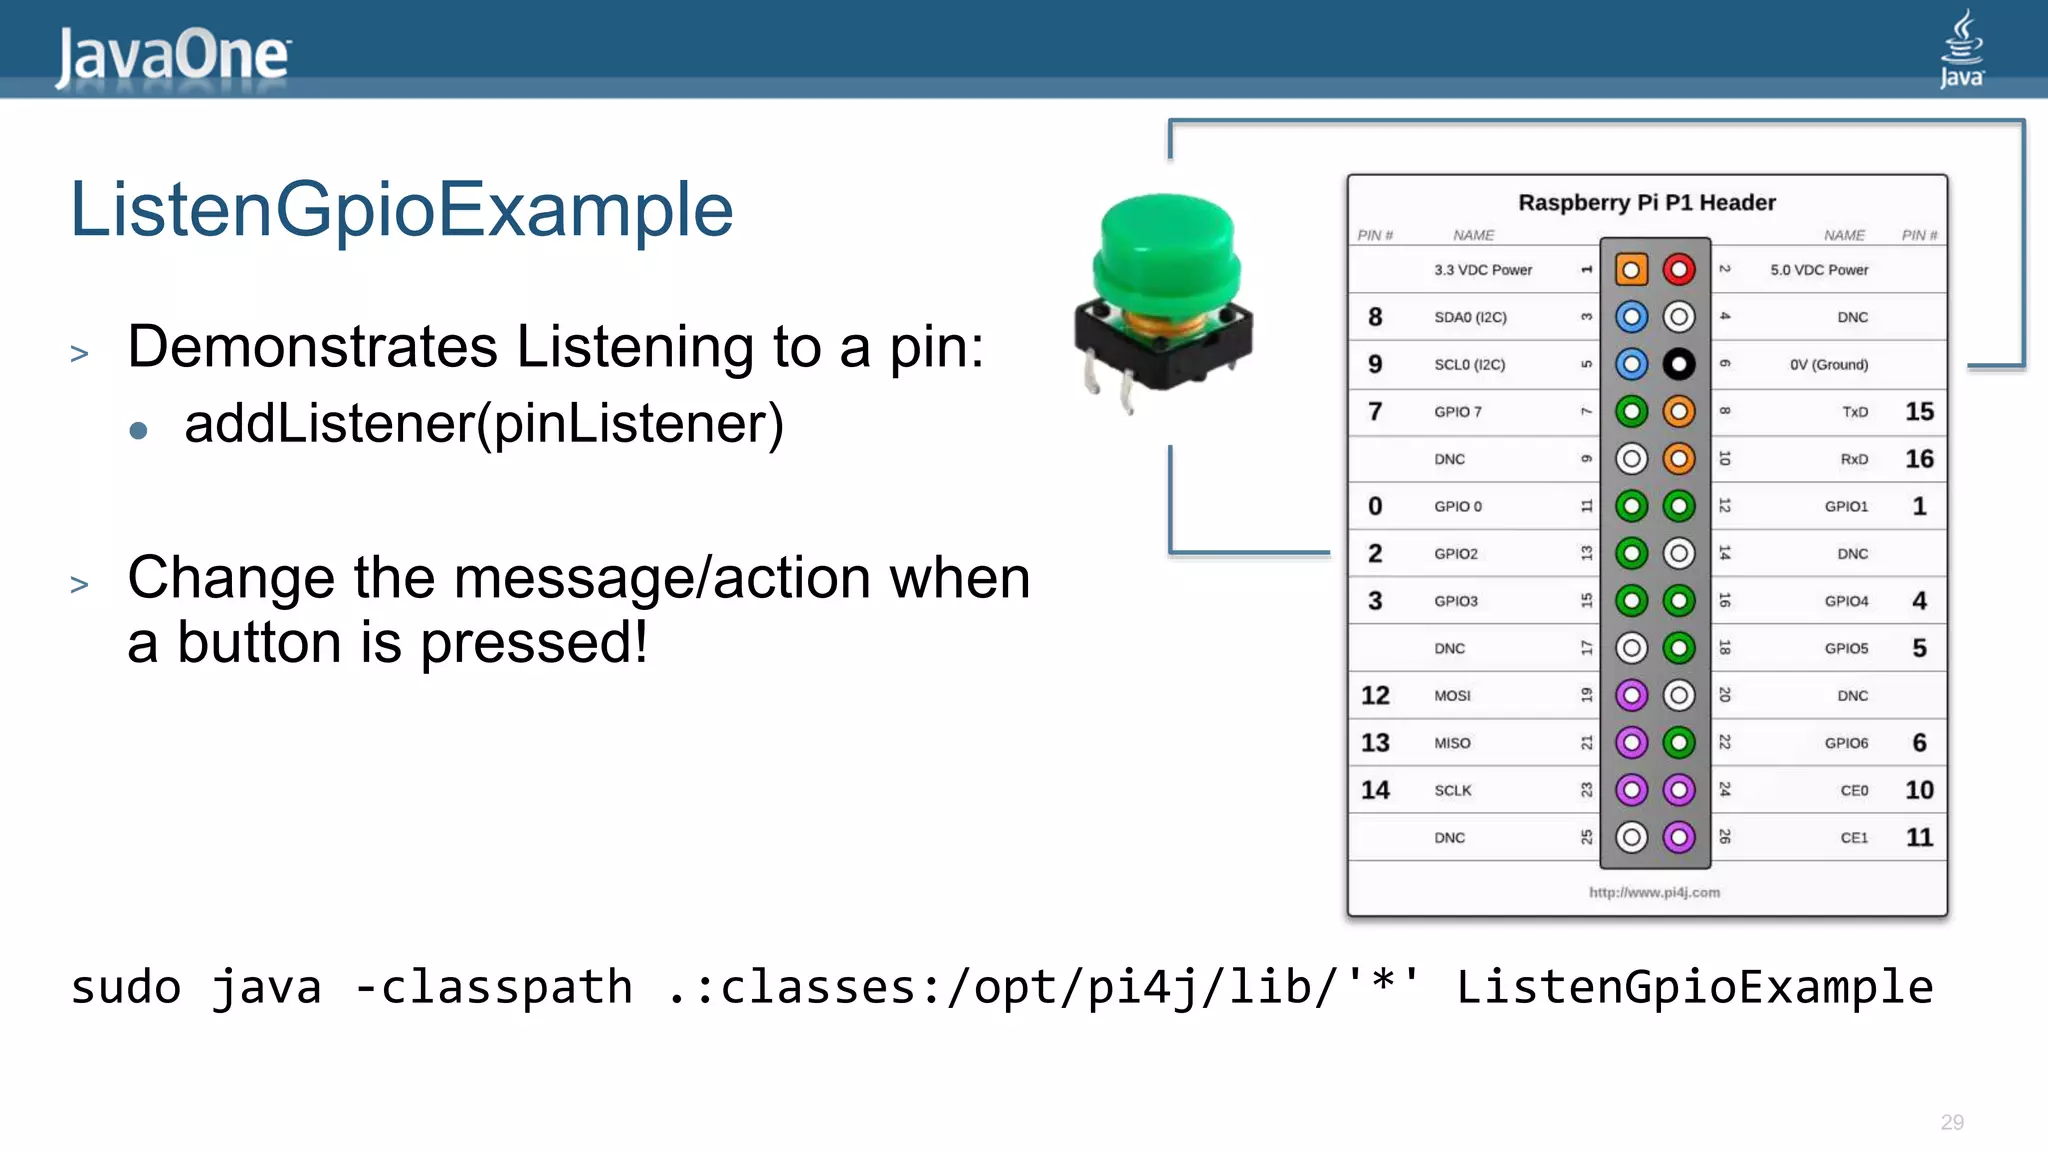
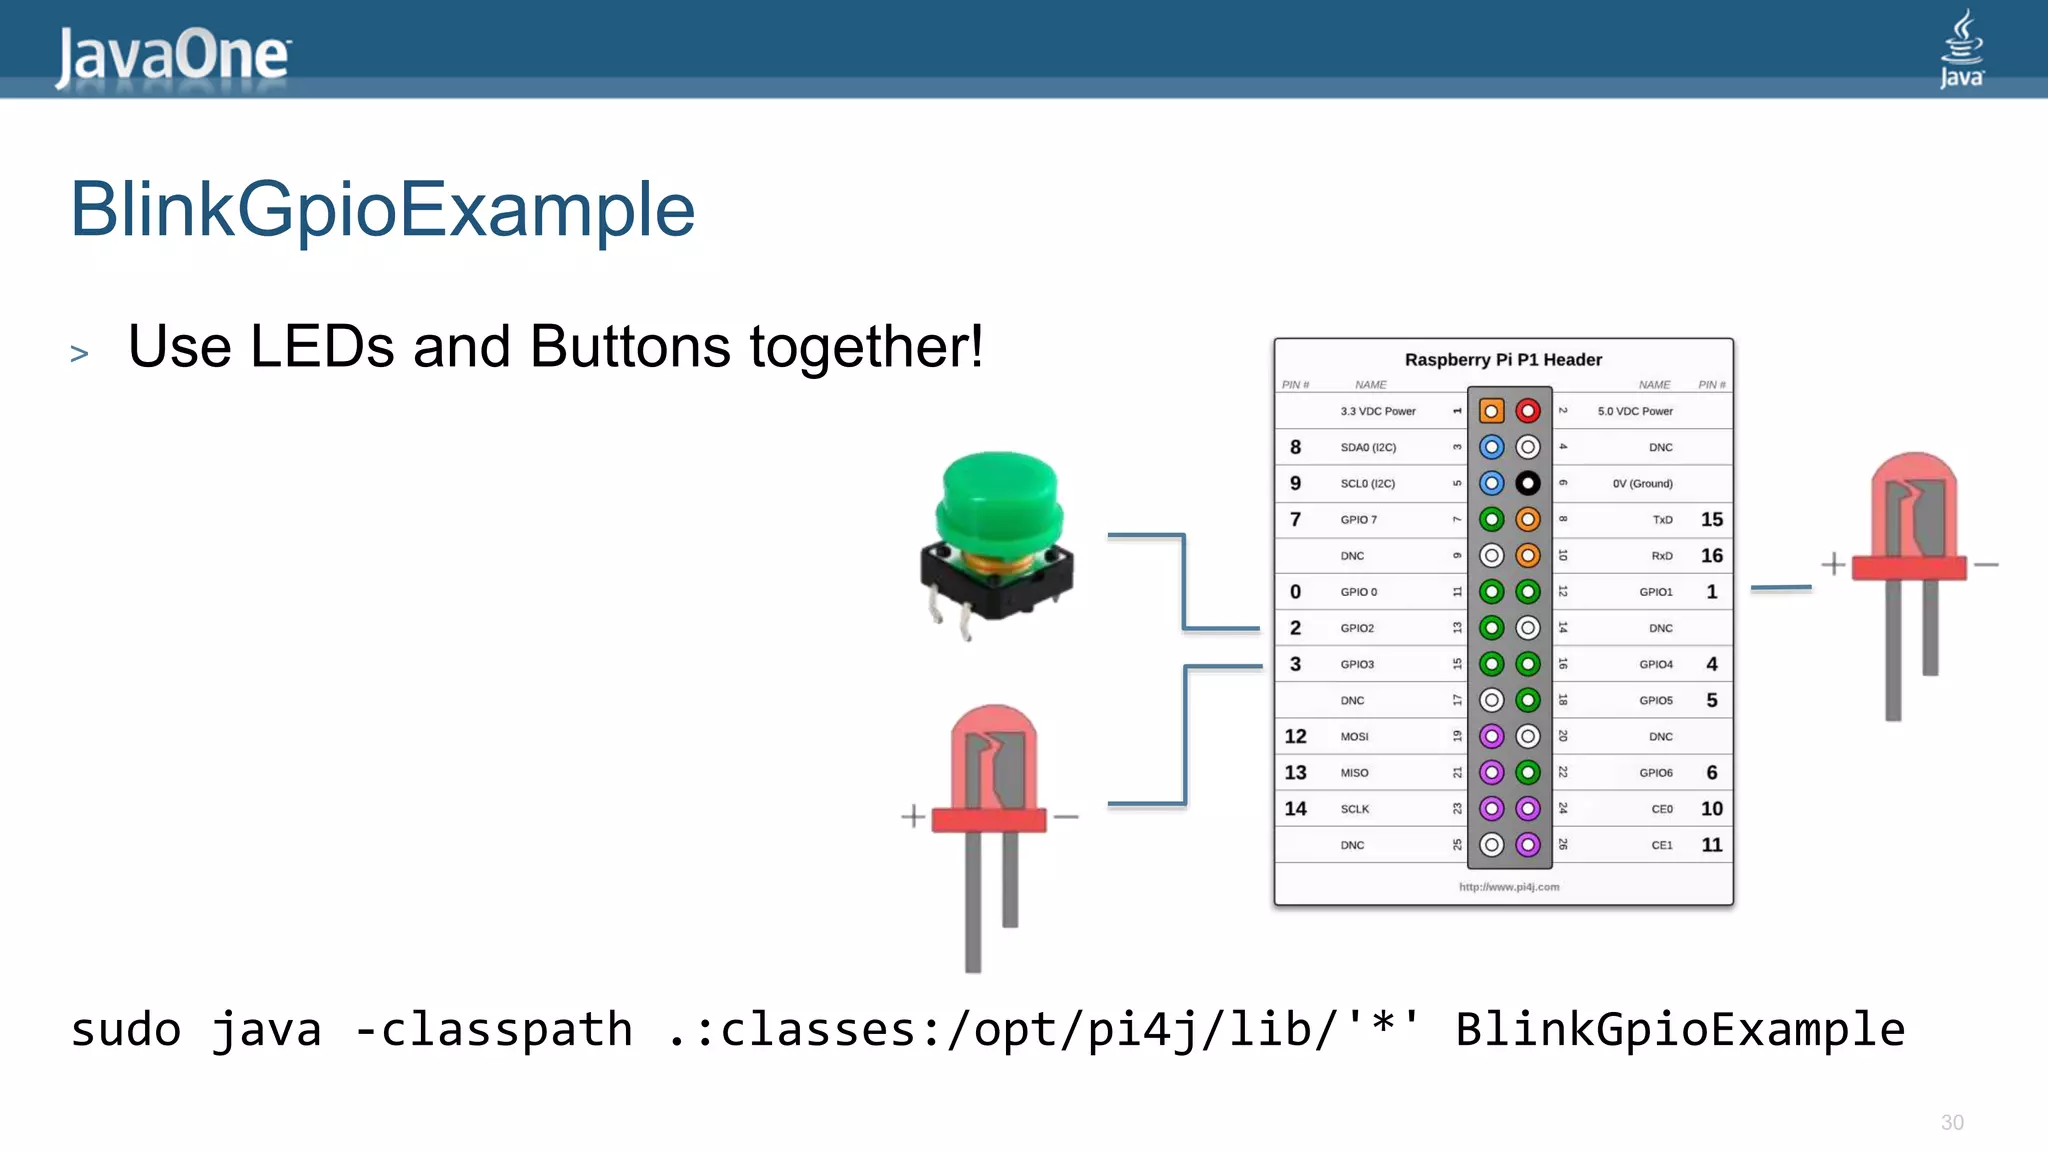
The document provides a comprehensive guide for setting up and using Java with Raspberry Pi and LEGO EV3, detailing steps to install Java, connect hardware components, and execute sample applications. It includes specific wiring instructions for LED and button connections, and offers examples of programs to control motors and sensors. Additionally, it emphasizes safety precautions and references for troubleshooting and enhancements.