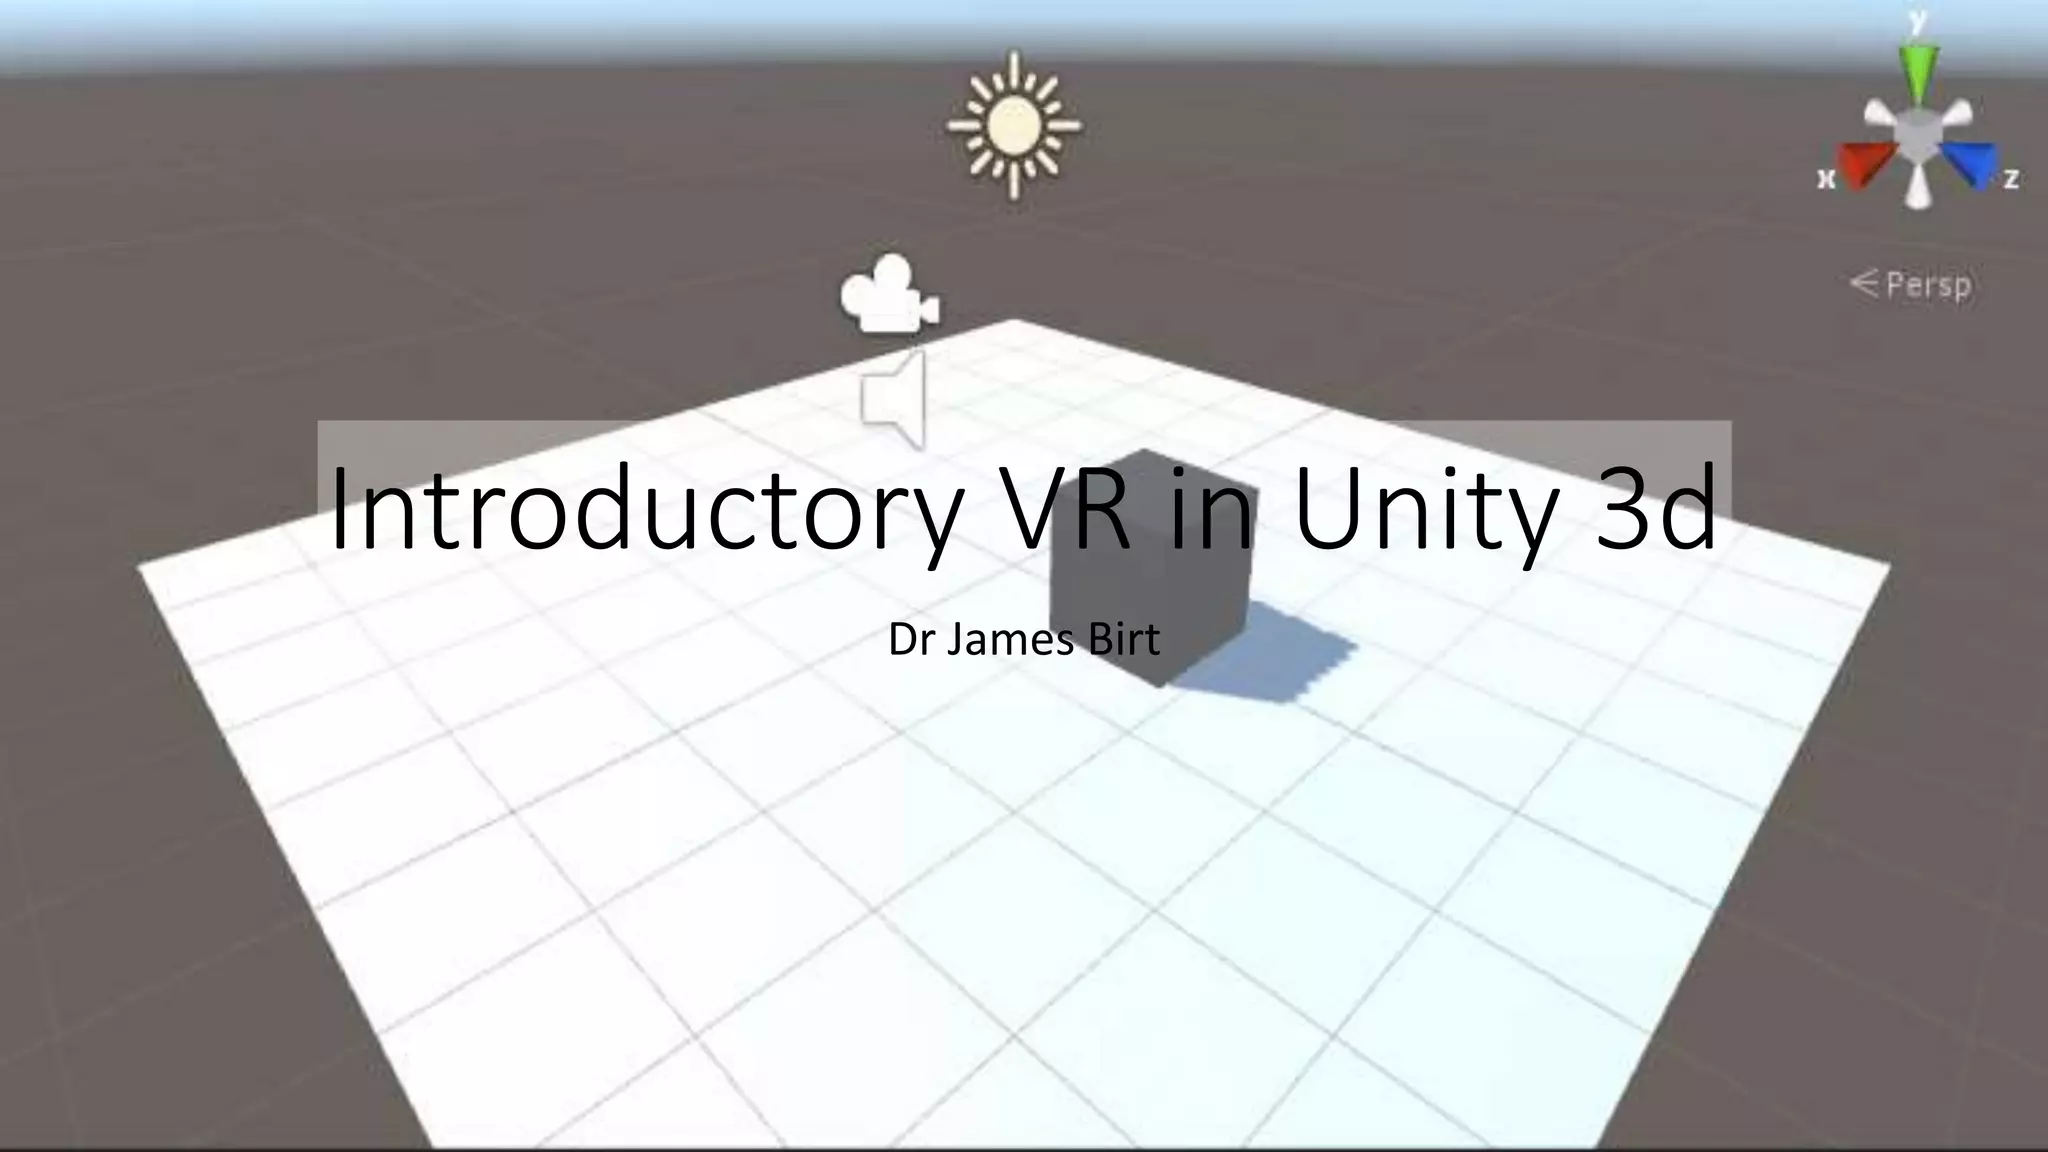
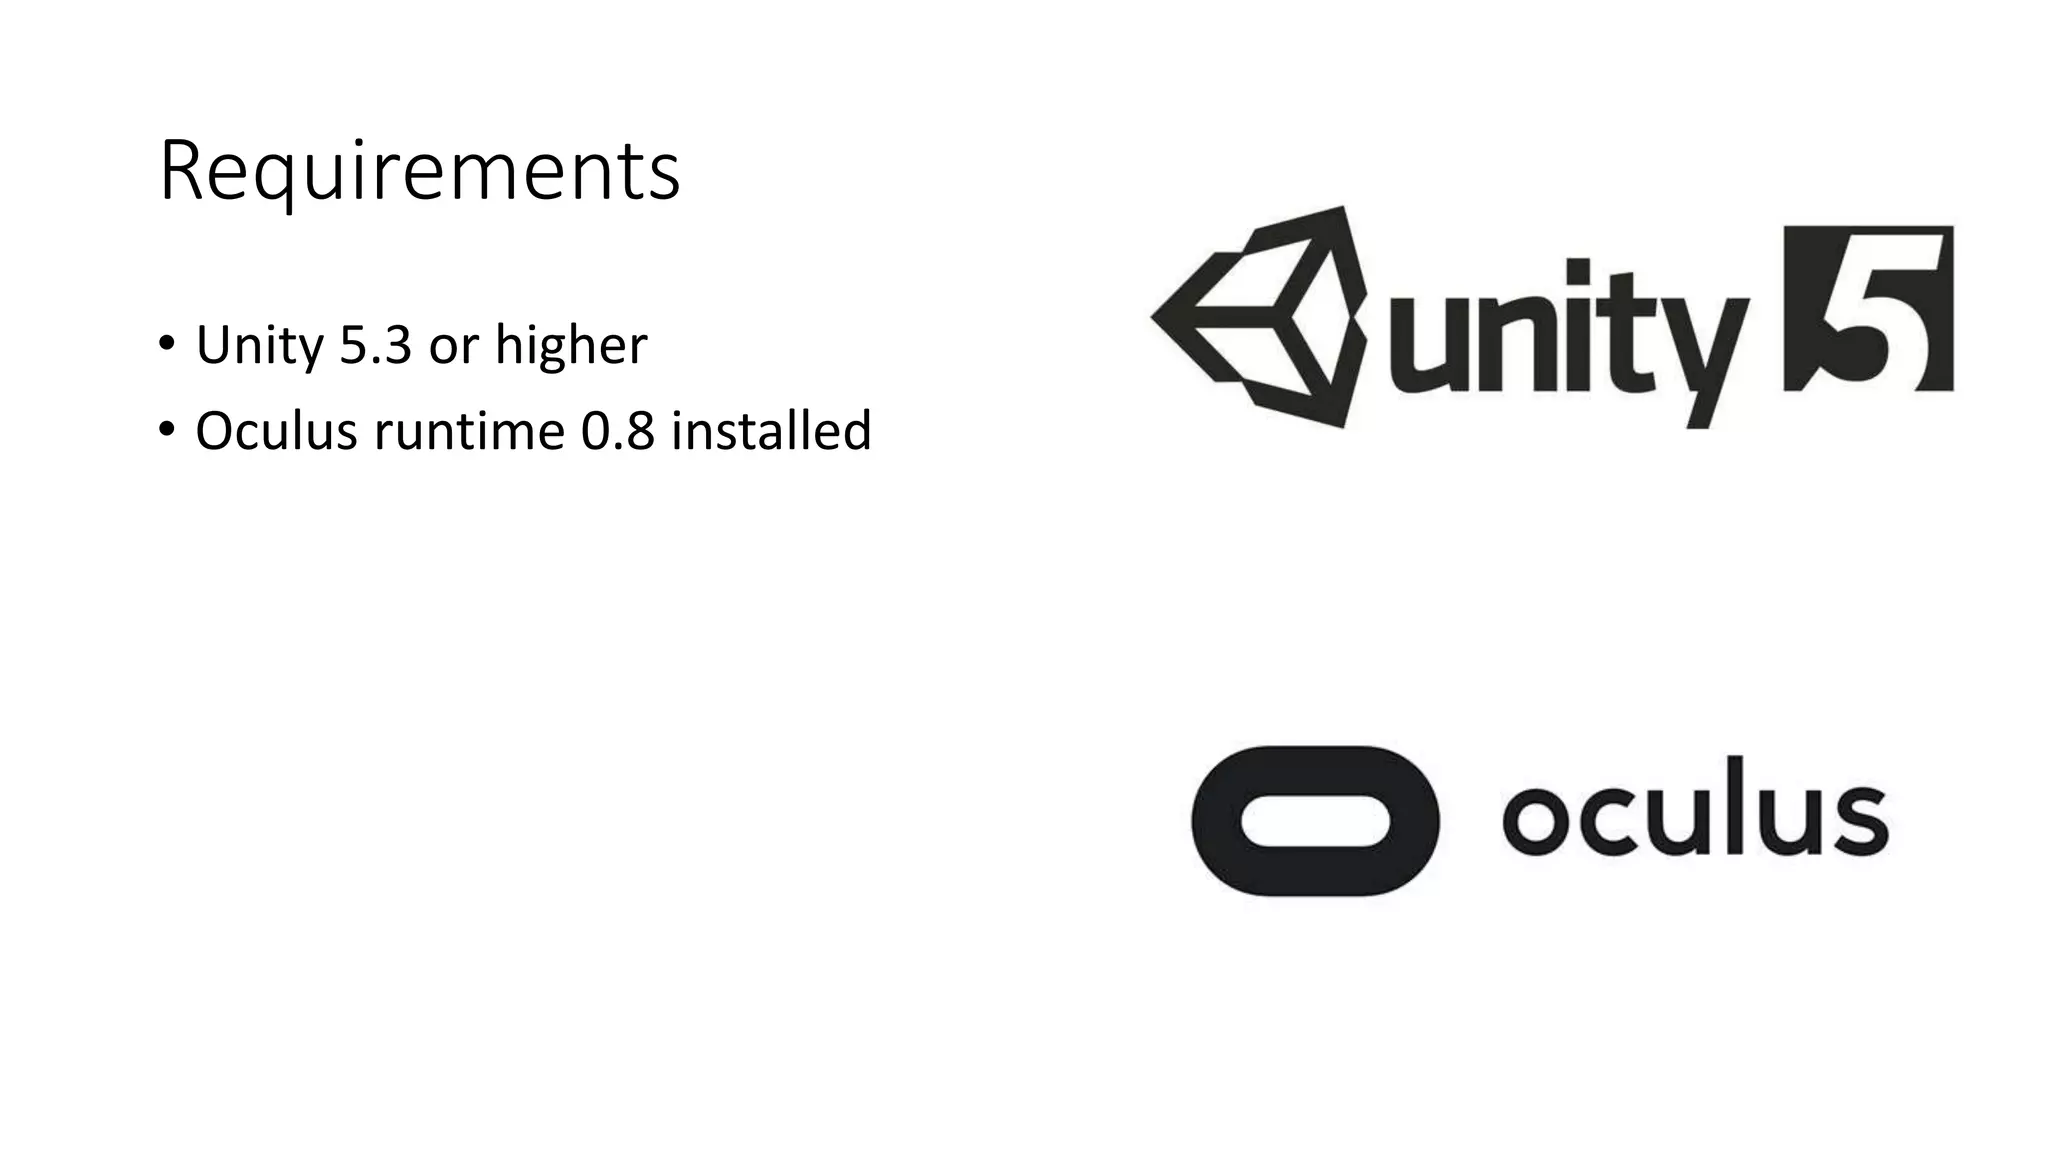
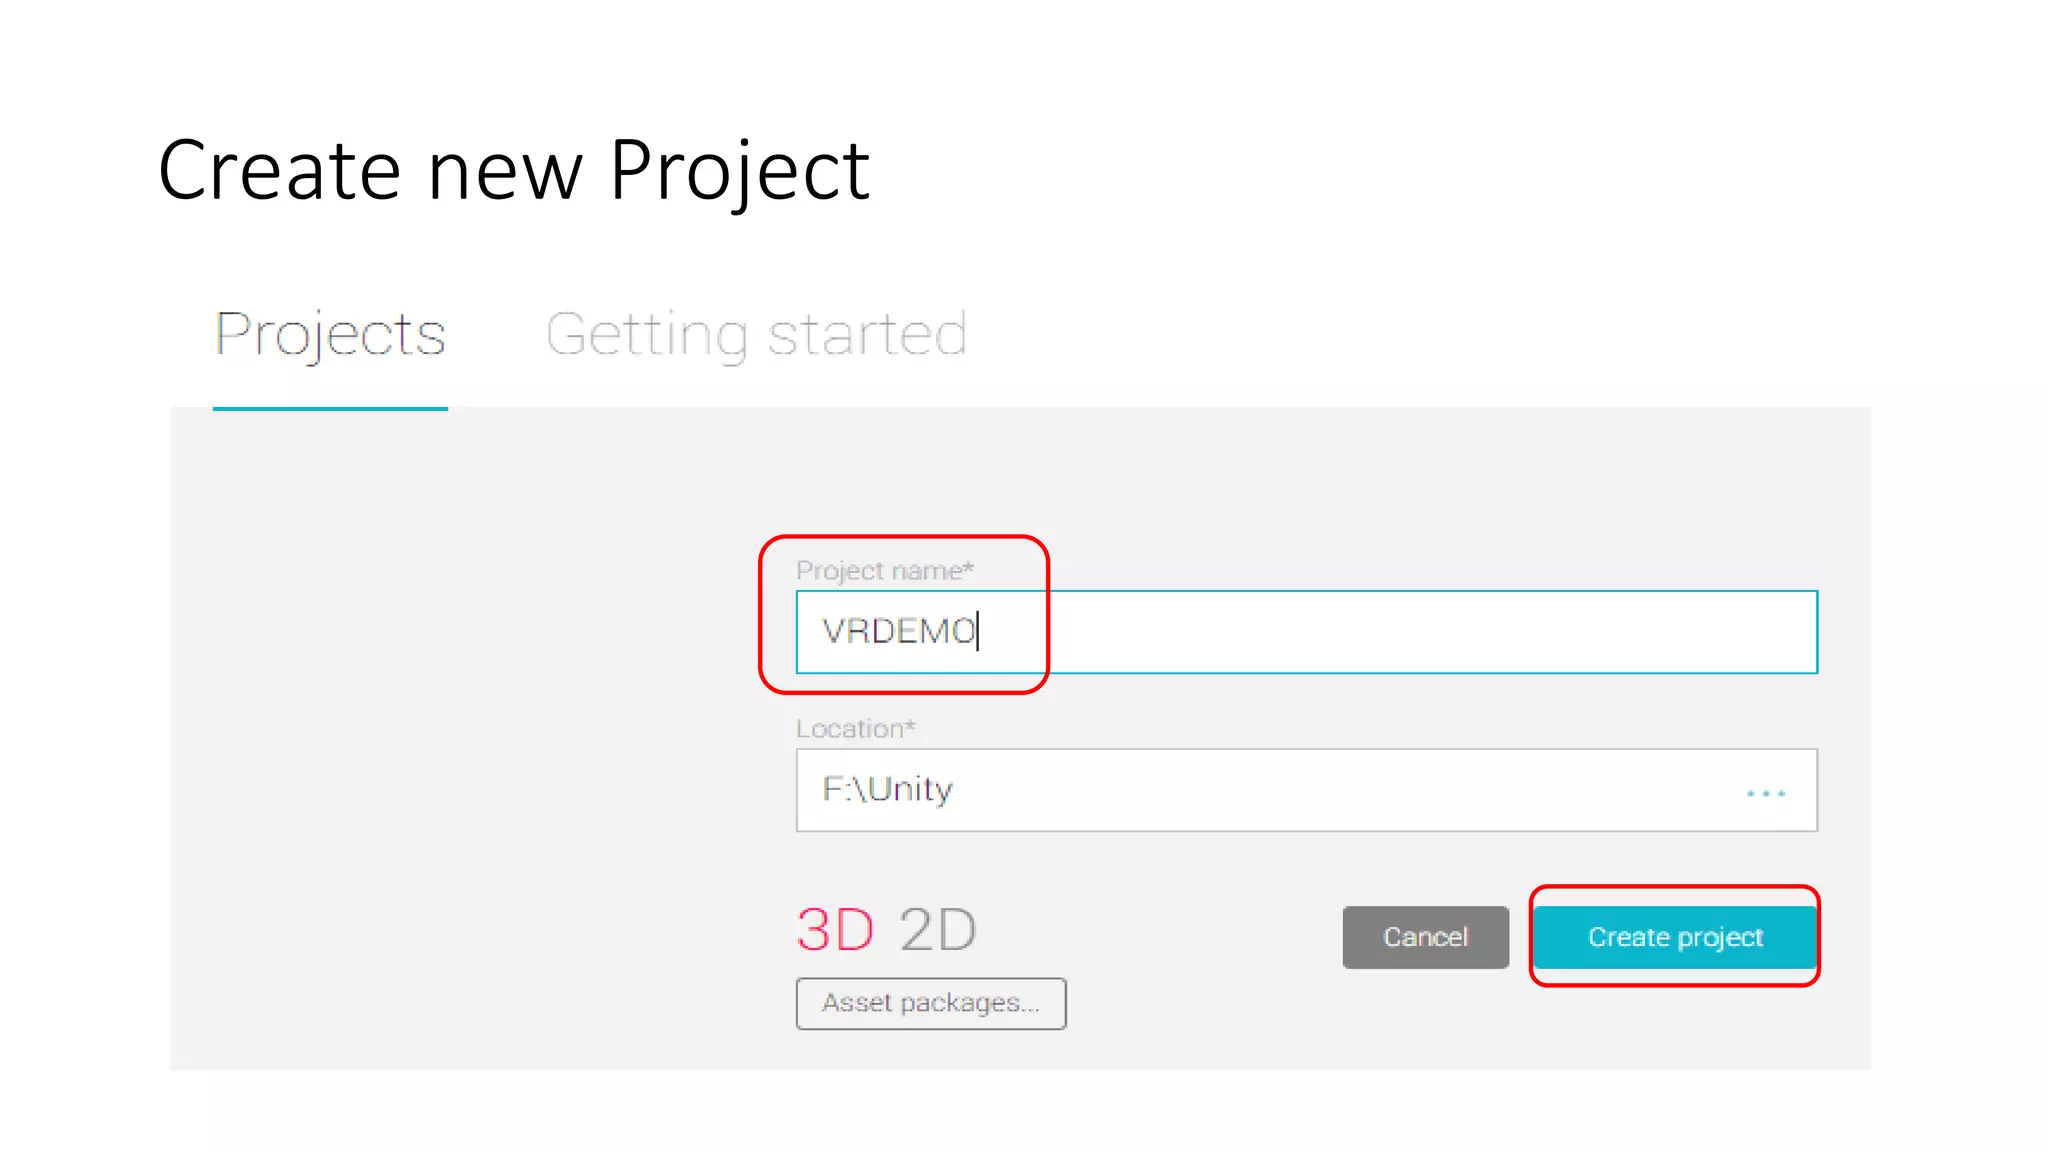
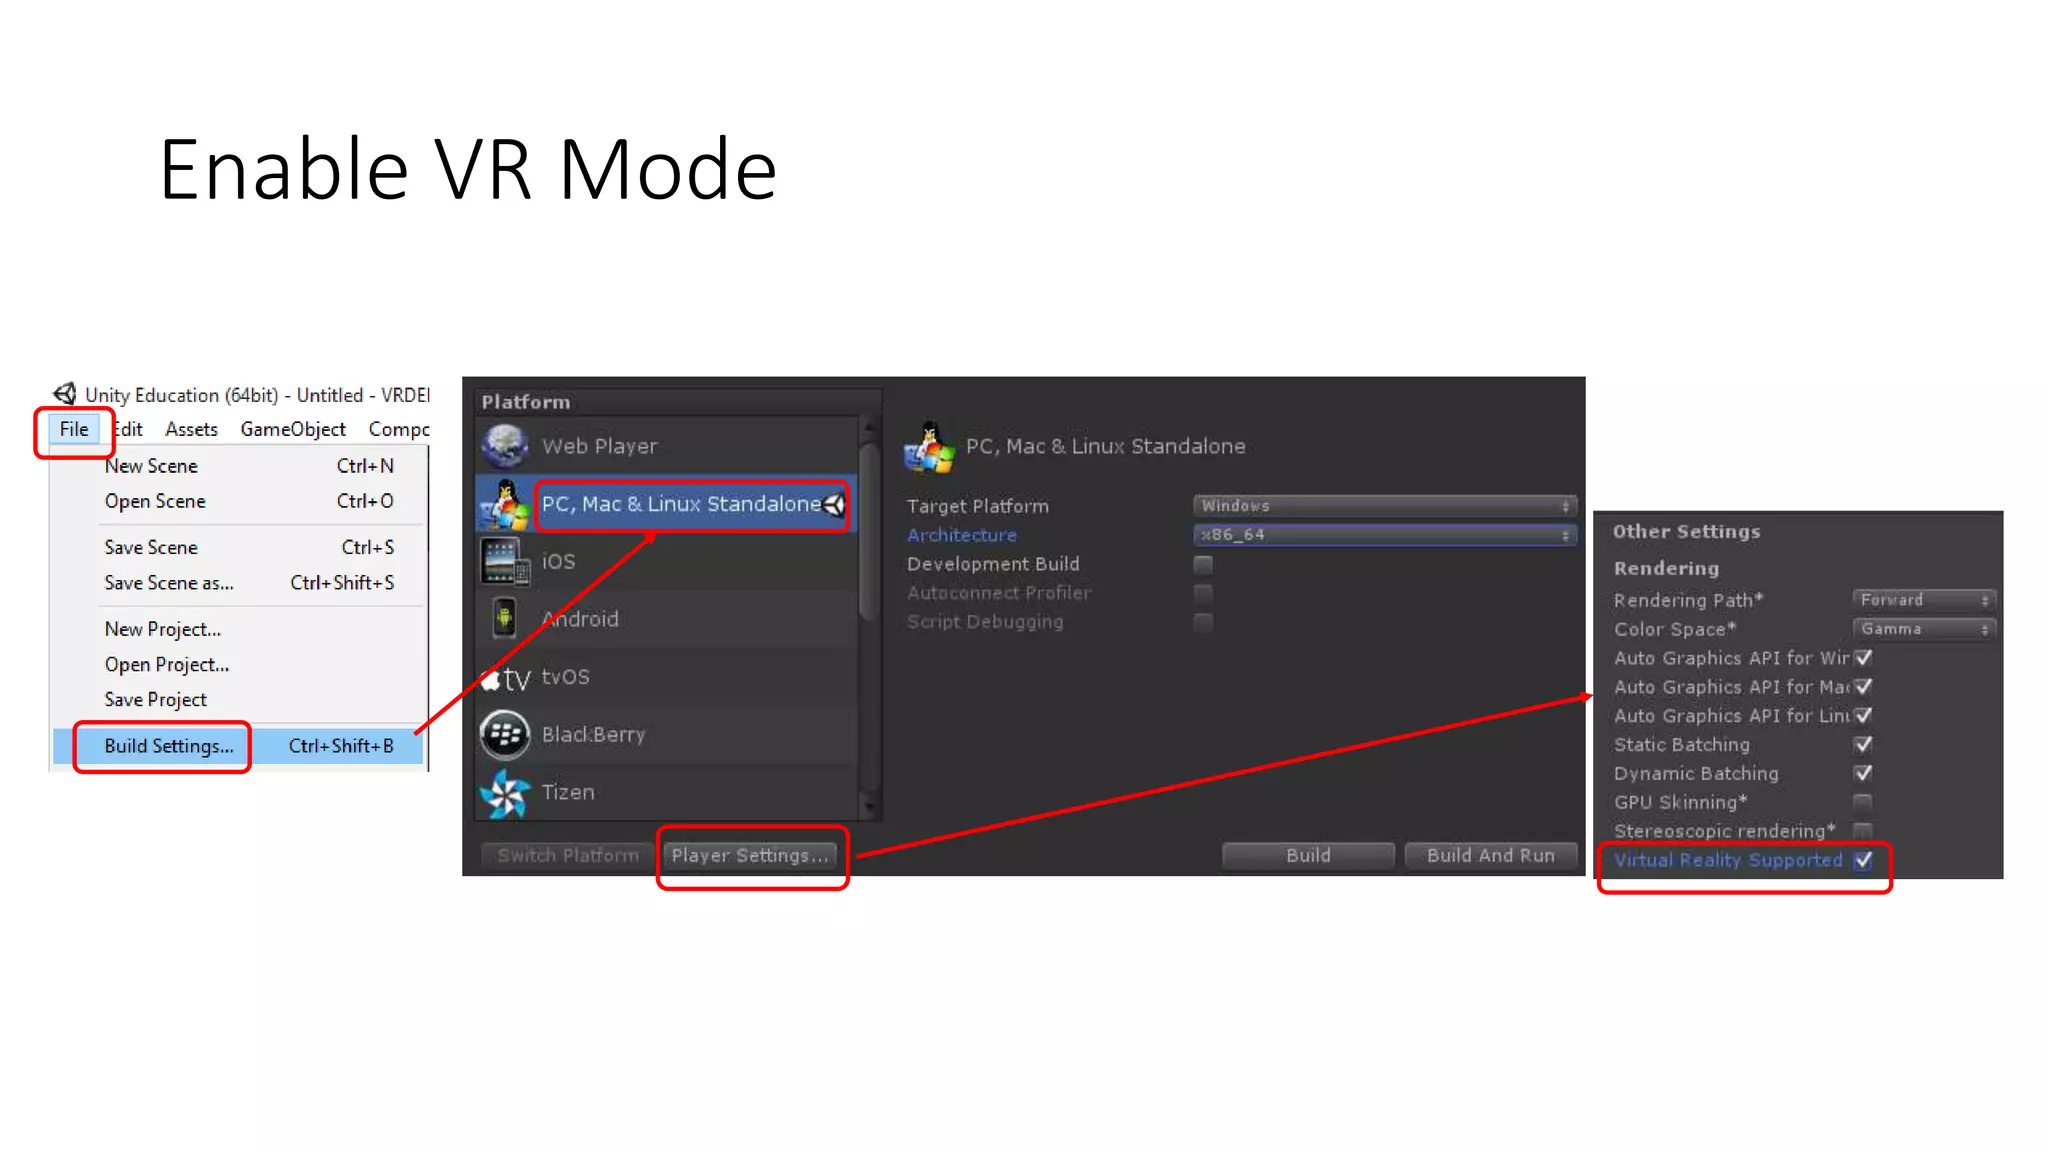
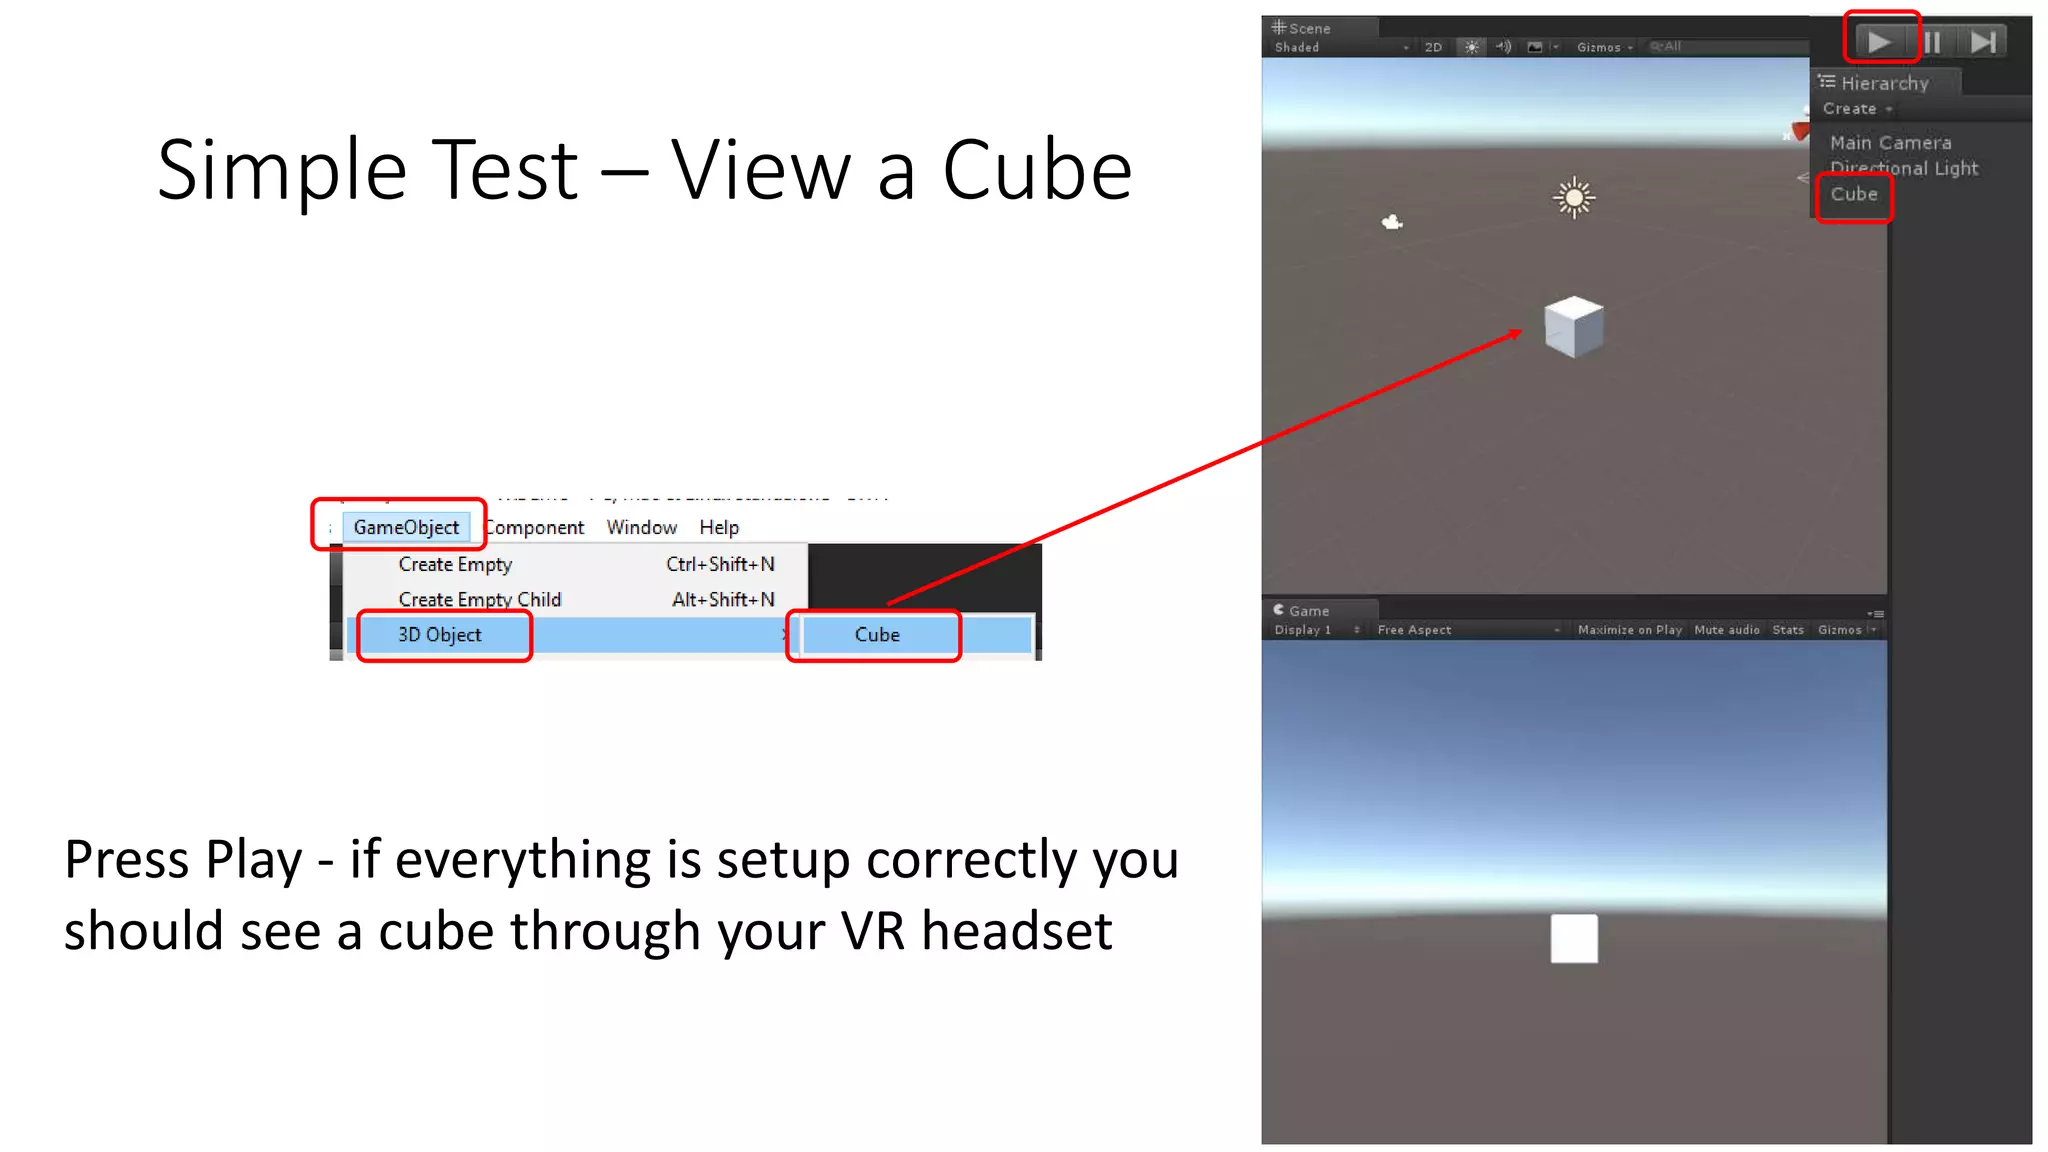
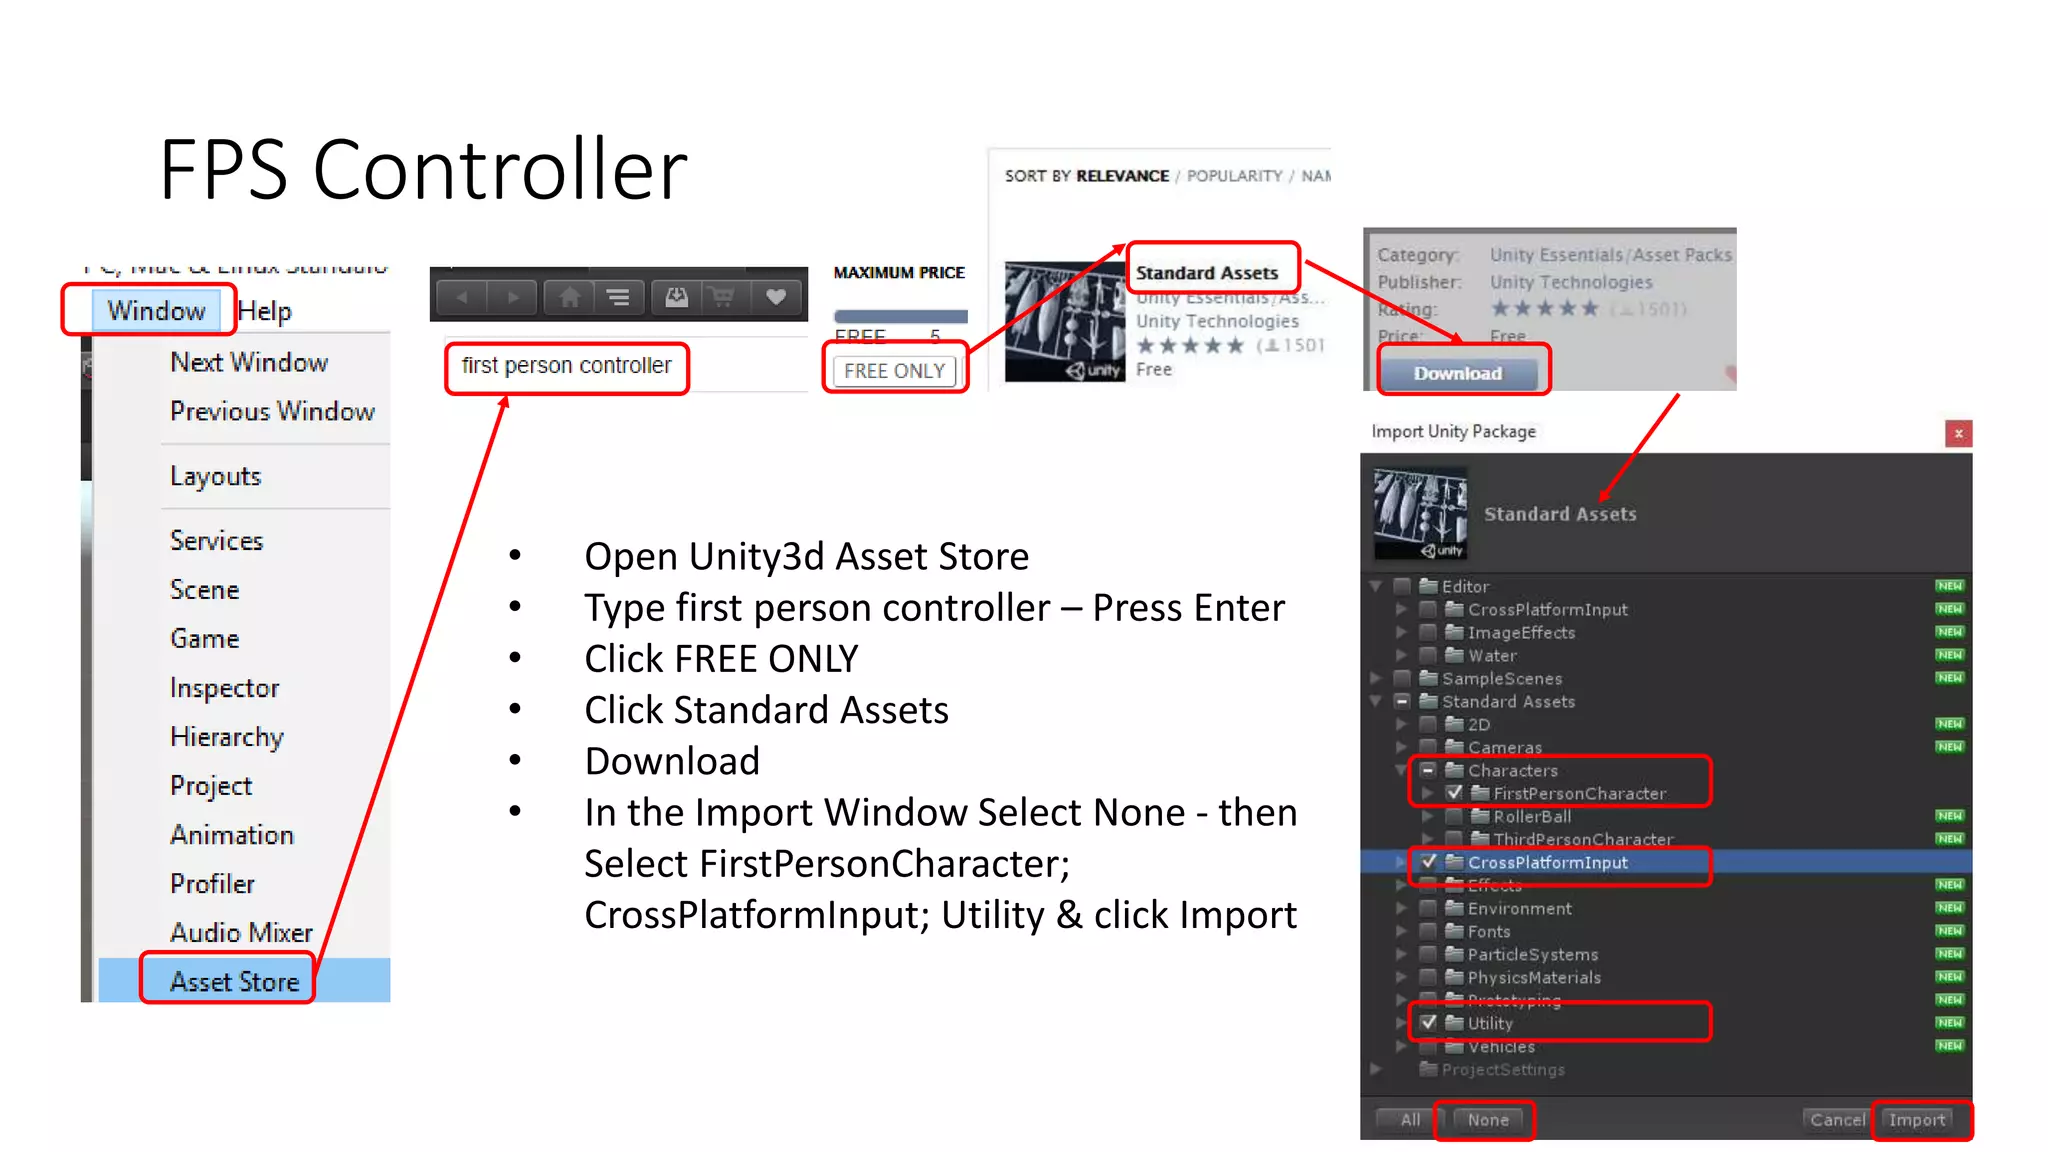
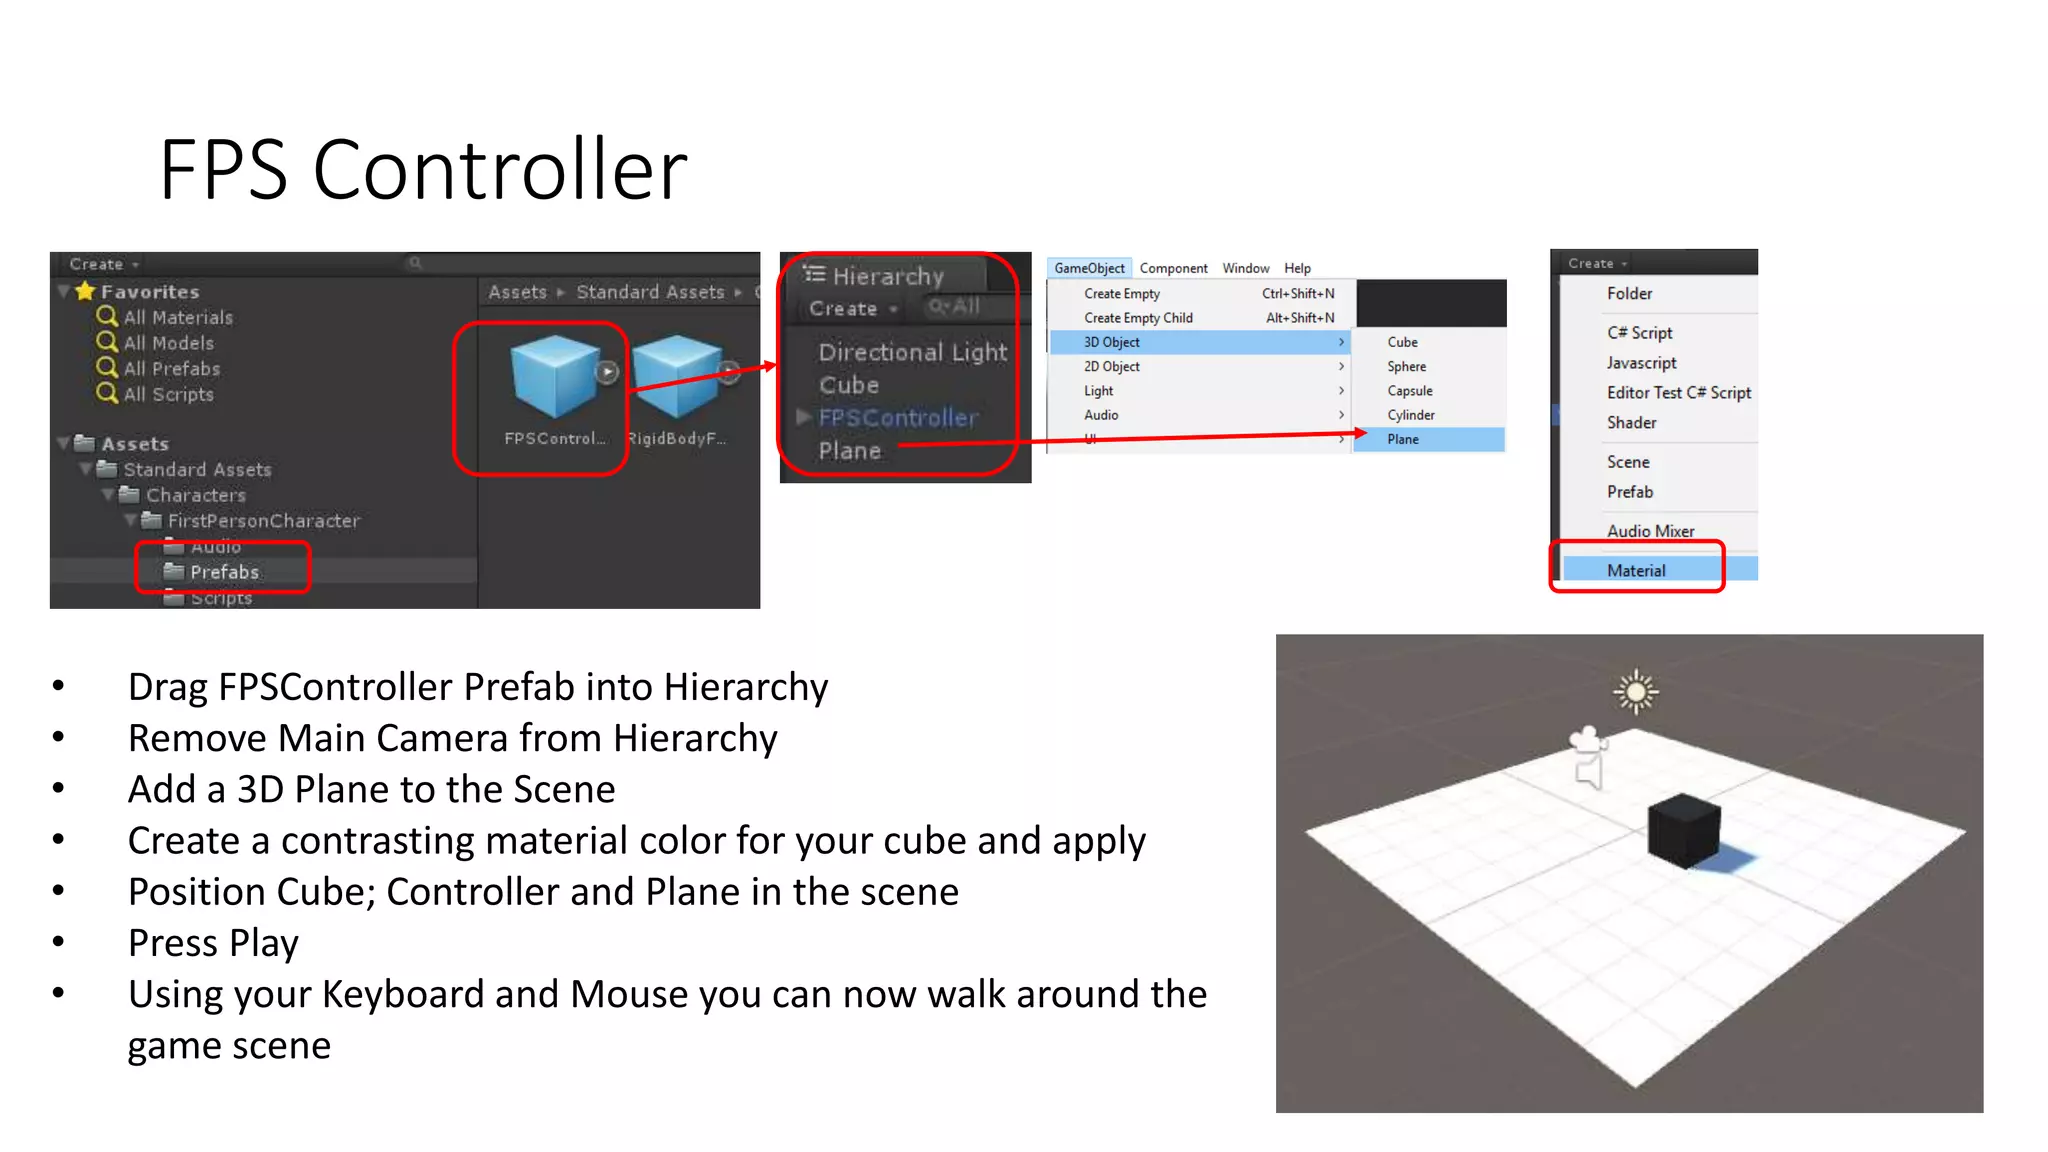
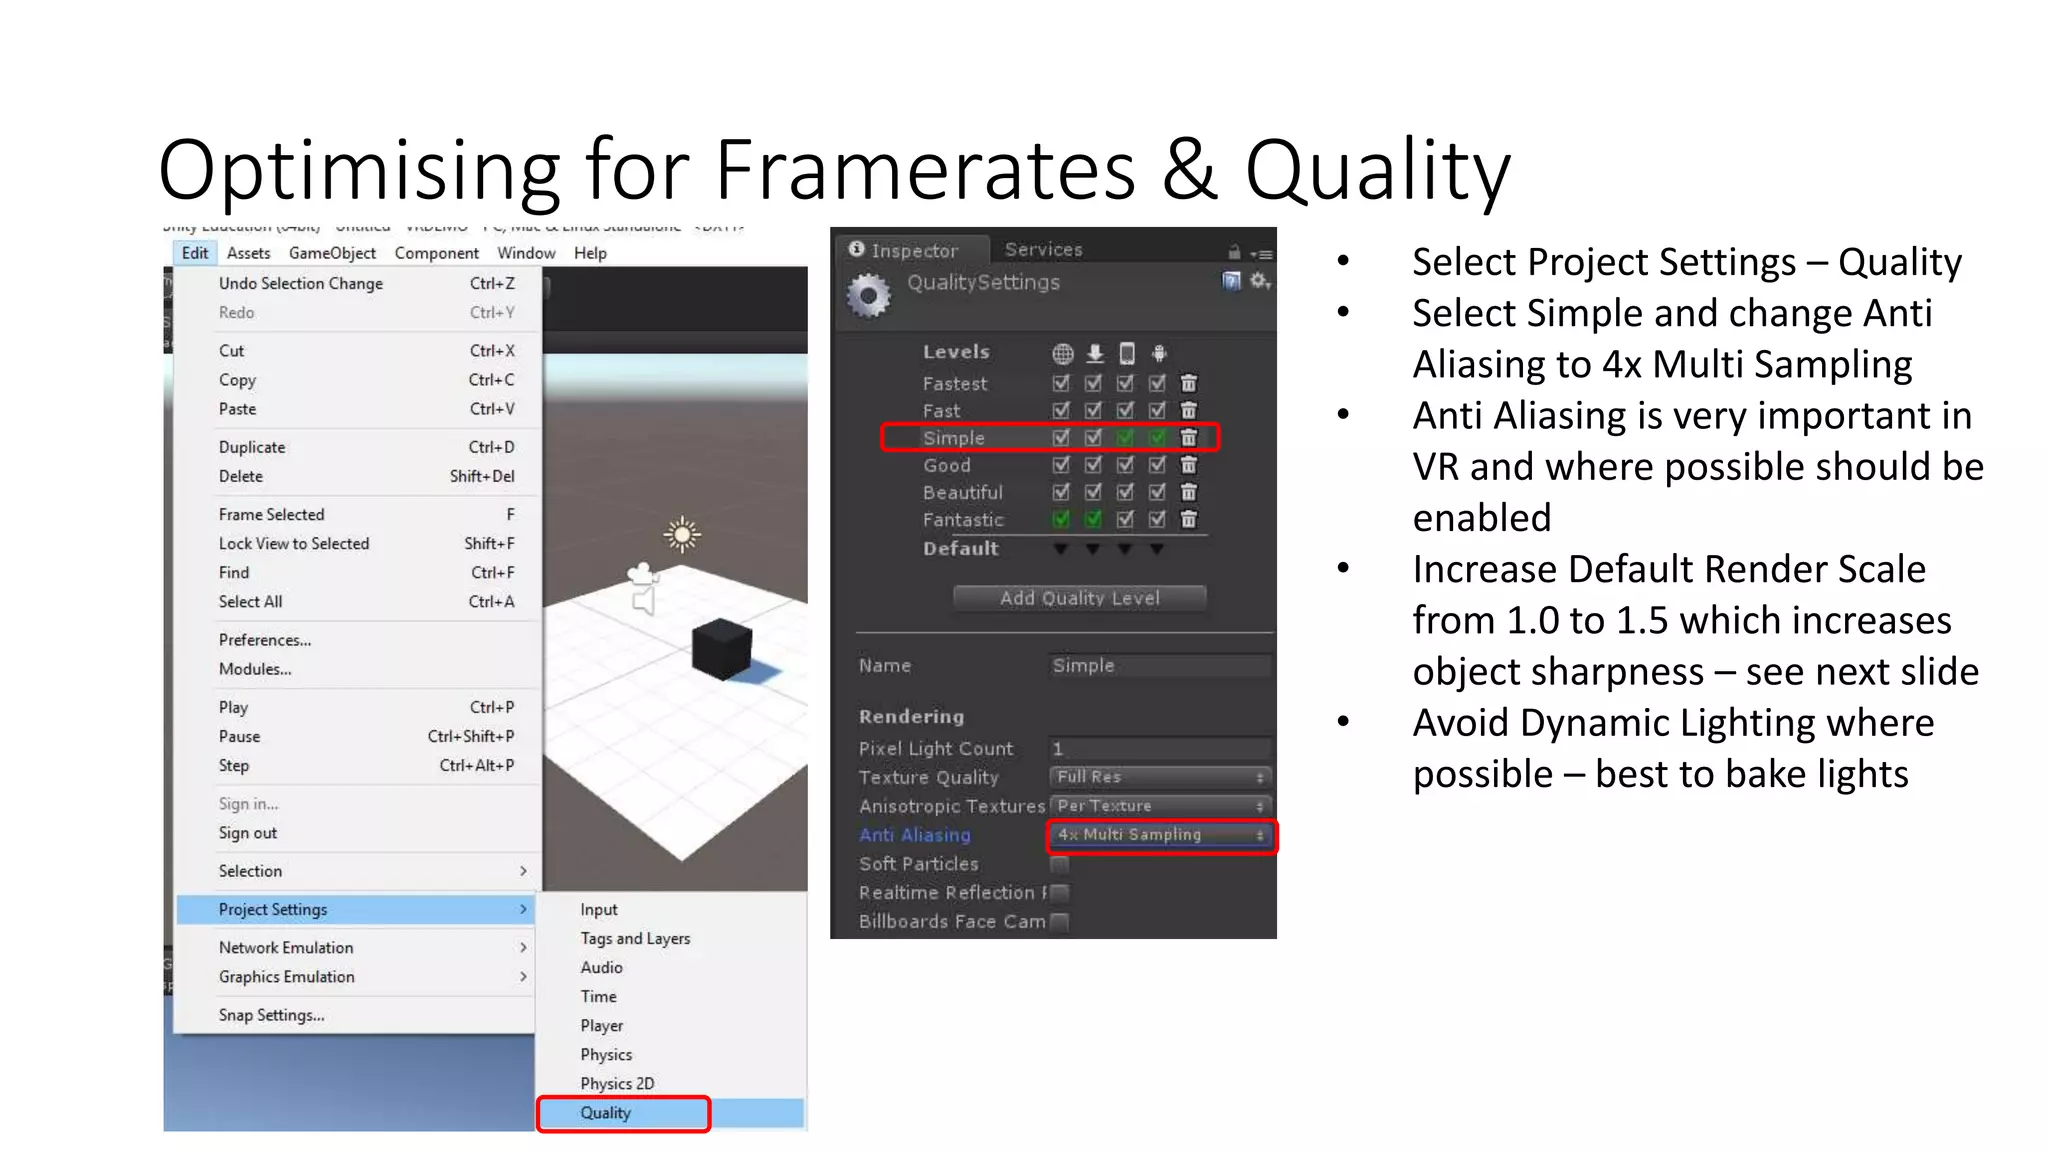
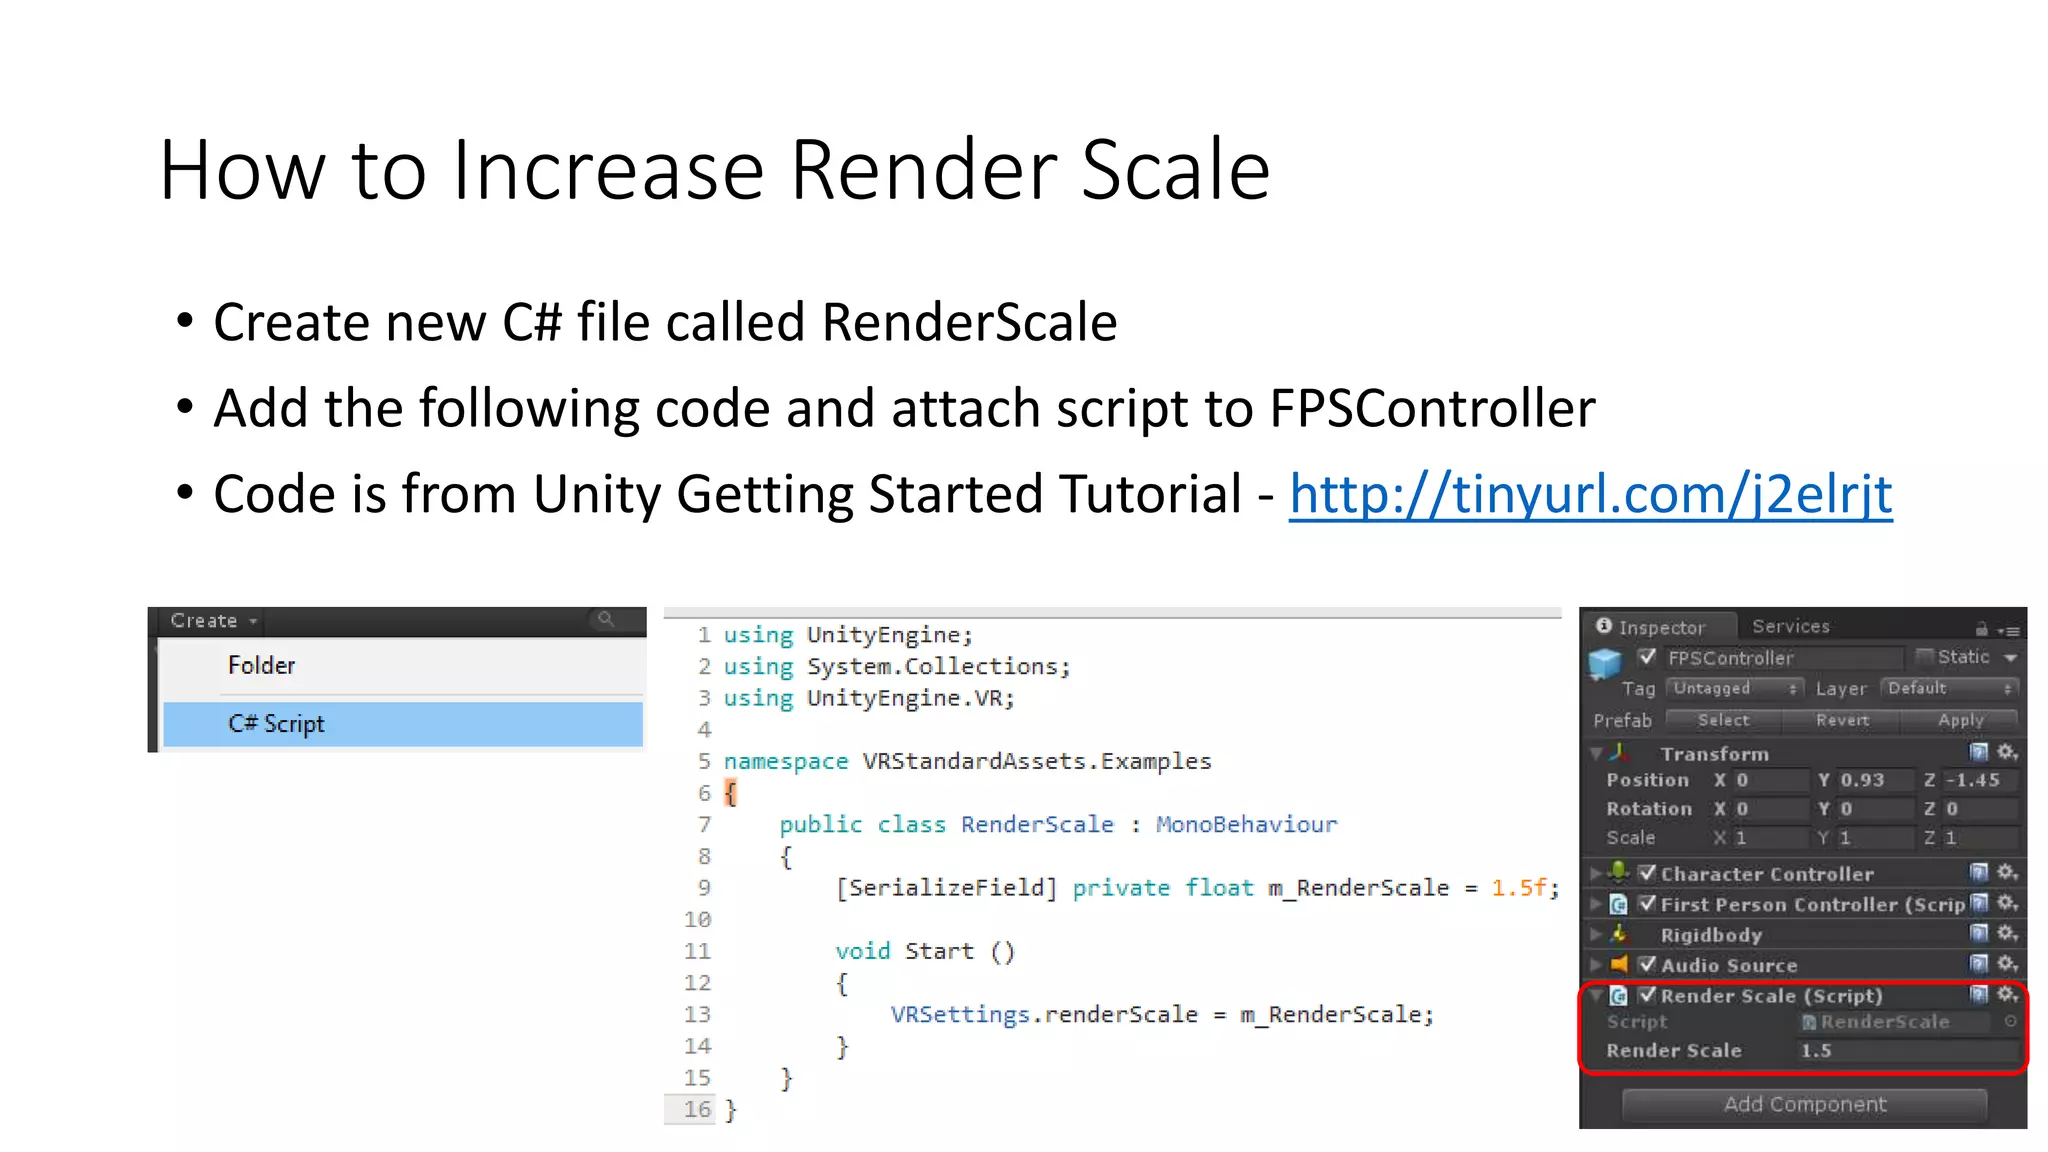
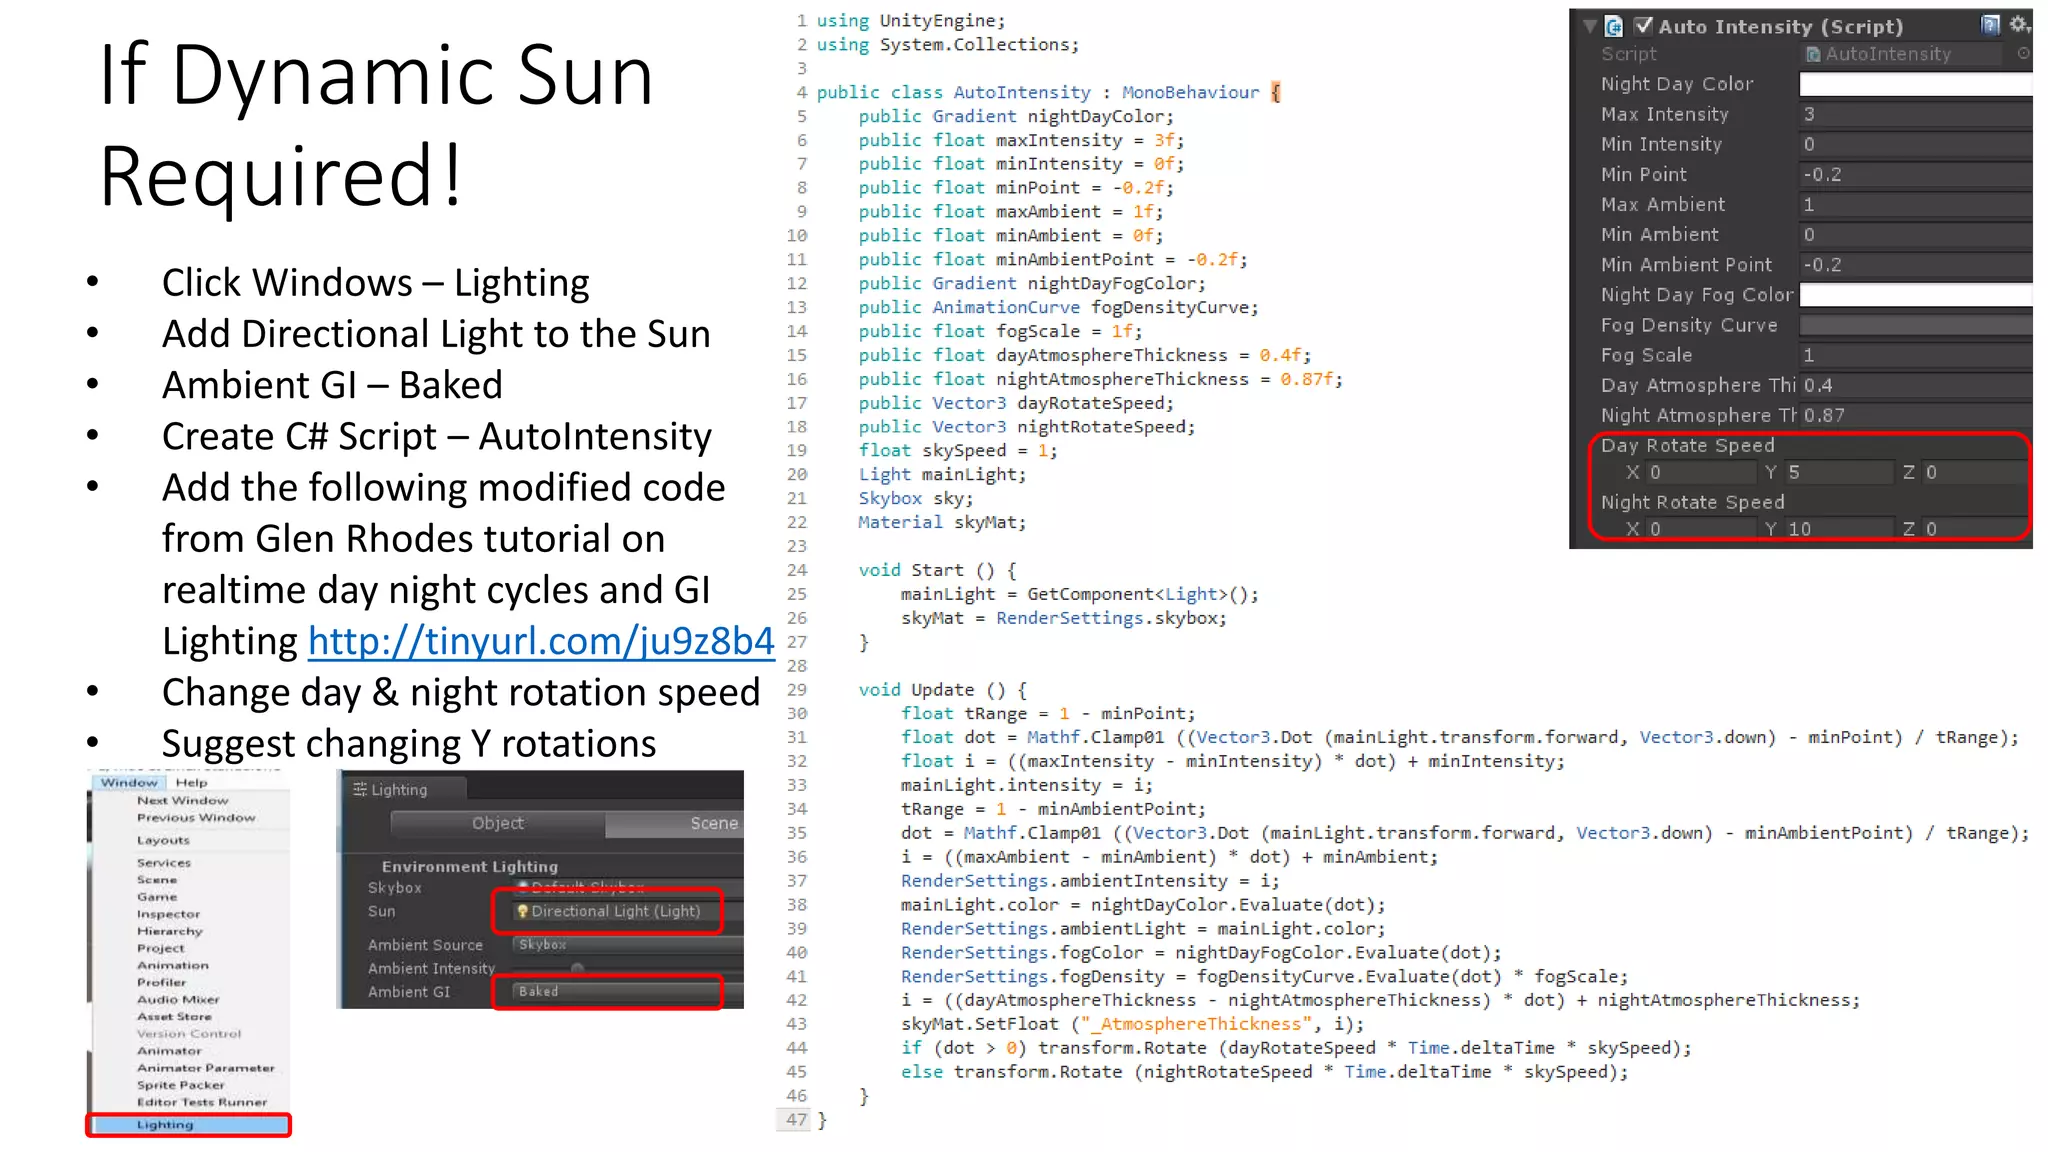
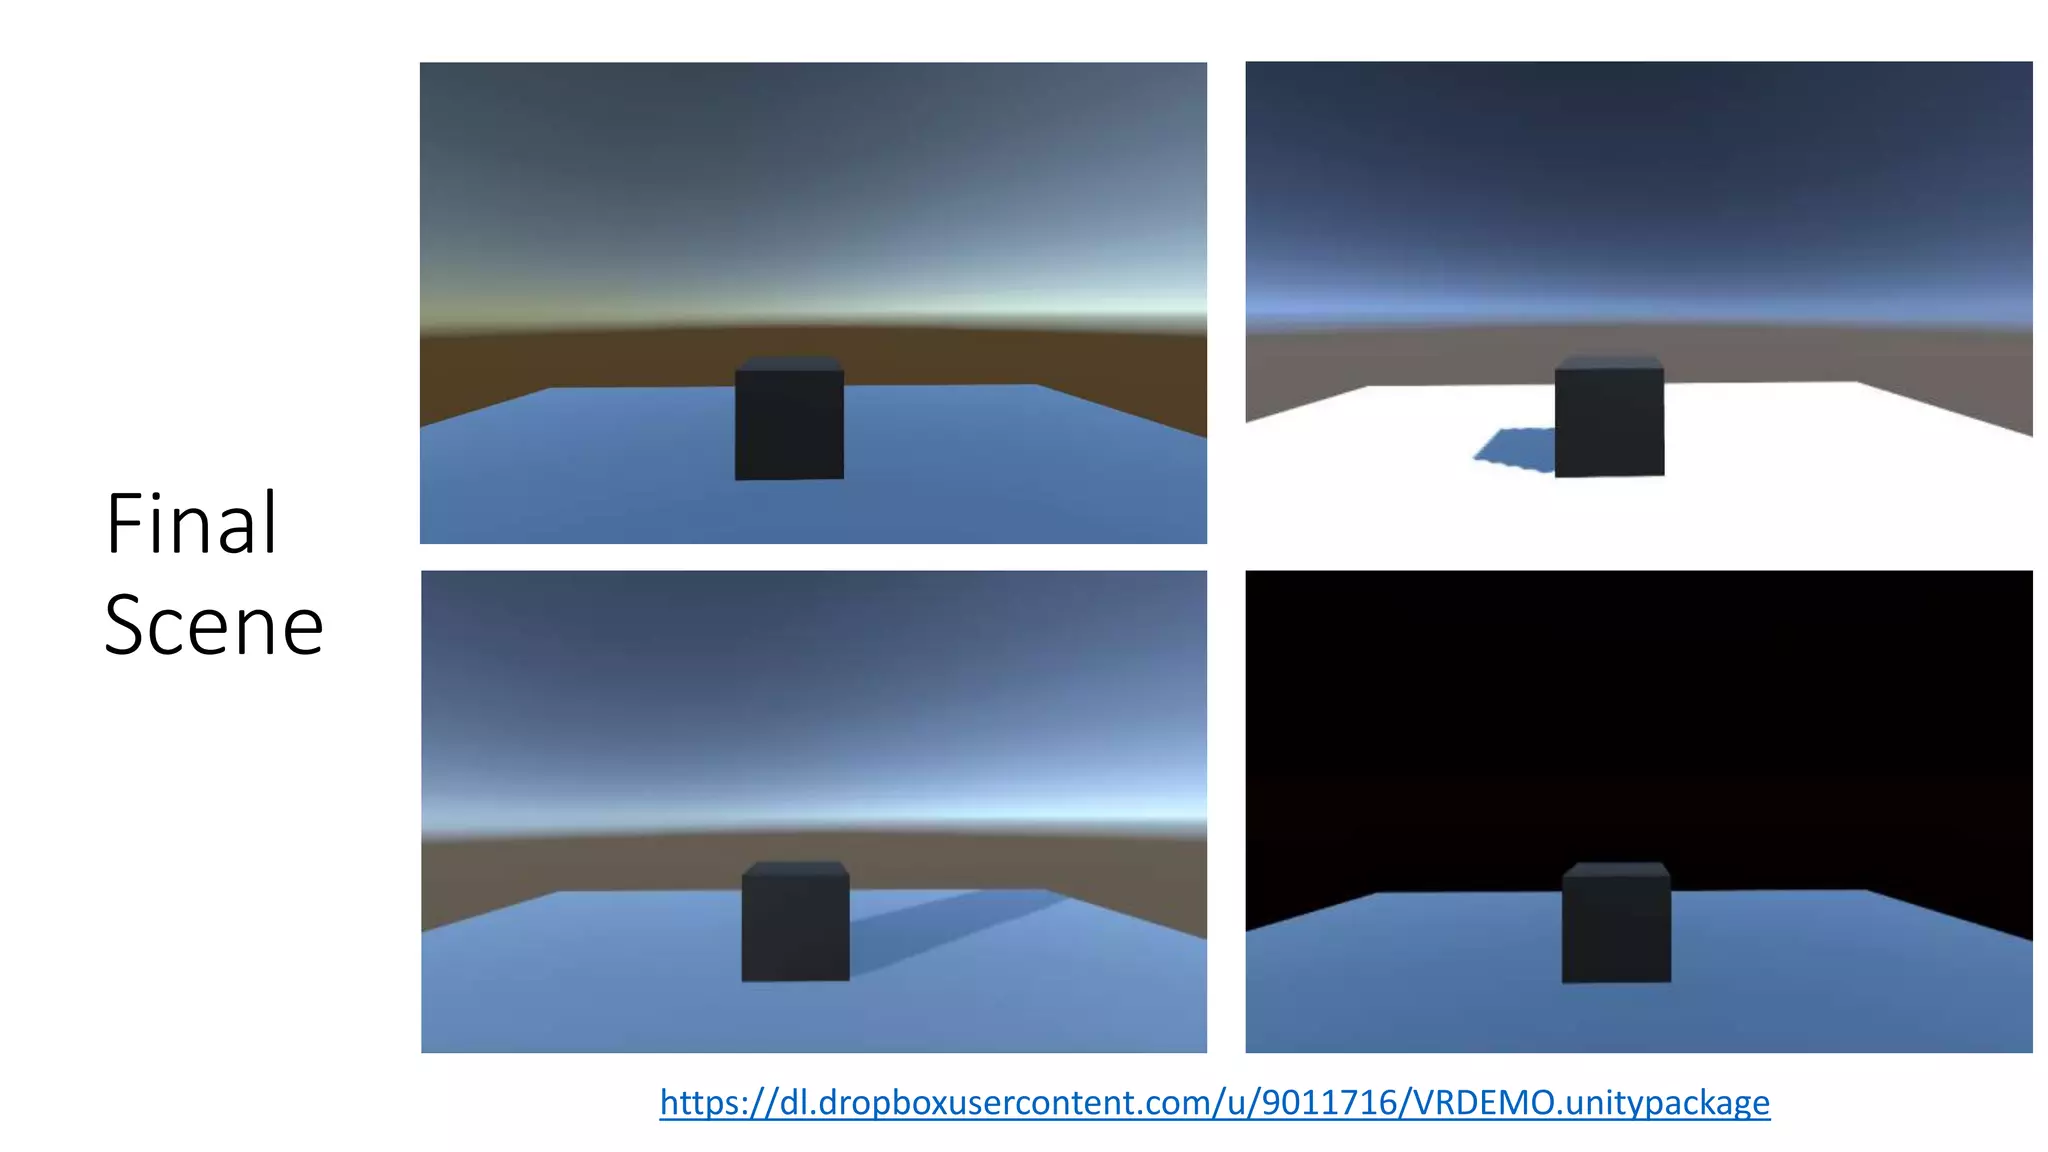
Introductory VR in Unity 3d
Dr James Birt
Requirements
• Unity 5.3 or higher
• Oculus runtime 0.8 installed
Create new Project
Enable VR Mode
Simple Test – View a Cube
Press Play - if everything is setup correctly you
should see a cube through your VR headset
FPS Controller
• Open Unity3d Asset Store
• Type first person controller – Press Enter
• Click FREE ONLY
• Click Standard Assets
• Download
• In the Import Window Select None - then
Select FirstPersonCharacter;
CrossPlatformInput; Utility & click Import
FPS Controller
• Drag FPSController Prefab into Hierarchy
• Remove Main Camera from Hierarchy
• Add a 3D Plane to the Scene
• Create a contrasting material color for your cube and apply
• Position Cube; Controller and Plane in the scene
• Press Play
• Using your Keyboard and Mouse you can now walk around the
game scene
Optimising for Framerates & Quality
• Select Project Settings – Quality
• Select Simple and change Anti
Aliasing to 4x Multi Sampling
• Anti Aliasing is very important in
VR and where possible should be
enabled
• Increase Default Render Scale
from 1.0 to 1.5 which increases
object sharpness – see next slide
• Avoid Dynamic Lighting where
possible – best to bake lights
How to Increase Render Scale
• Create new C# file called RenderScale
• Add the following code and attach script to FPSController
• Code is from Unity Getting Started Tutorial - http://tinyurl.com/j2elrjt
If Dynamic Sun
Required!
• Click Windows – Lighting
• Add Directional Light to the Sun
• Ambient GI – Baked
• Create C# Script – AutoIntensity
• Add the following modified code
from Glen Rhodes tutorial on
realtime day night cycles and GI
Lighting http://tinyurl.com/ju9z8b4
• Change day & night rotation speed
• Suggest changing Y rotations
Final
Scene
https://dl.dropboxusercontent.com/u/9011716/VRDEMO.unitypackage

Introductory Virtual Reality in Unity3d

  • 1.
    Introductory VR inUnity 3d Dr James Birt
  • 2.
    Requirements • Unity 5.3or higher • Oculus runtime 0.8 installed
  • 3.
  • 4.
  • 5.
    Simple Test –View a Cube Press Play - if everything is setup correctly you should see a cube through your VR headset
  • 6.
    FPS Controller • OpenUnity3d Asset Store • Type first person controller – Press Enter • Click FREE ONLY • Click Standard Assets • Download • In the Import Window Select None - then Select FirstPersonCharacter; CrossPlatformInput; Utility & click Import
  • 7.
    FPS Controller • DragFPSController Prefab into Hierarchy • Remove Main Camera from Hierarchy • Add a 3D Plane to the Scene • Create a contrasting material color for your cube and apply • Position Cube; Controller and Plane in the scene • Press Play • Using your Keyboard and Mouse you can now walk around the game scene
  • 8.
    Optimising for Framerates& Quality • Select Project Settings – Quality • Select Simple and change Anti Aliasing to 4x Multi Sampling • Anti Aliasing is very important in VR and where possible should be enabled • Increase Default Render Scale from 1.0 to 1.5 which increases object sharpness – see next slide • Avoid Dynamic Lighting where possible – best to bake lights
  • 9.
    How to IncreaseRender Scale • Create new C# file called RenderScale • Add the following code and attach script to FPSController • Code is from Unity Getting Started Tutorial - http://tinyurl.com/j2elrjt
  • 10.
    If Dynamic Sun Required! •Click Windows – Lighting • Add Directional Light to the Sun • Ambient GI – Baked • Create C# Script – AutoIntensity • Add the following modified code from Glen Rhodes tutorial on realtime day night cycles and GI Lighting http://tinyurl.com/ju9z8b4 • Change day & night rotation speed • Suggest changing Y rotations
  • 11.