Download as PDF, PPTX


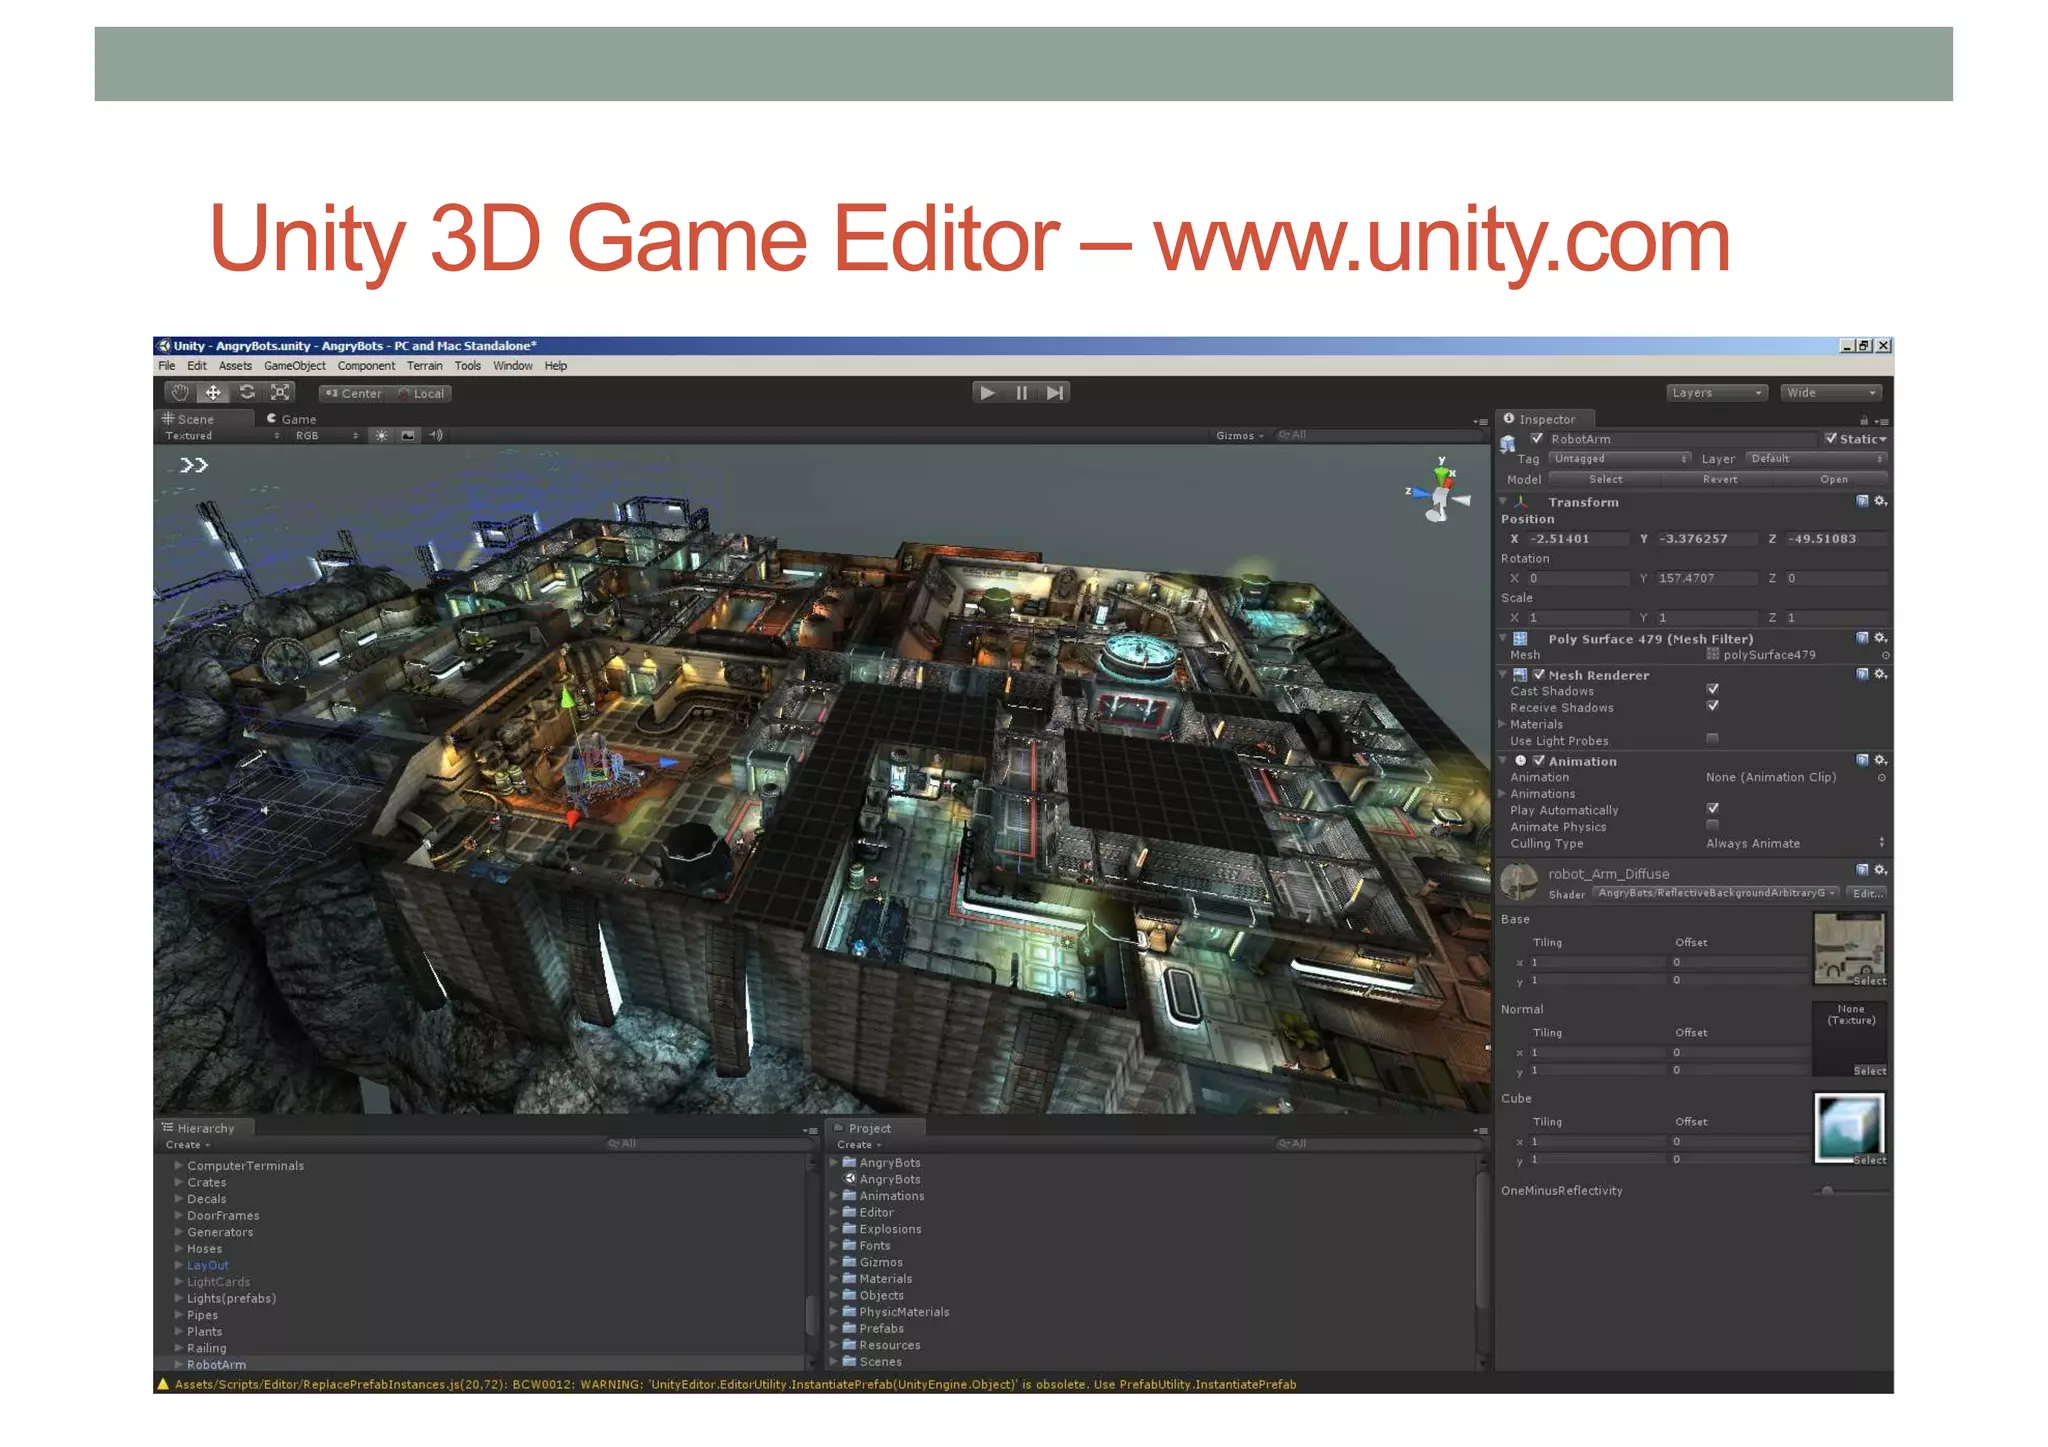

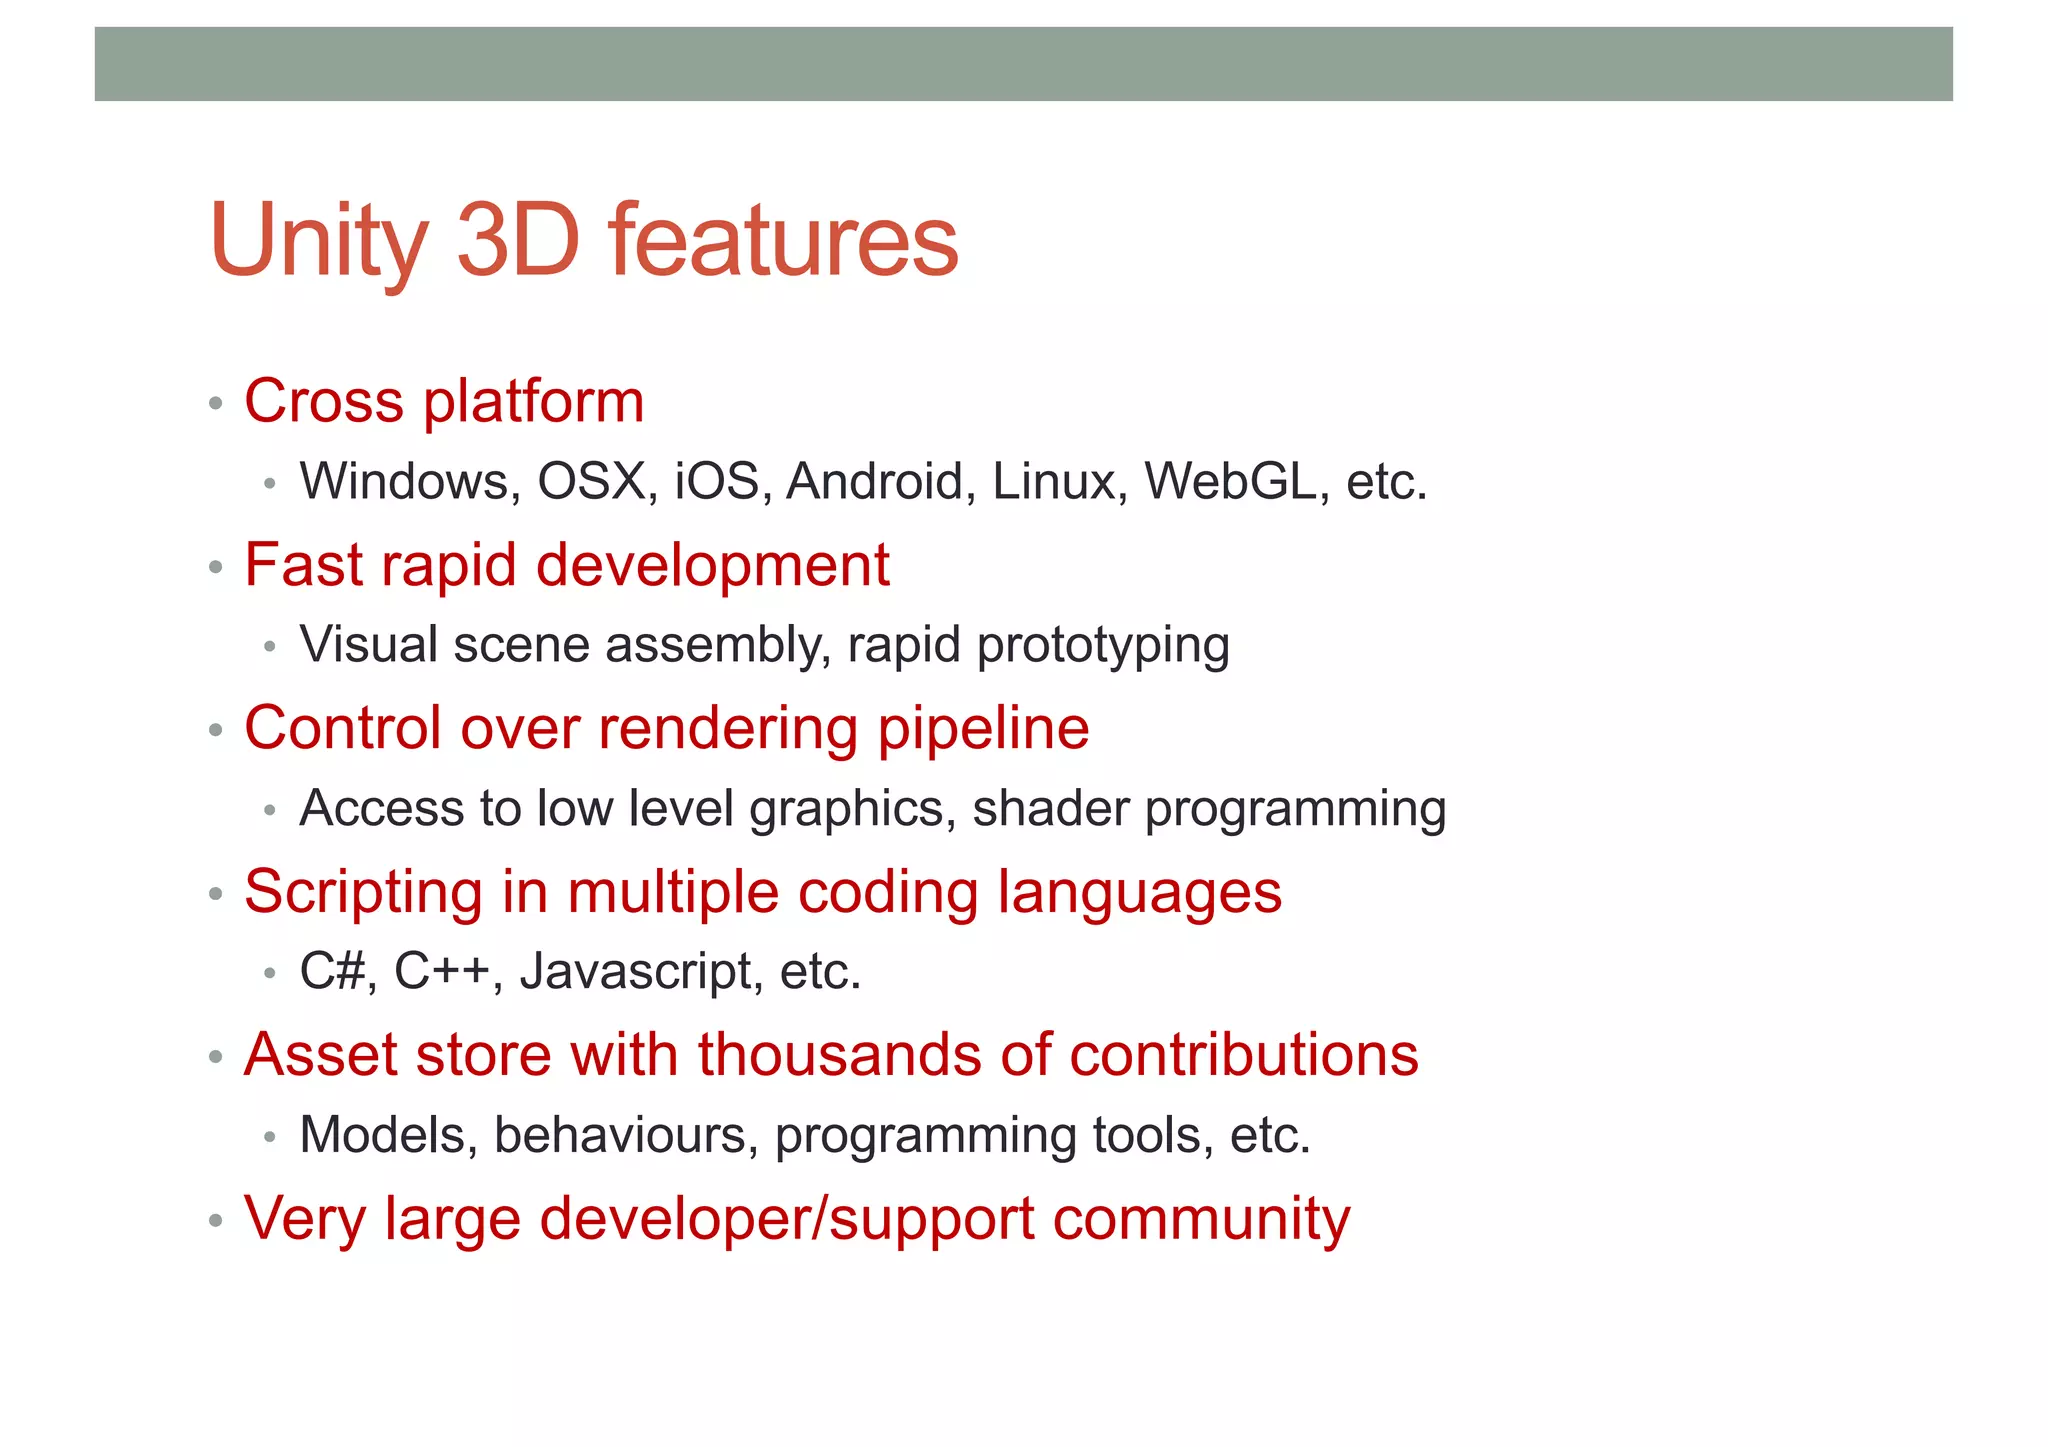


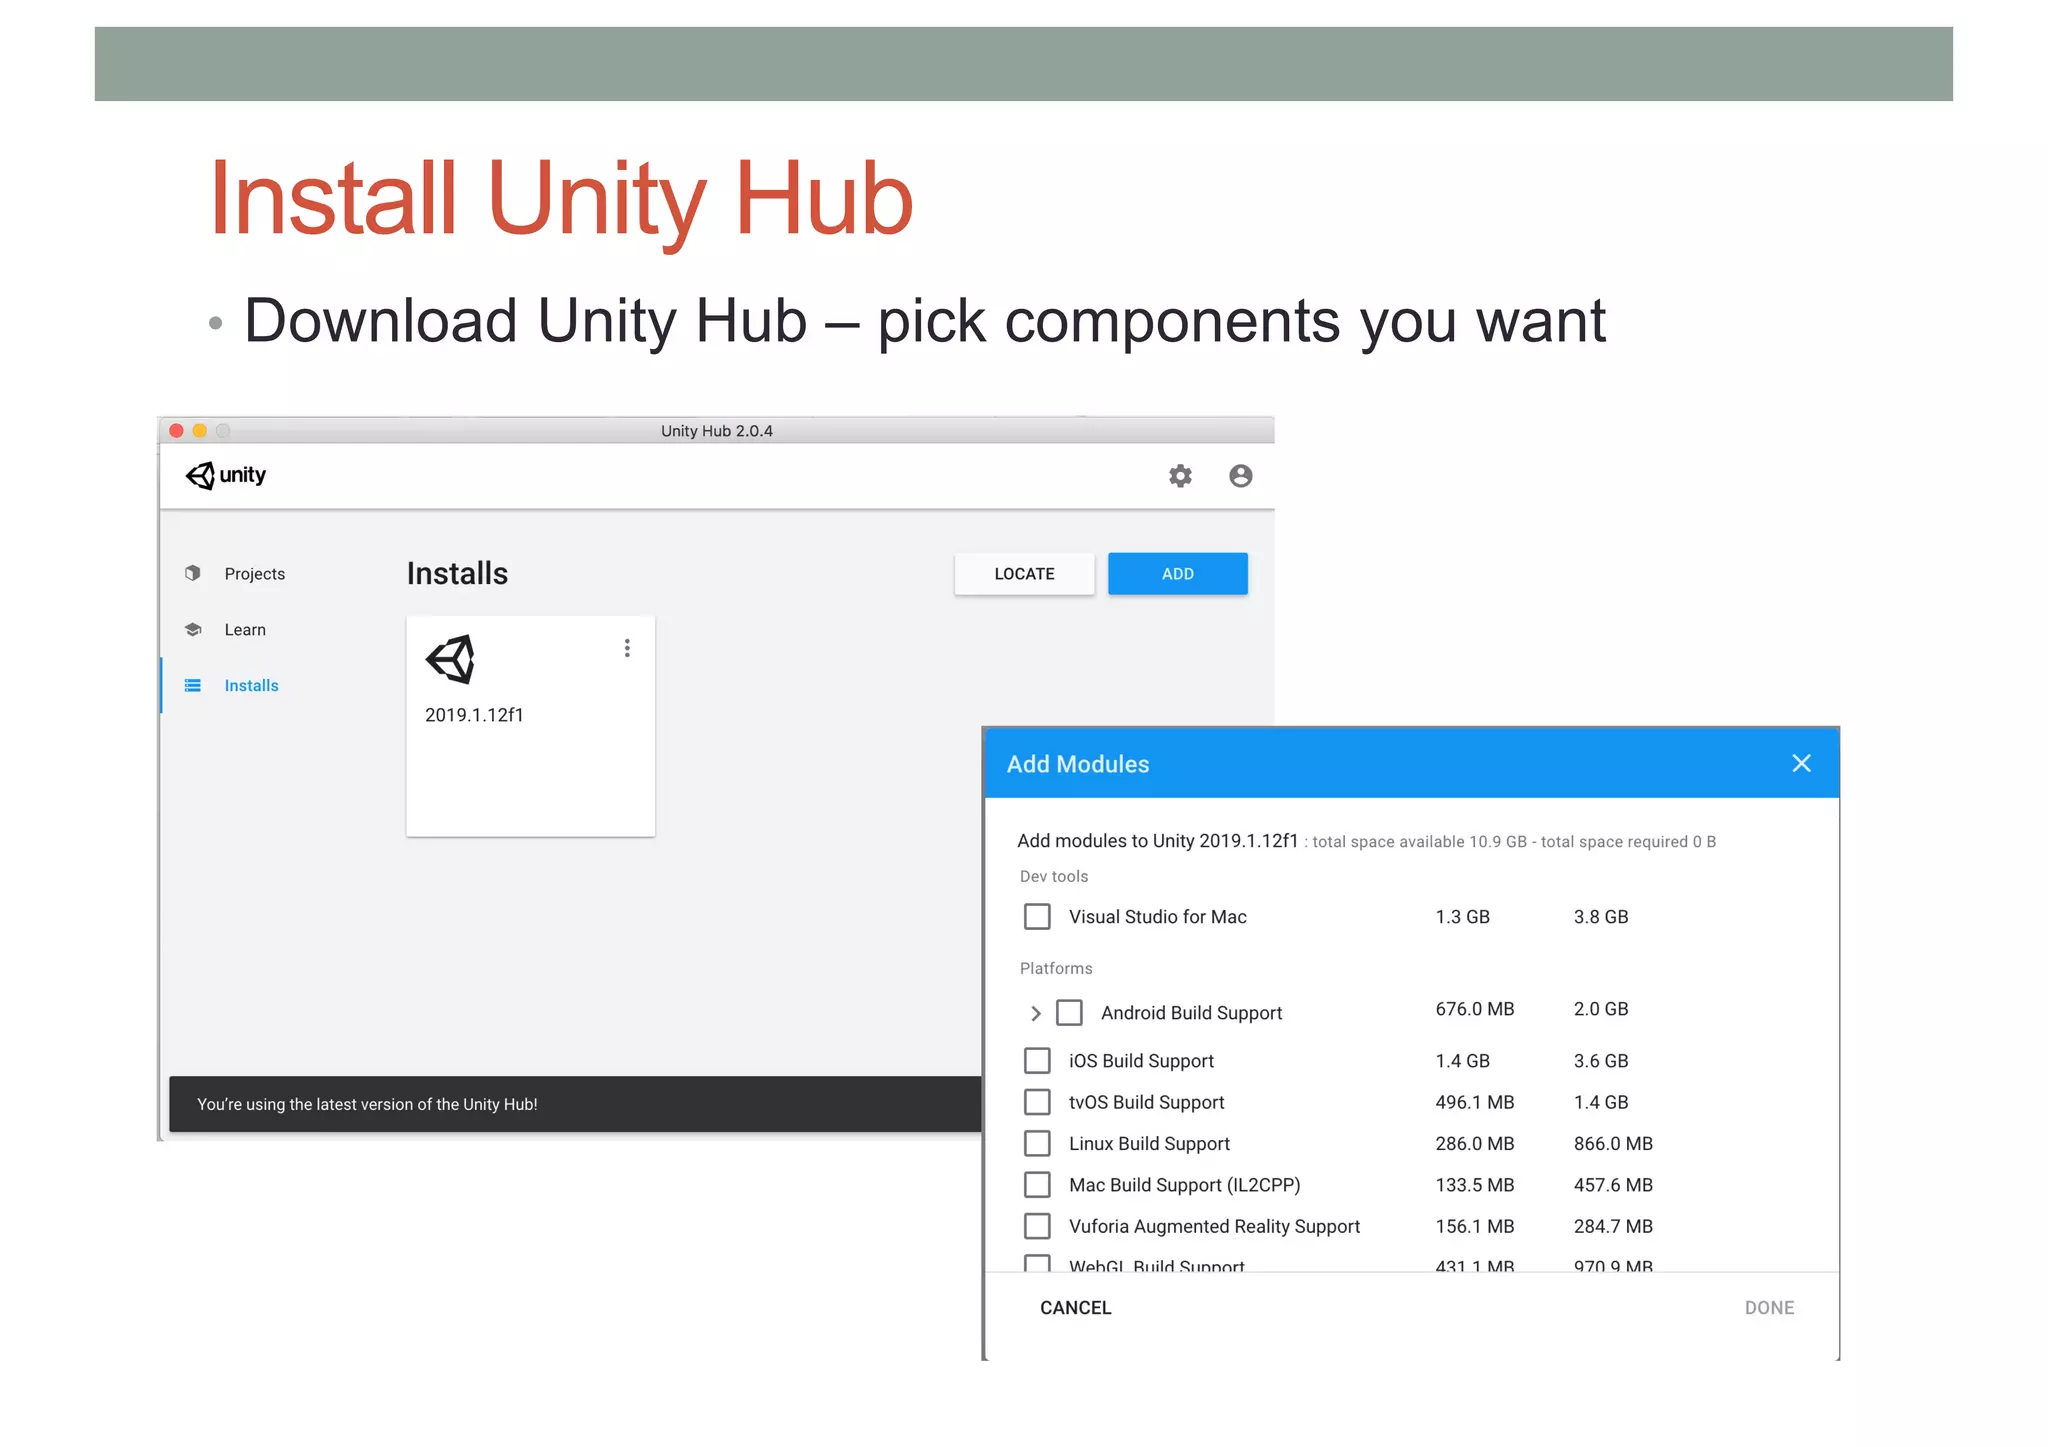
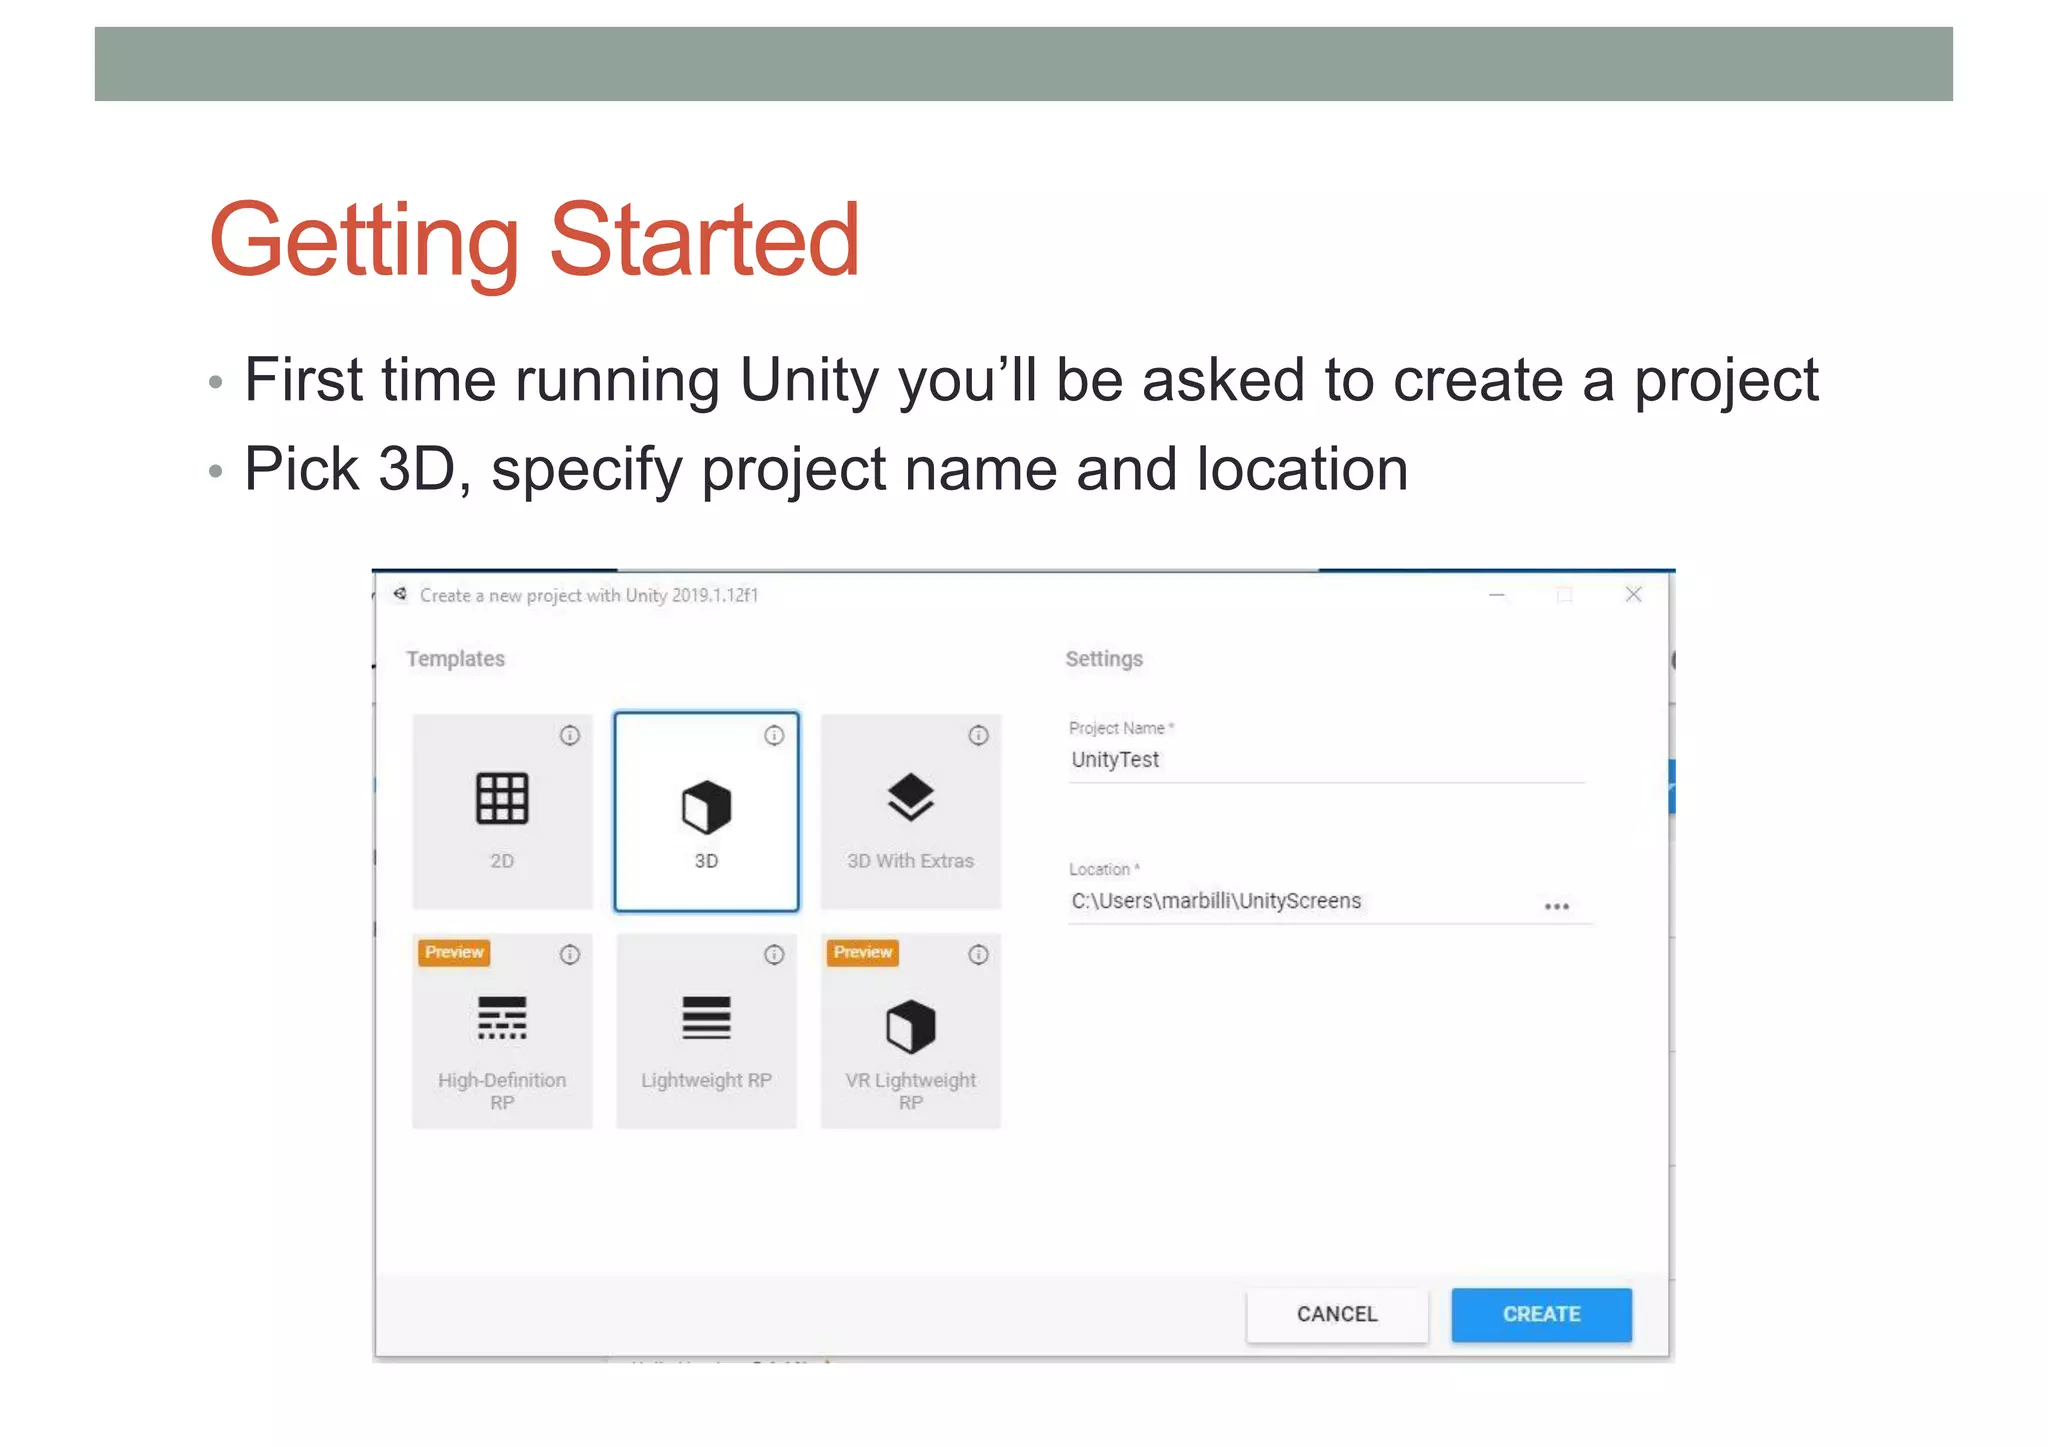
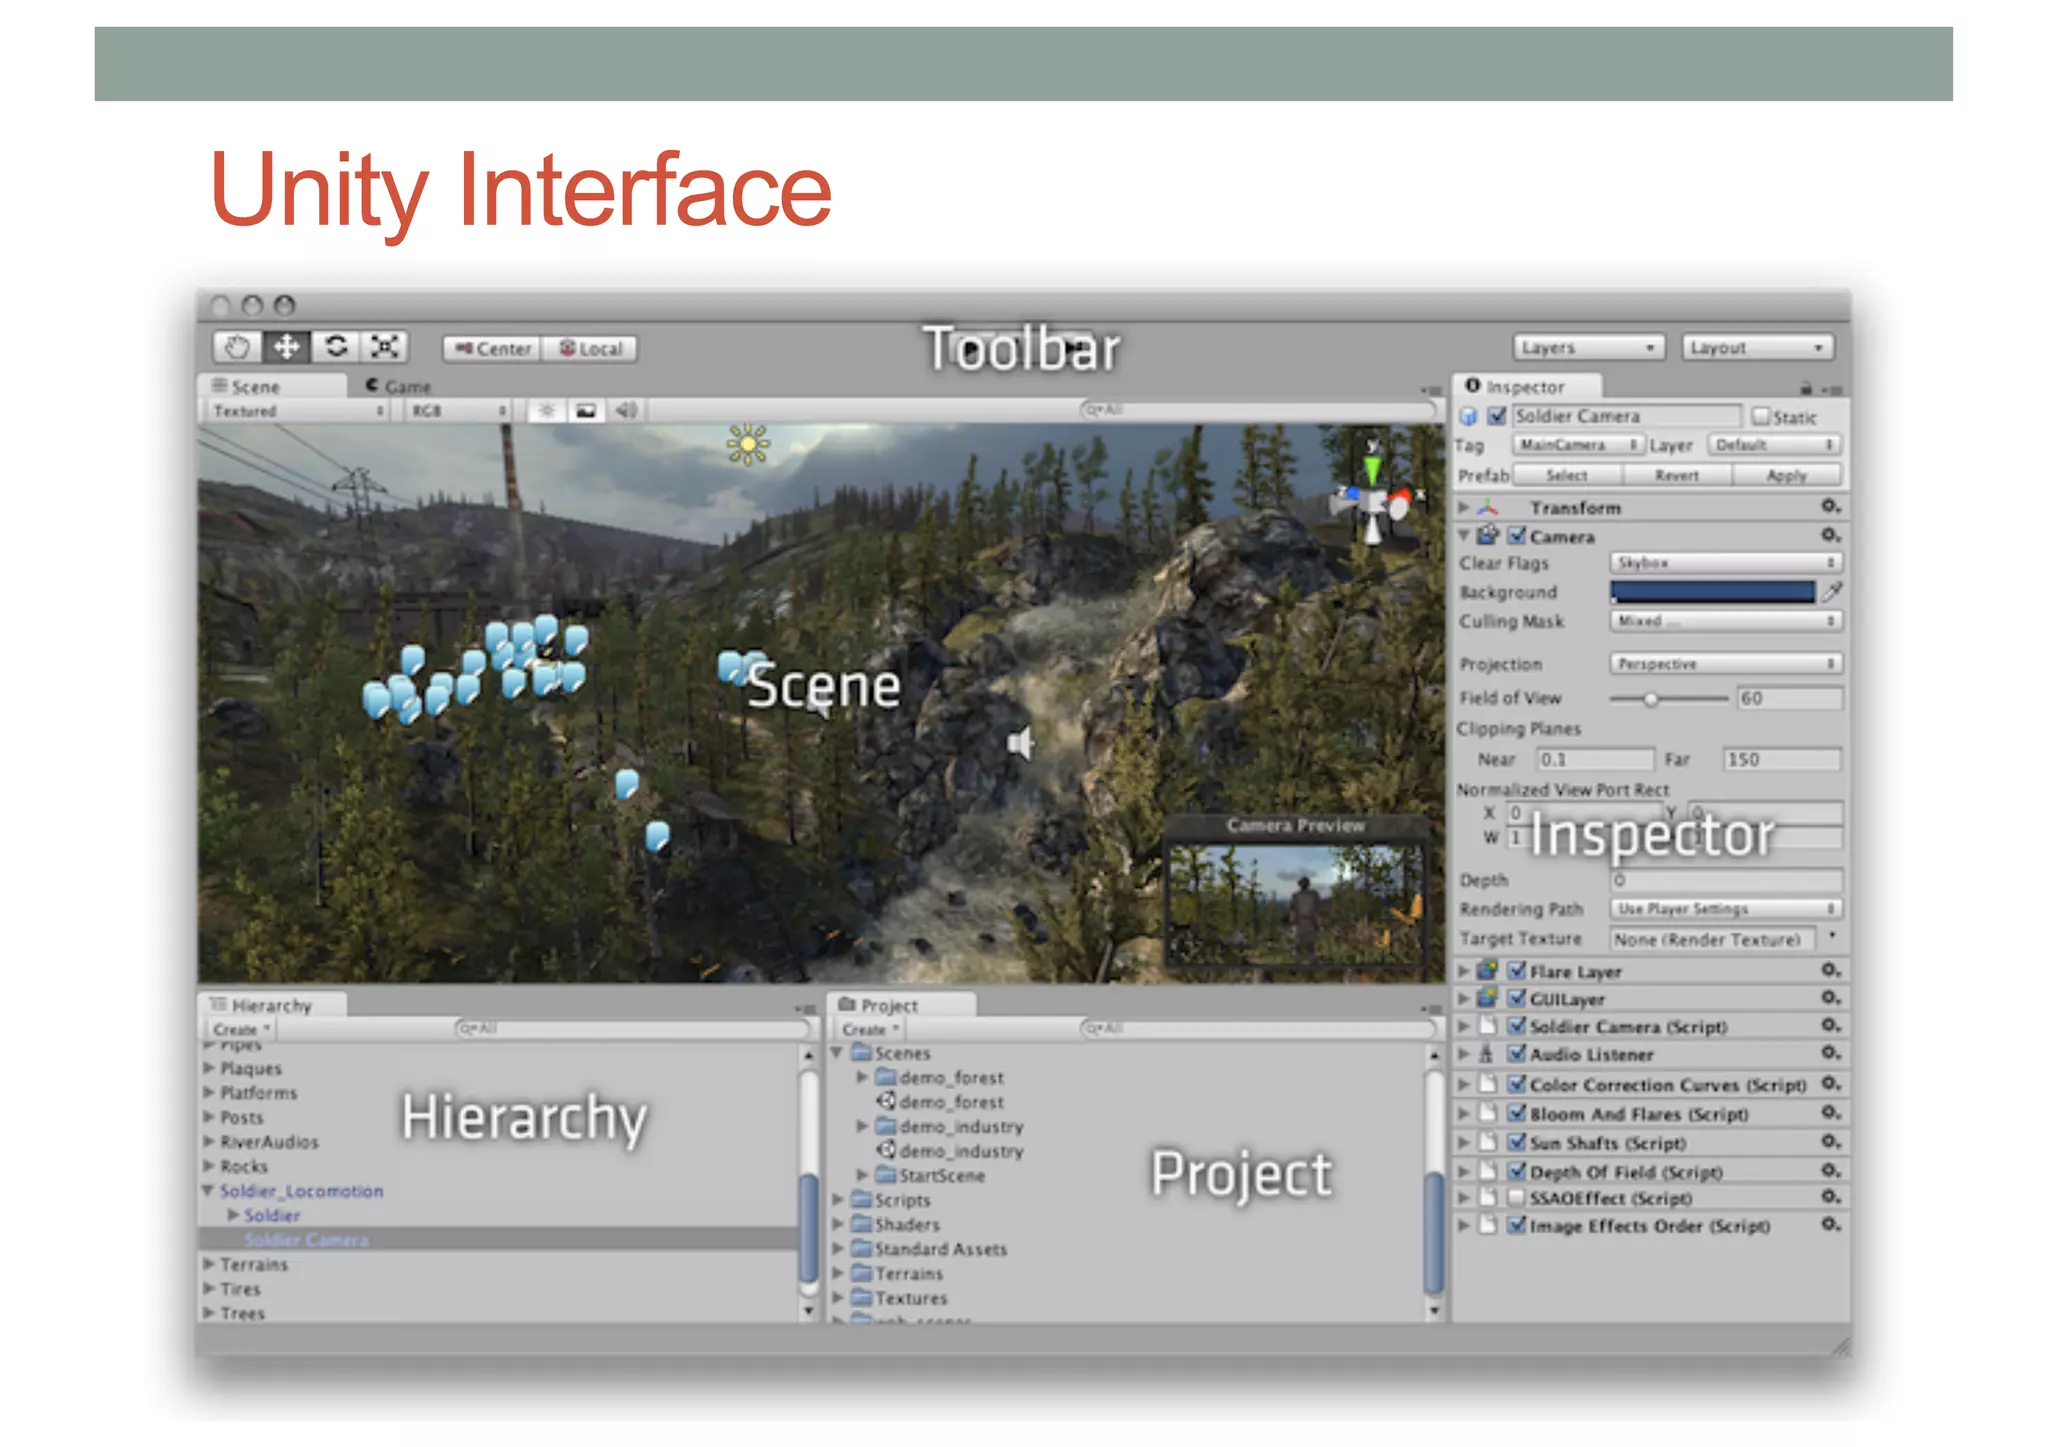
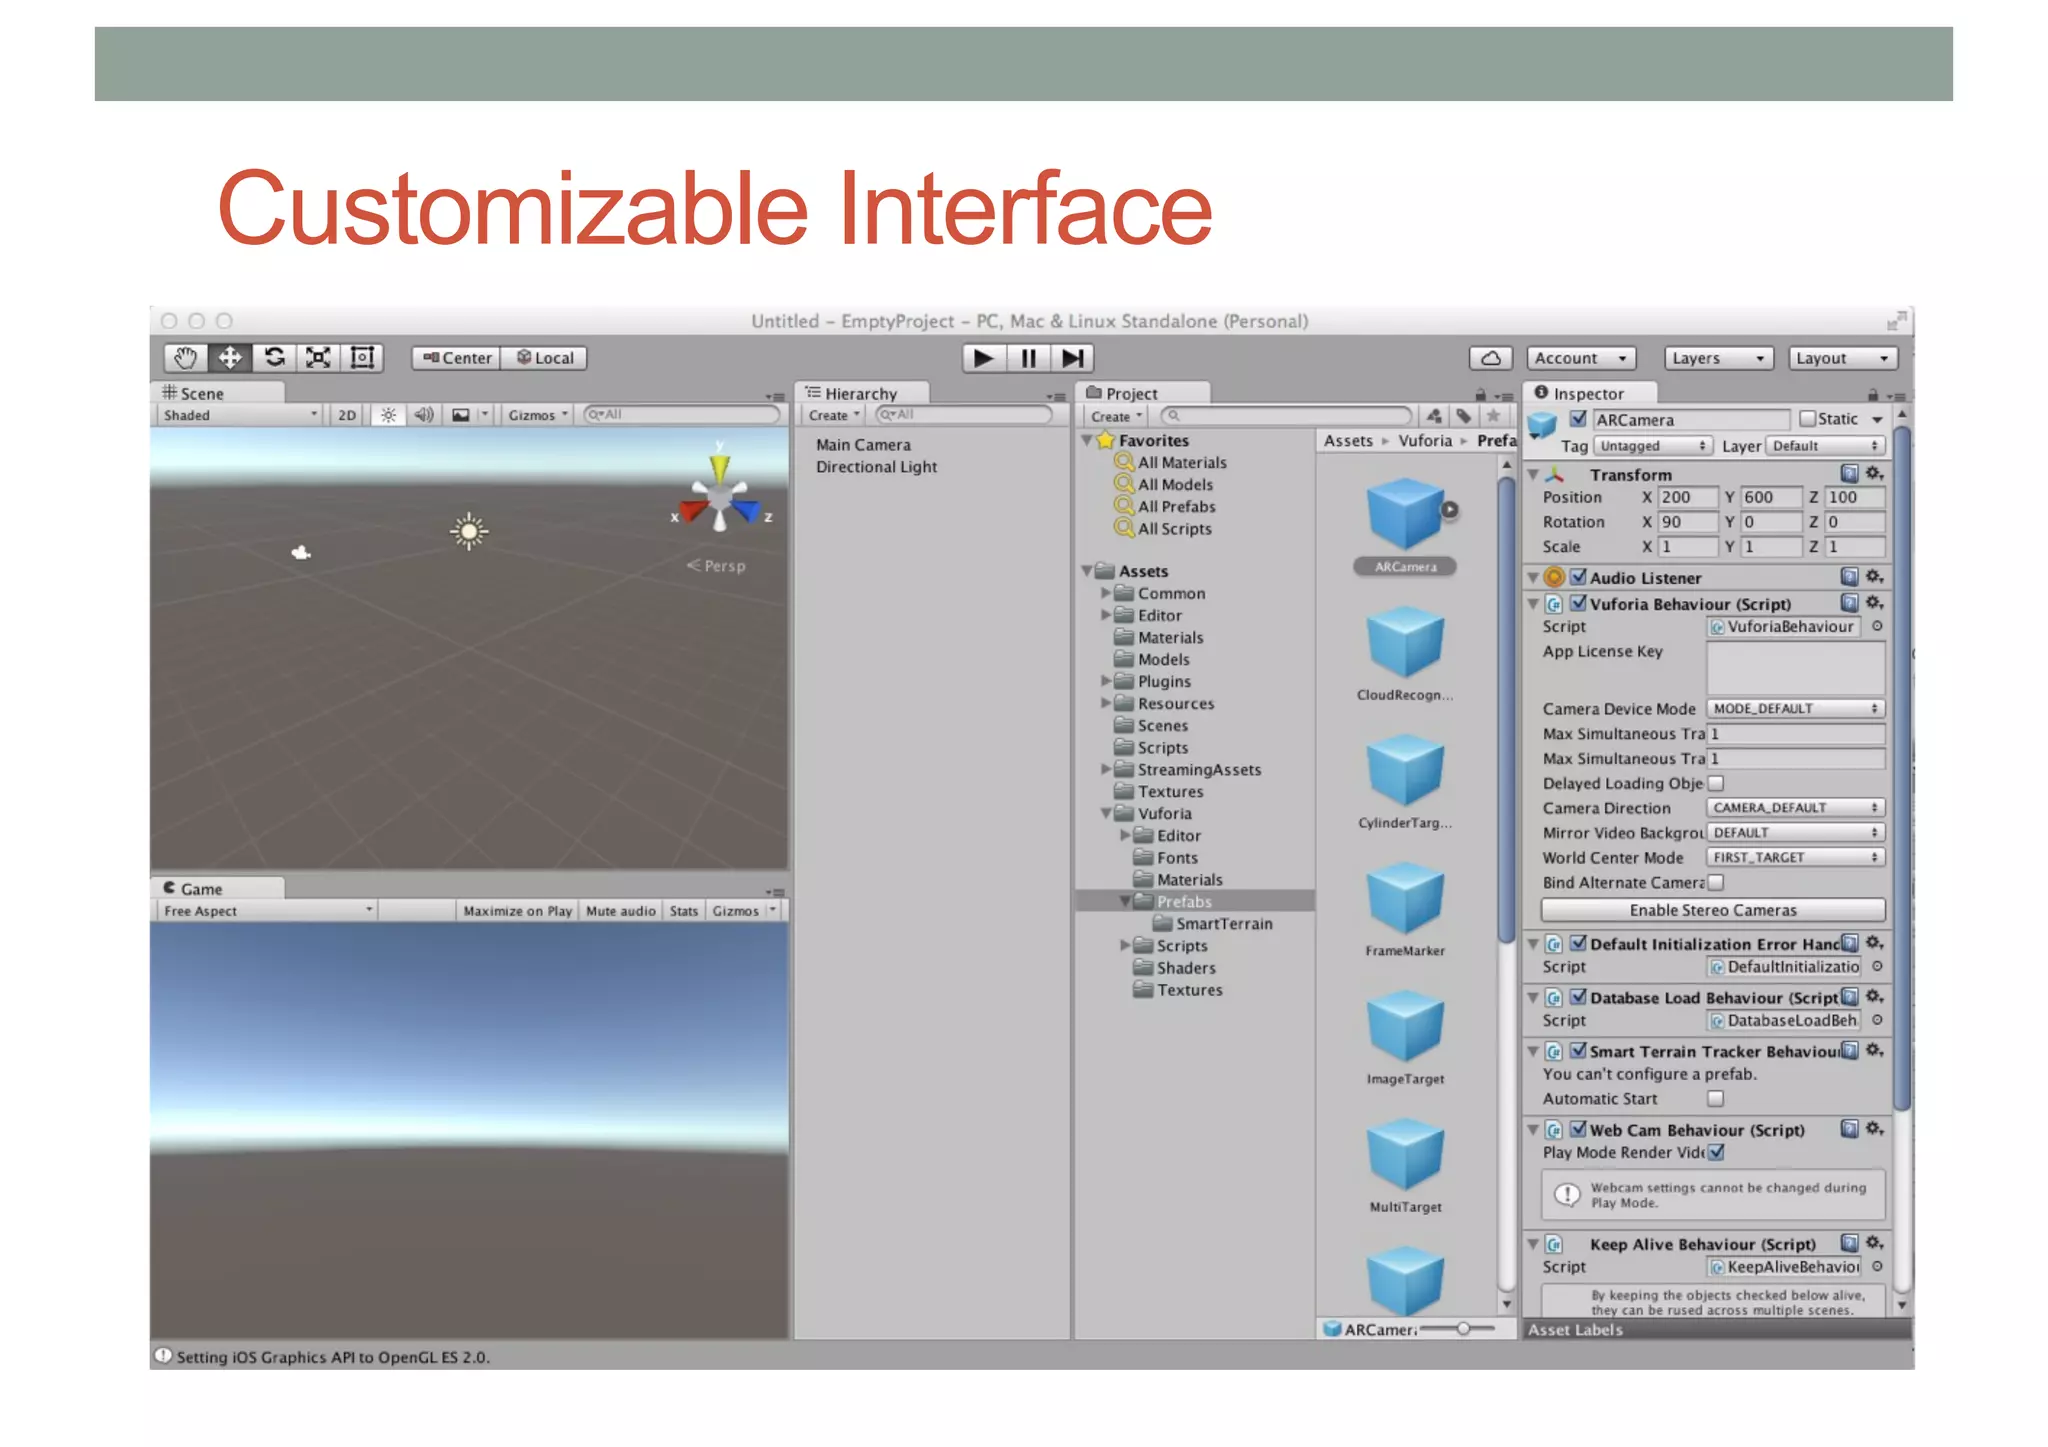
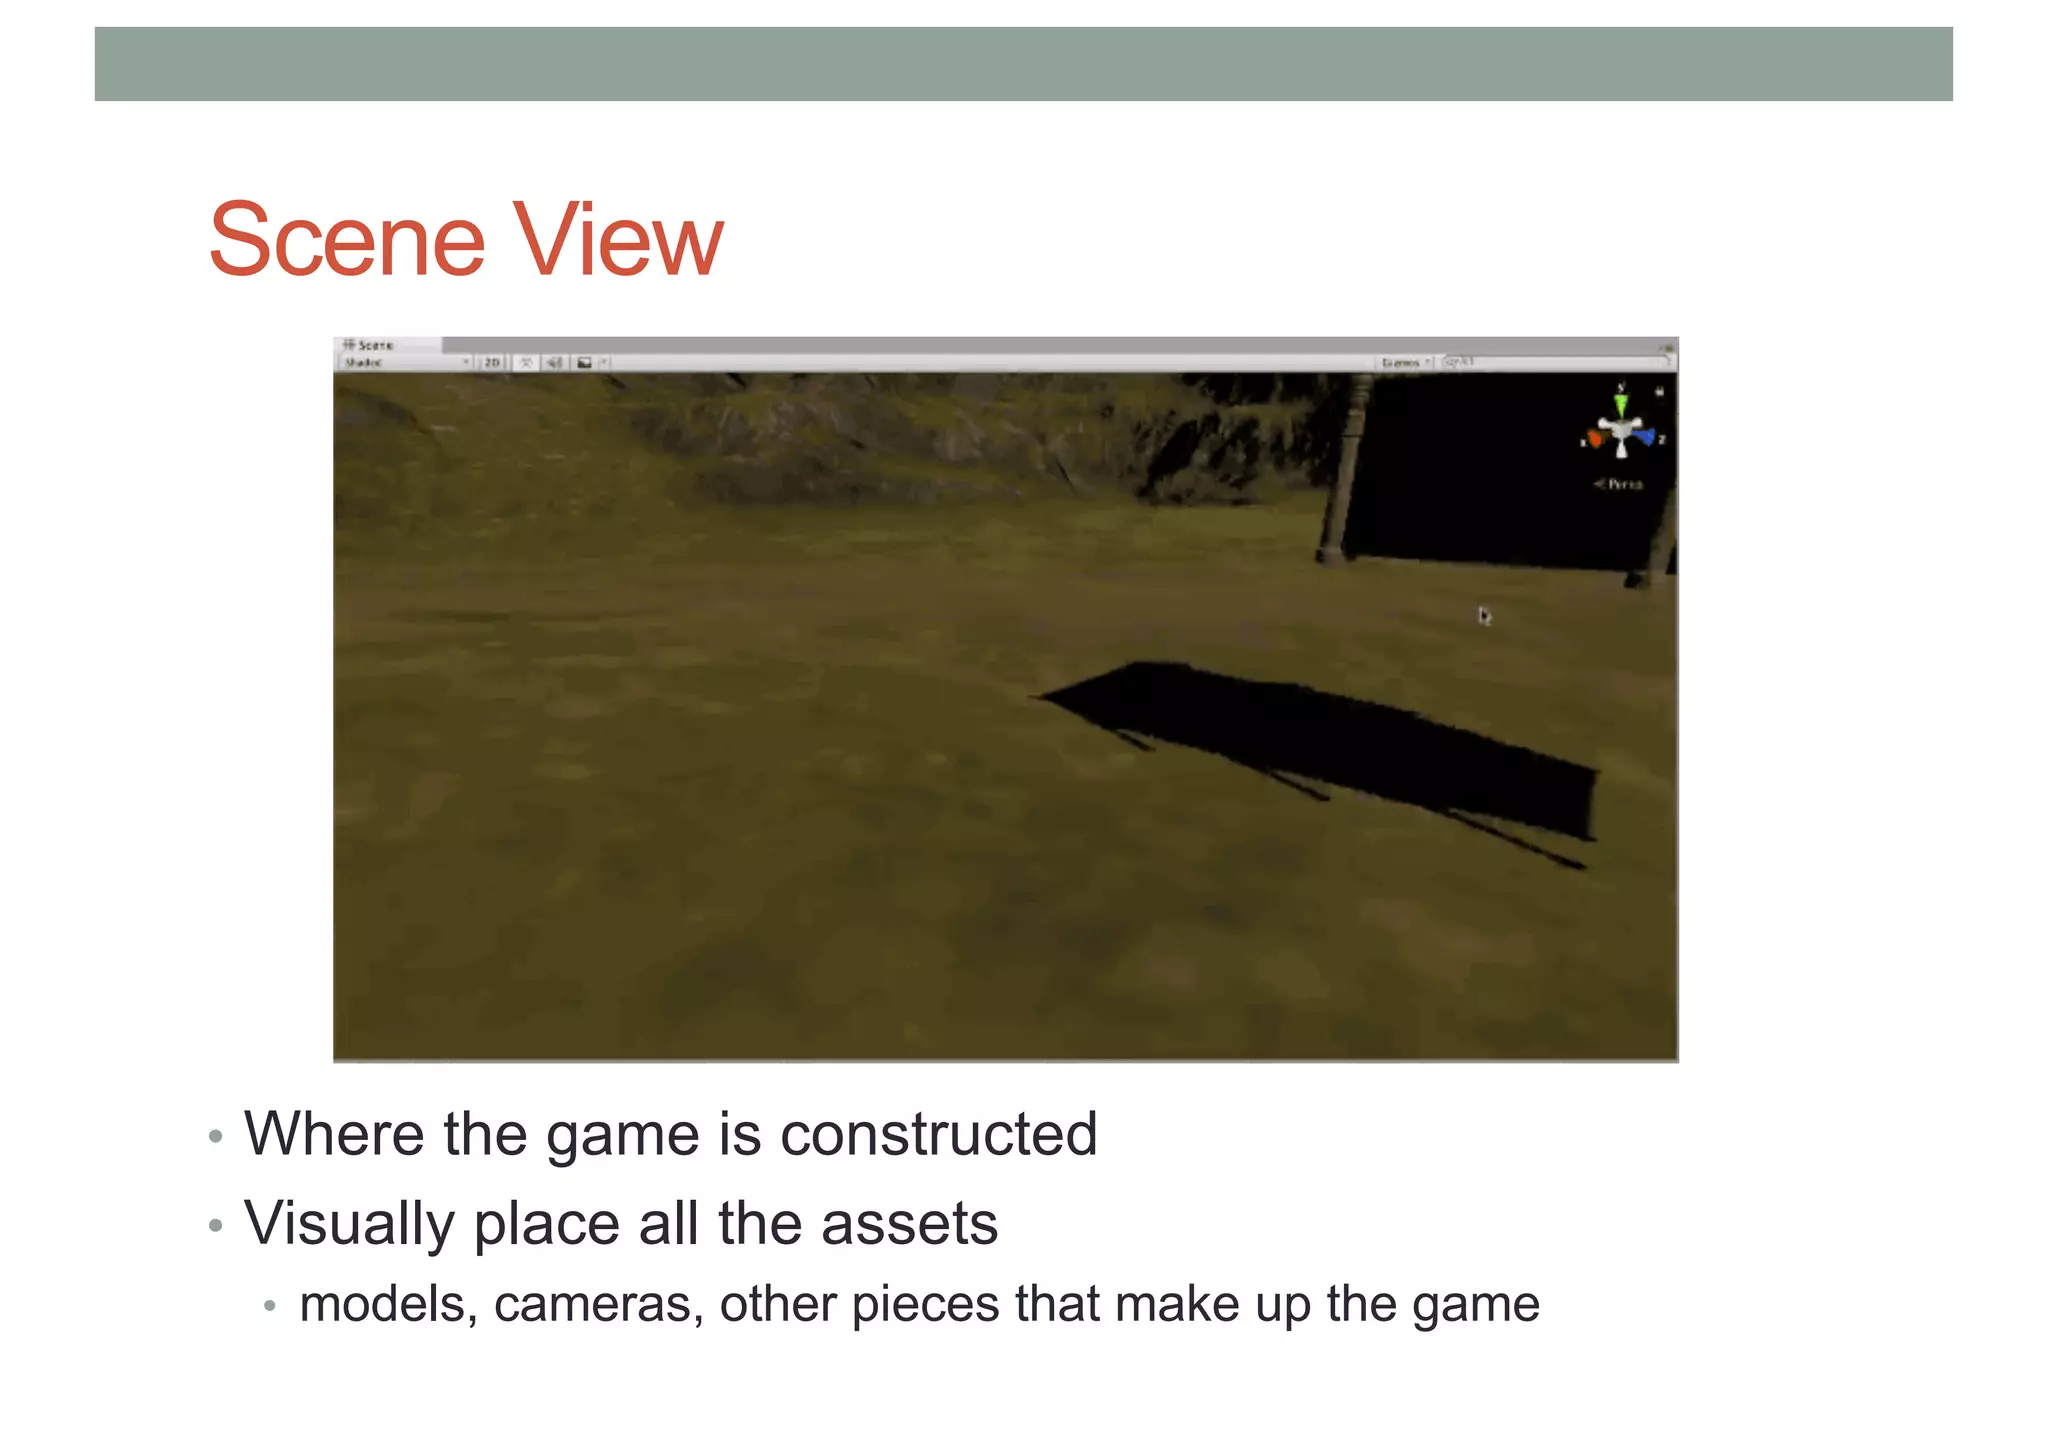
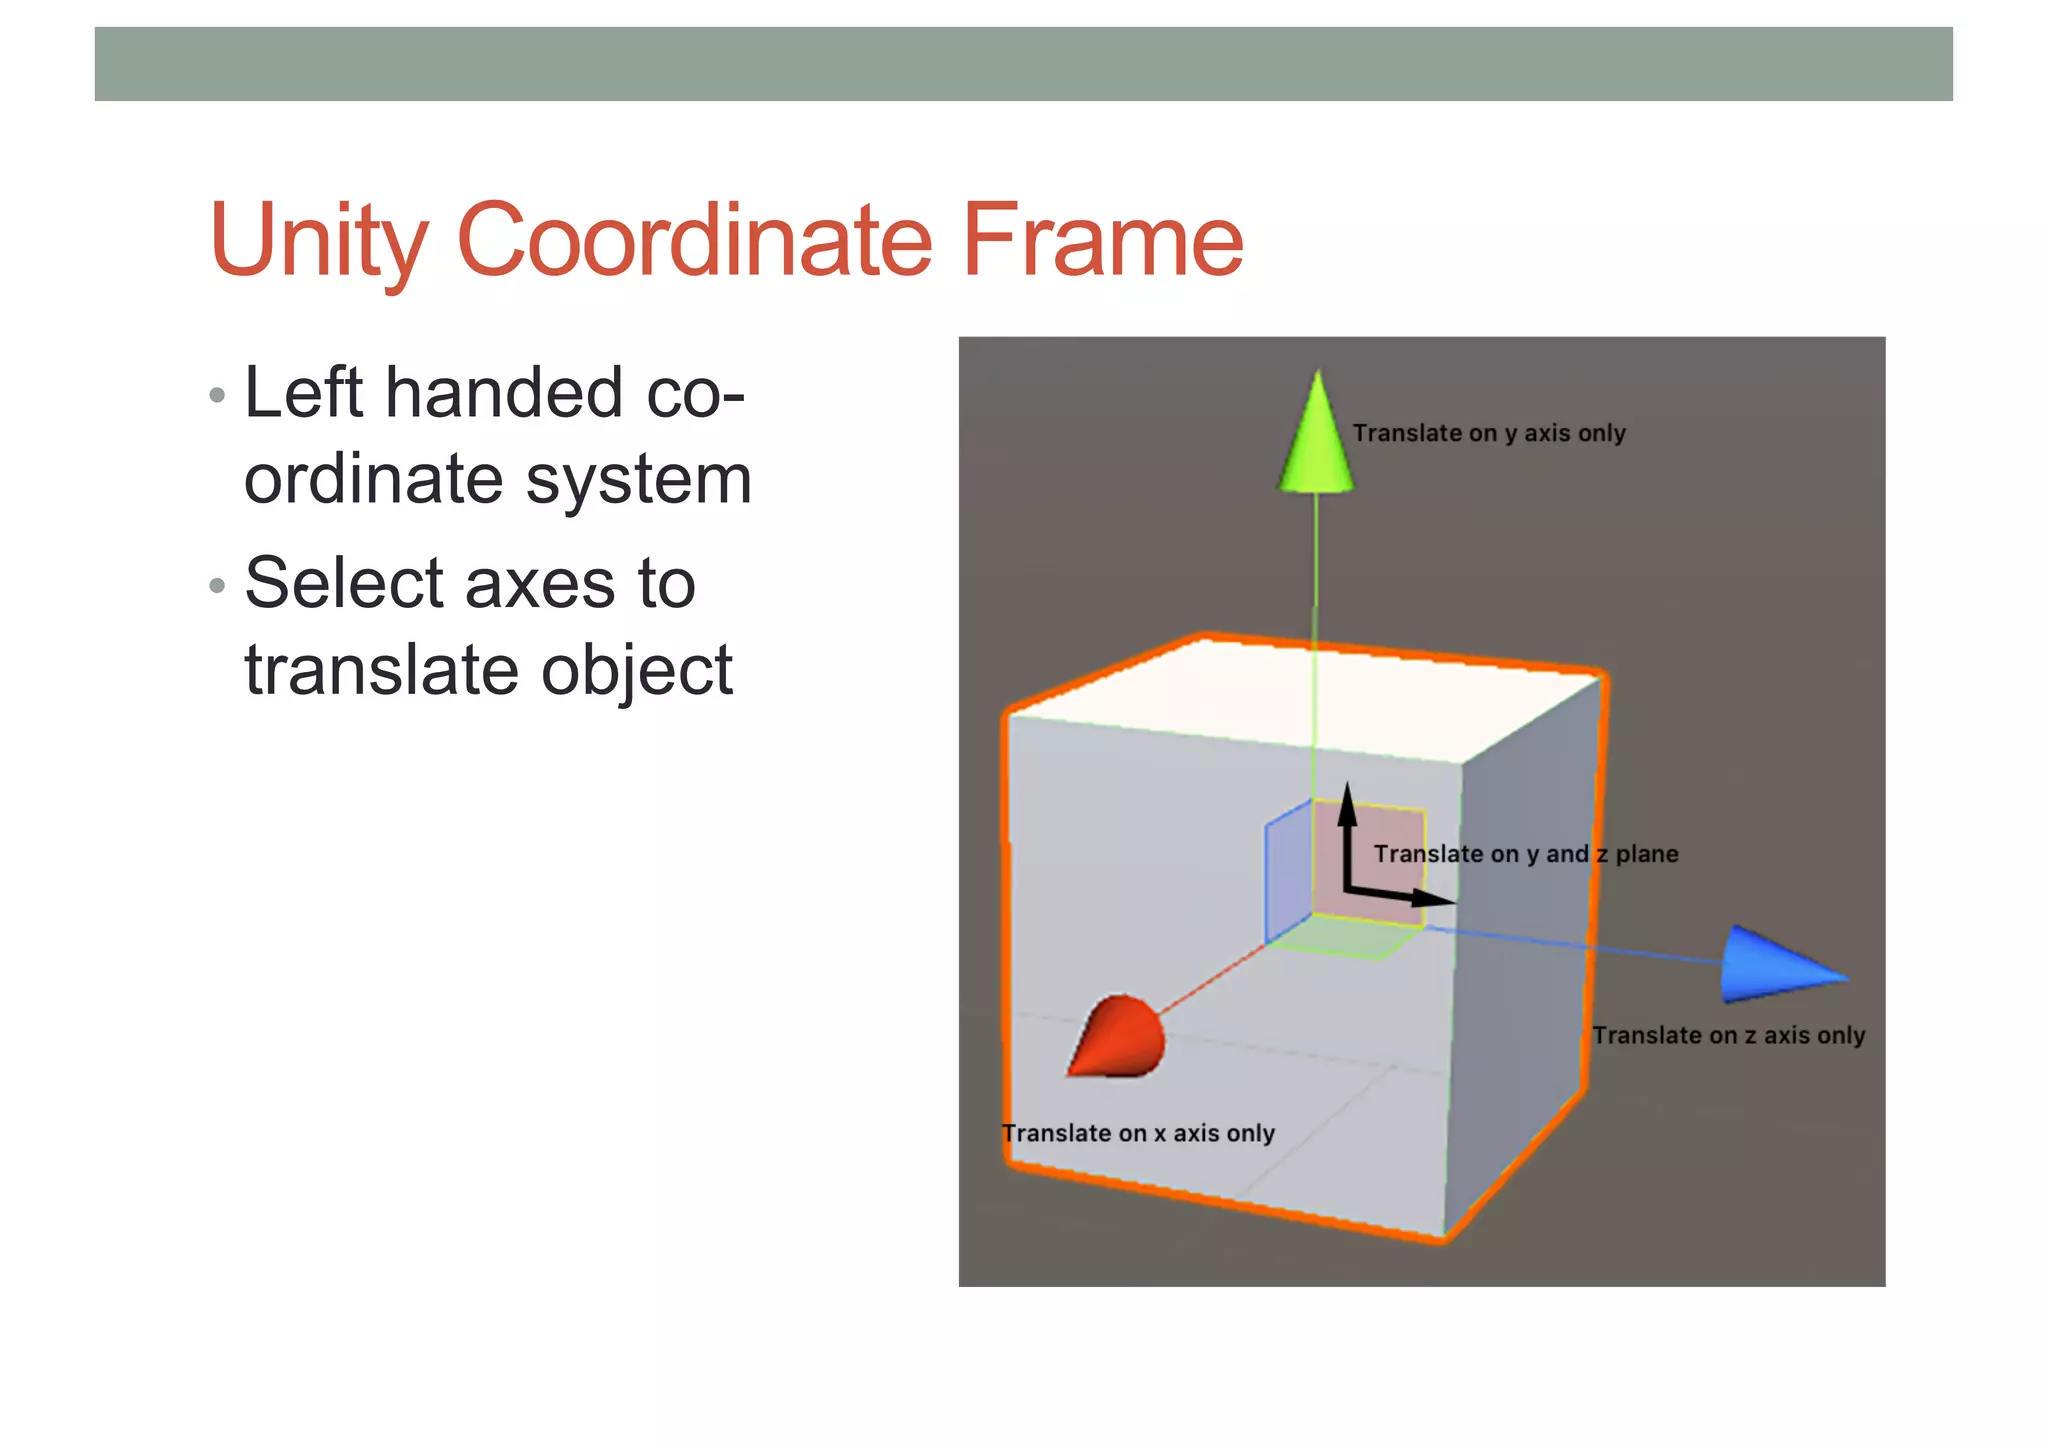
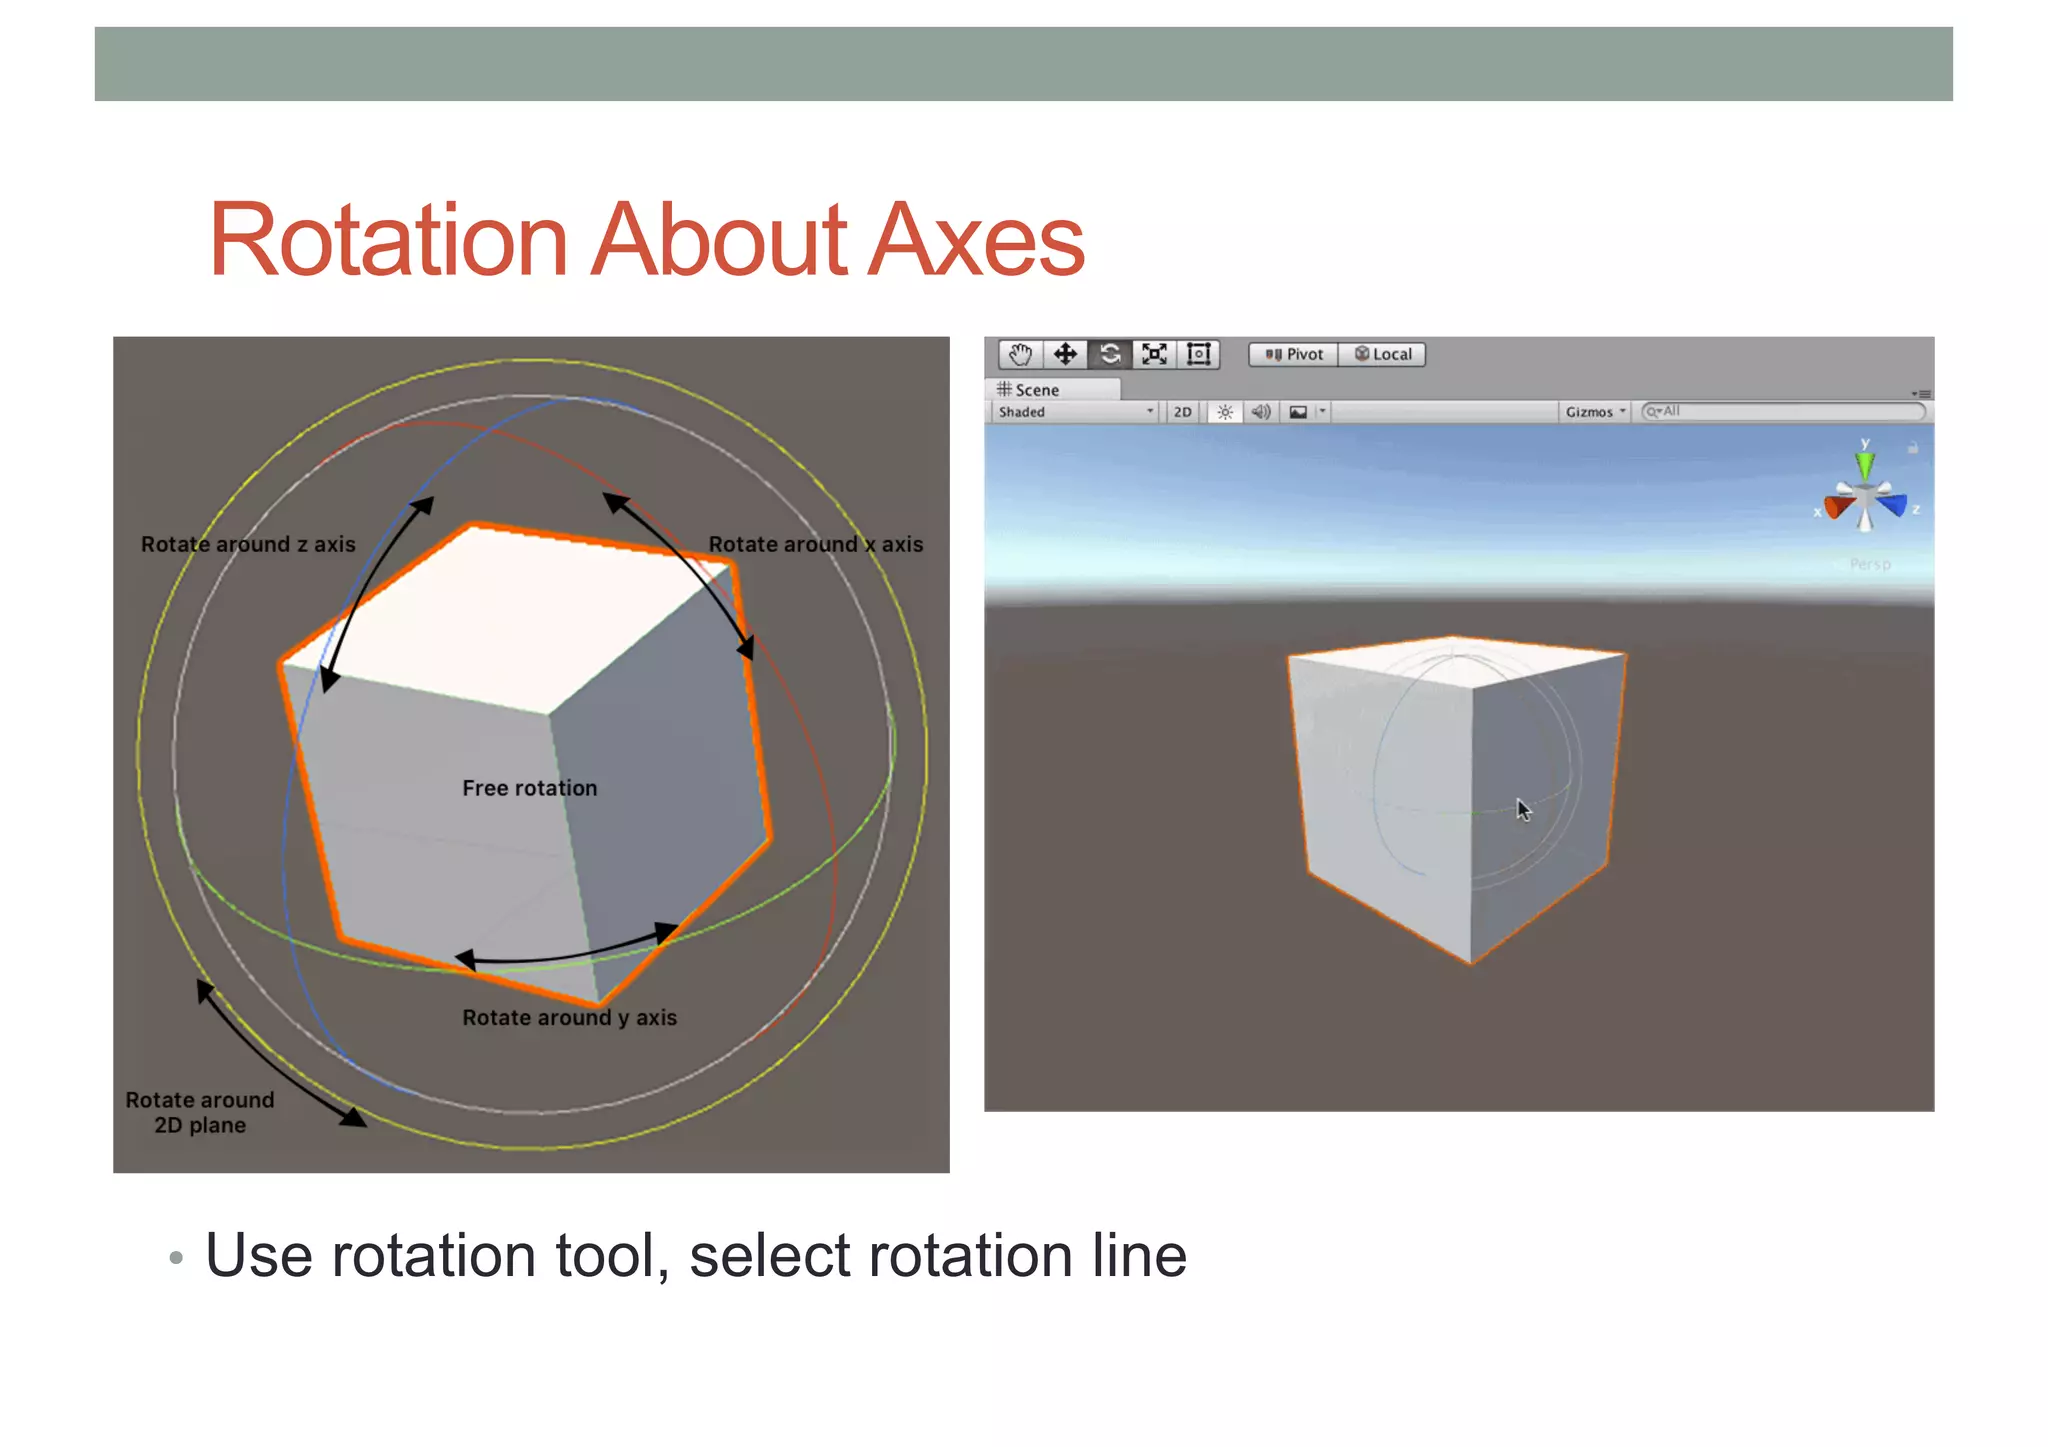
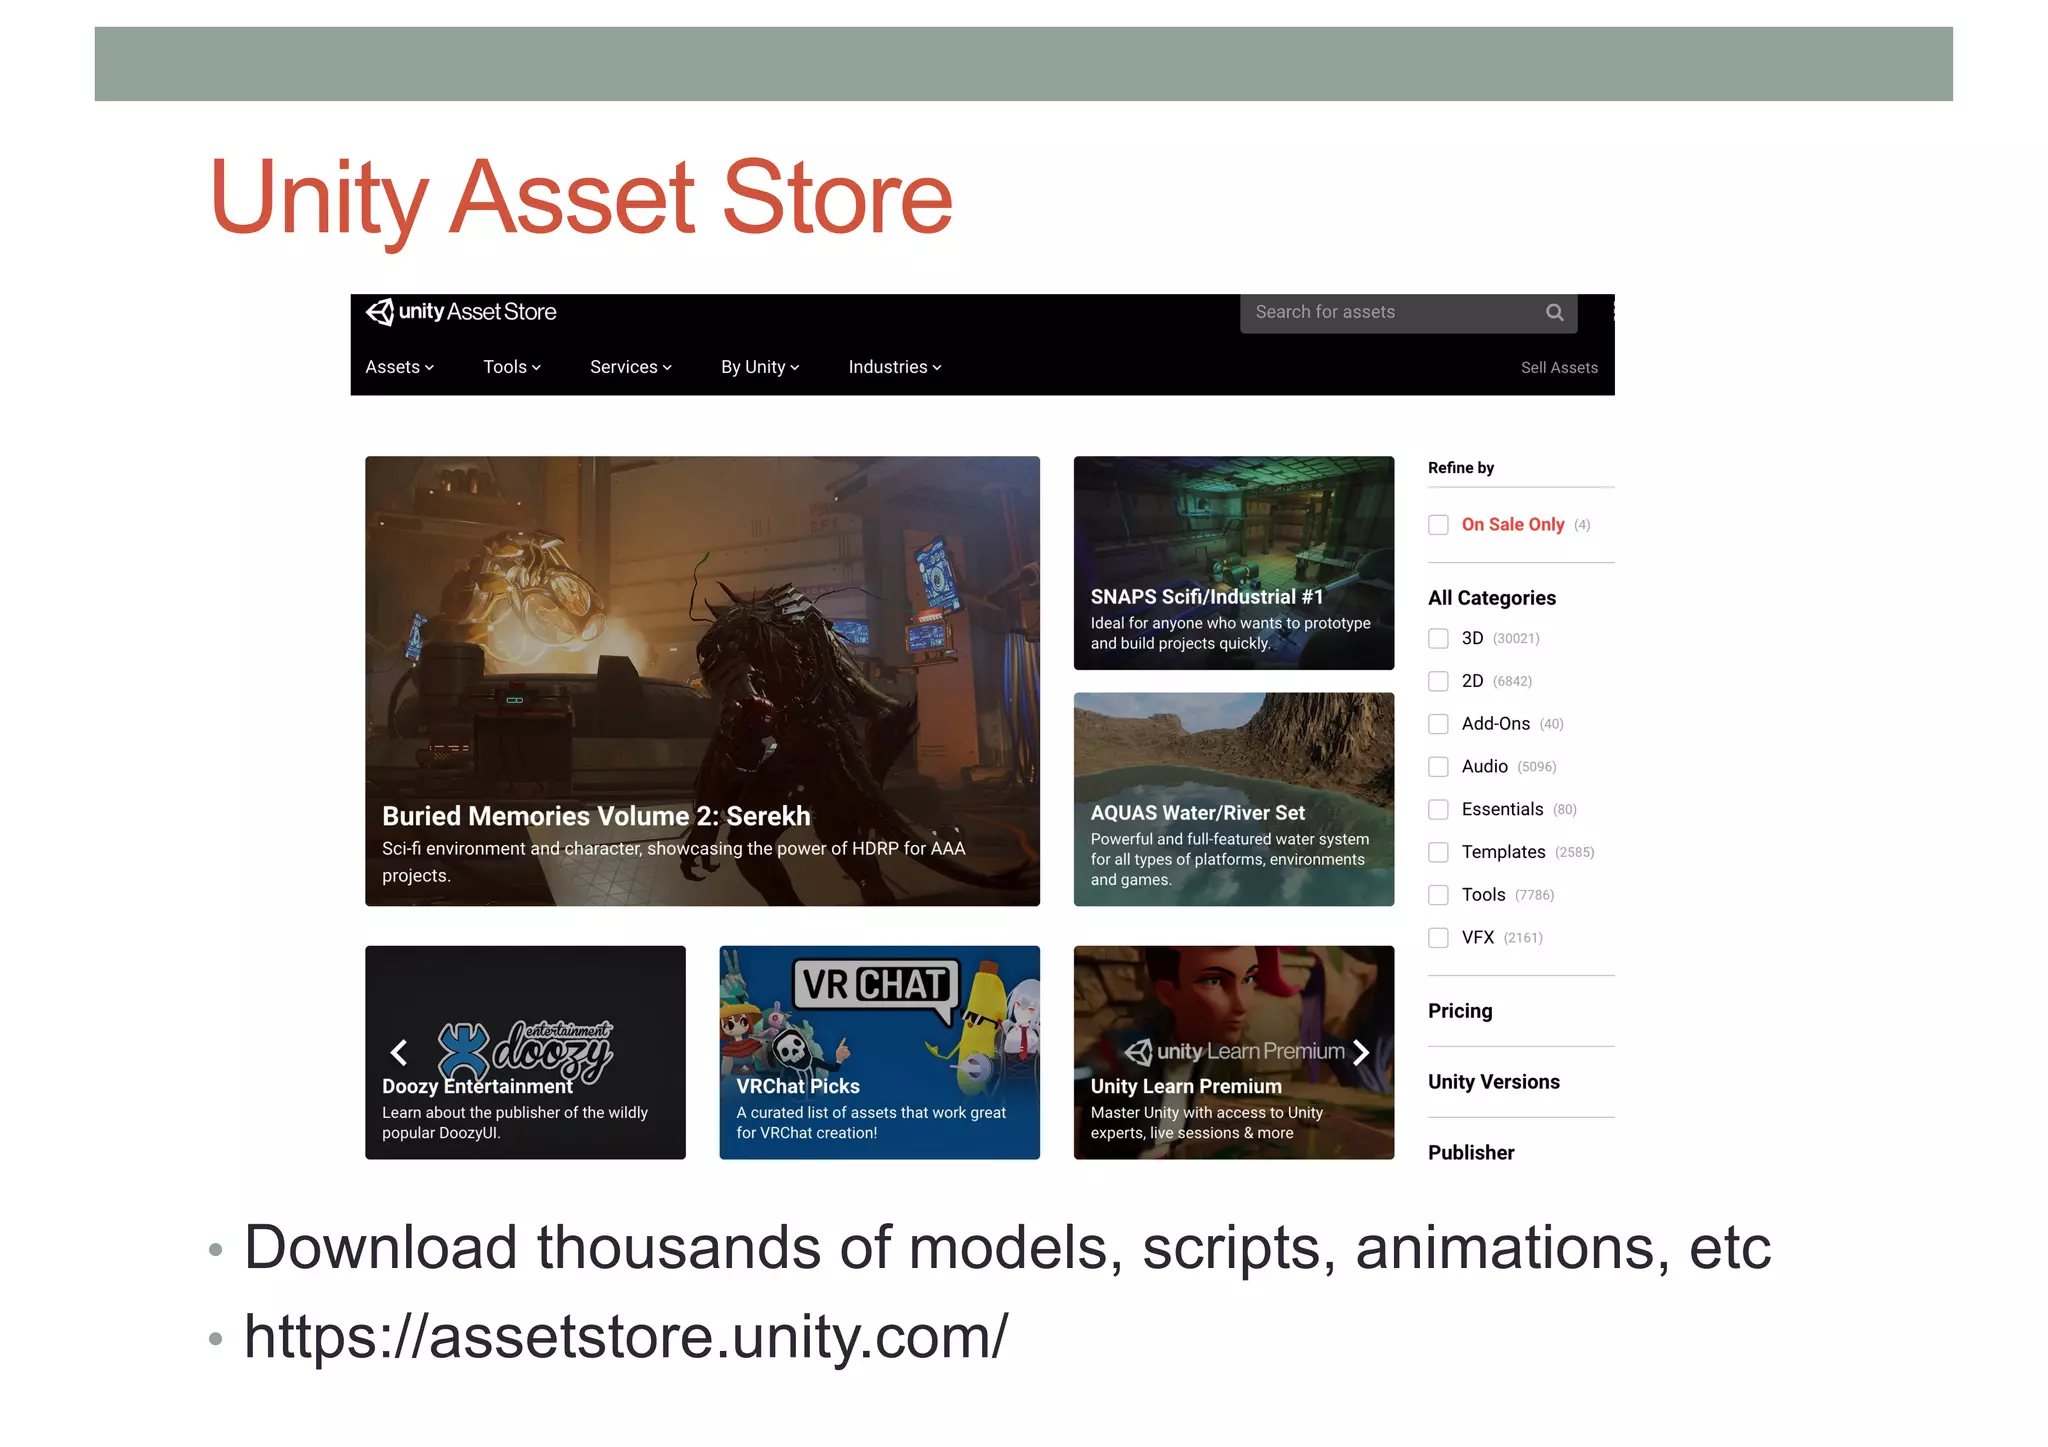
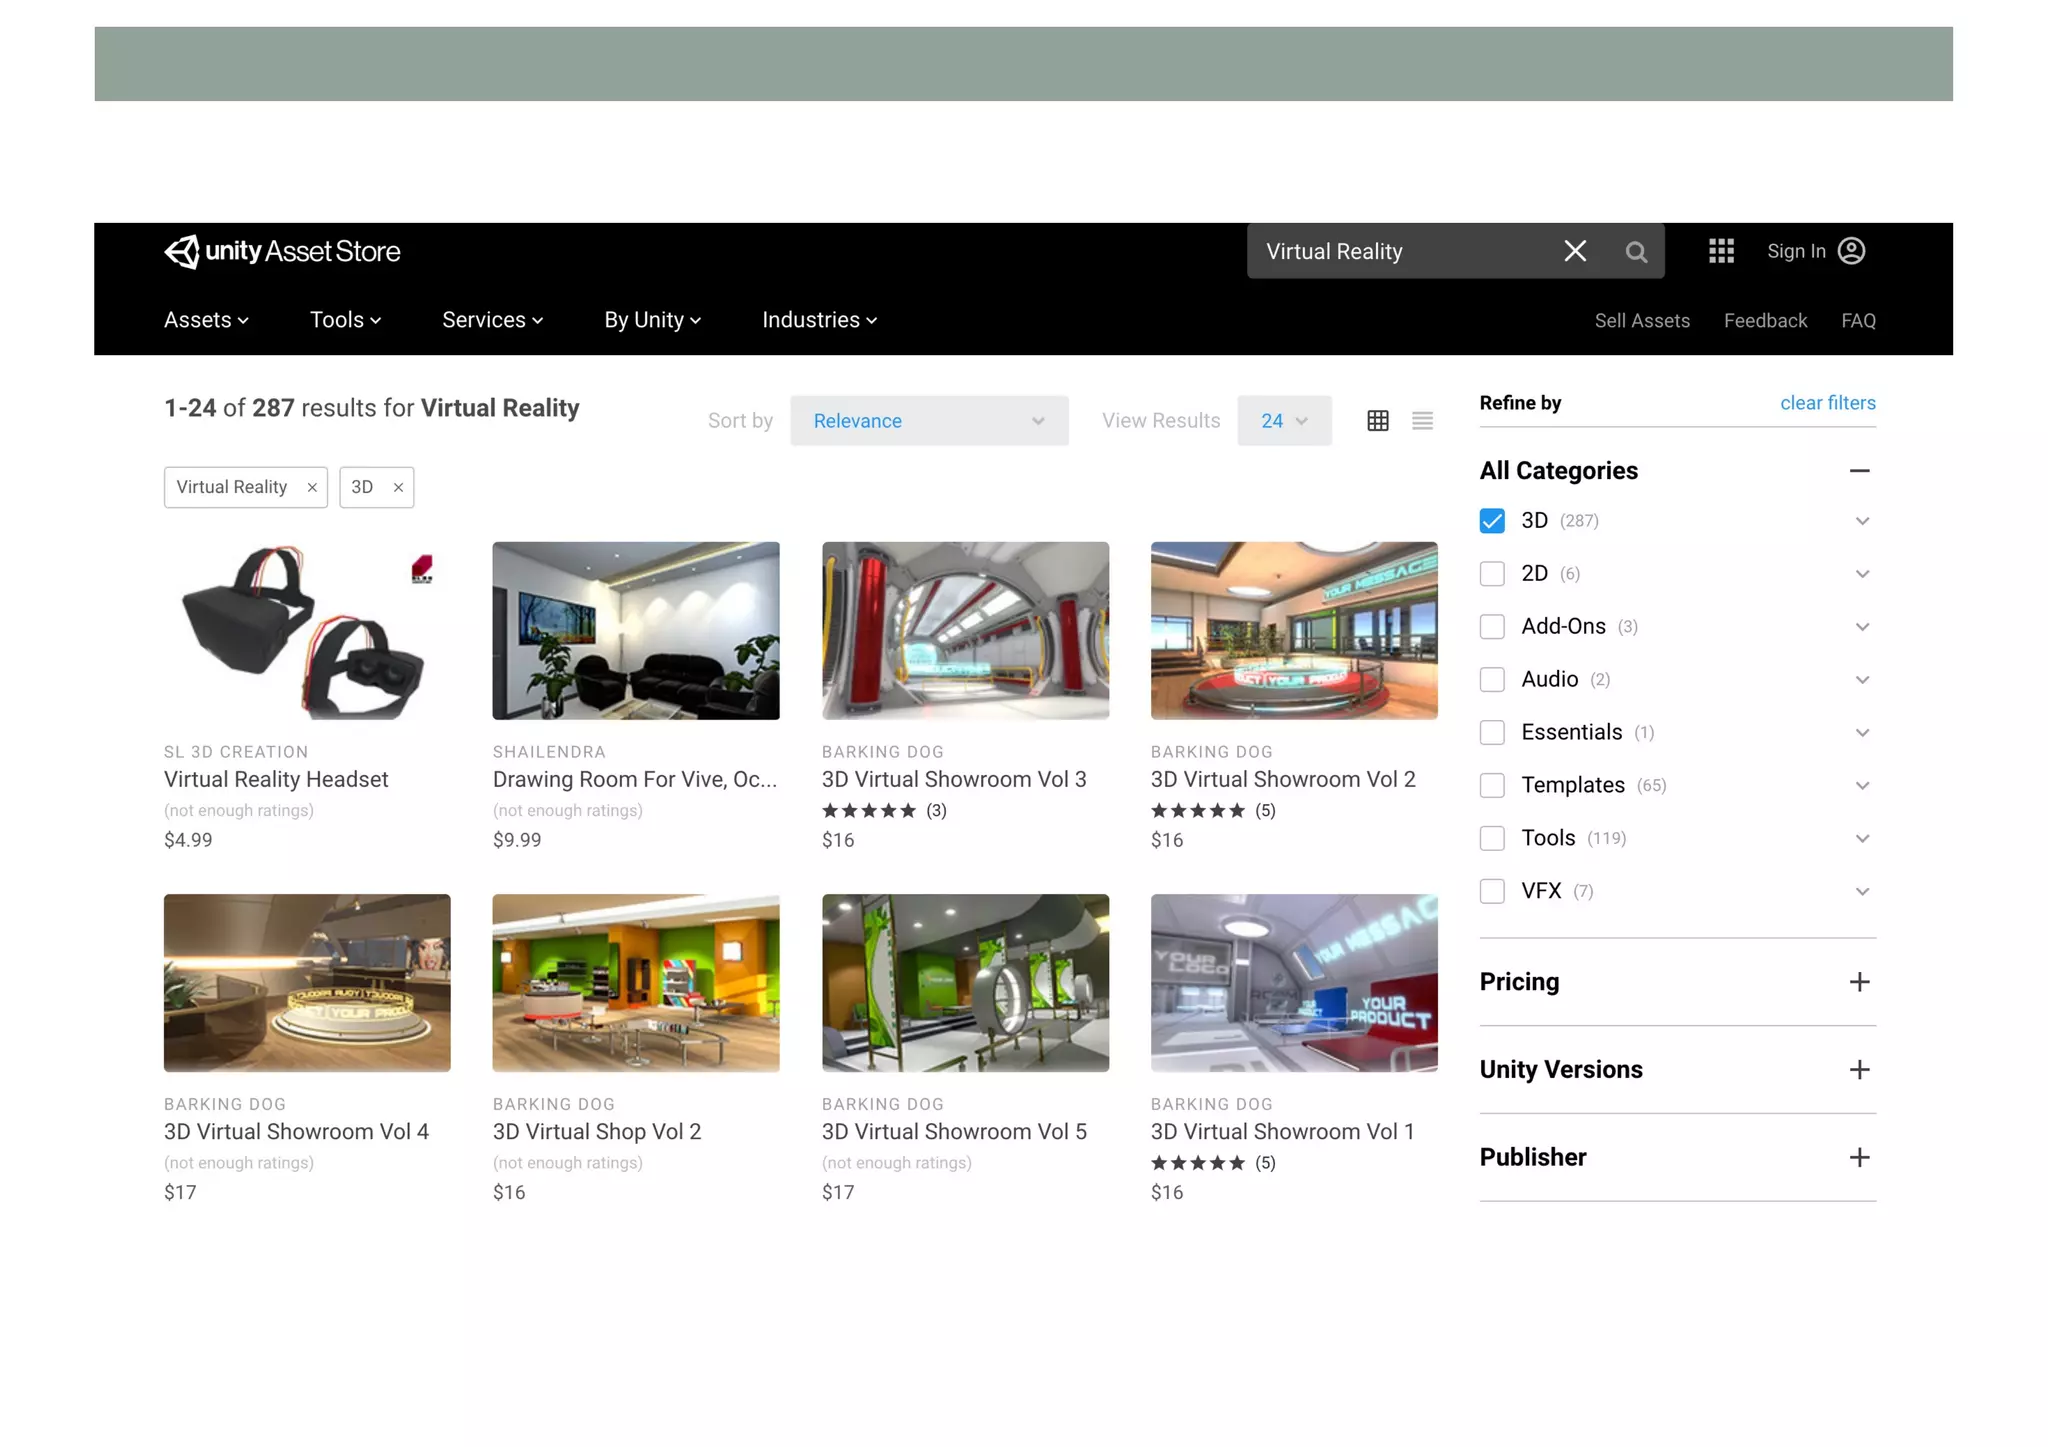
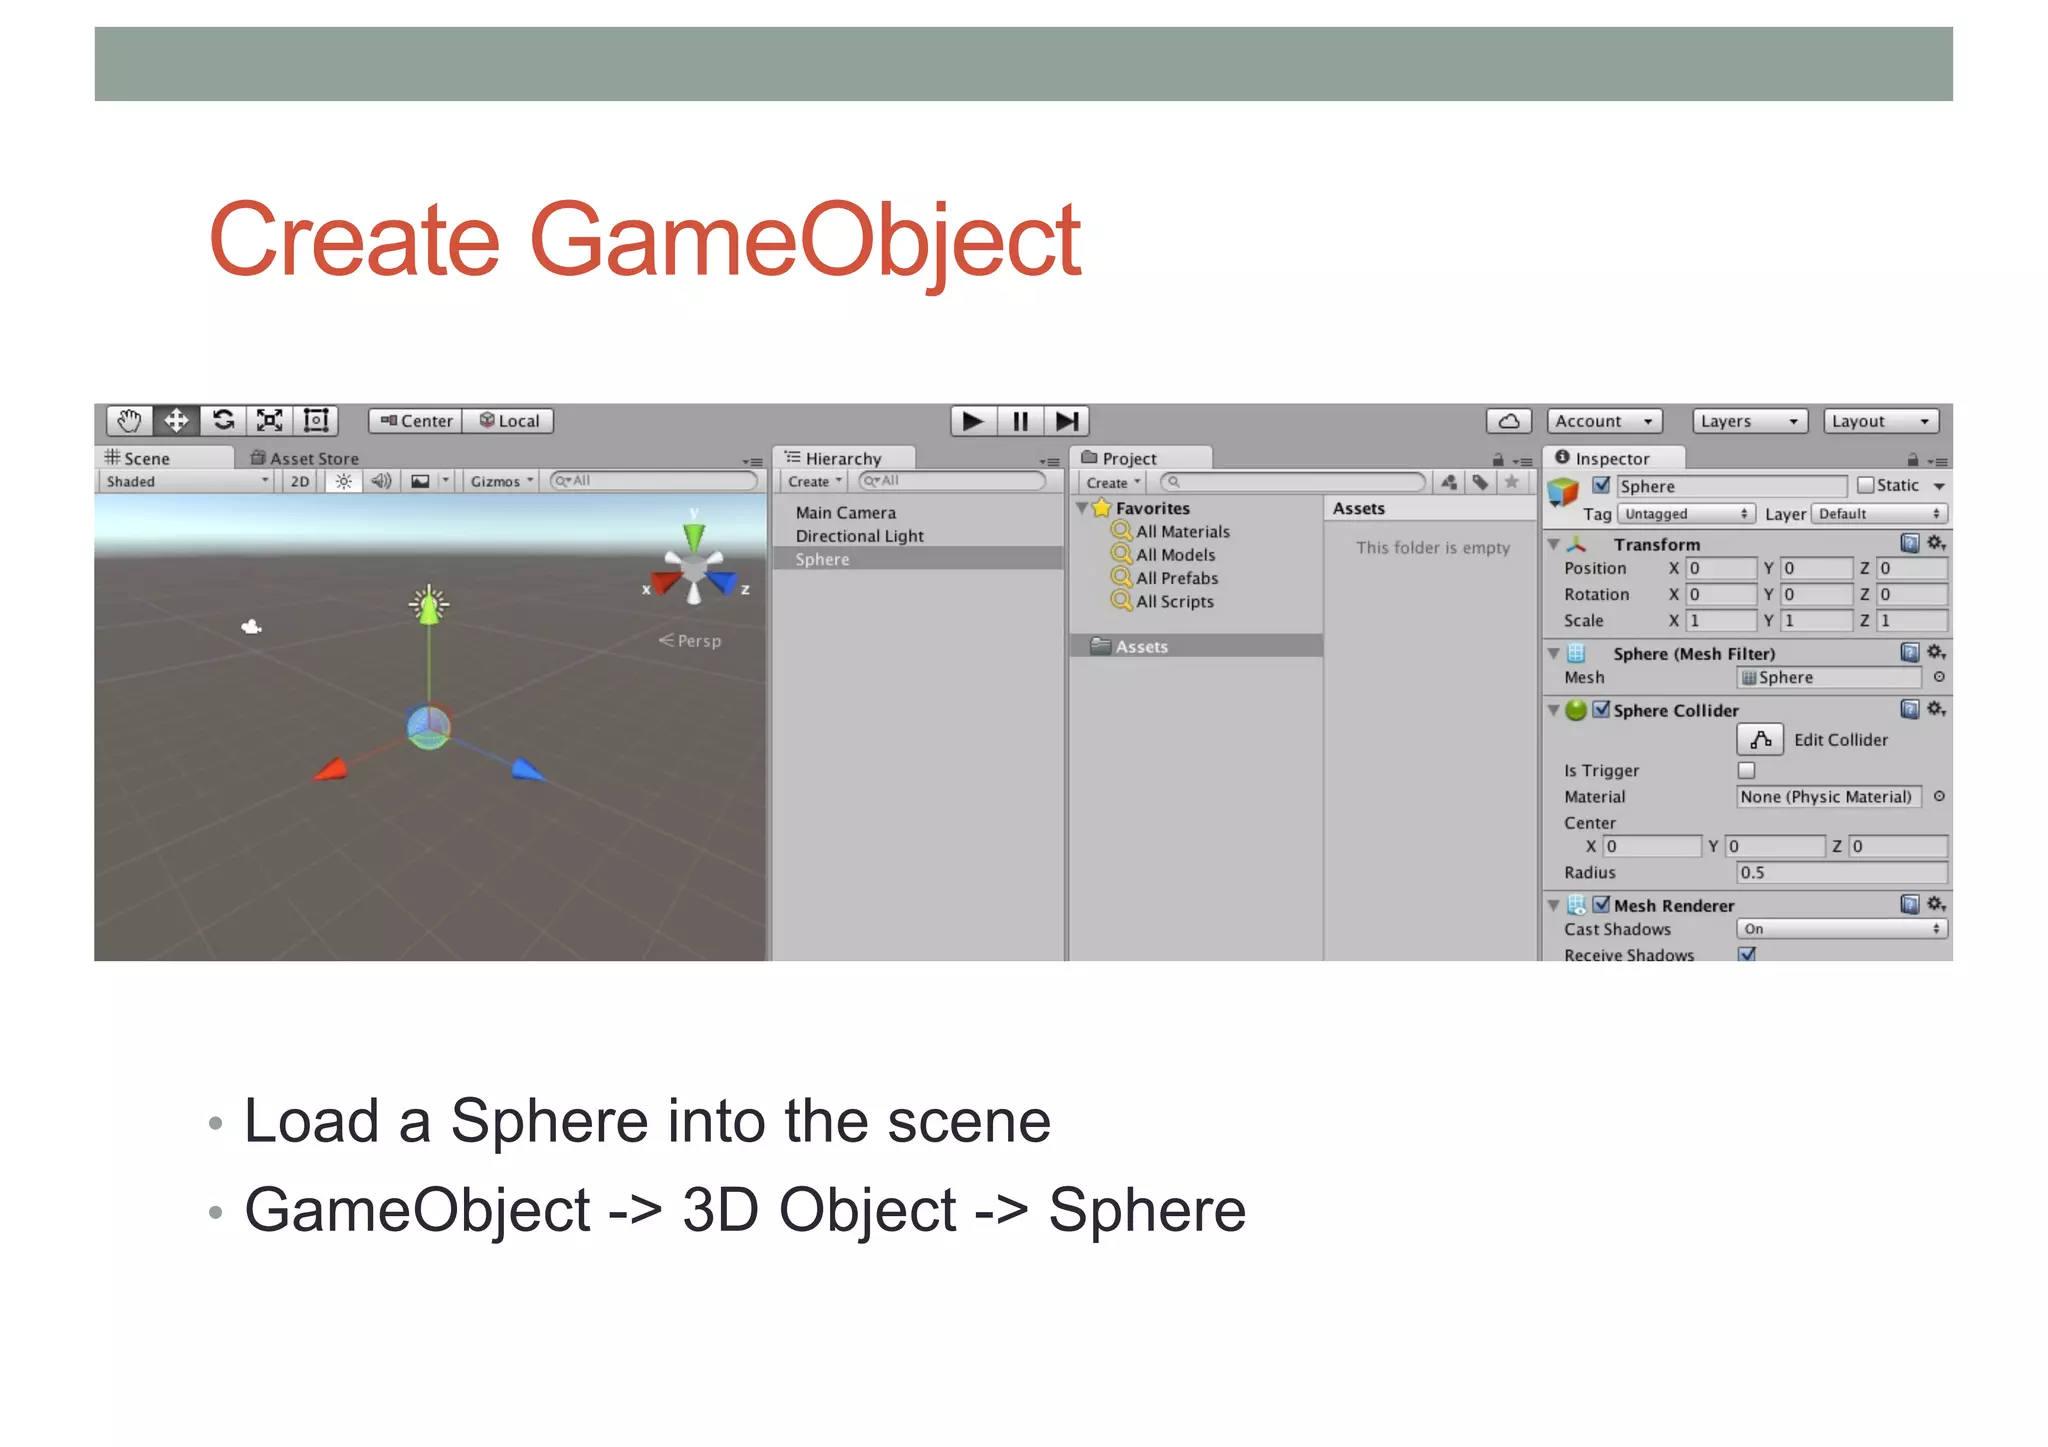
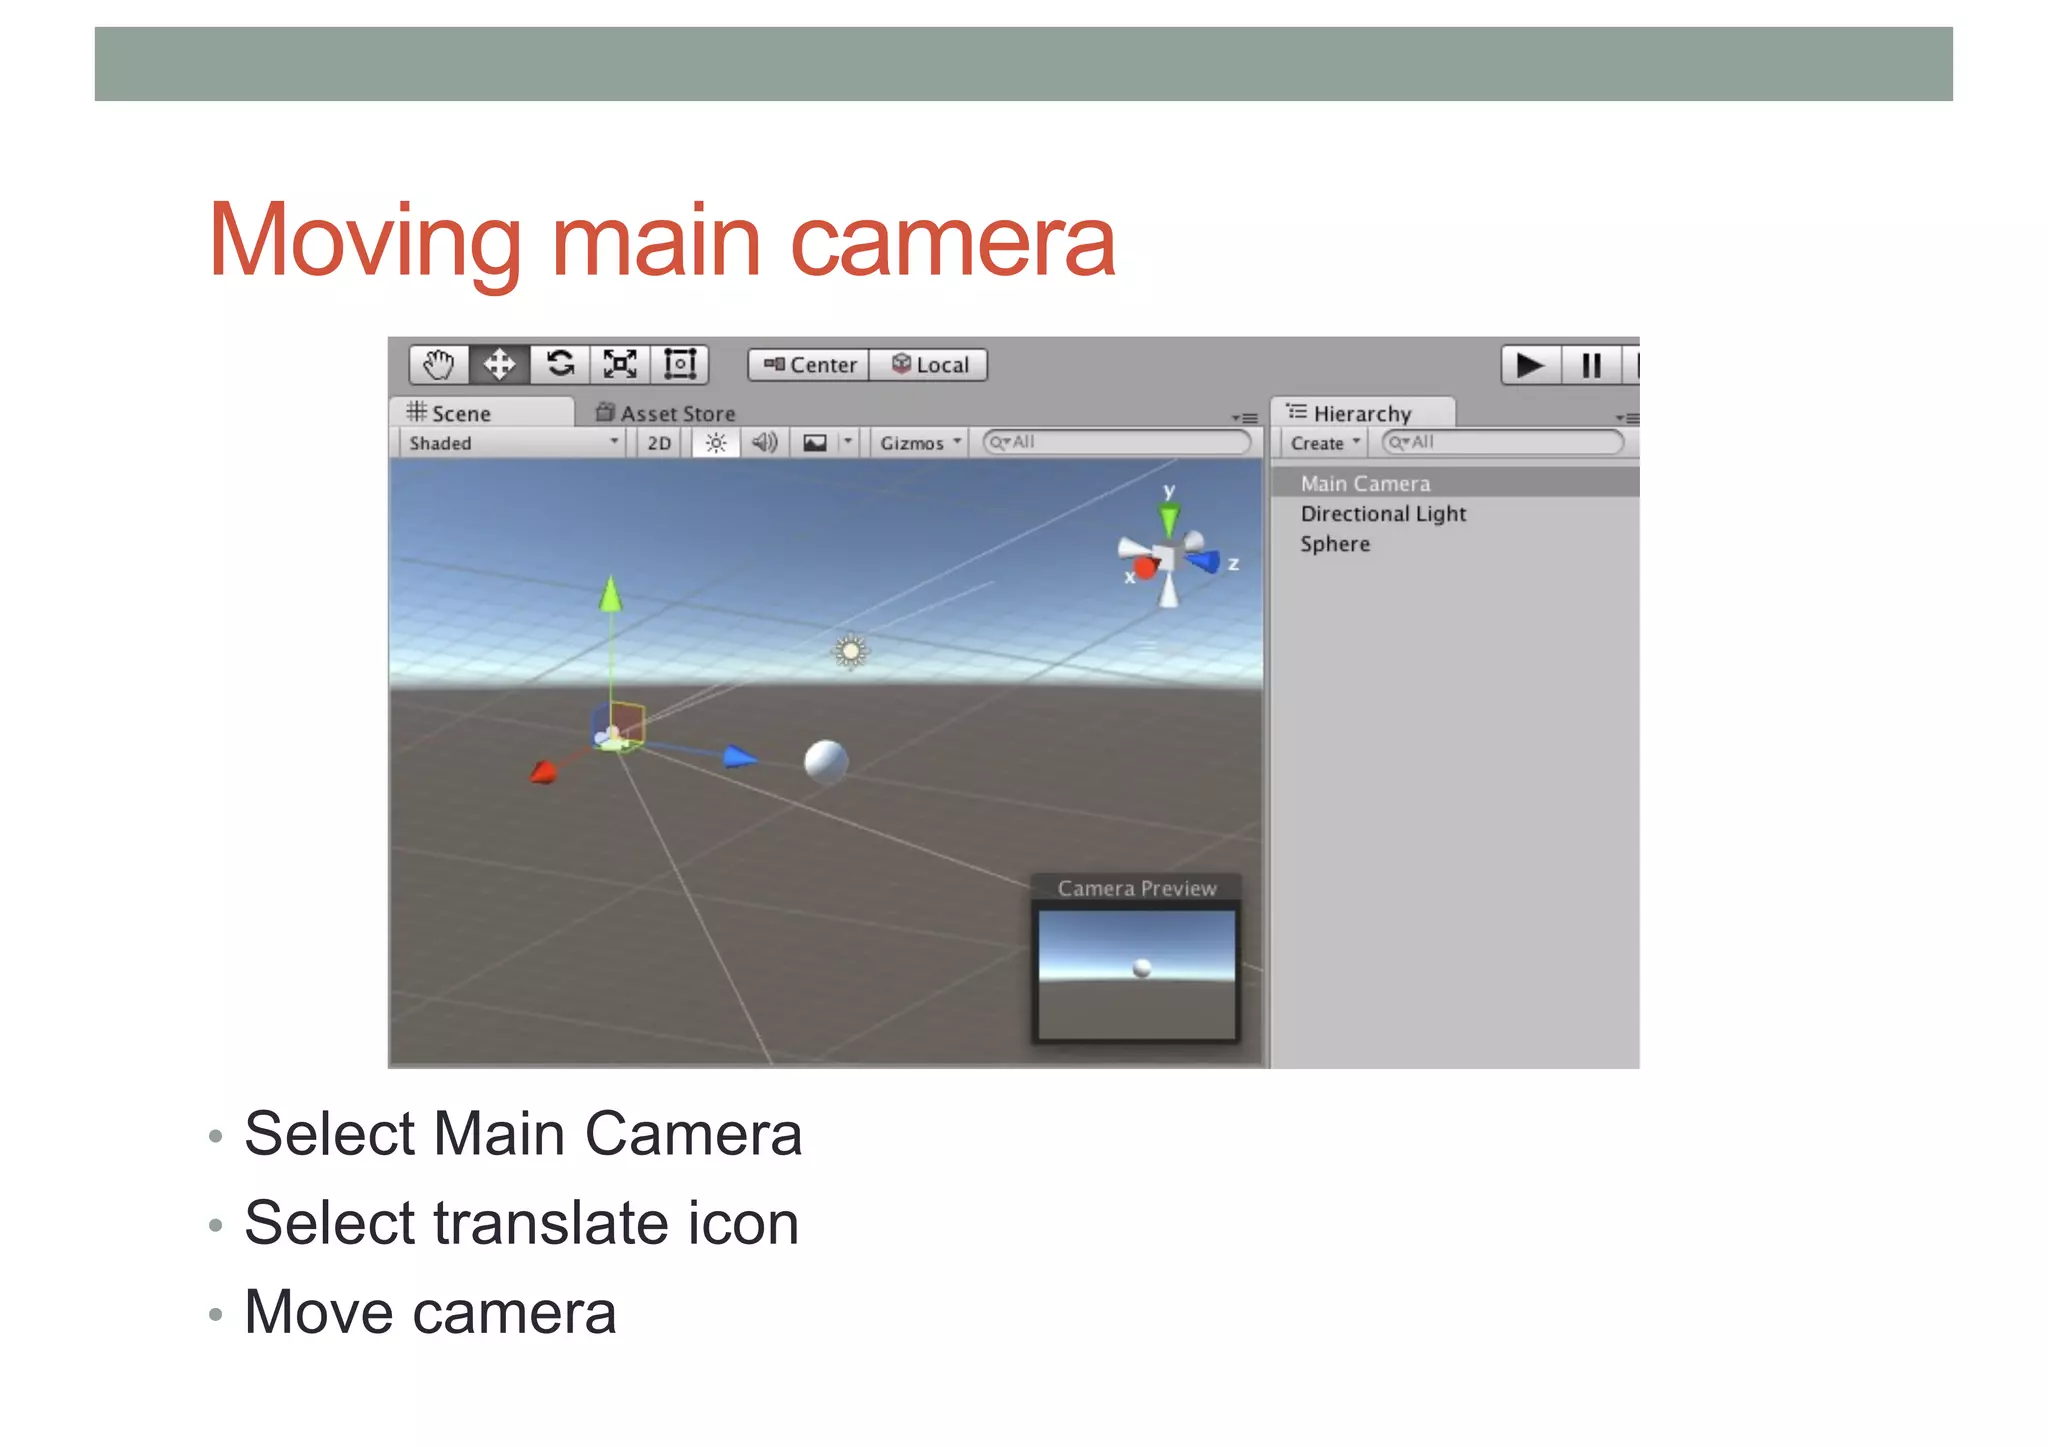
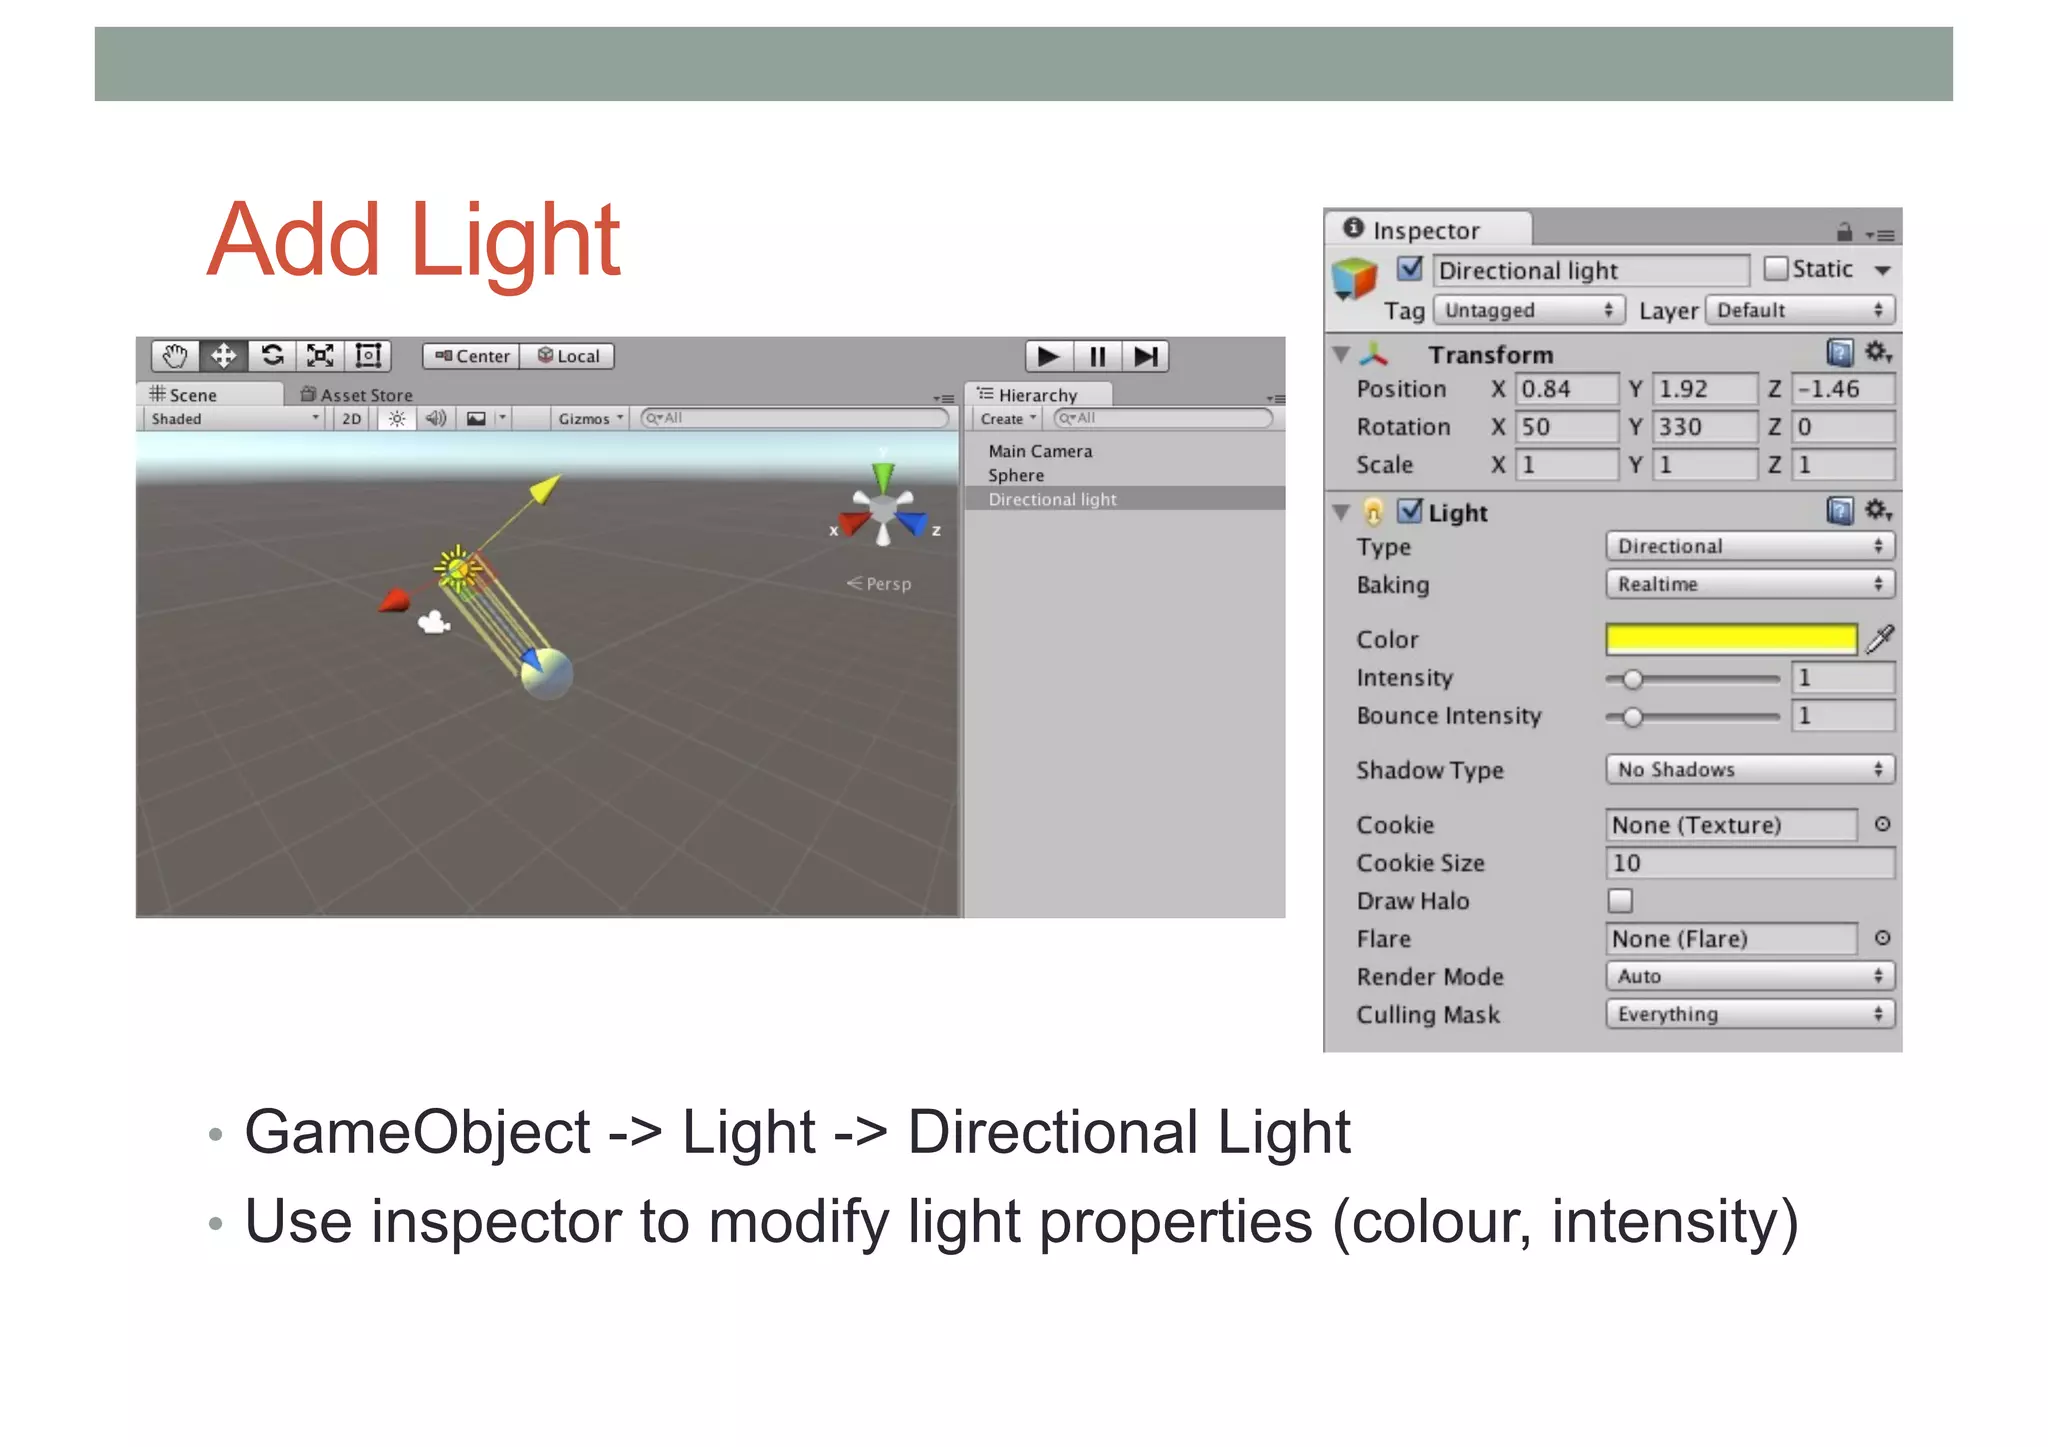
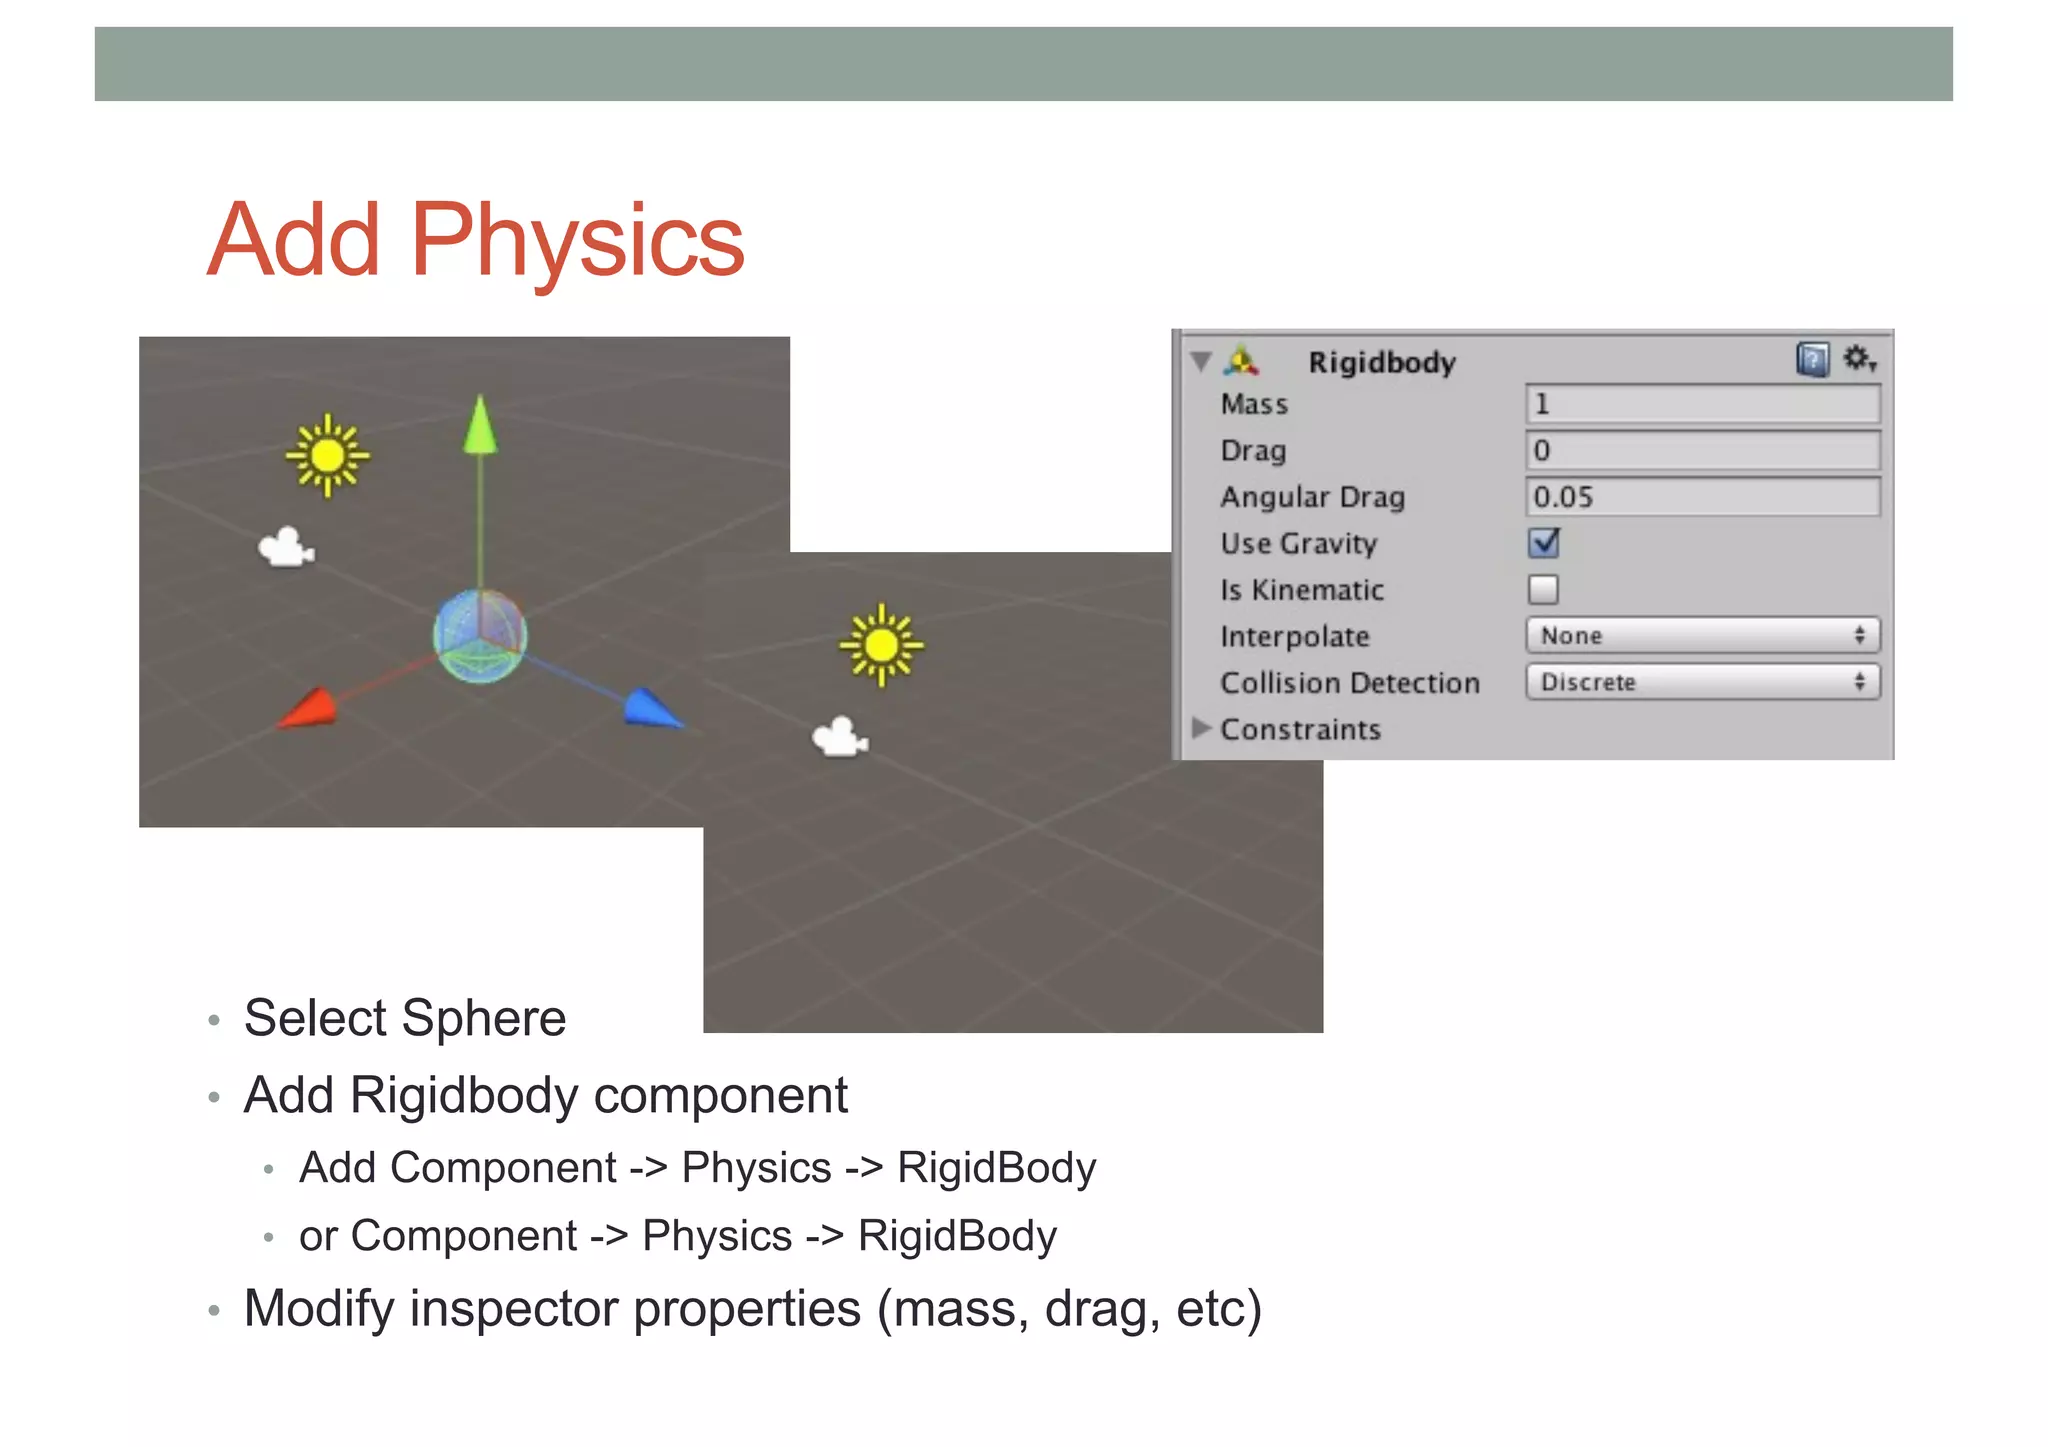
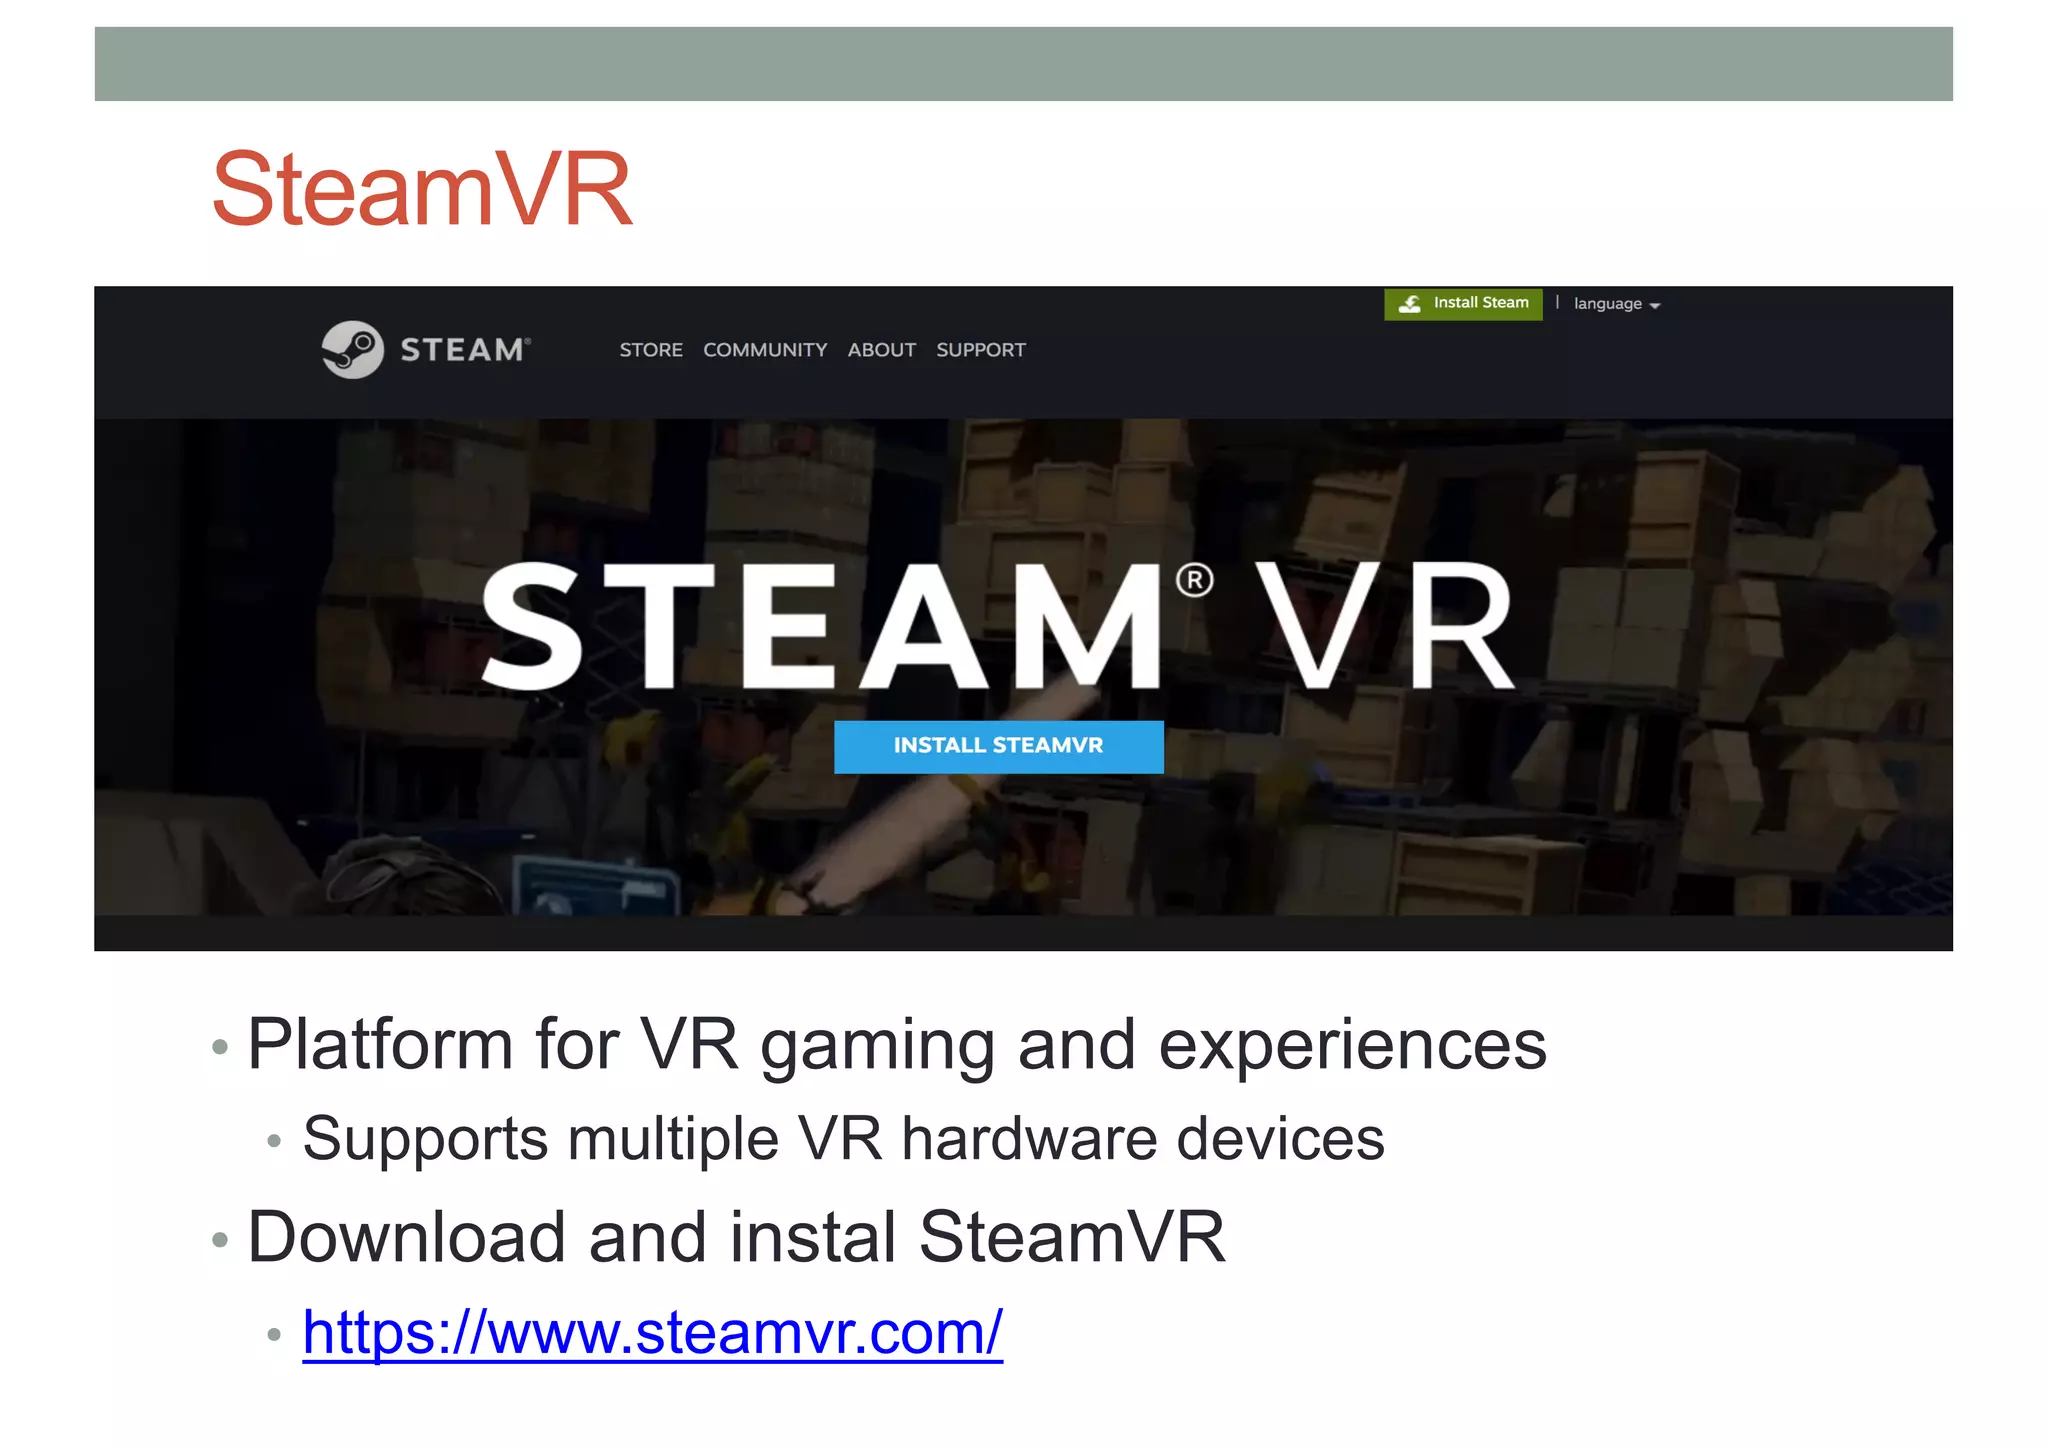
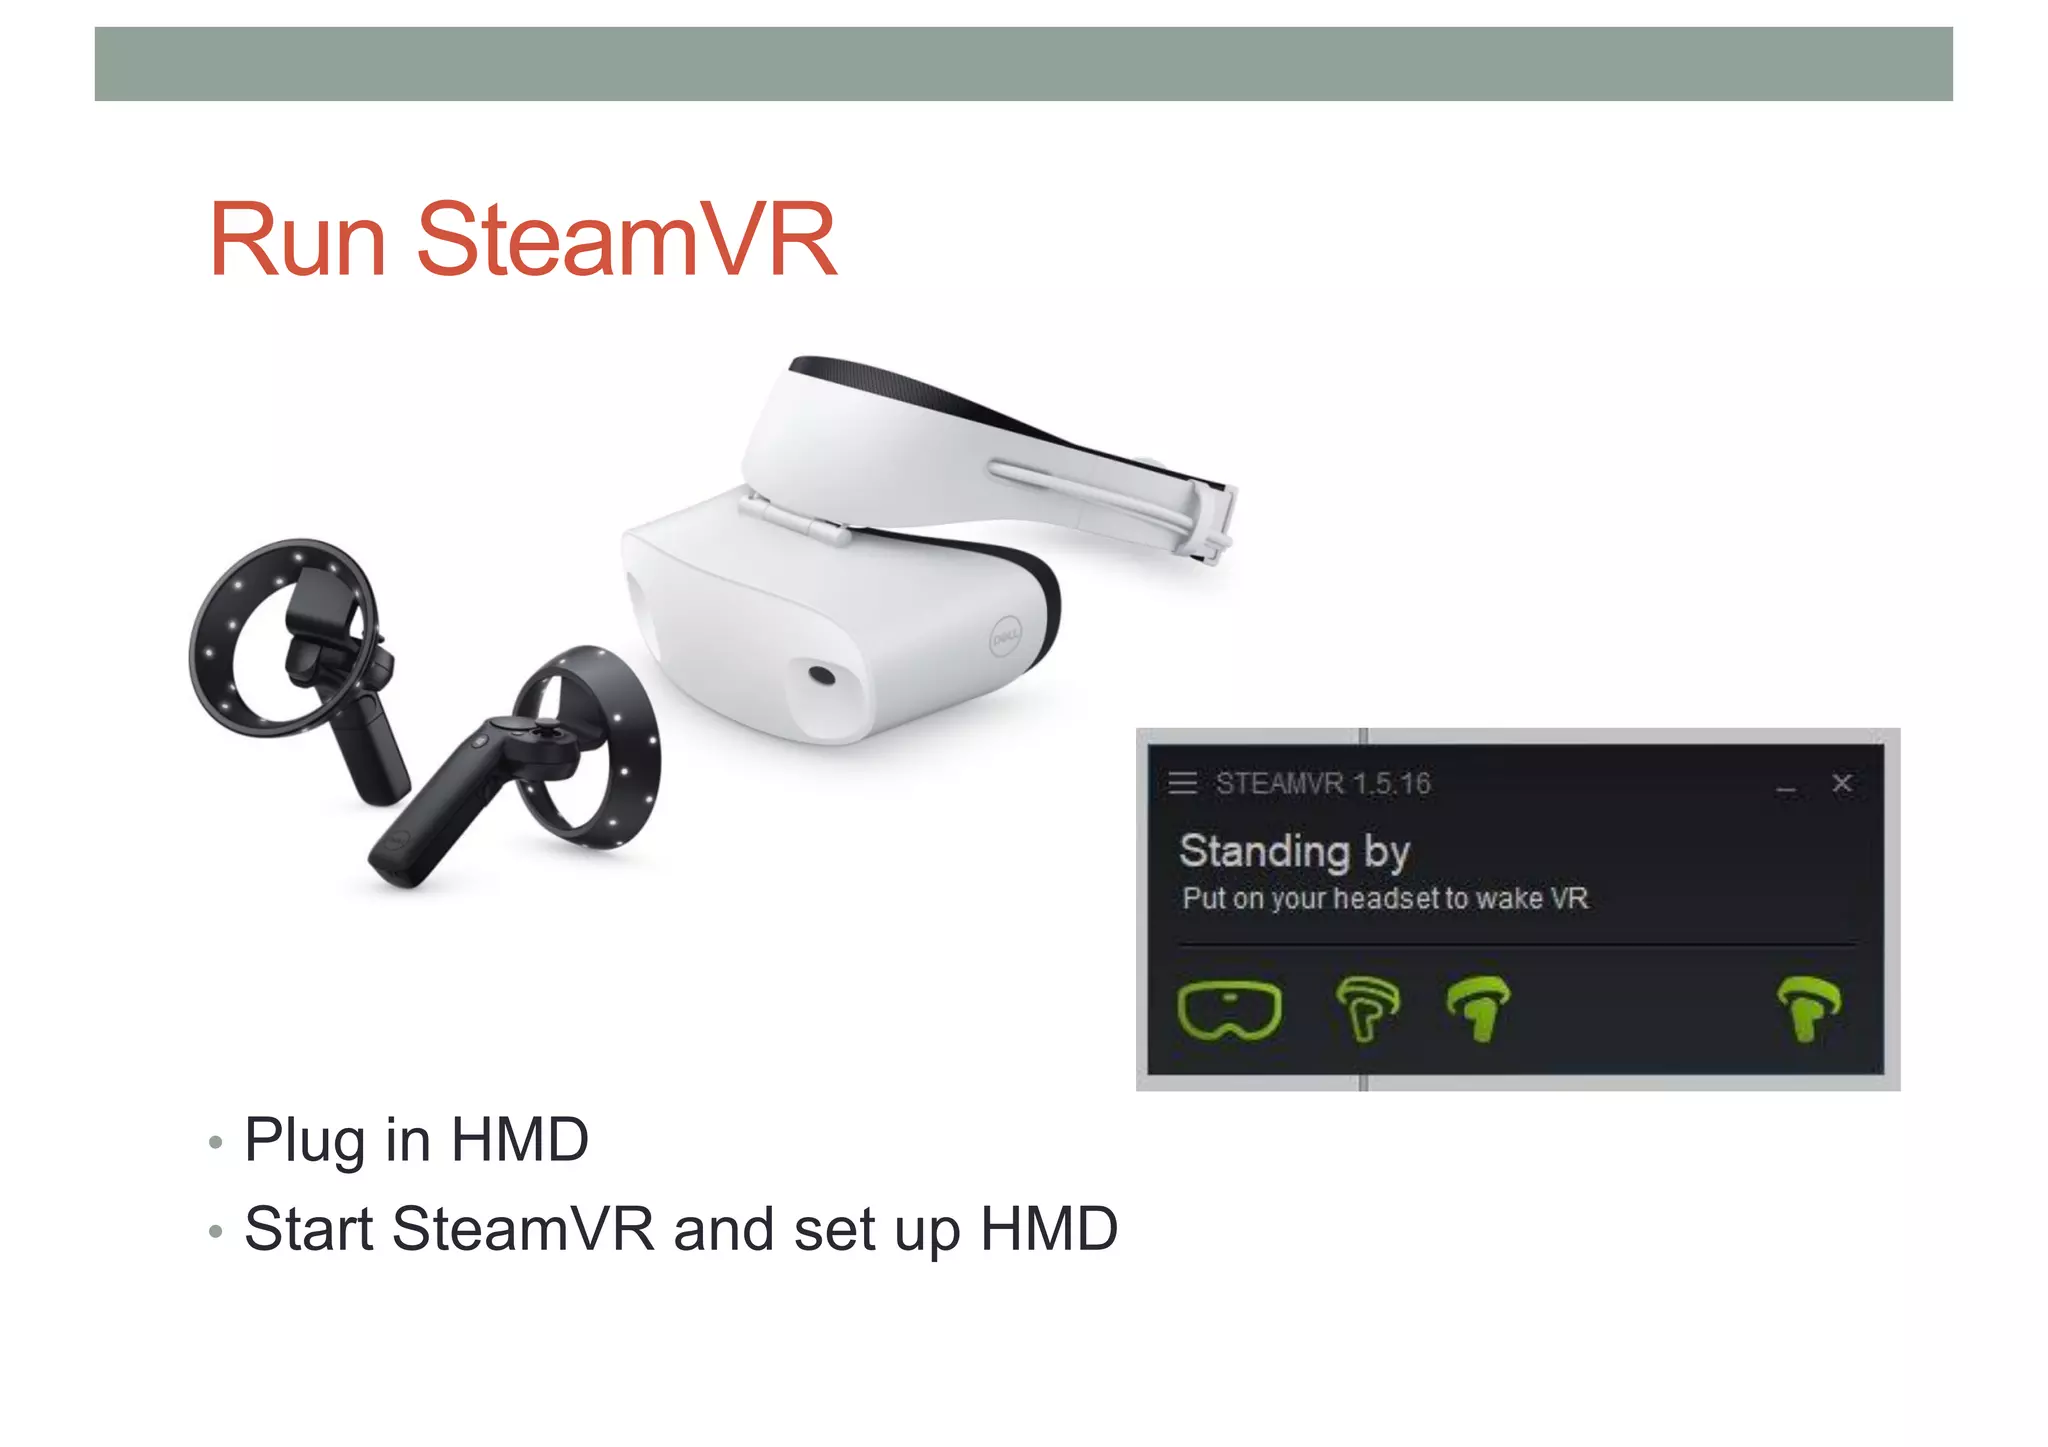
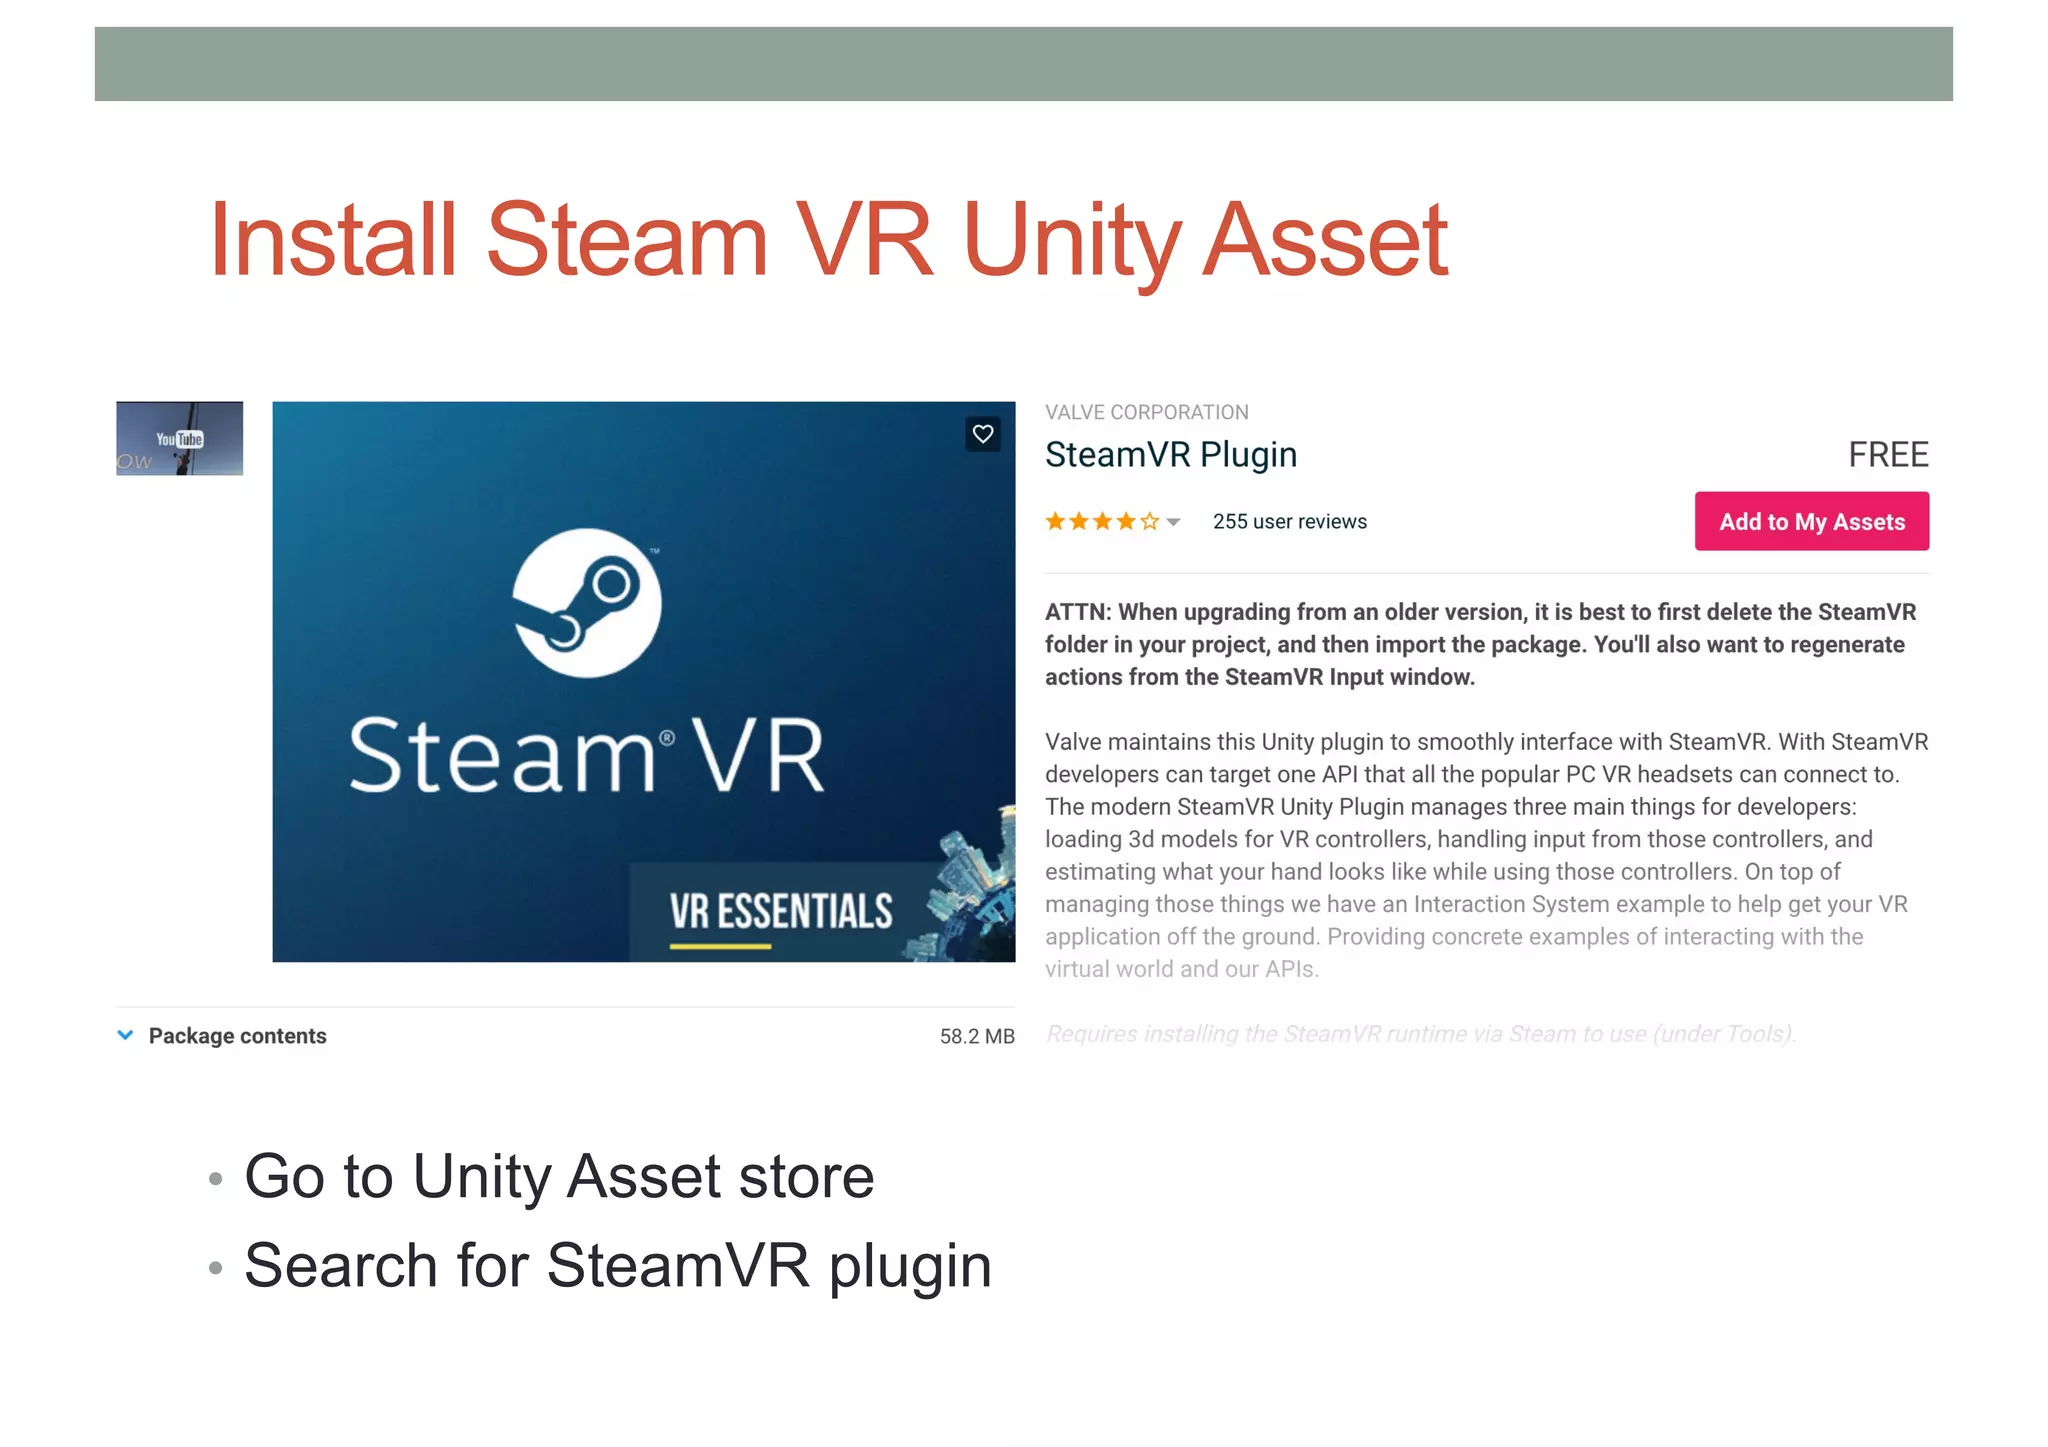


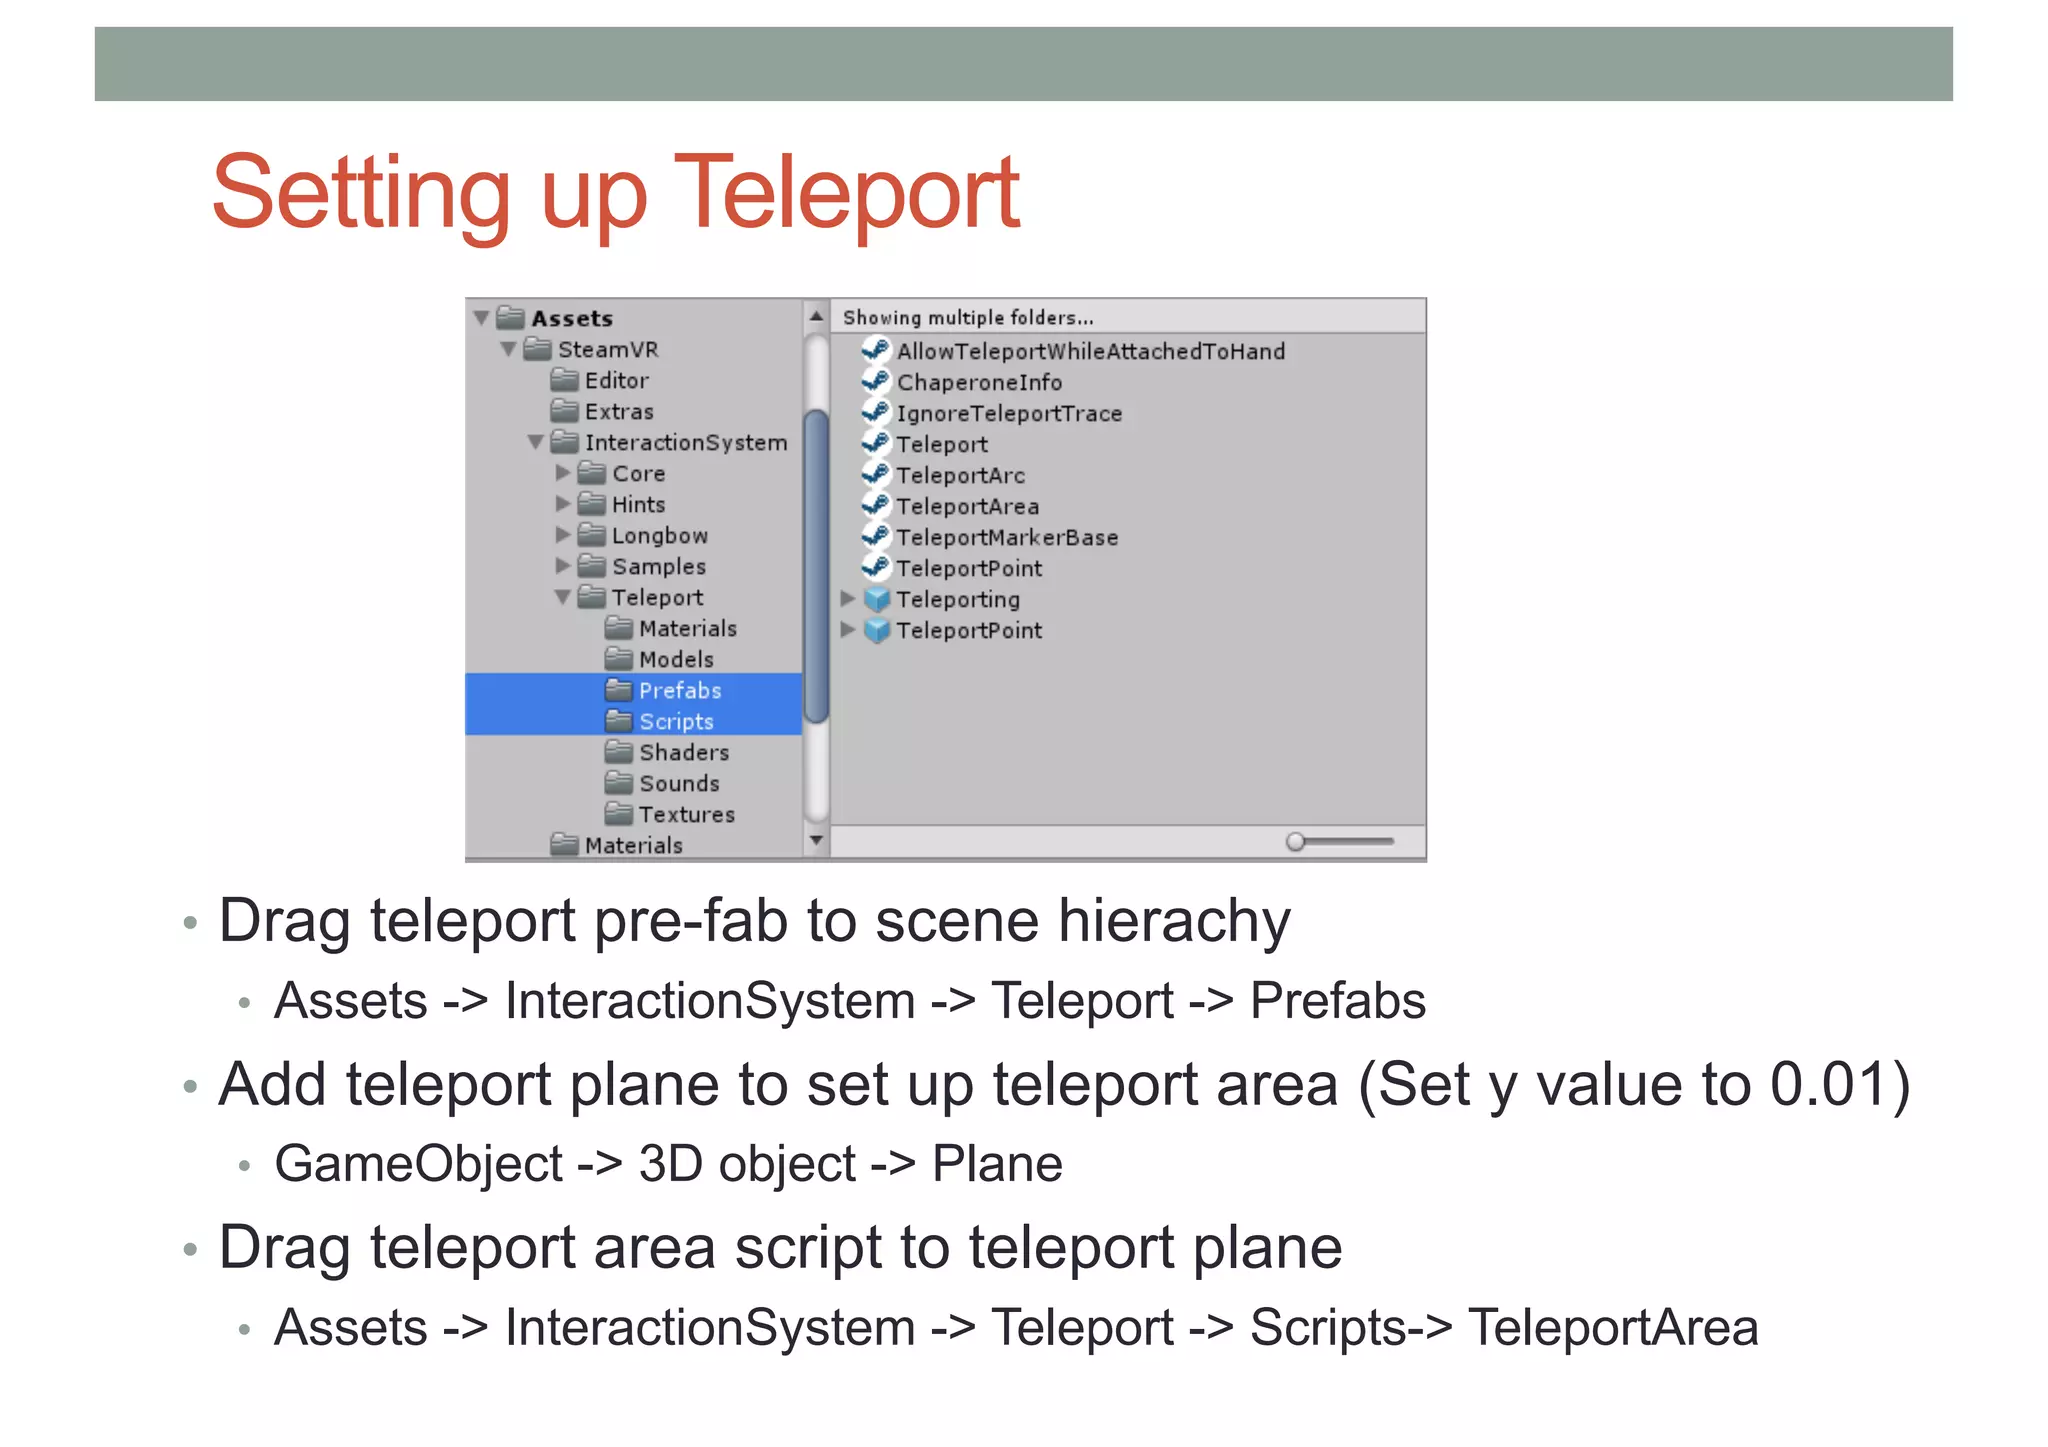
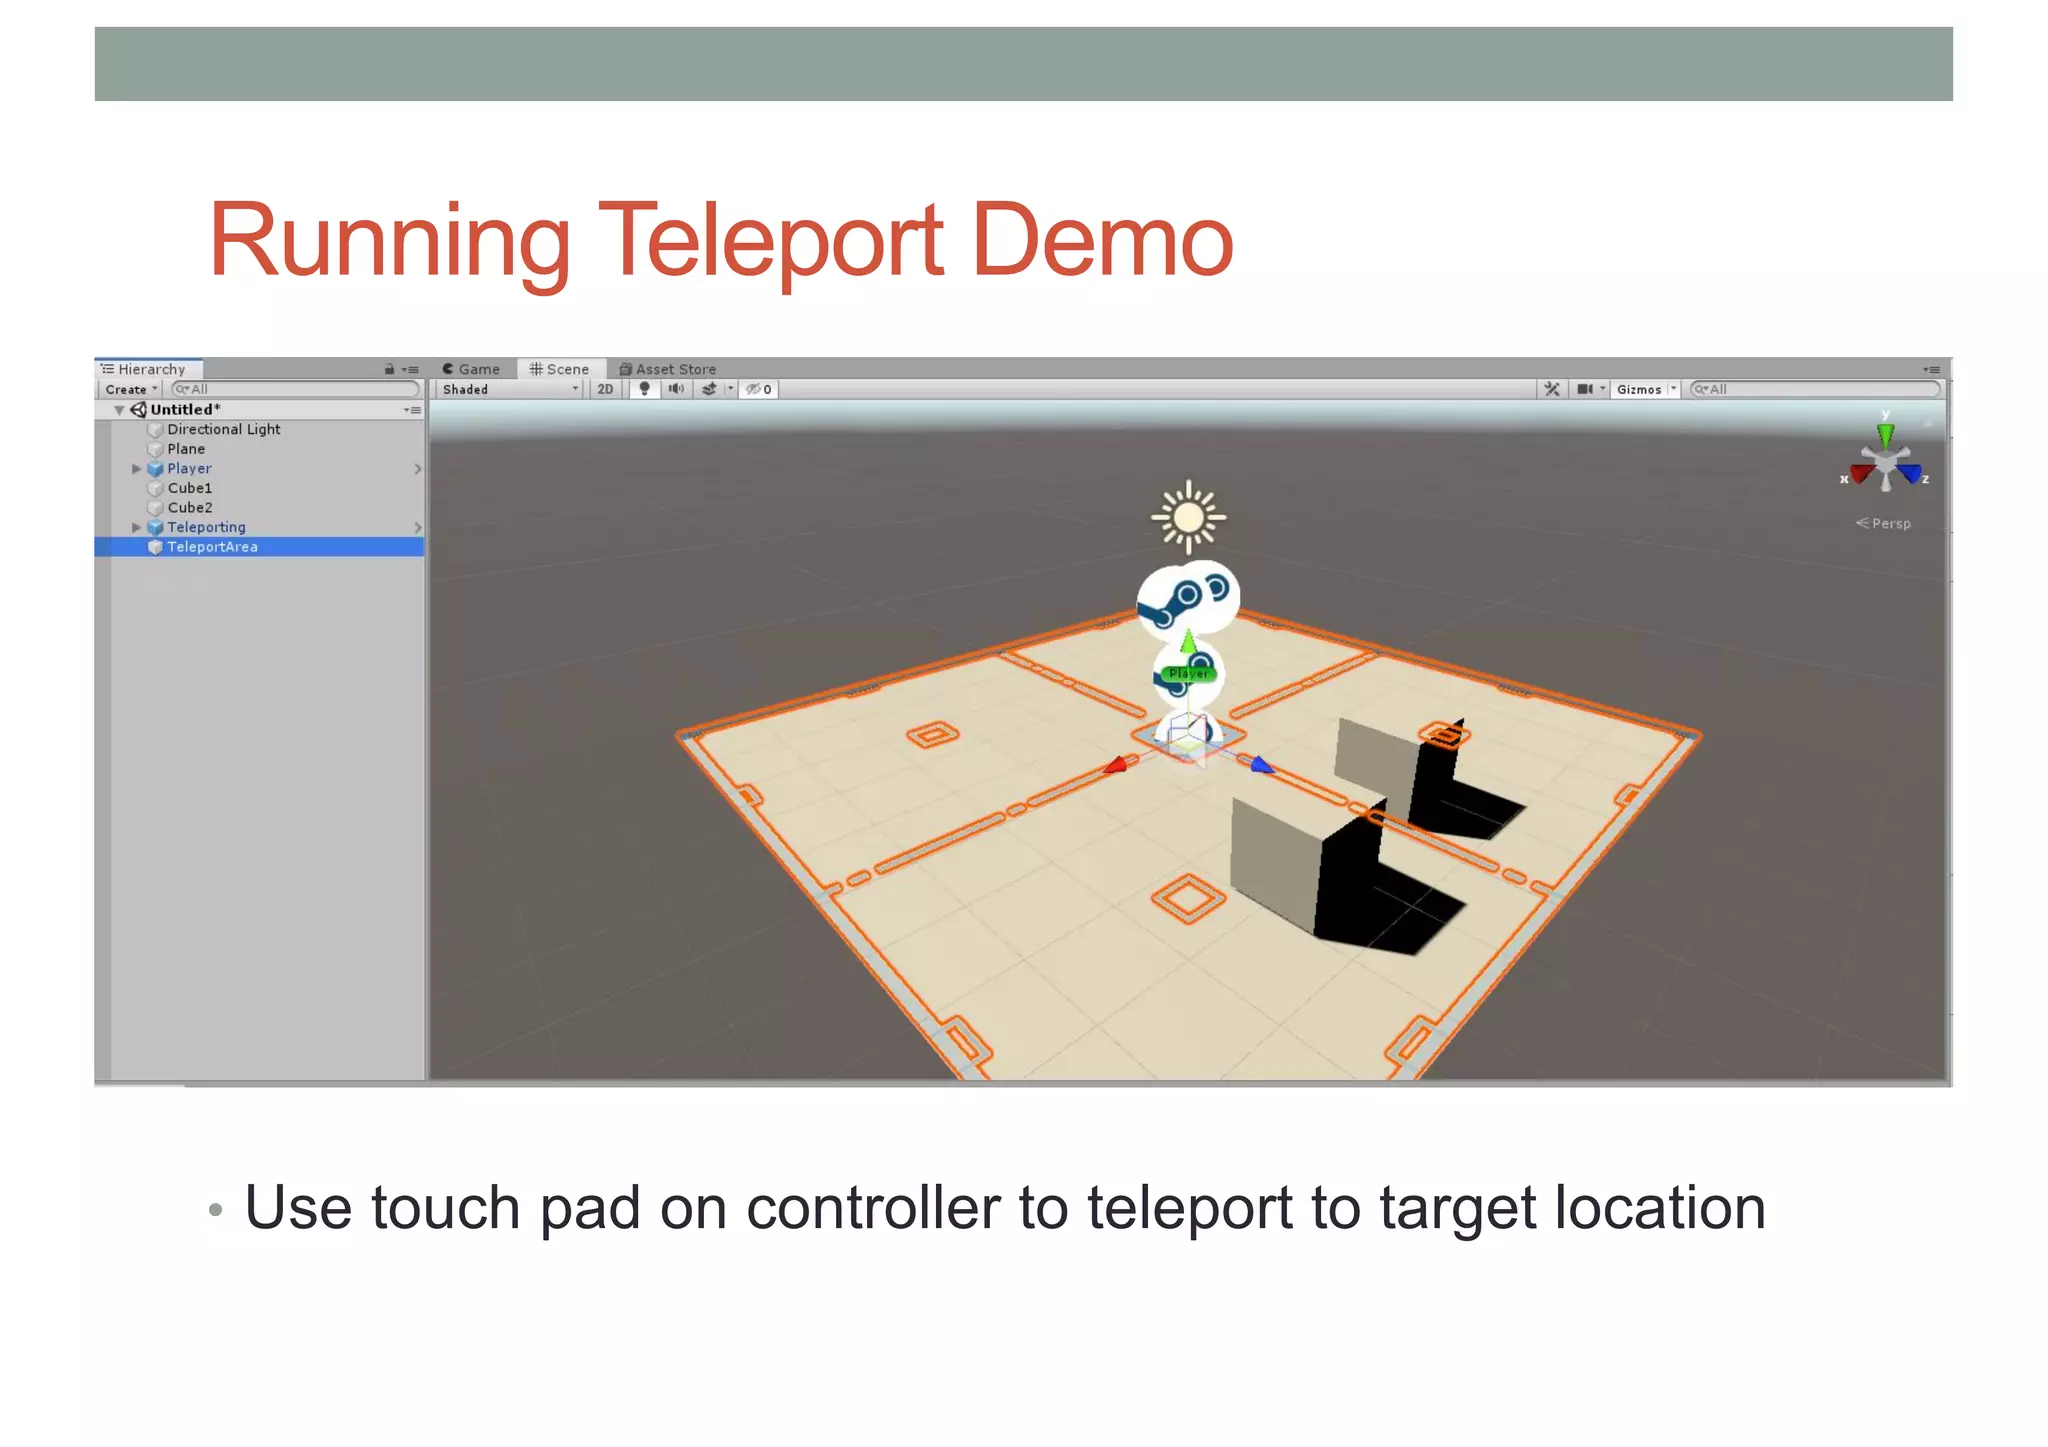
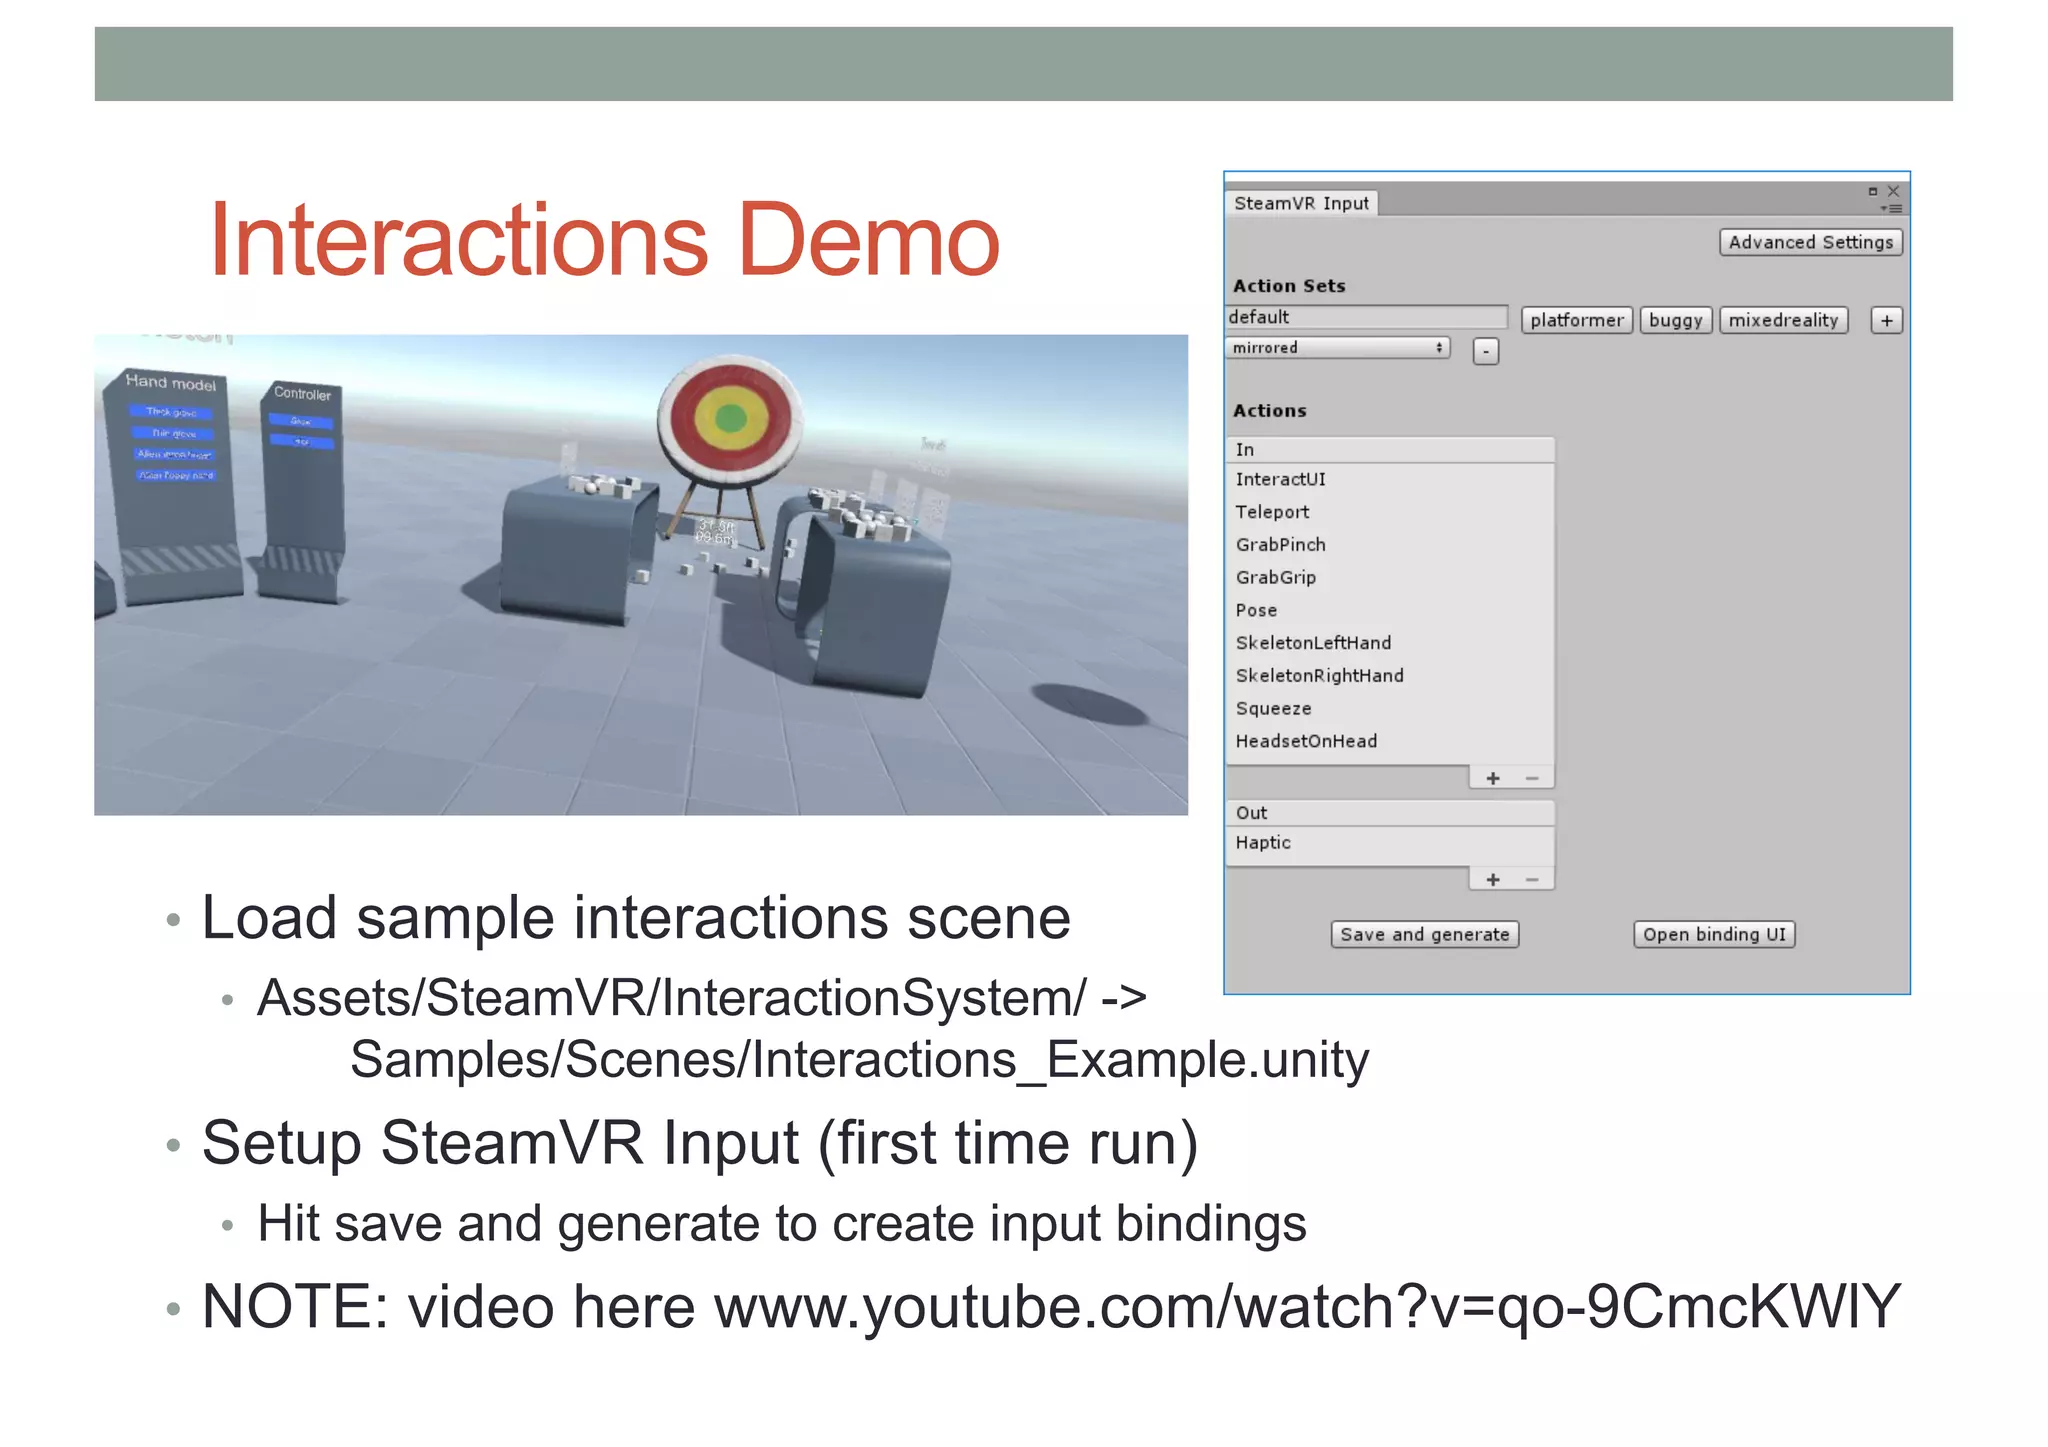
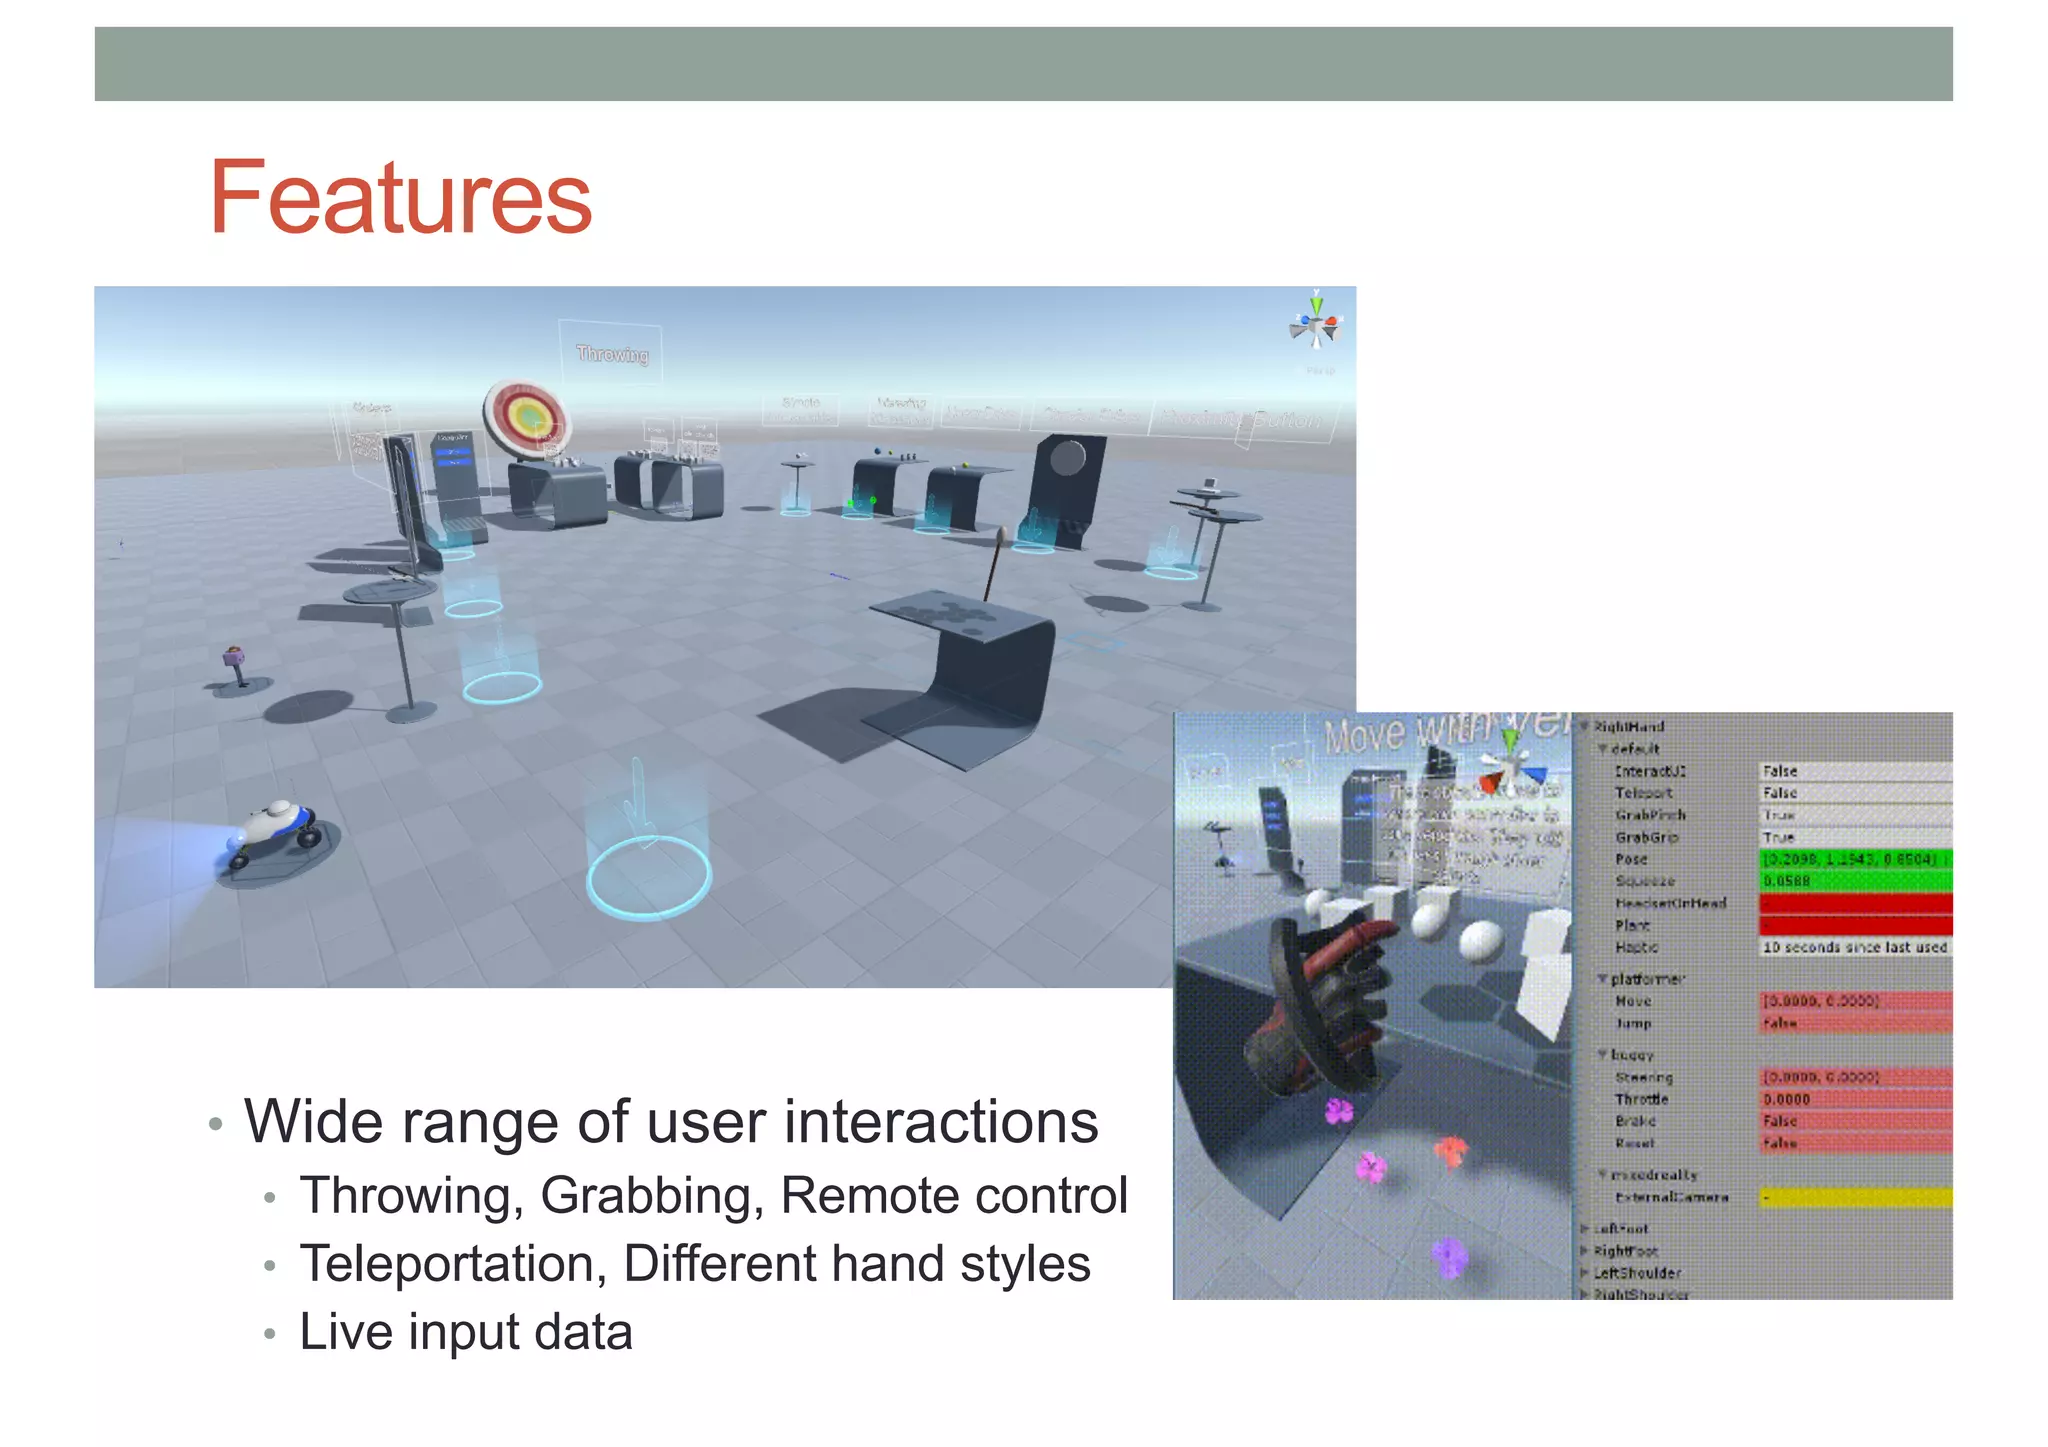


The document provides a comprehensive guide for developing VR experiences using Unity, detailing the installation of necessary software, setting up the Unity interface, and creating basic 3D scenes and interactions. It includes instructions for integrating the SteamVR platform, creating teleportation mechanics, and accessing various resources for further learning. Key features of Unity and the SteamVR plugin are highlighted, along with links to tutorials and community resources.


![[ICE 2025] Quick Prototyping with Unity & CoPilot.pptx](https://cdn.slidesharecdn.com/ss_thumbnails/ice2025quickprototypingwithunitycopilot-250819033823-549f06c1-thumbnail.jpg?width=640&height=640&fit=bounds)