Downloaded 308 times
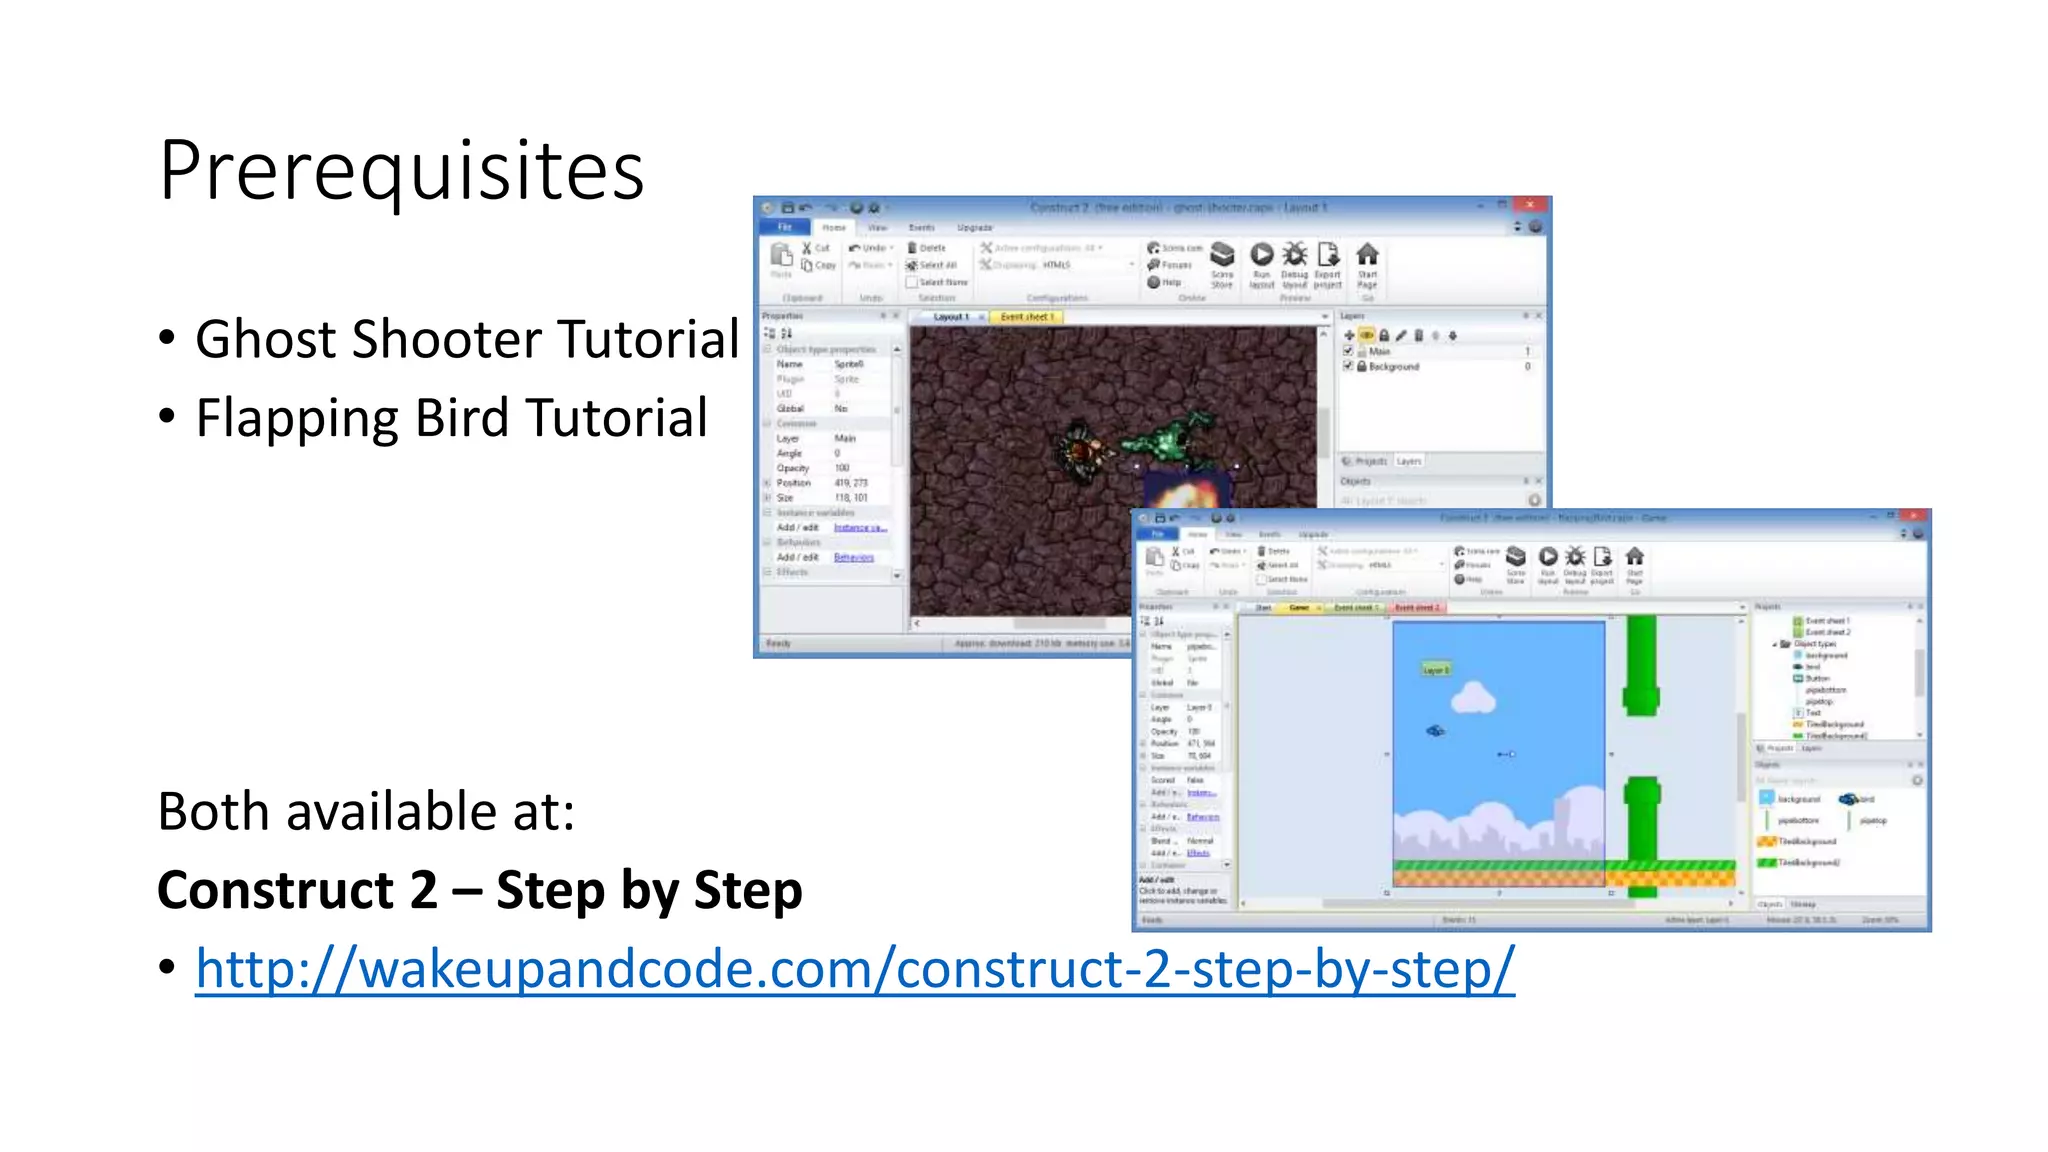
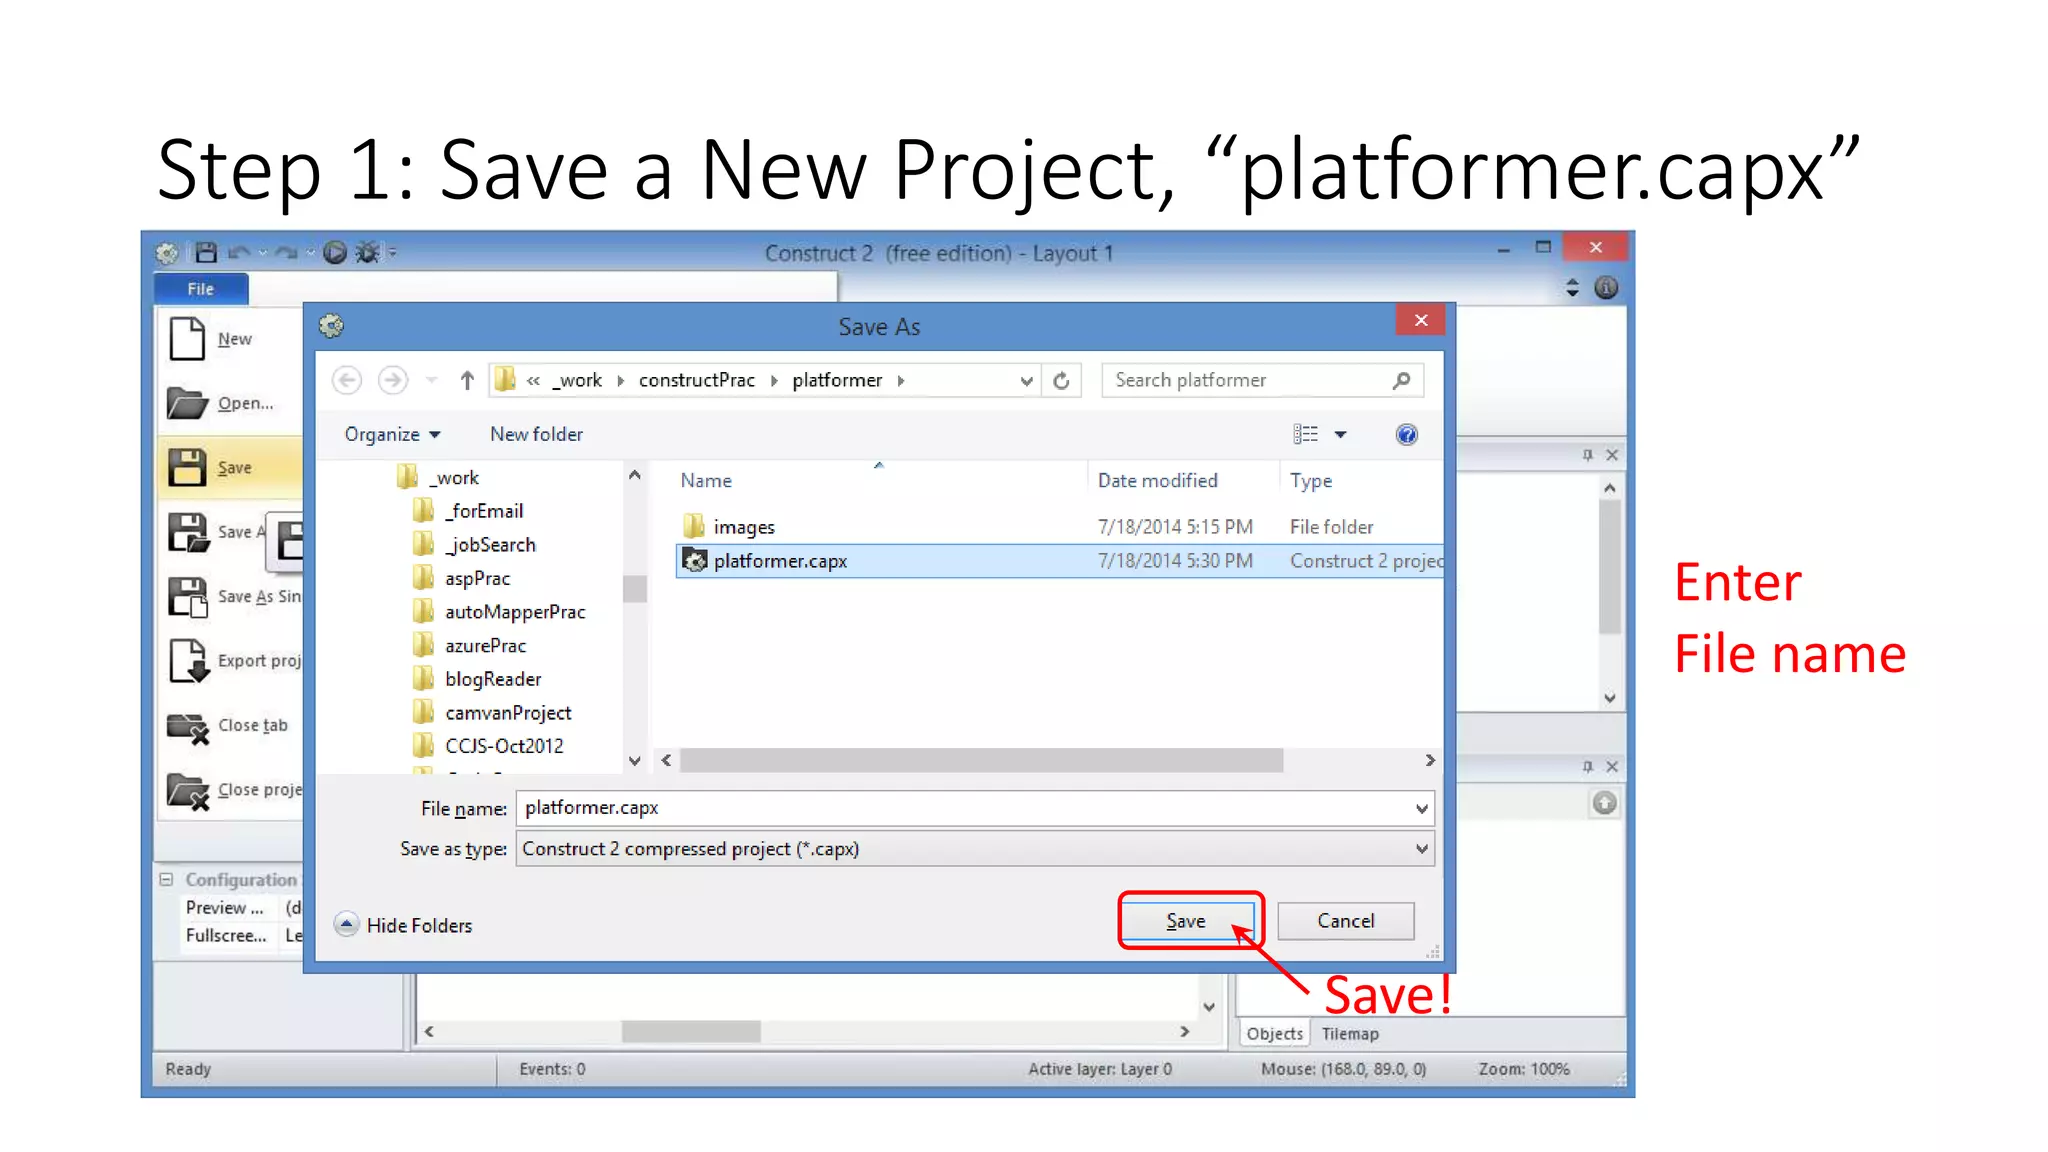
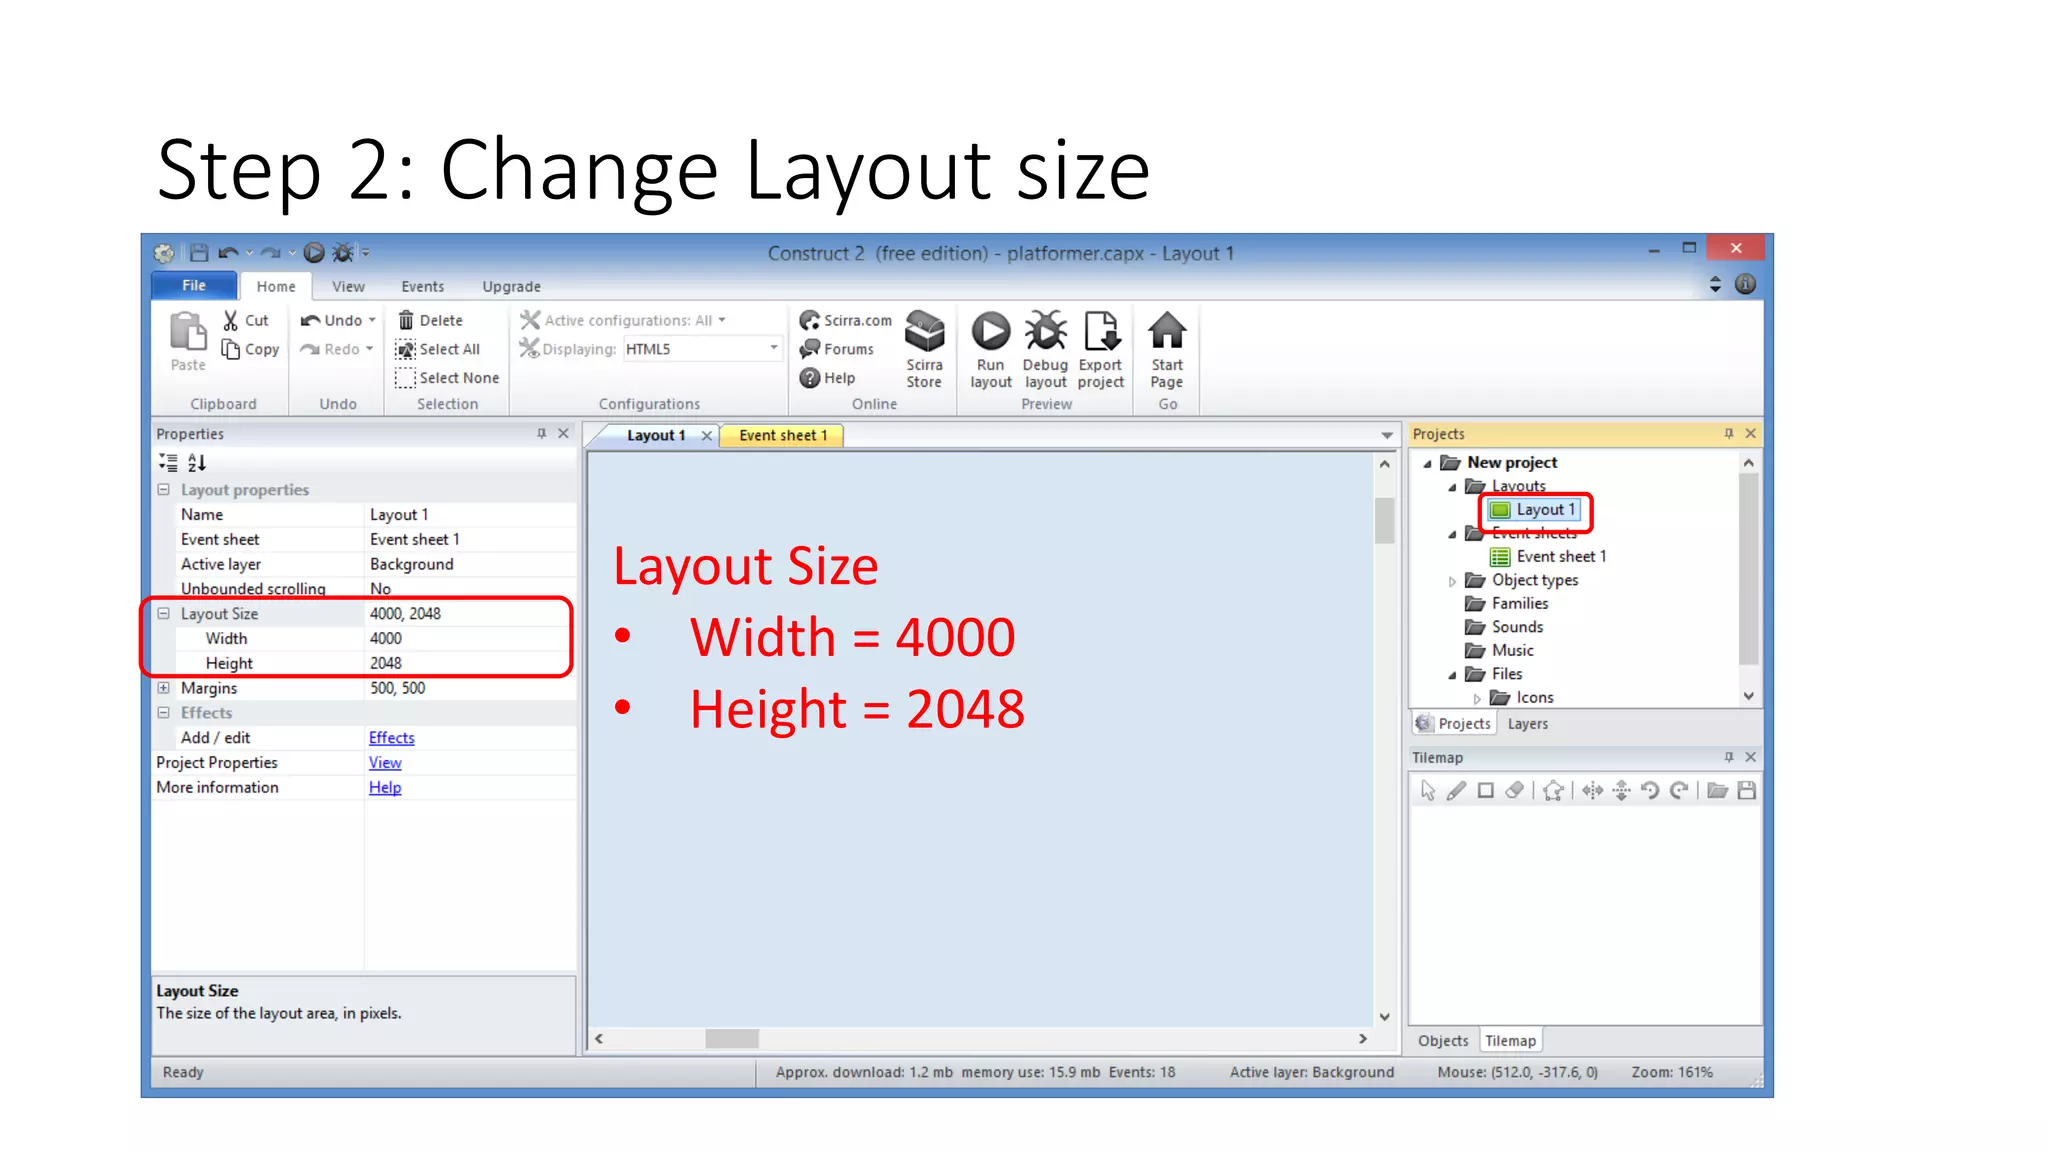
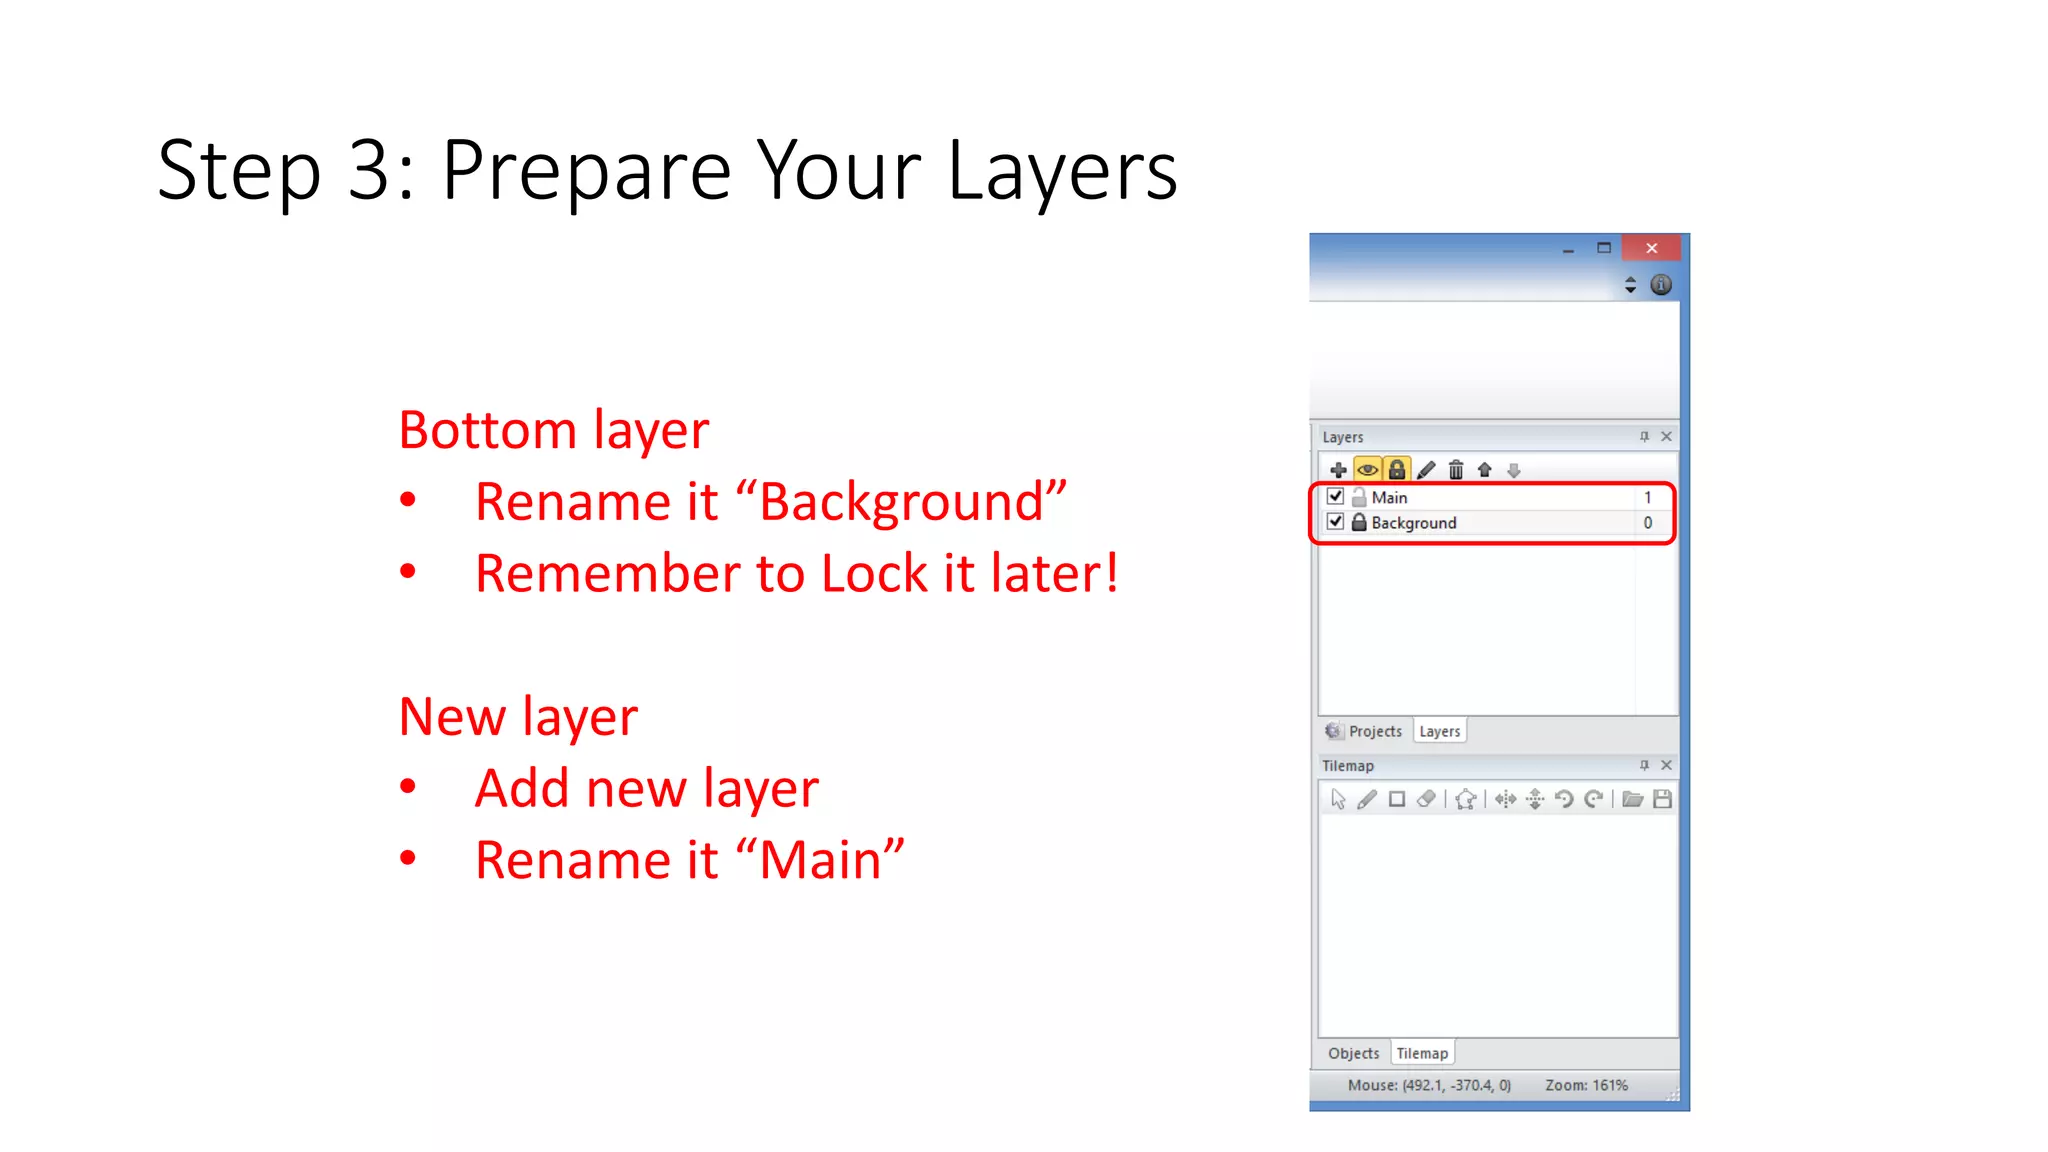
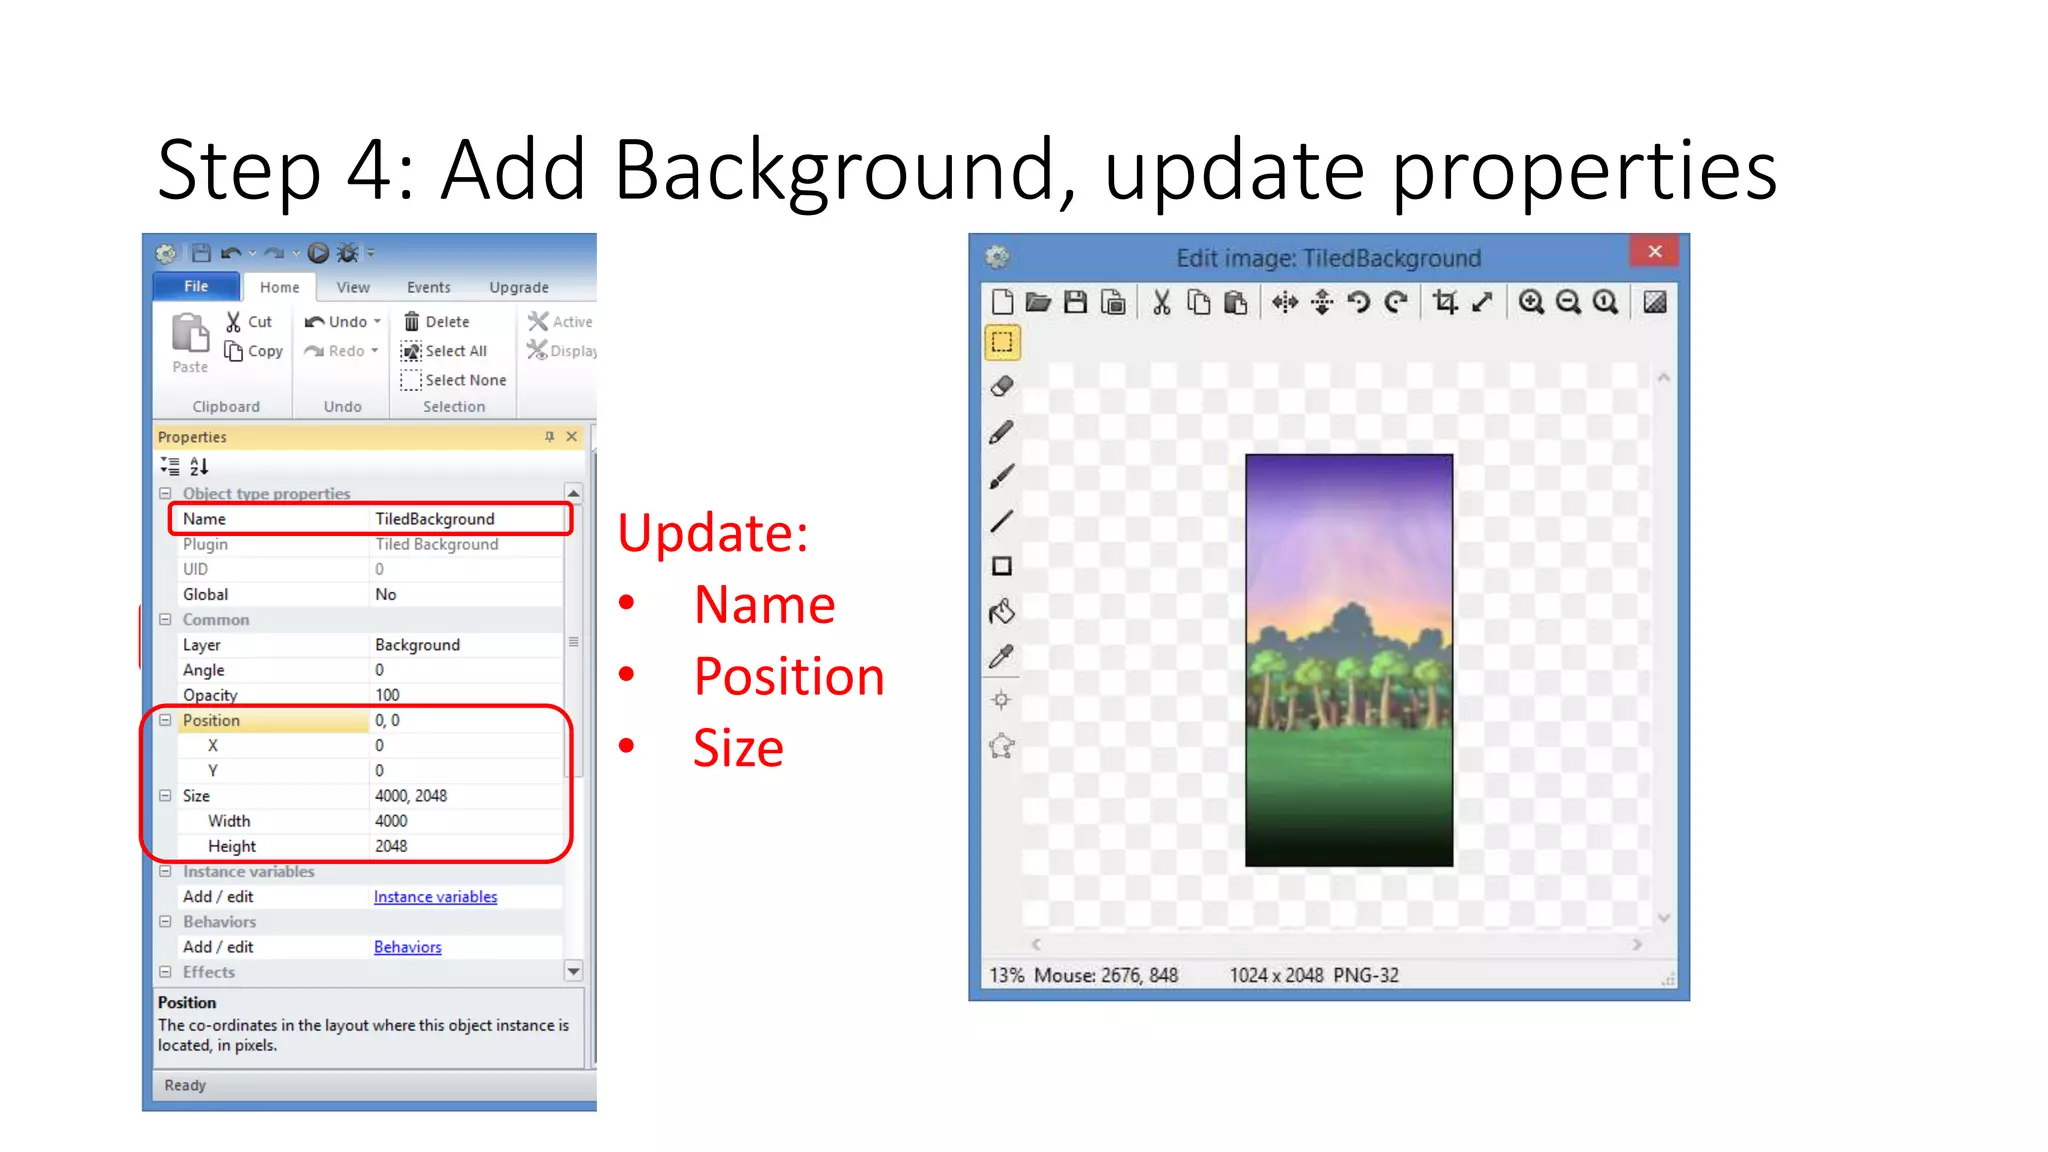
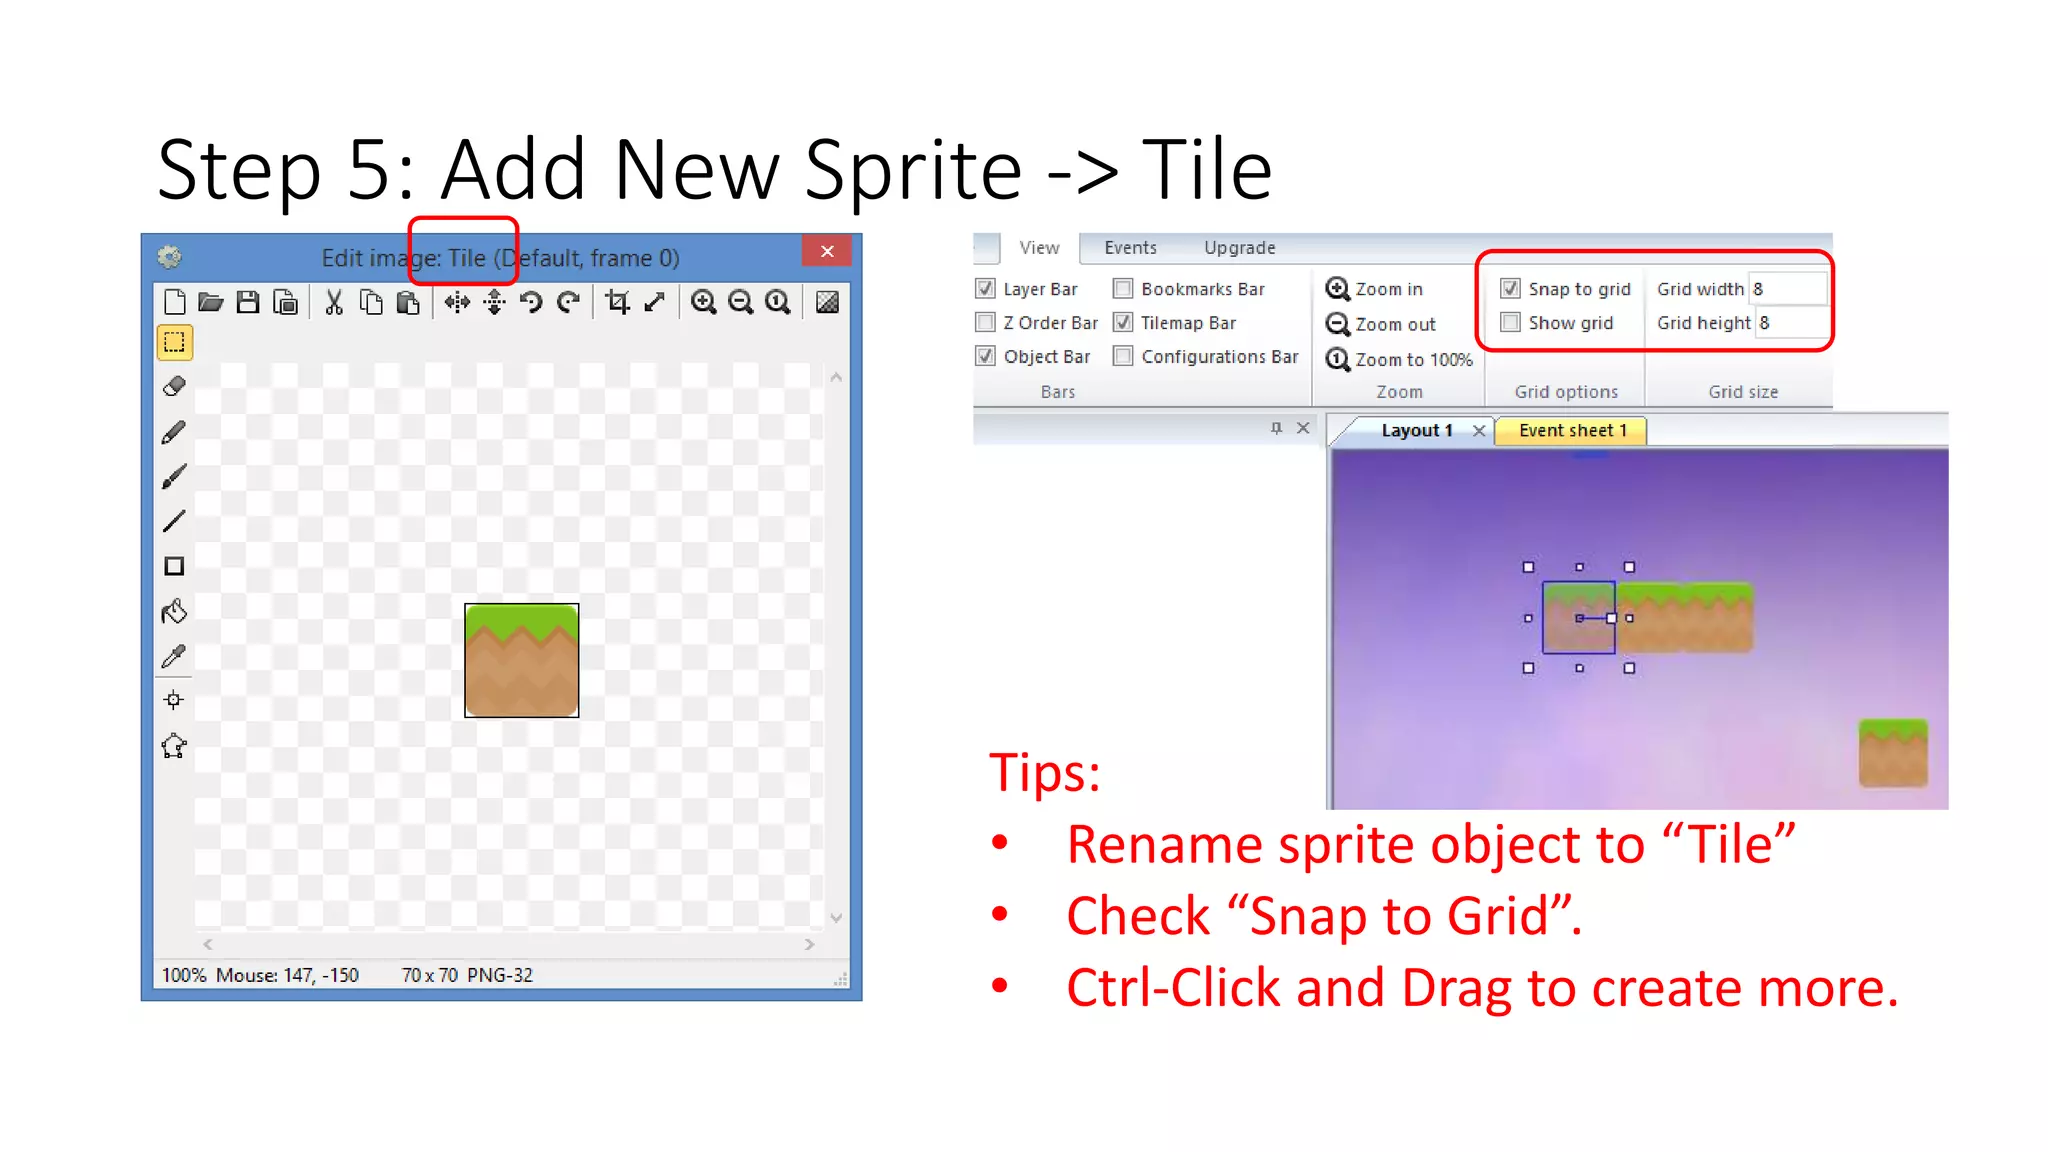

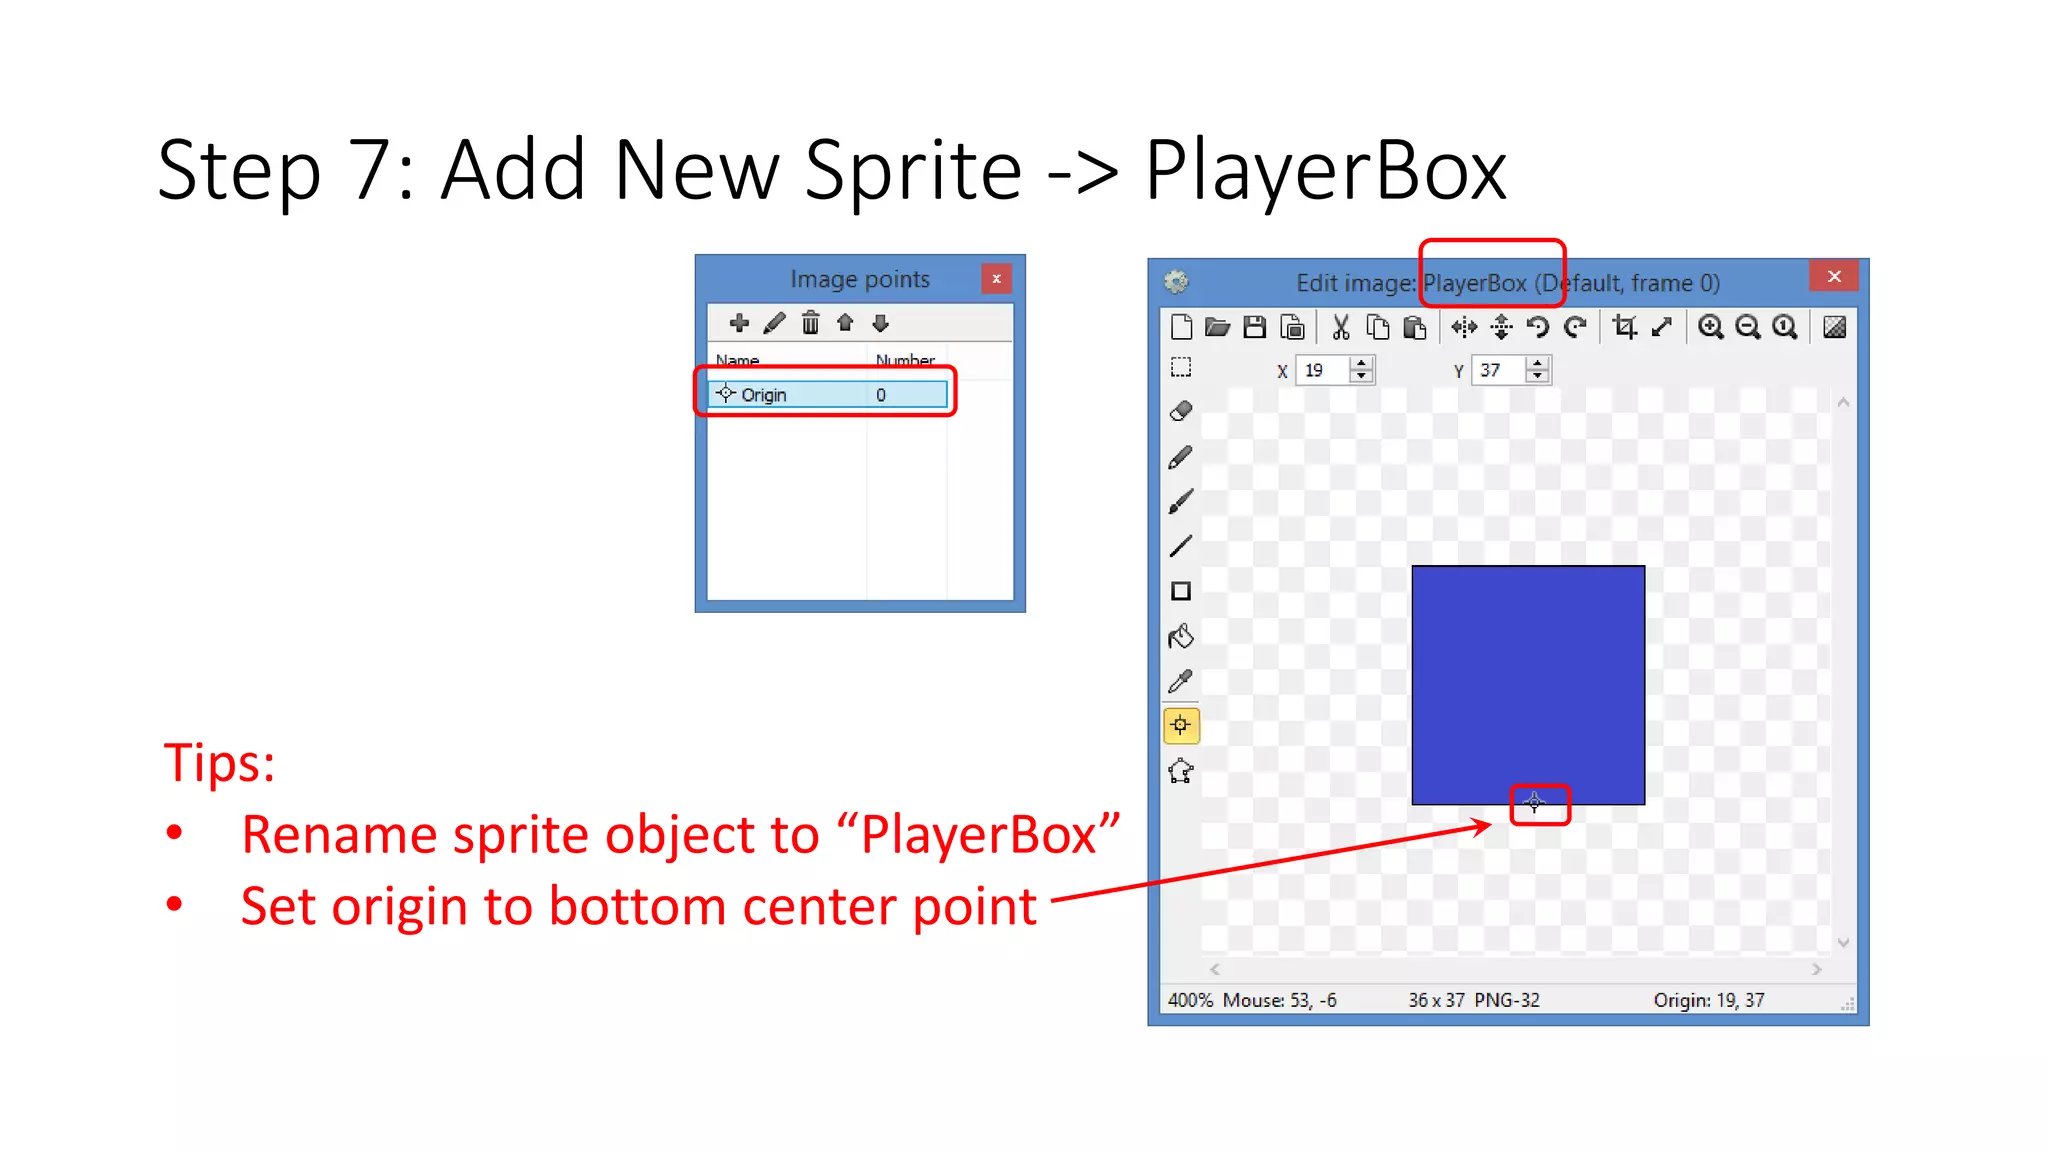
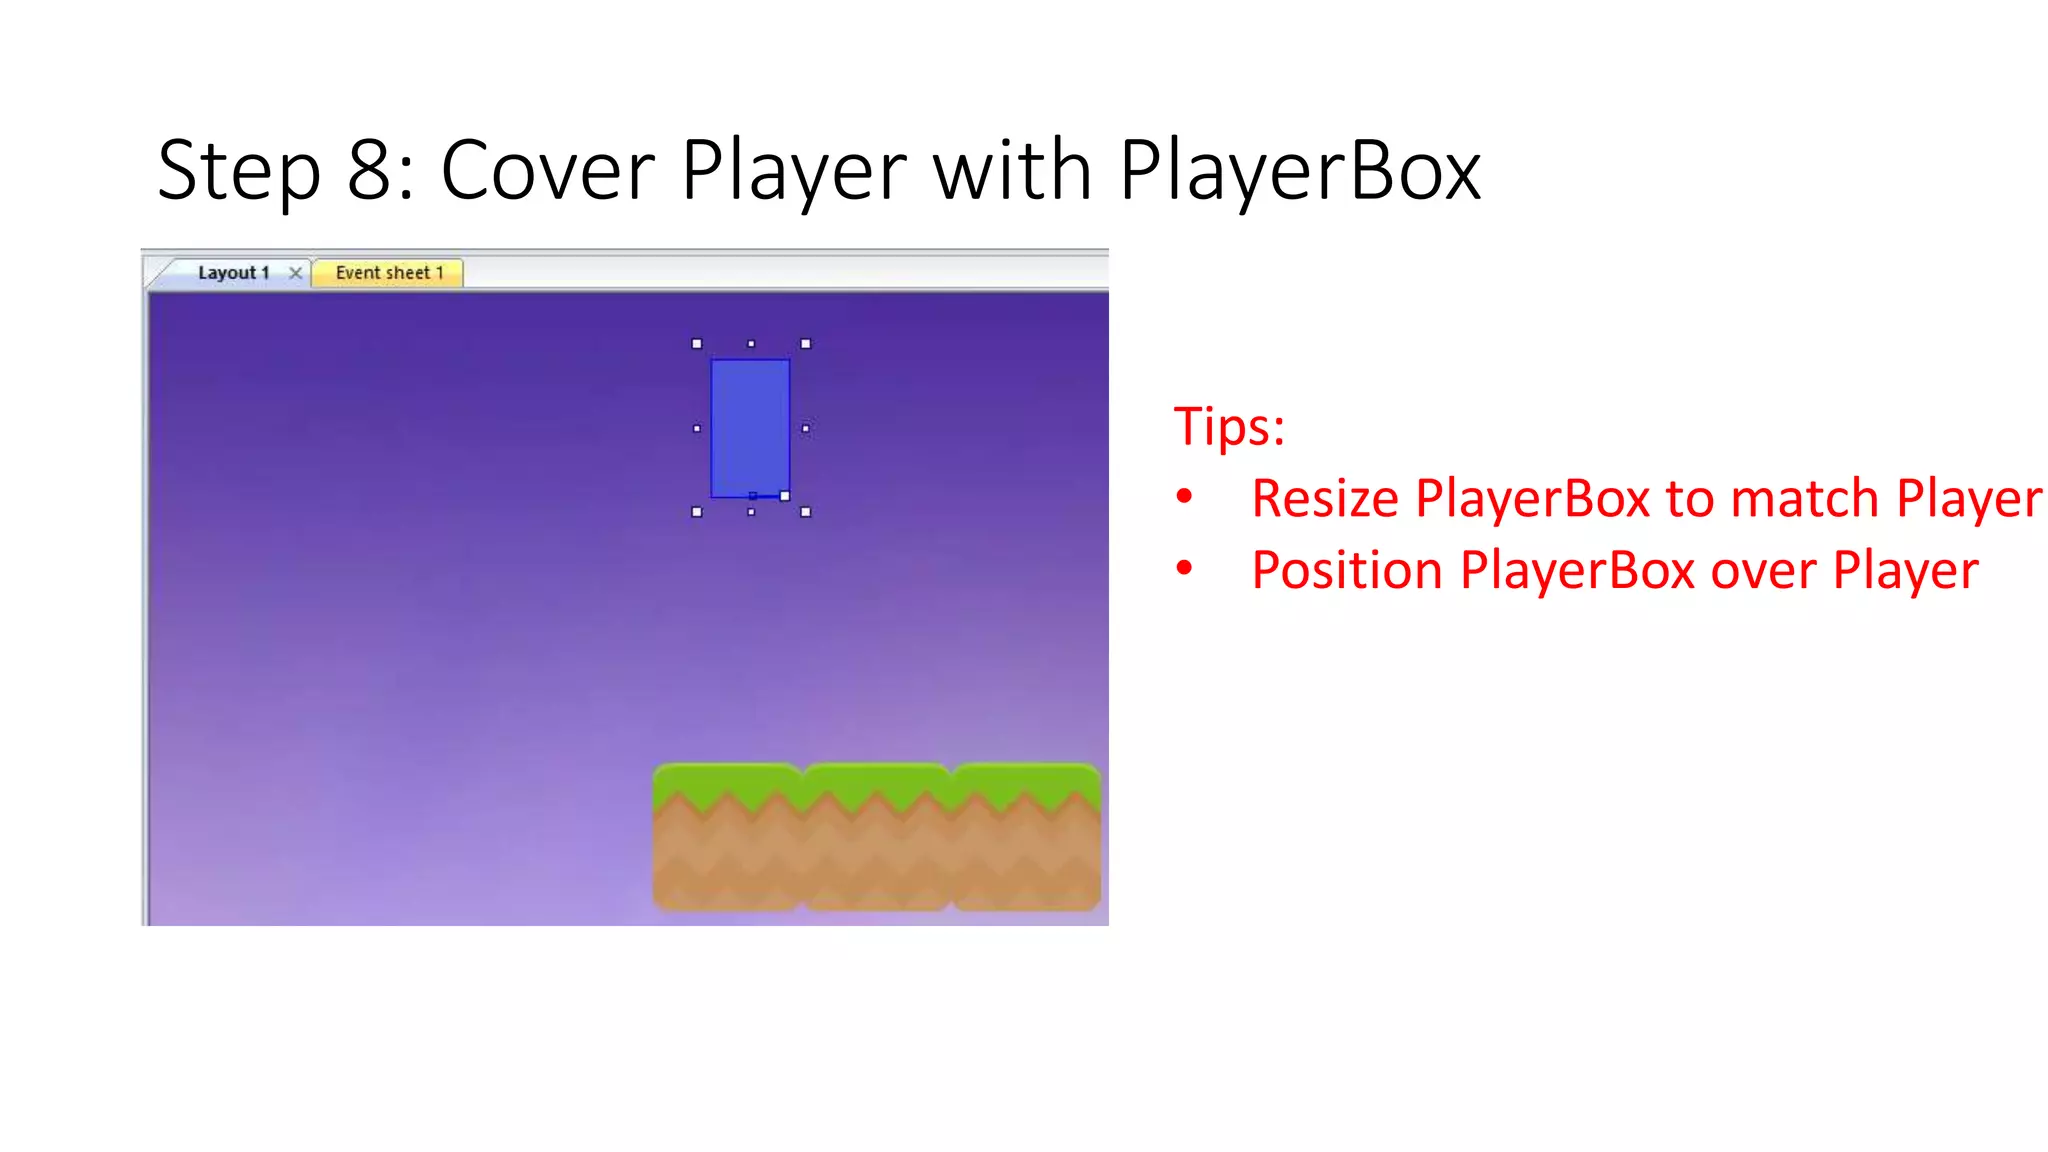
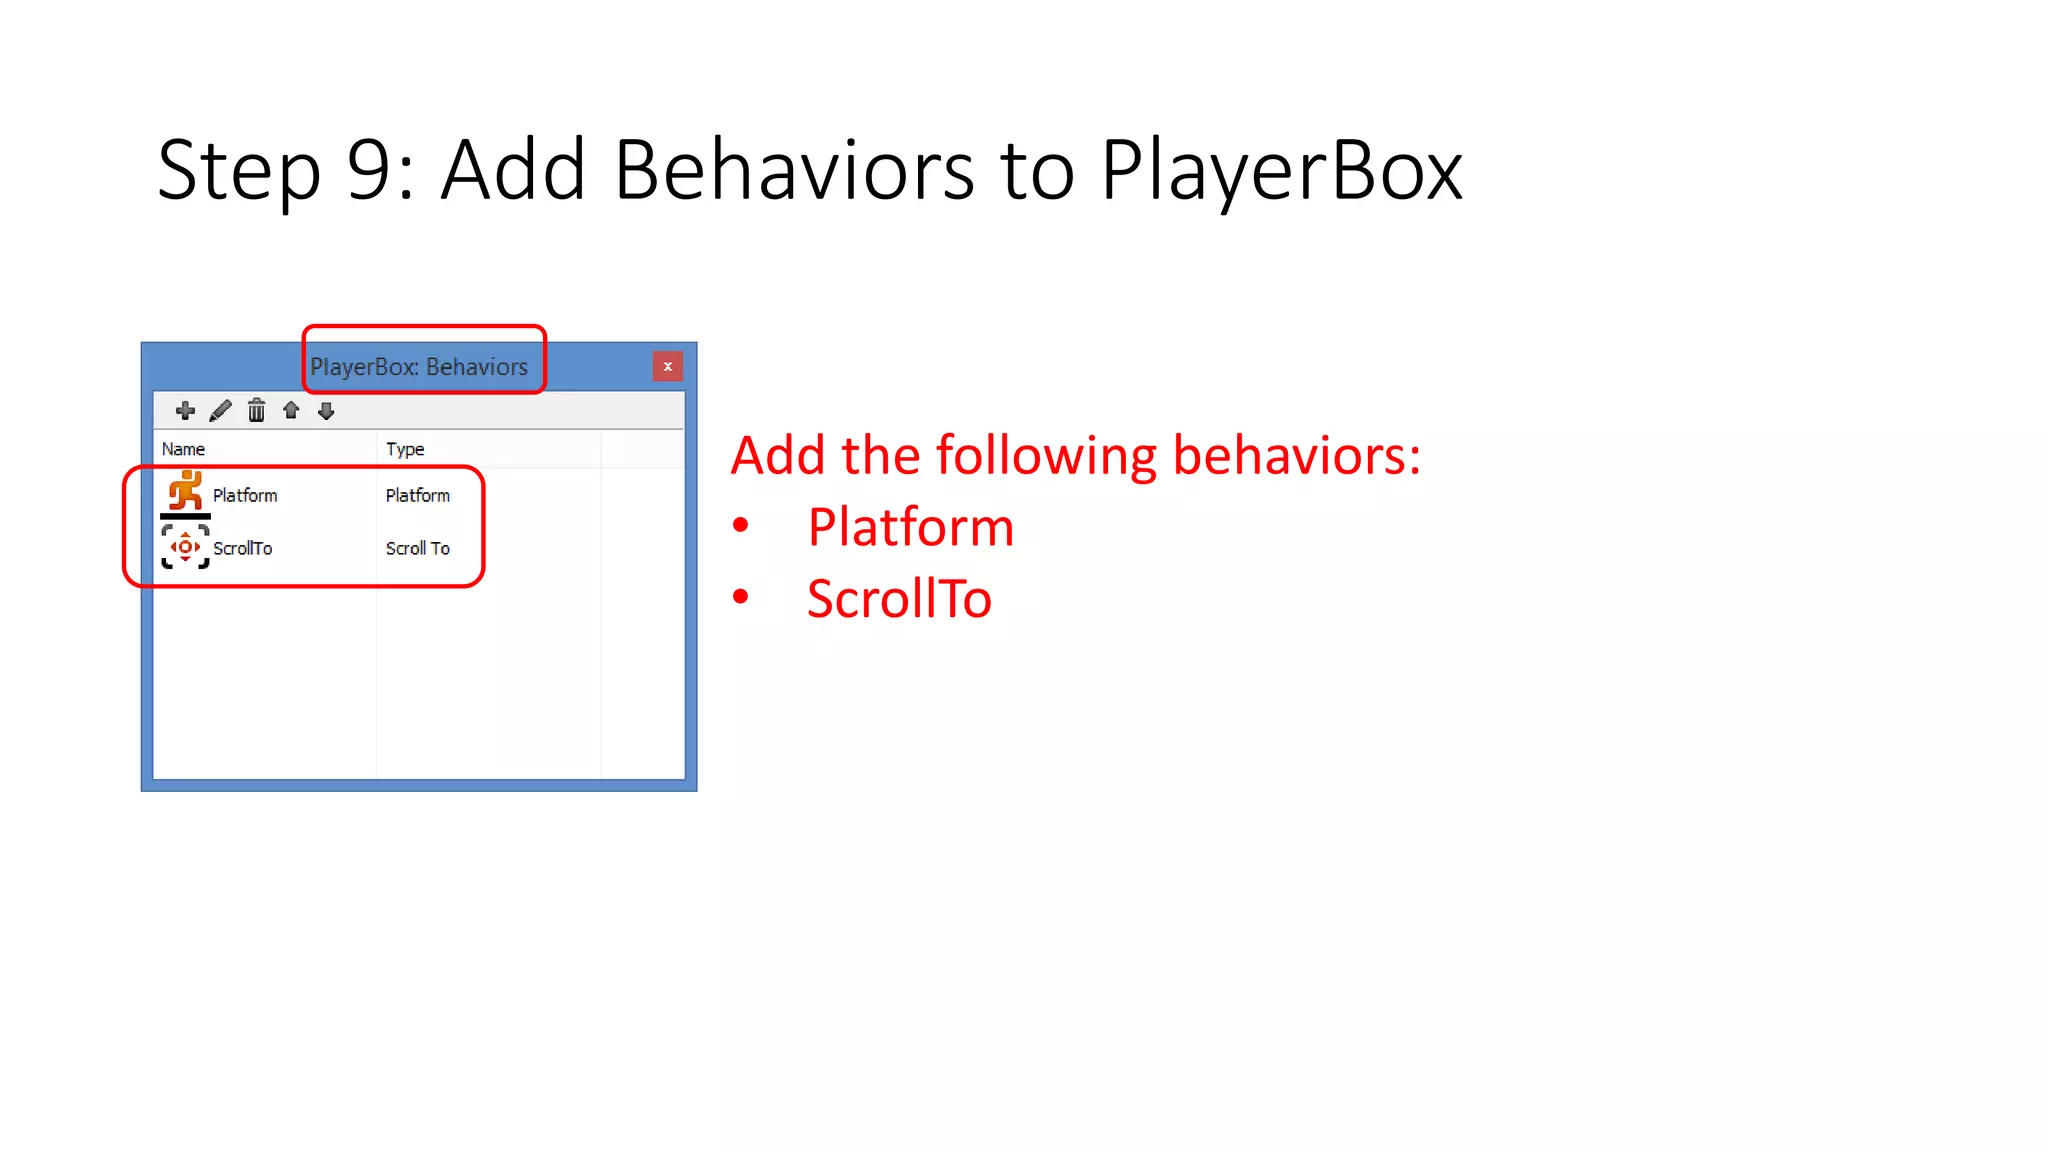
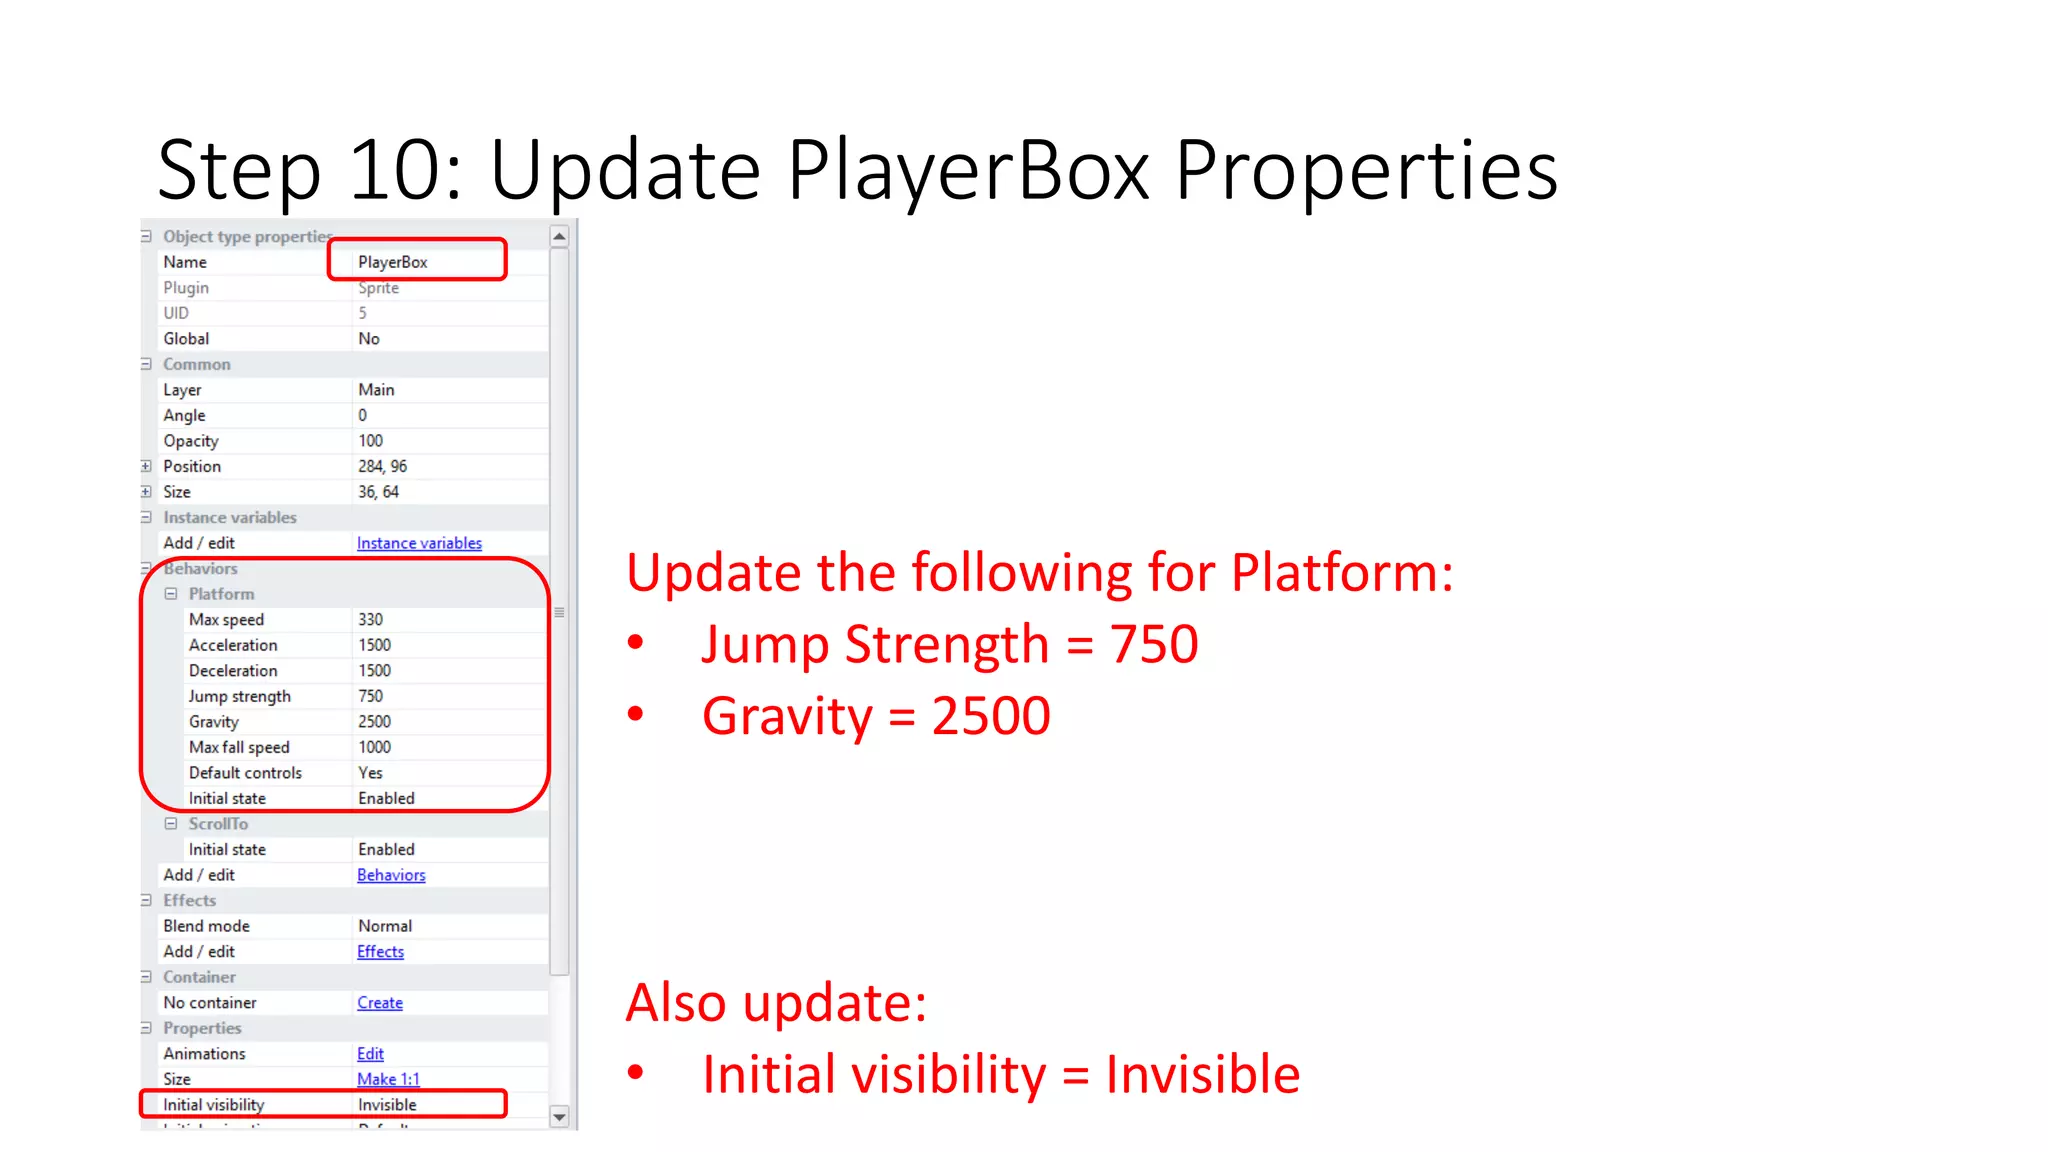
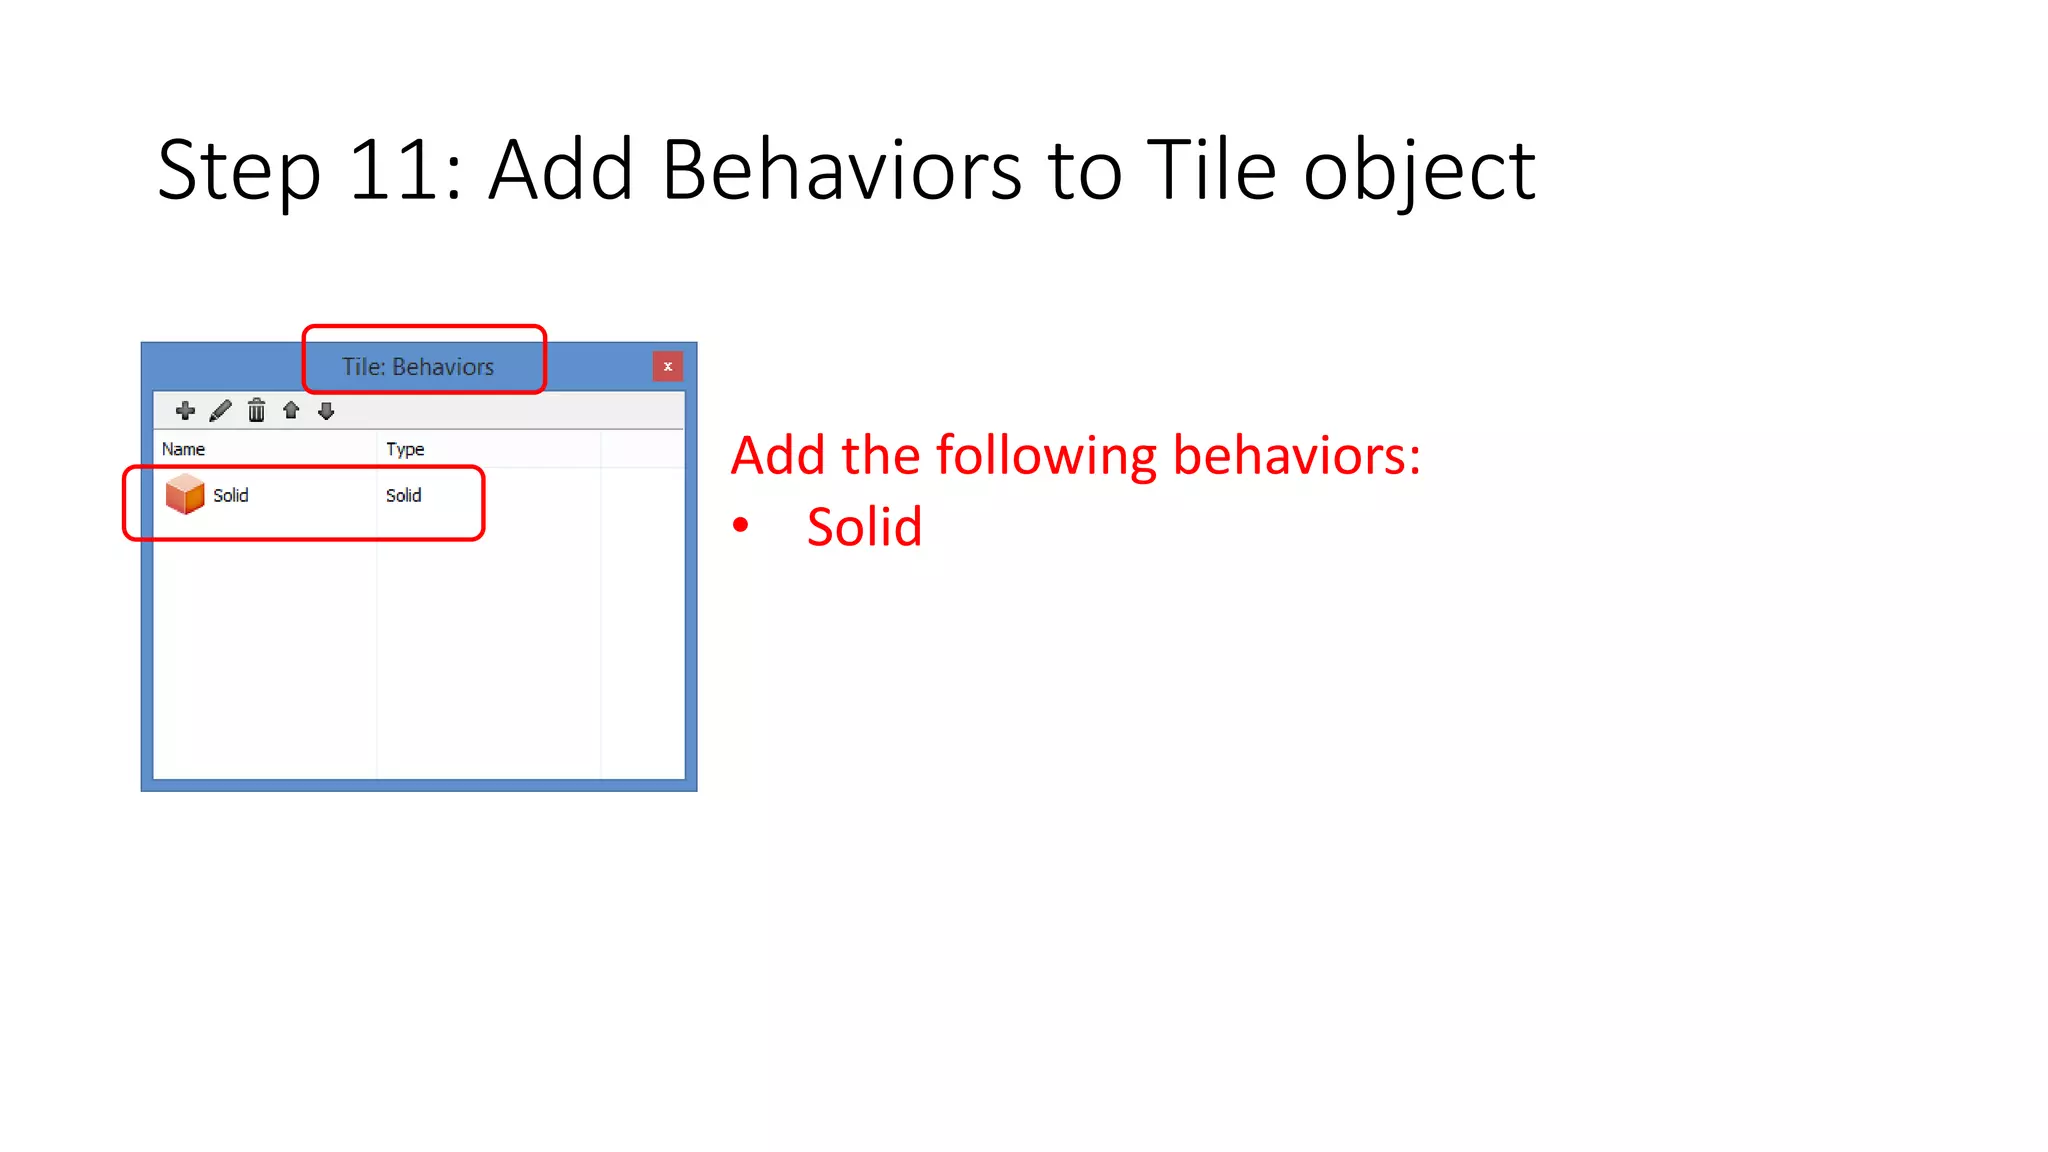

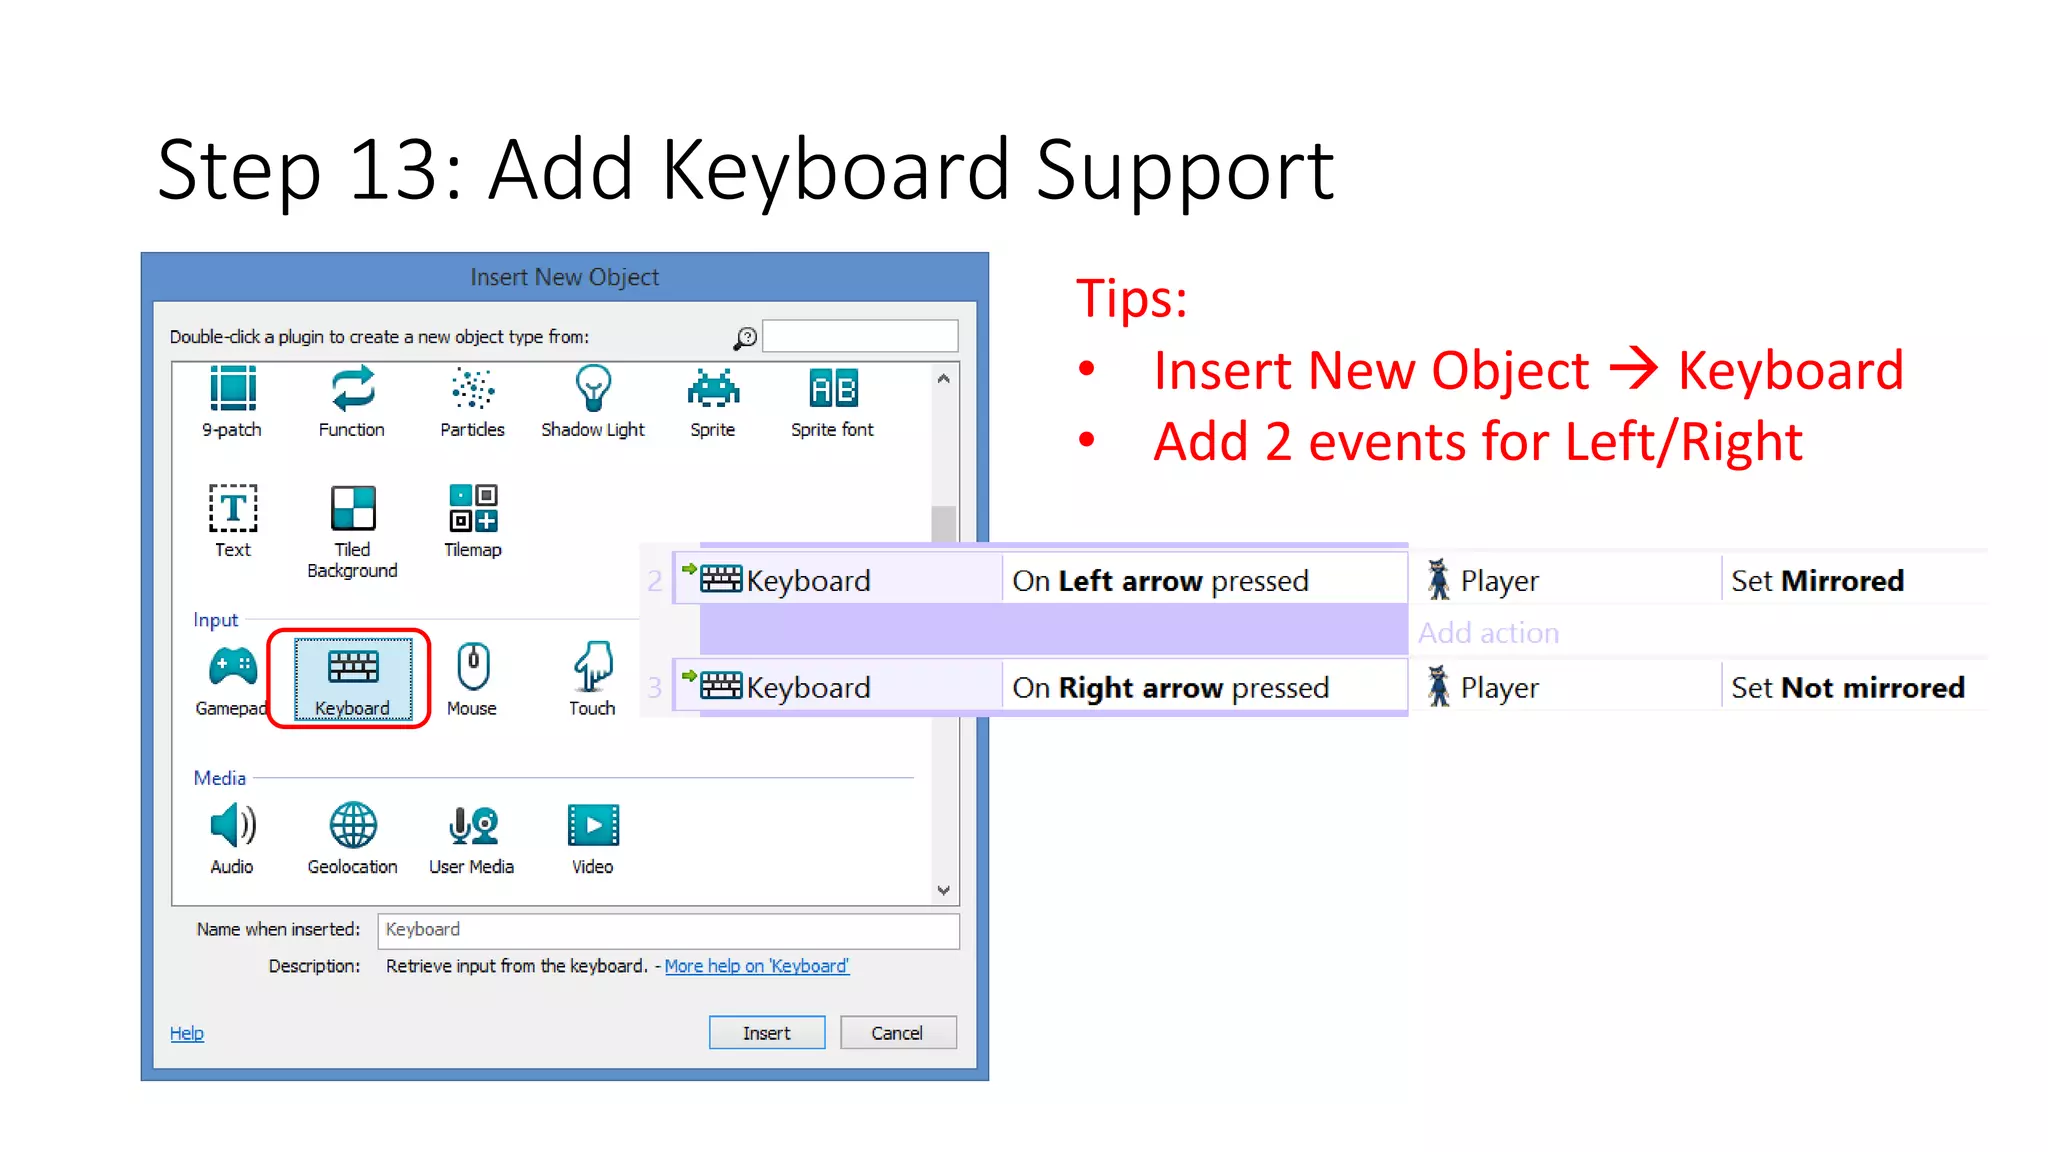
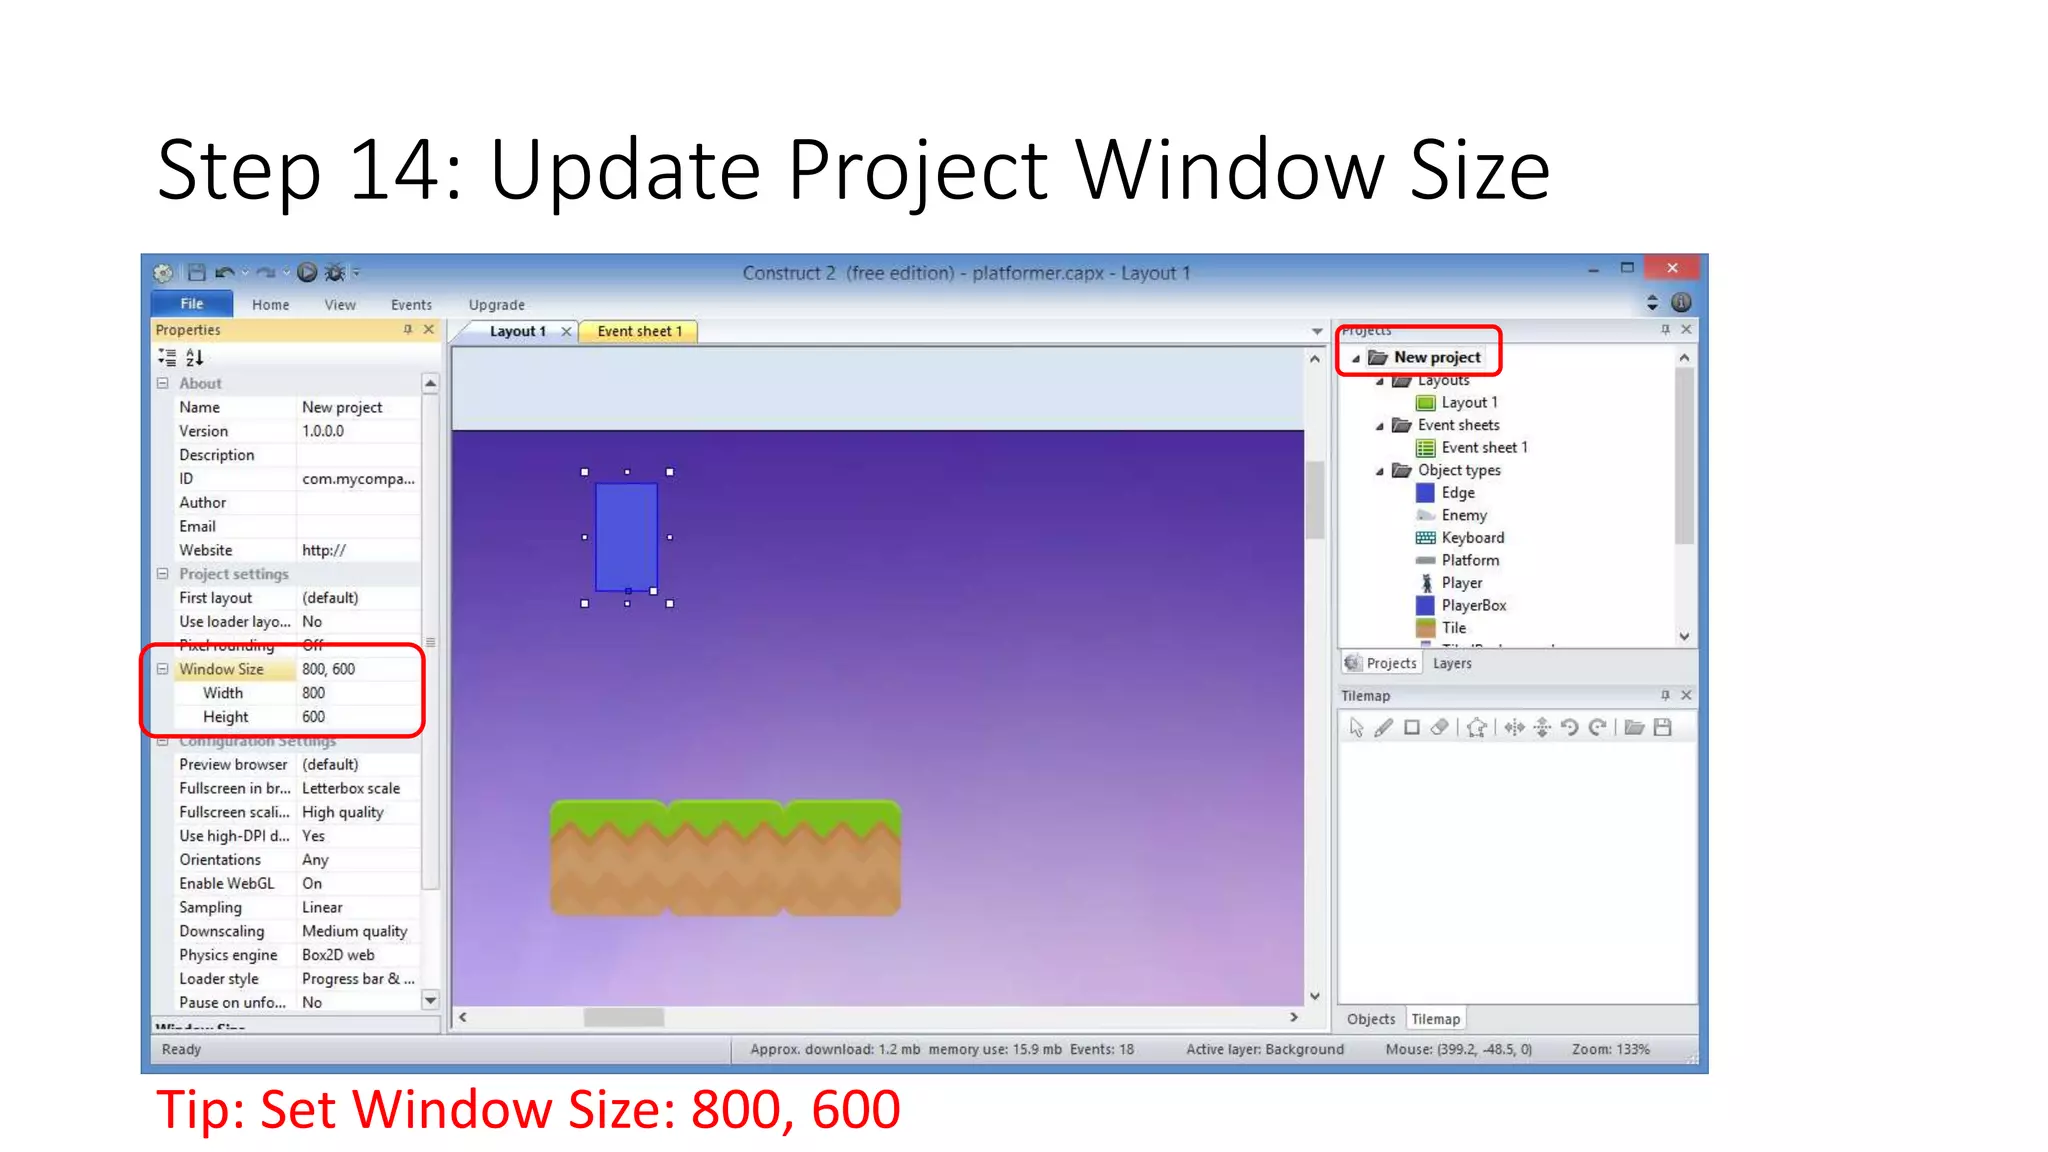
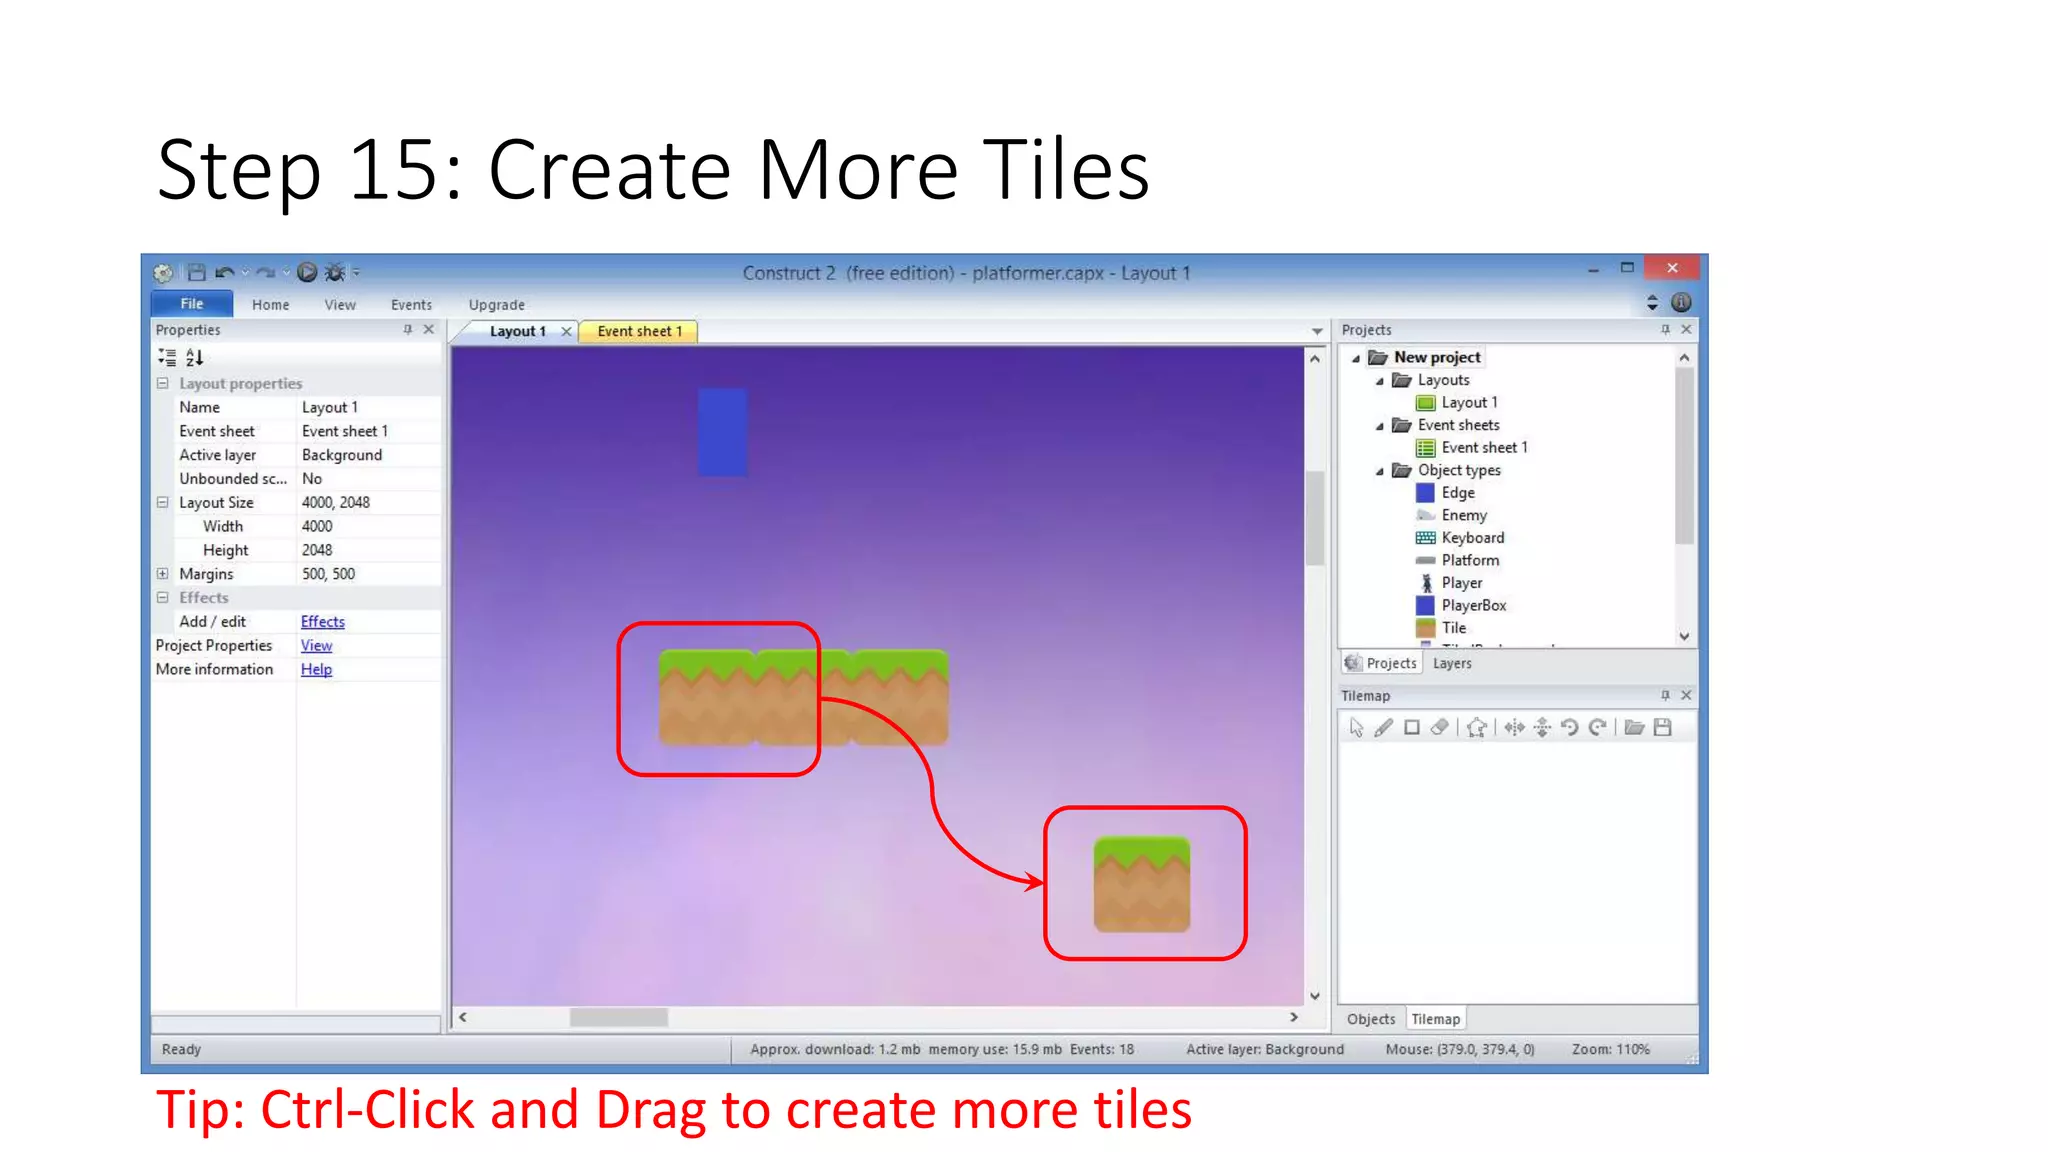
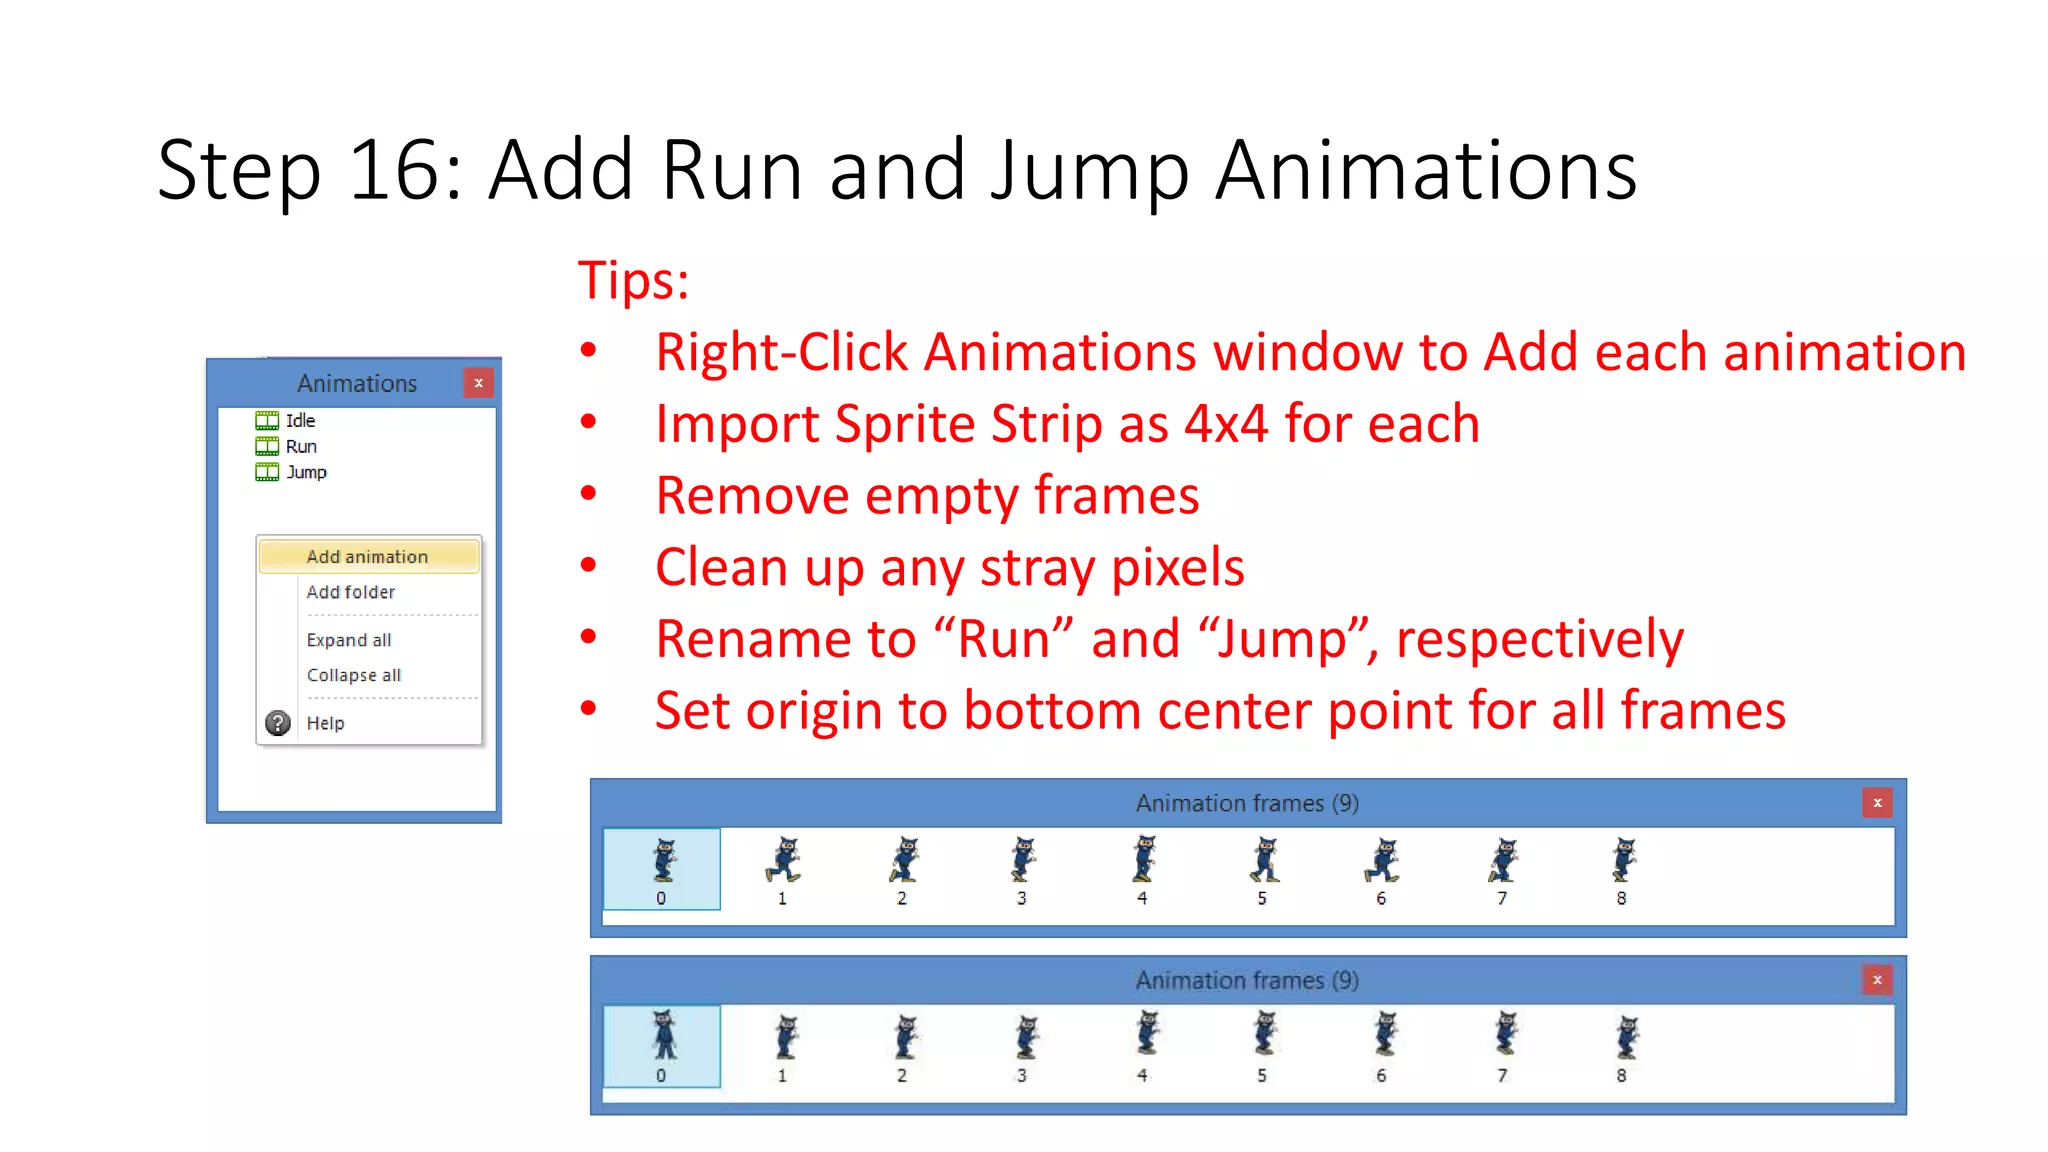
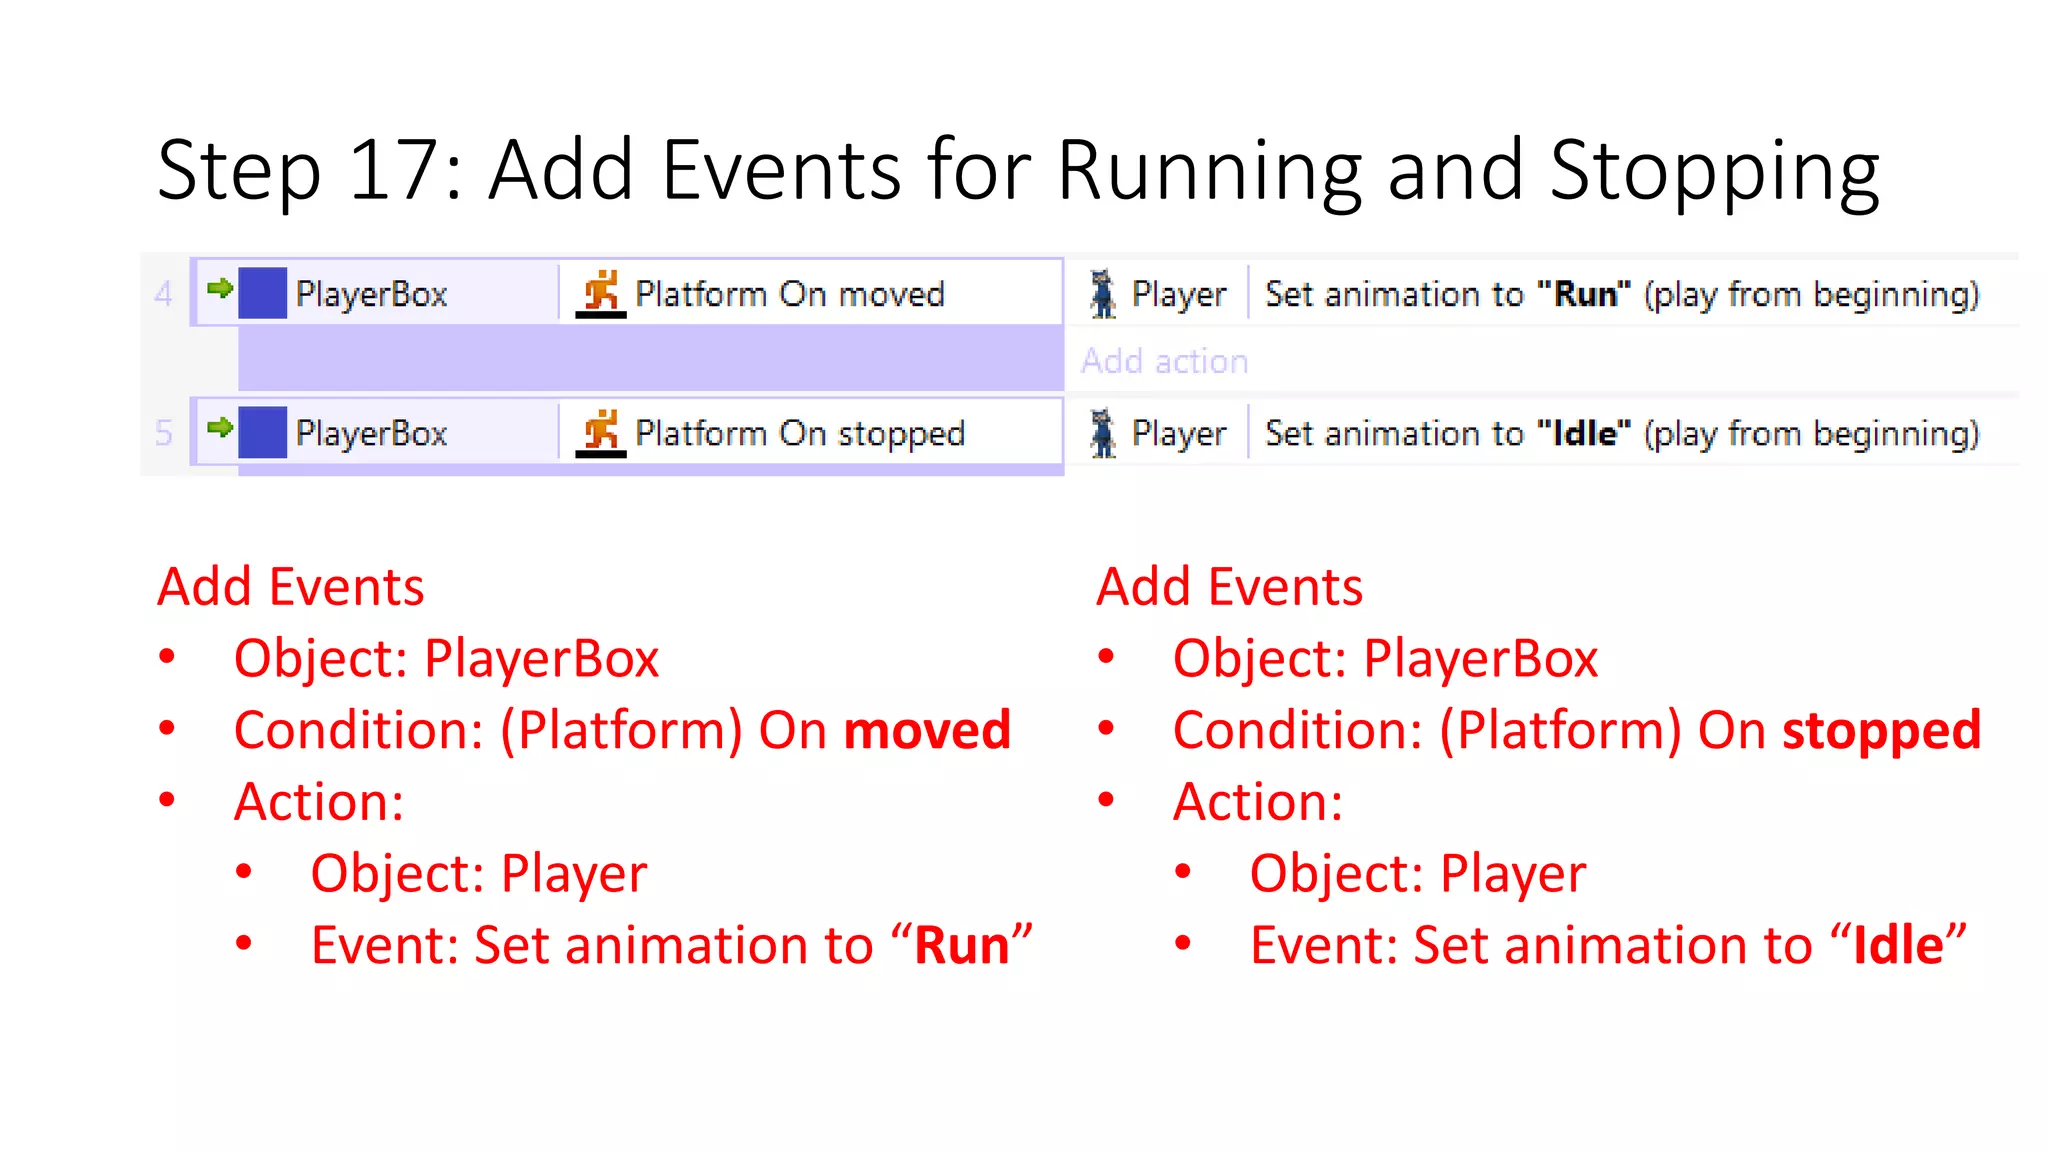

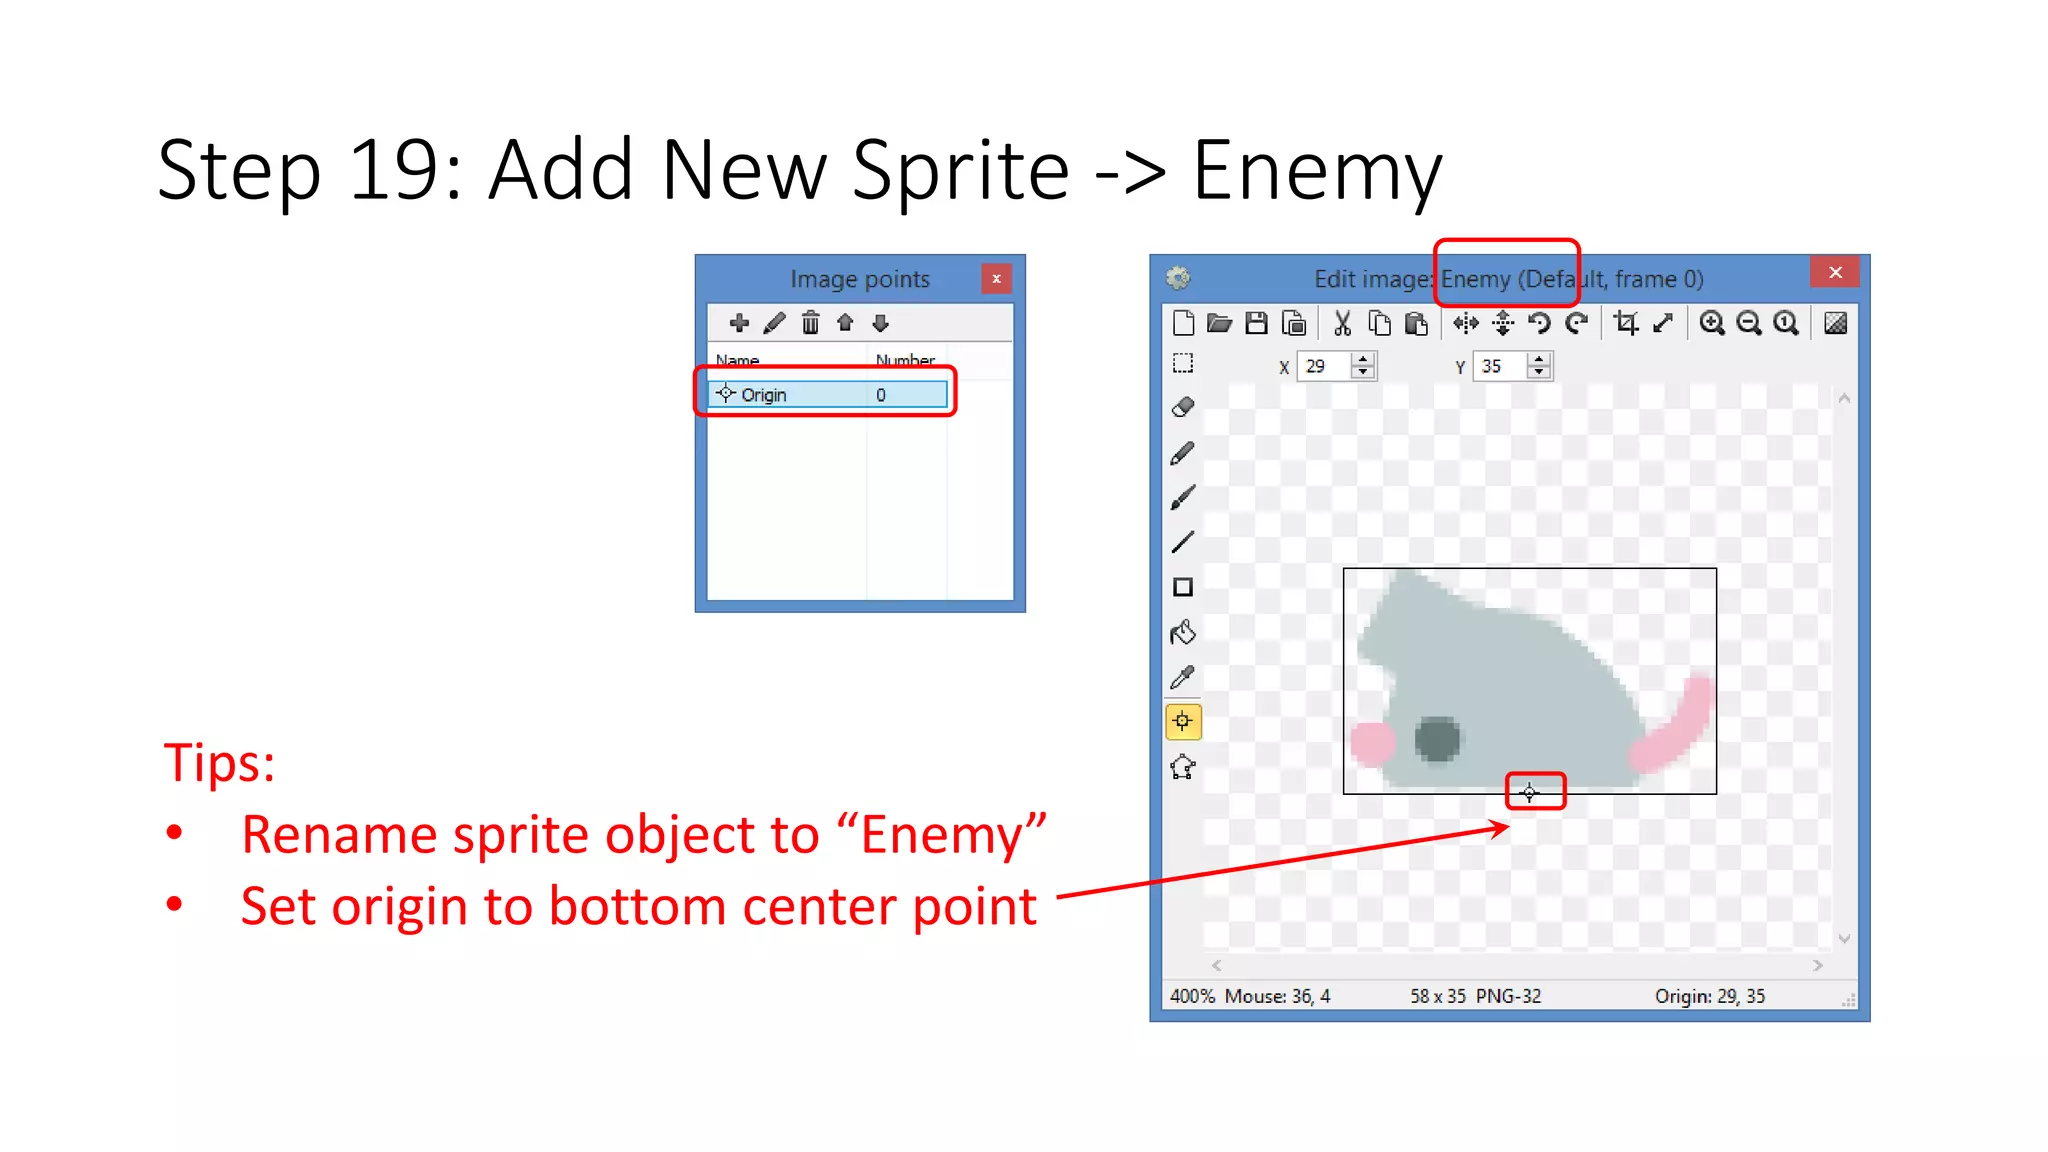
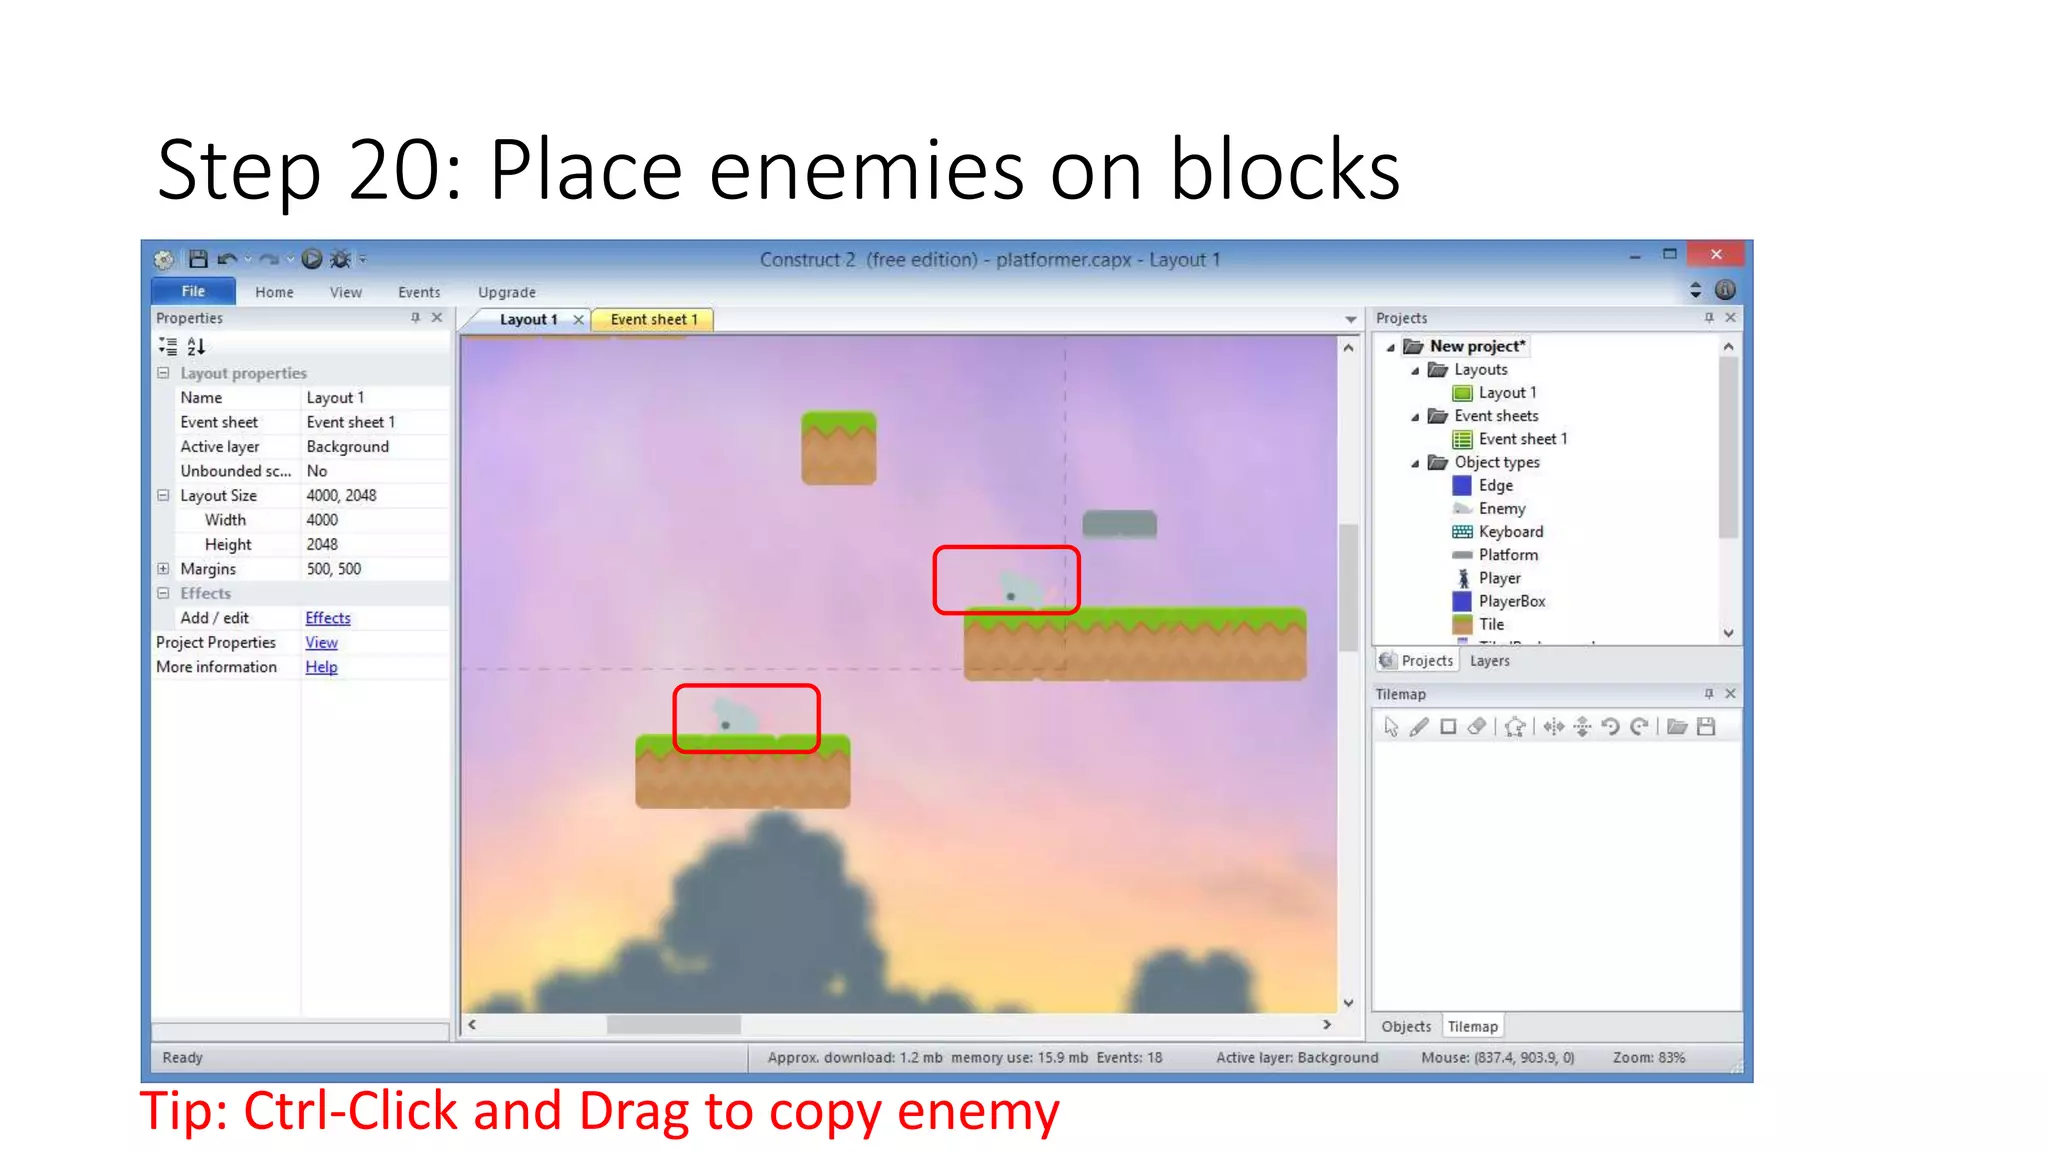
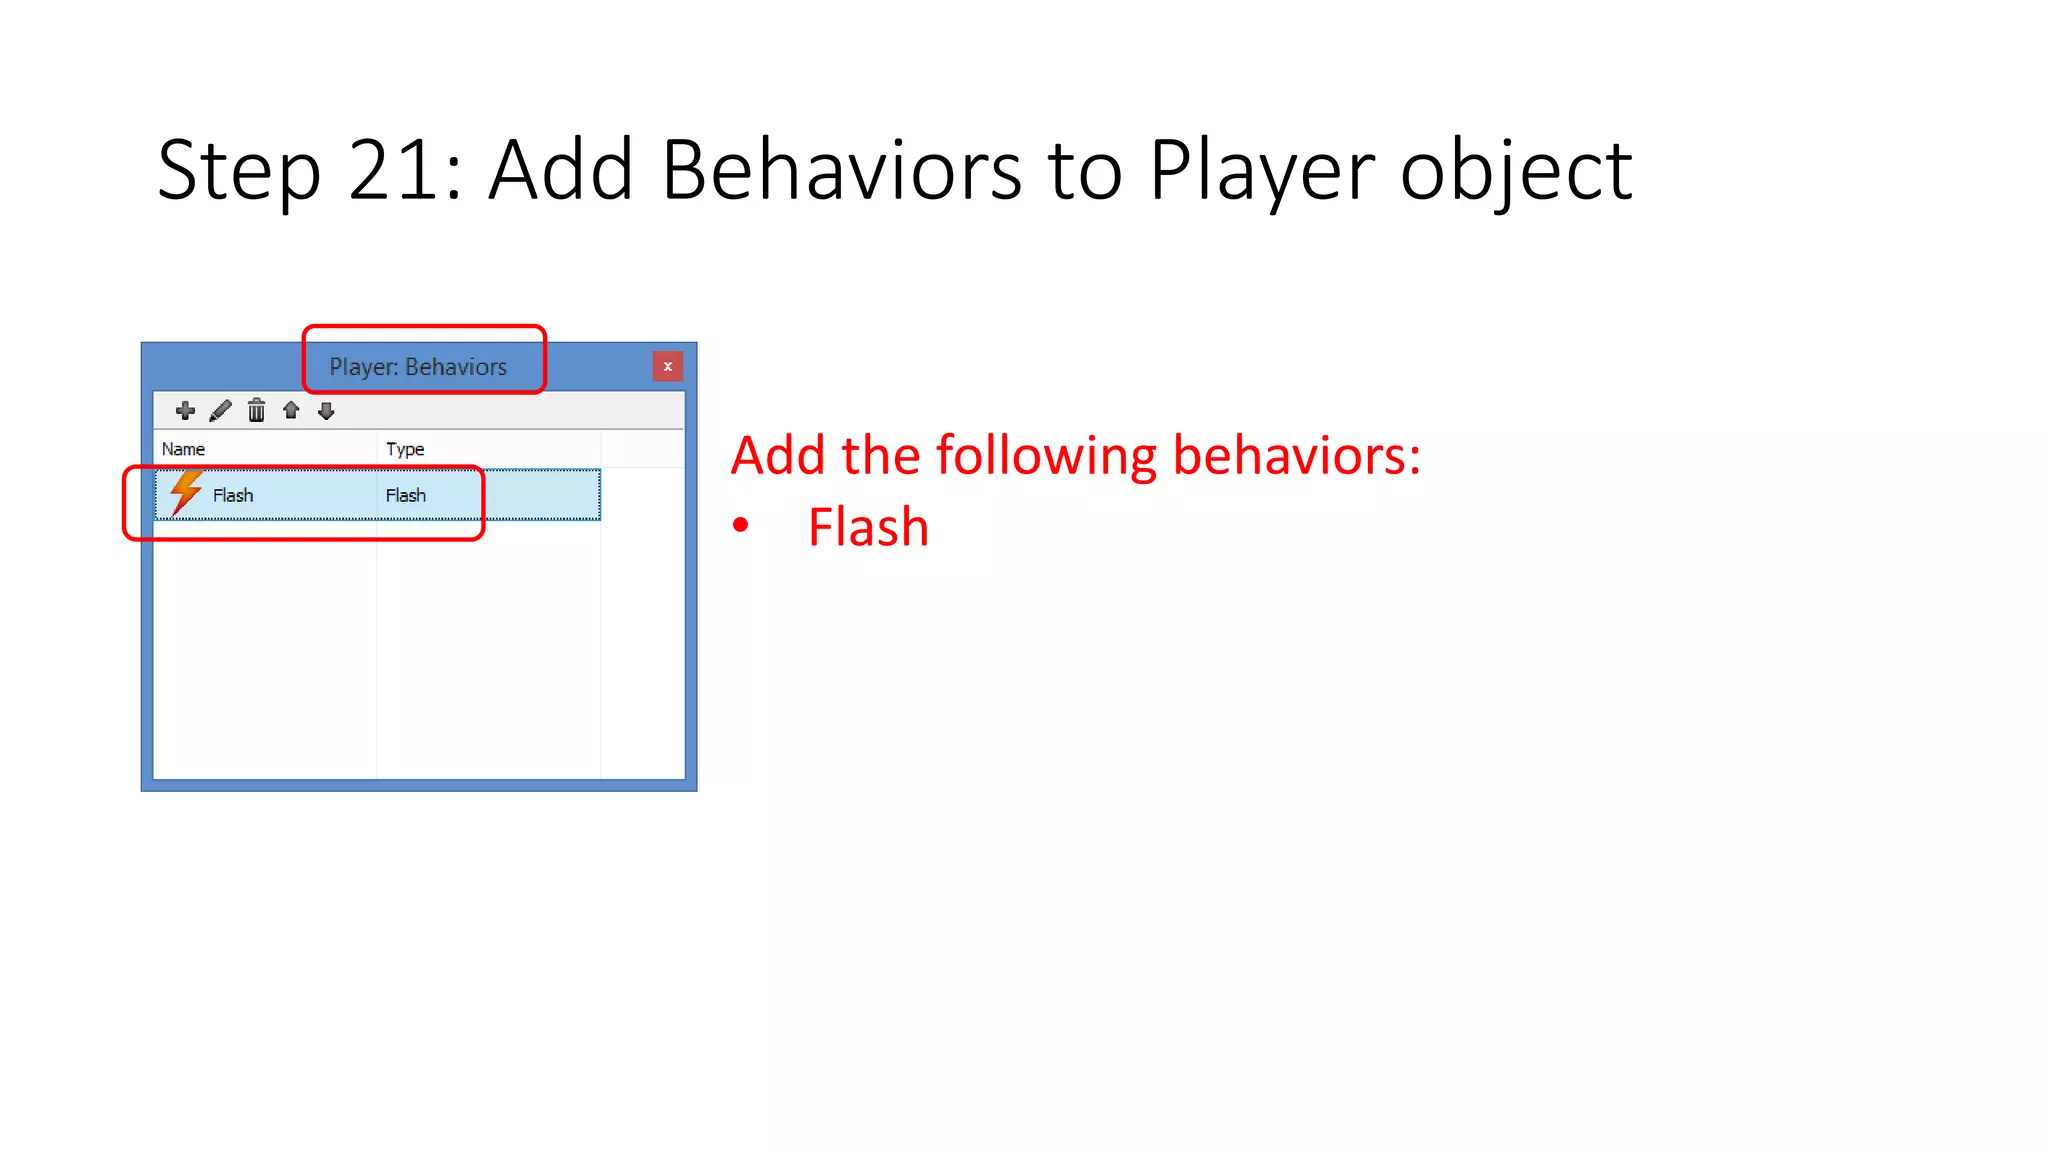
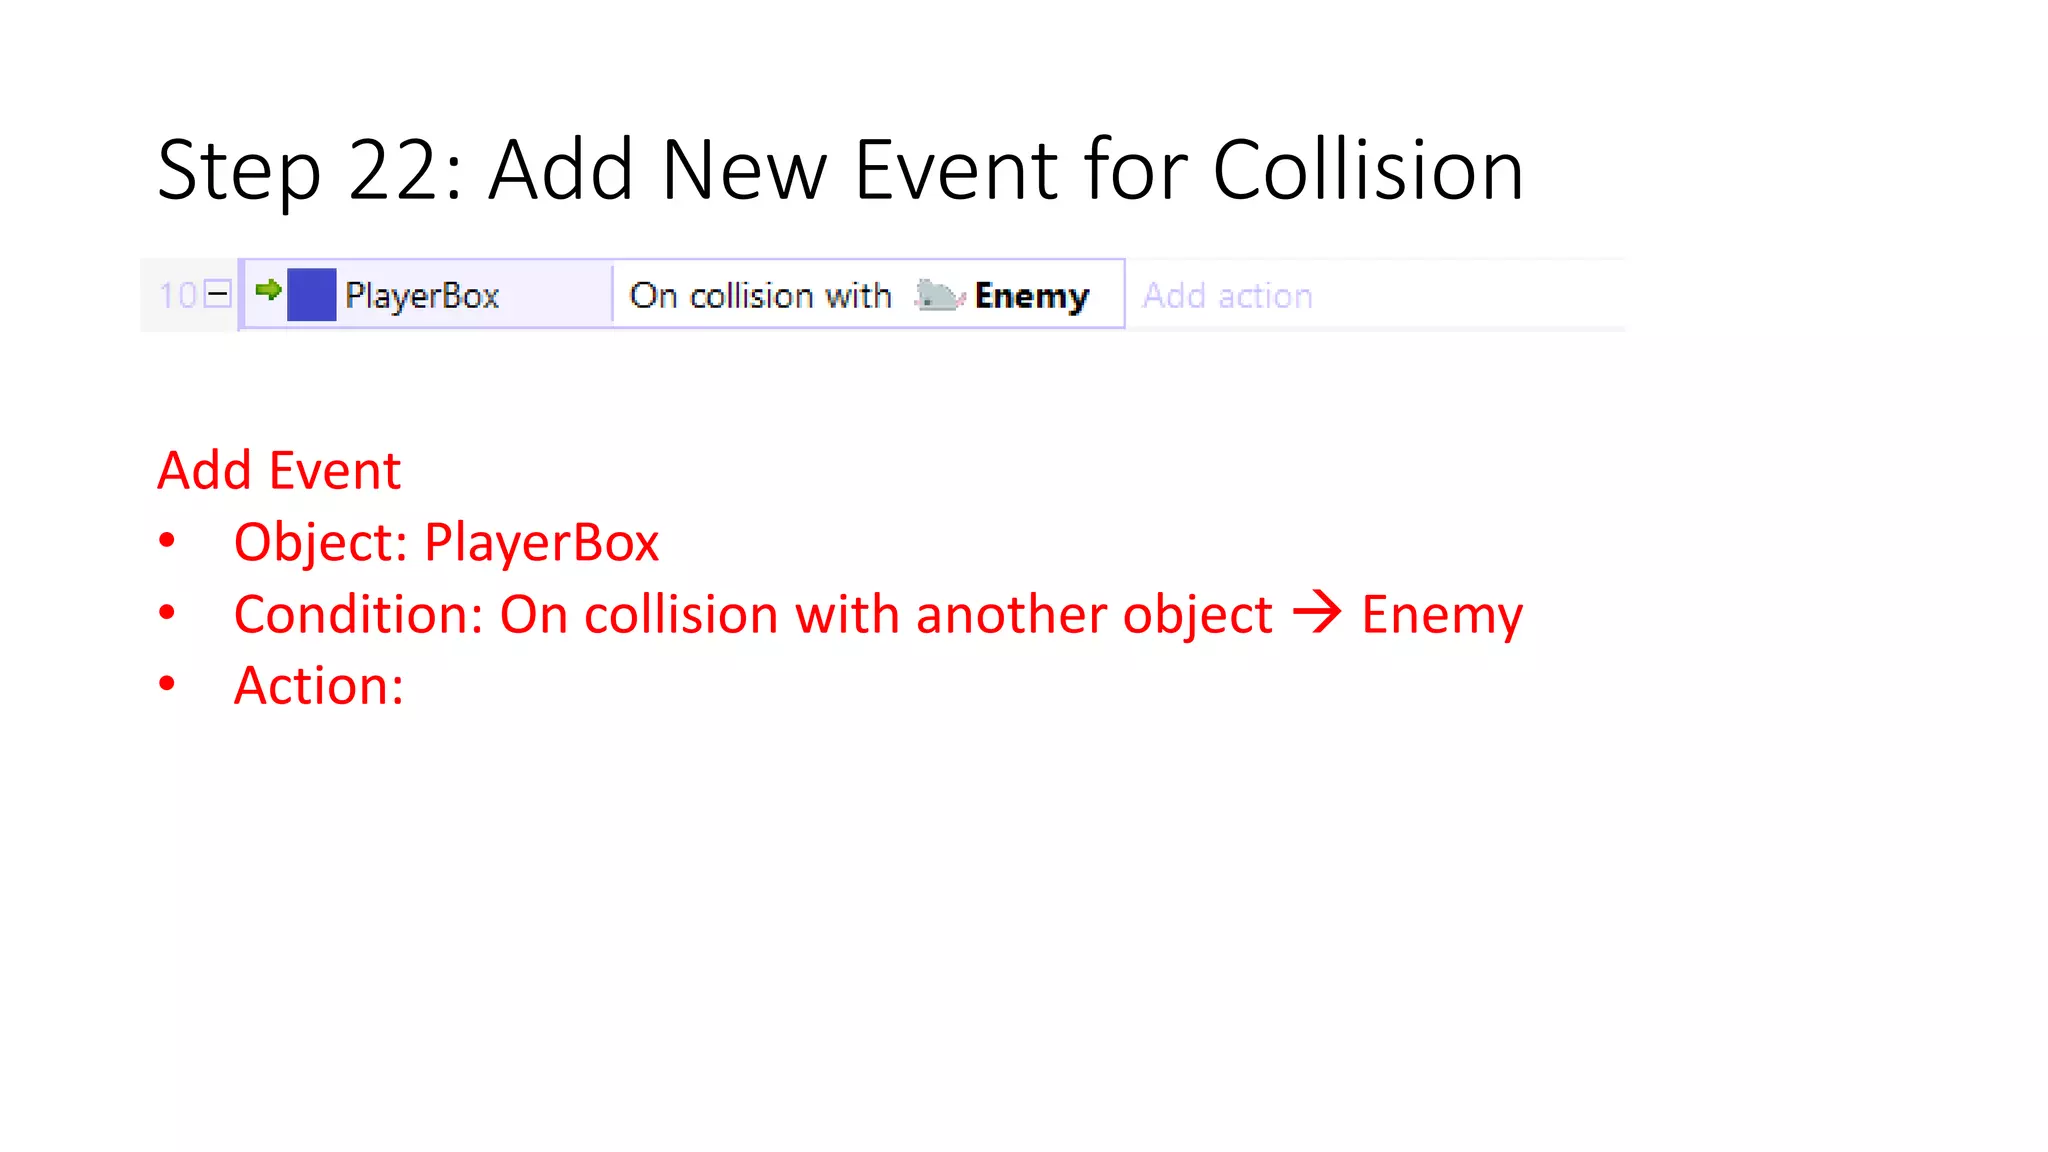
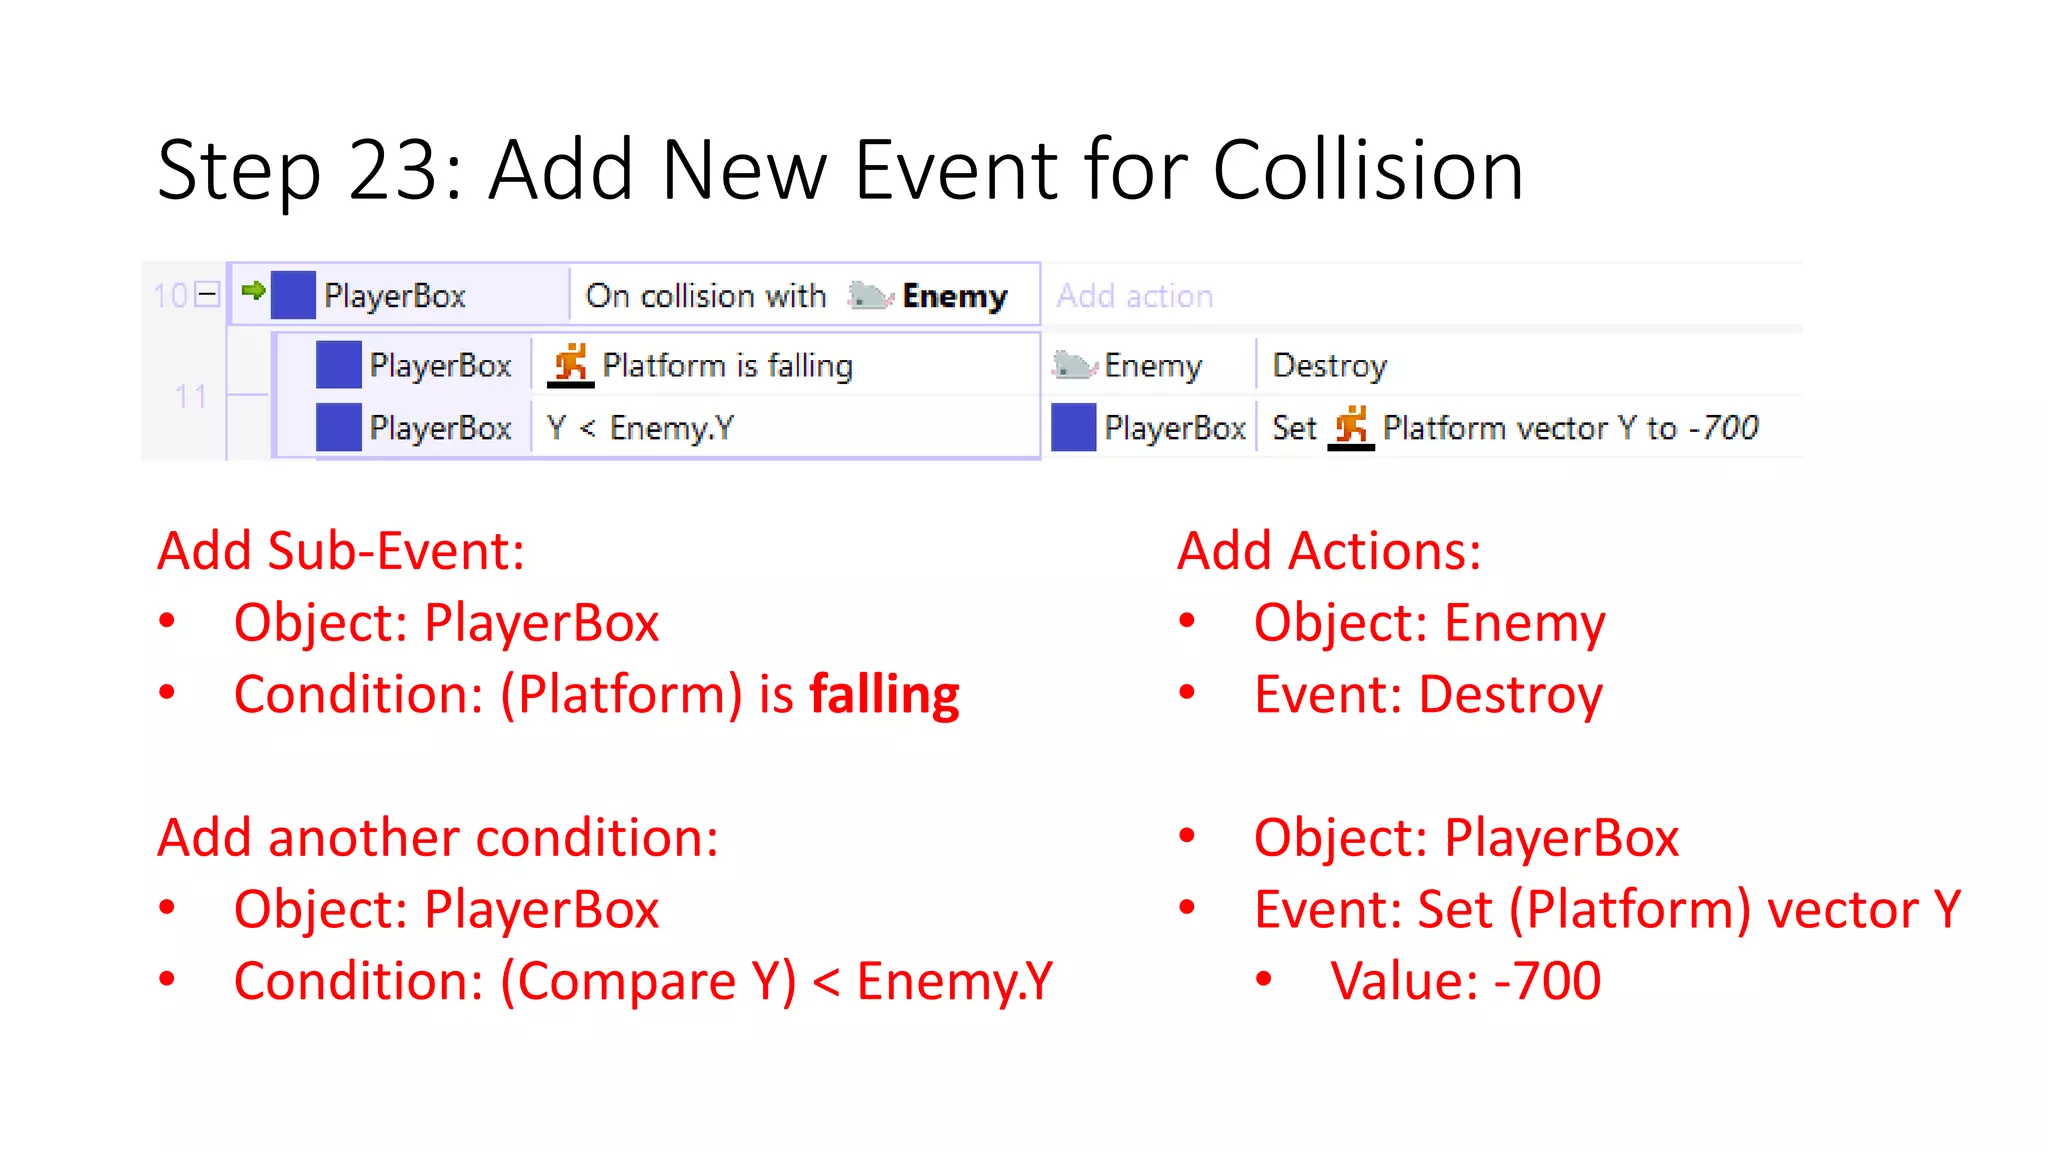
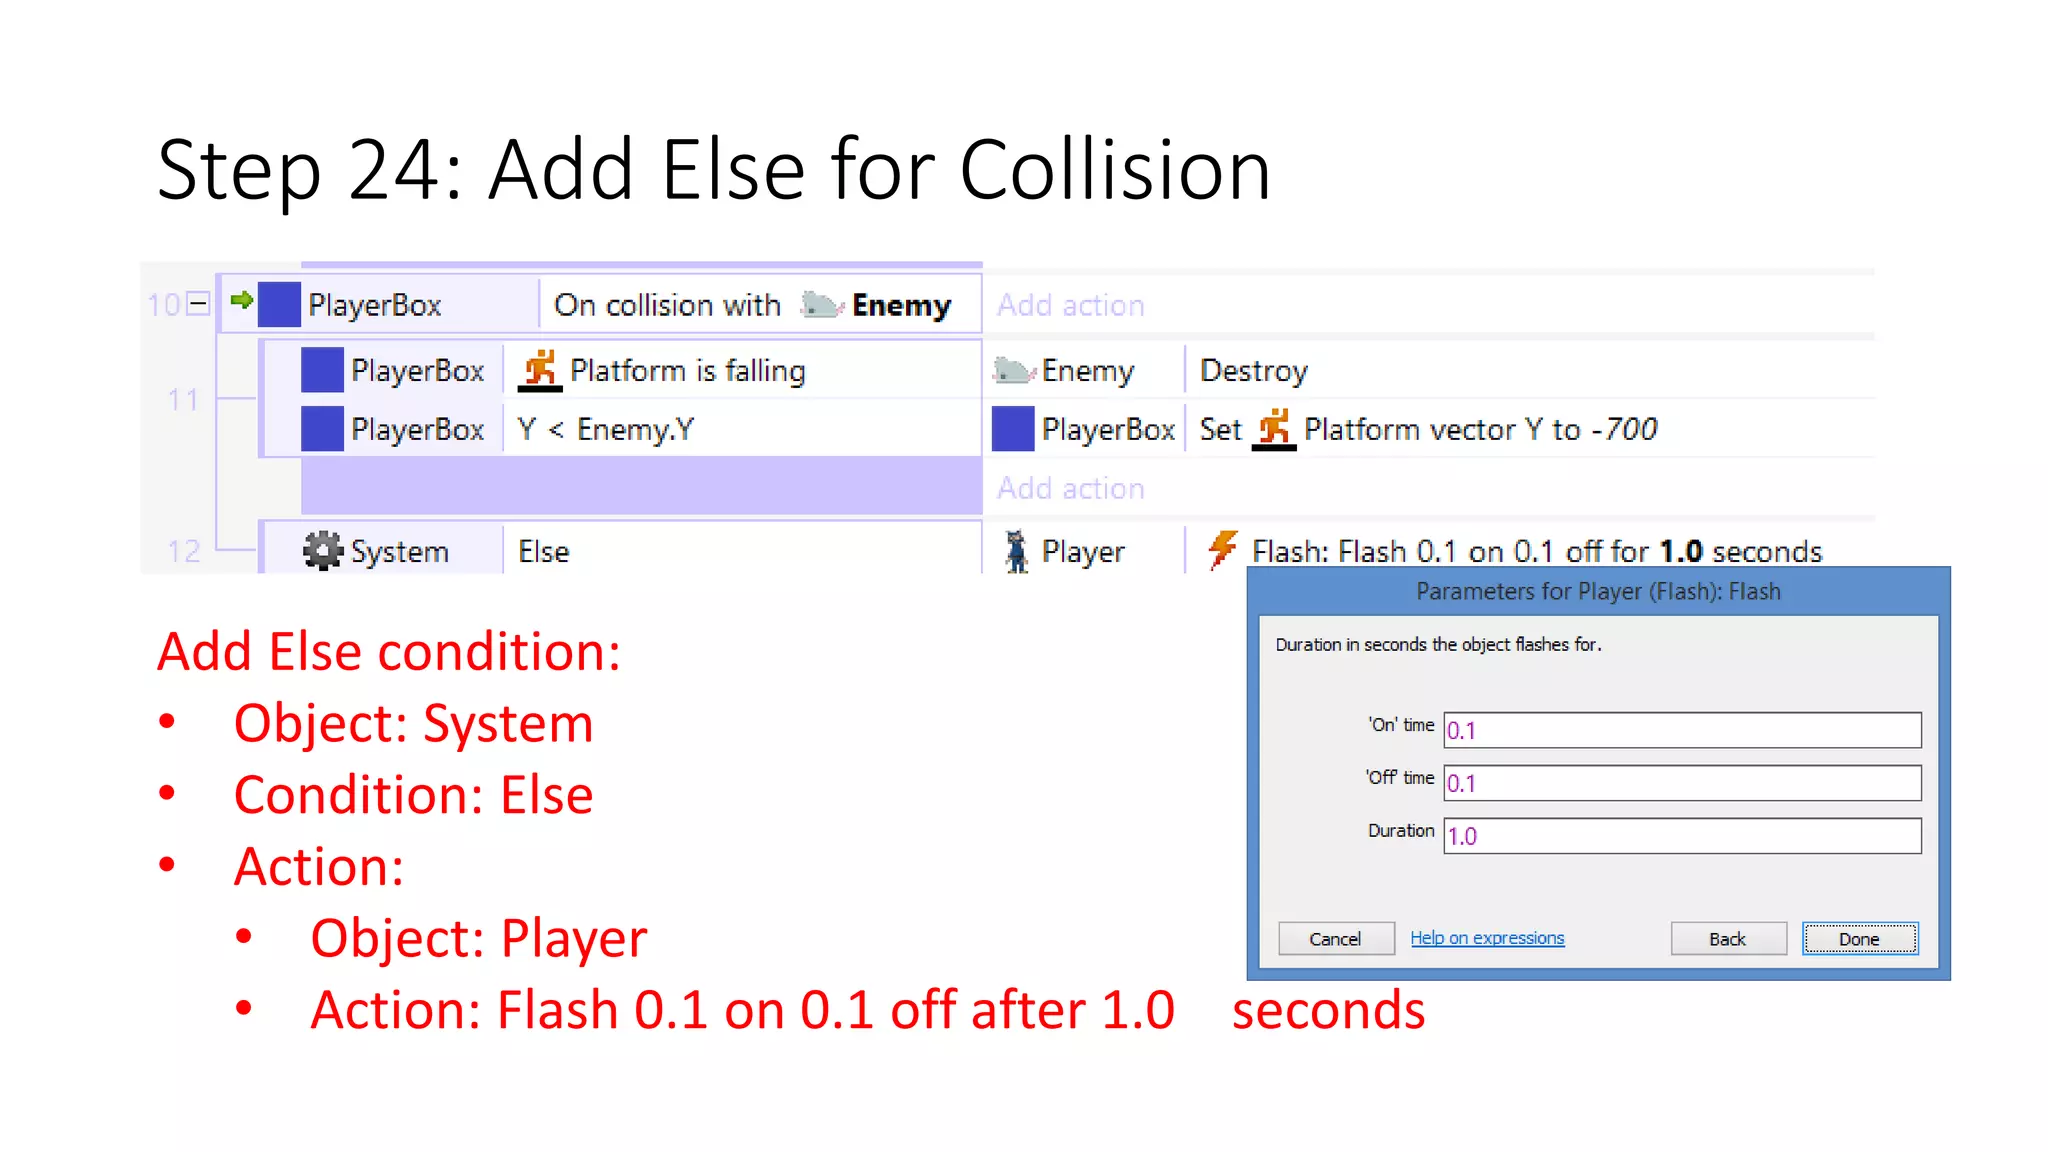
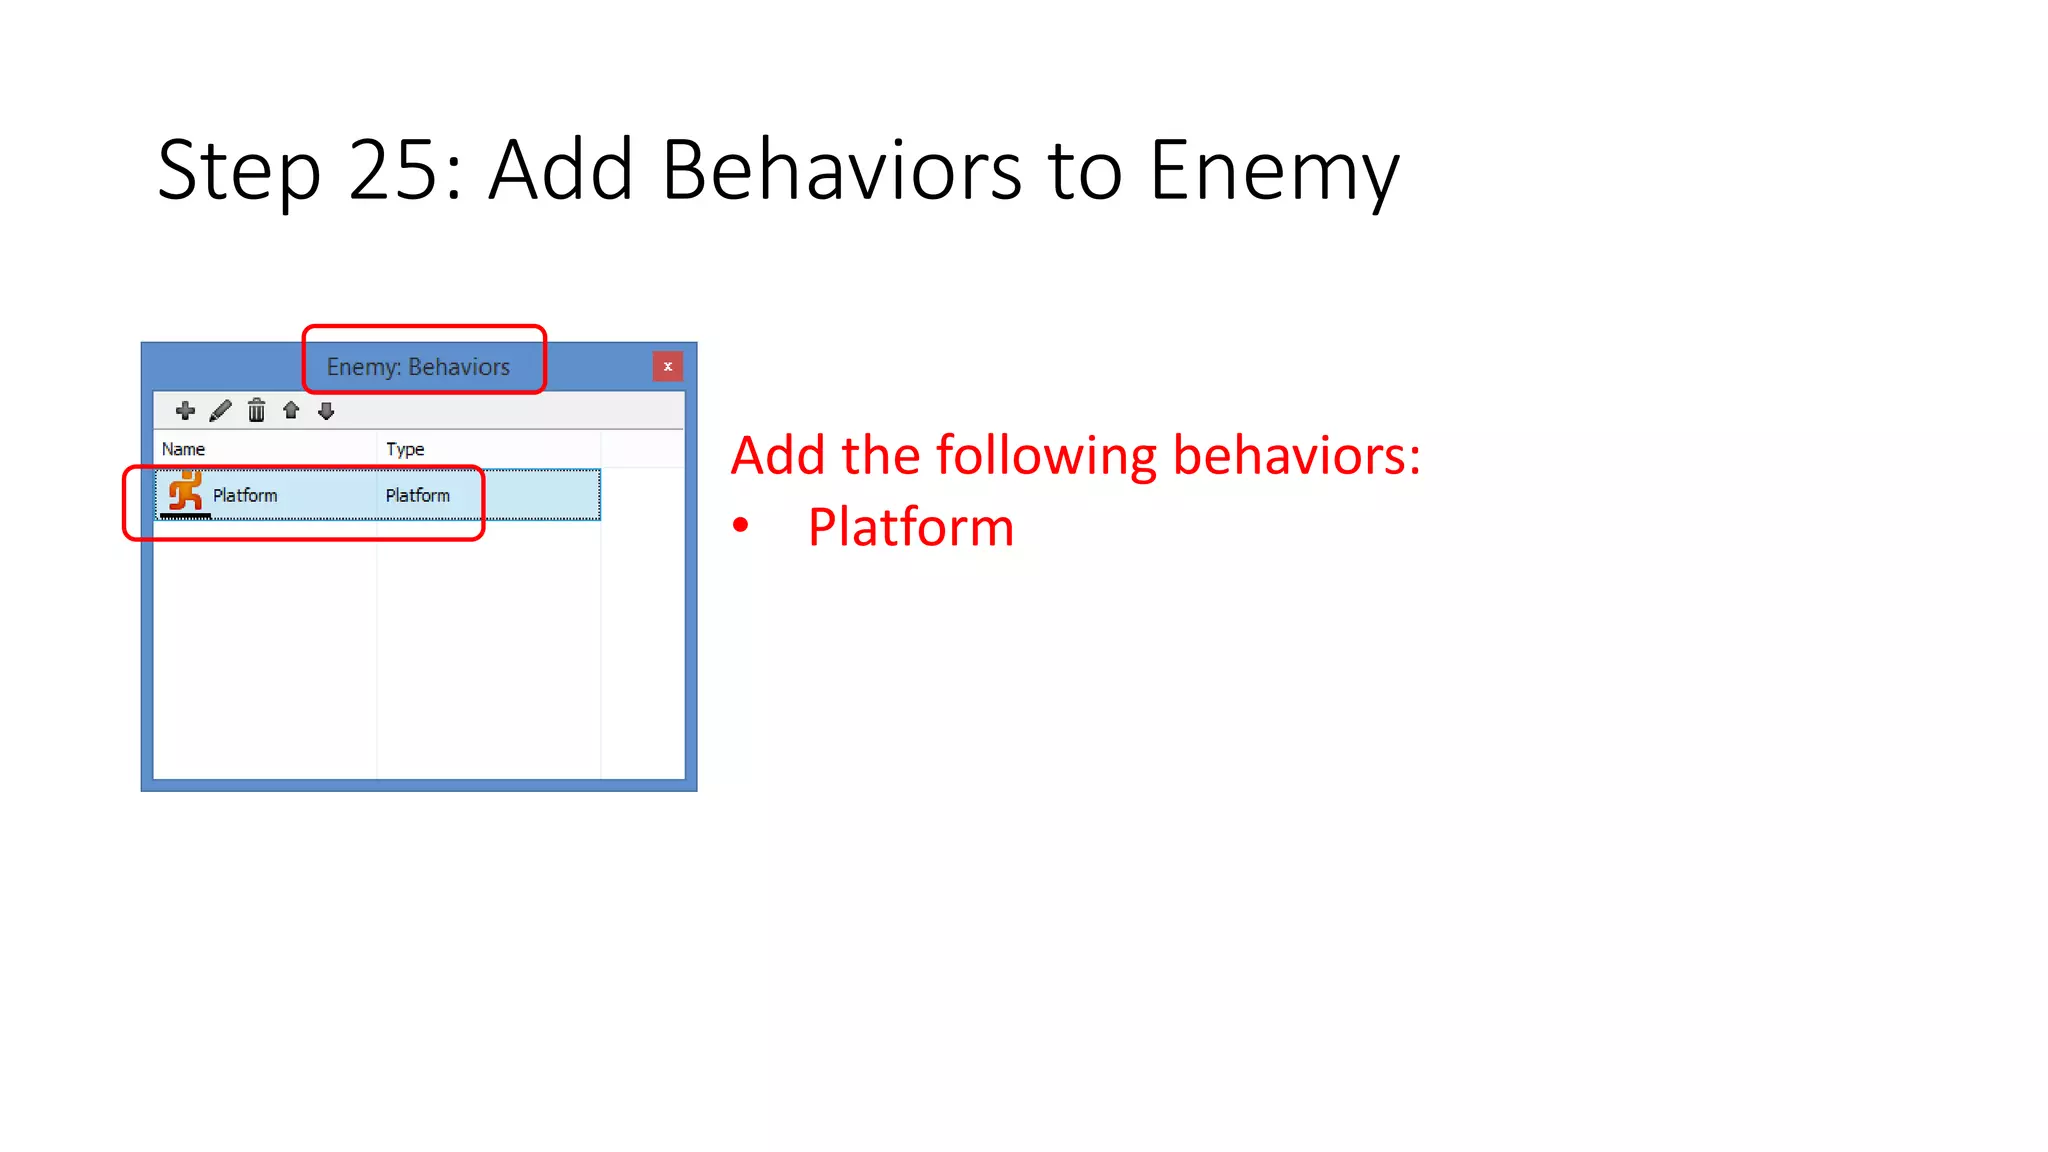
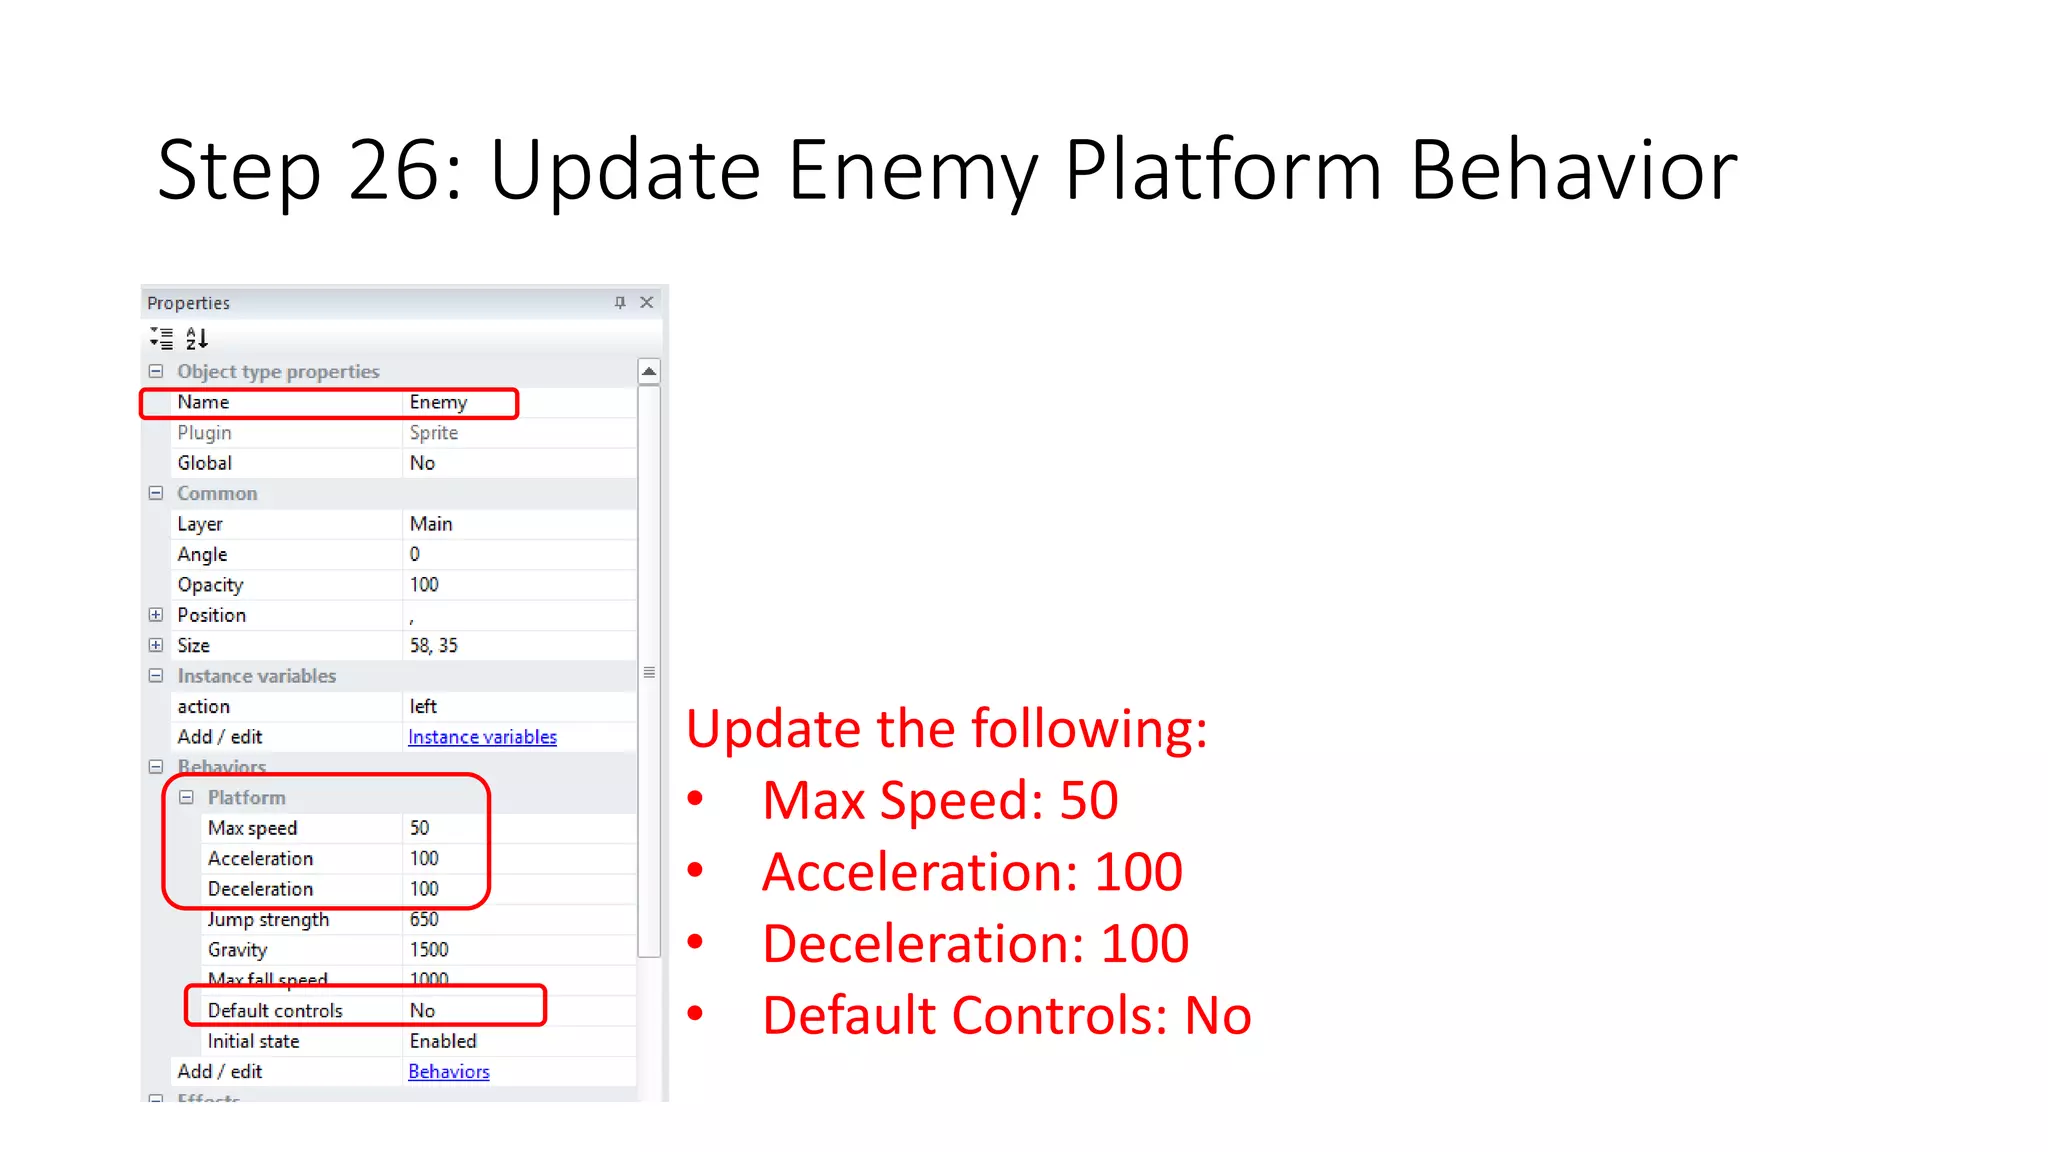
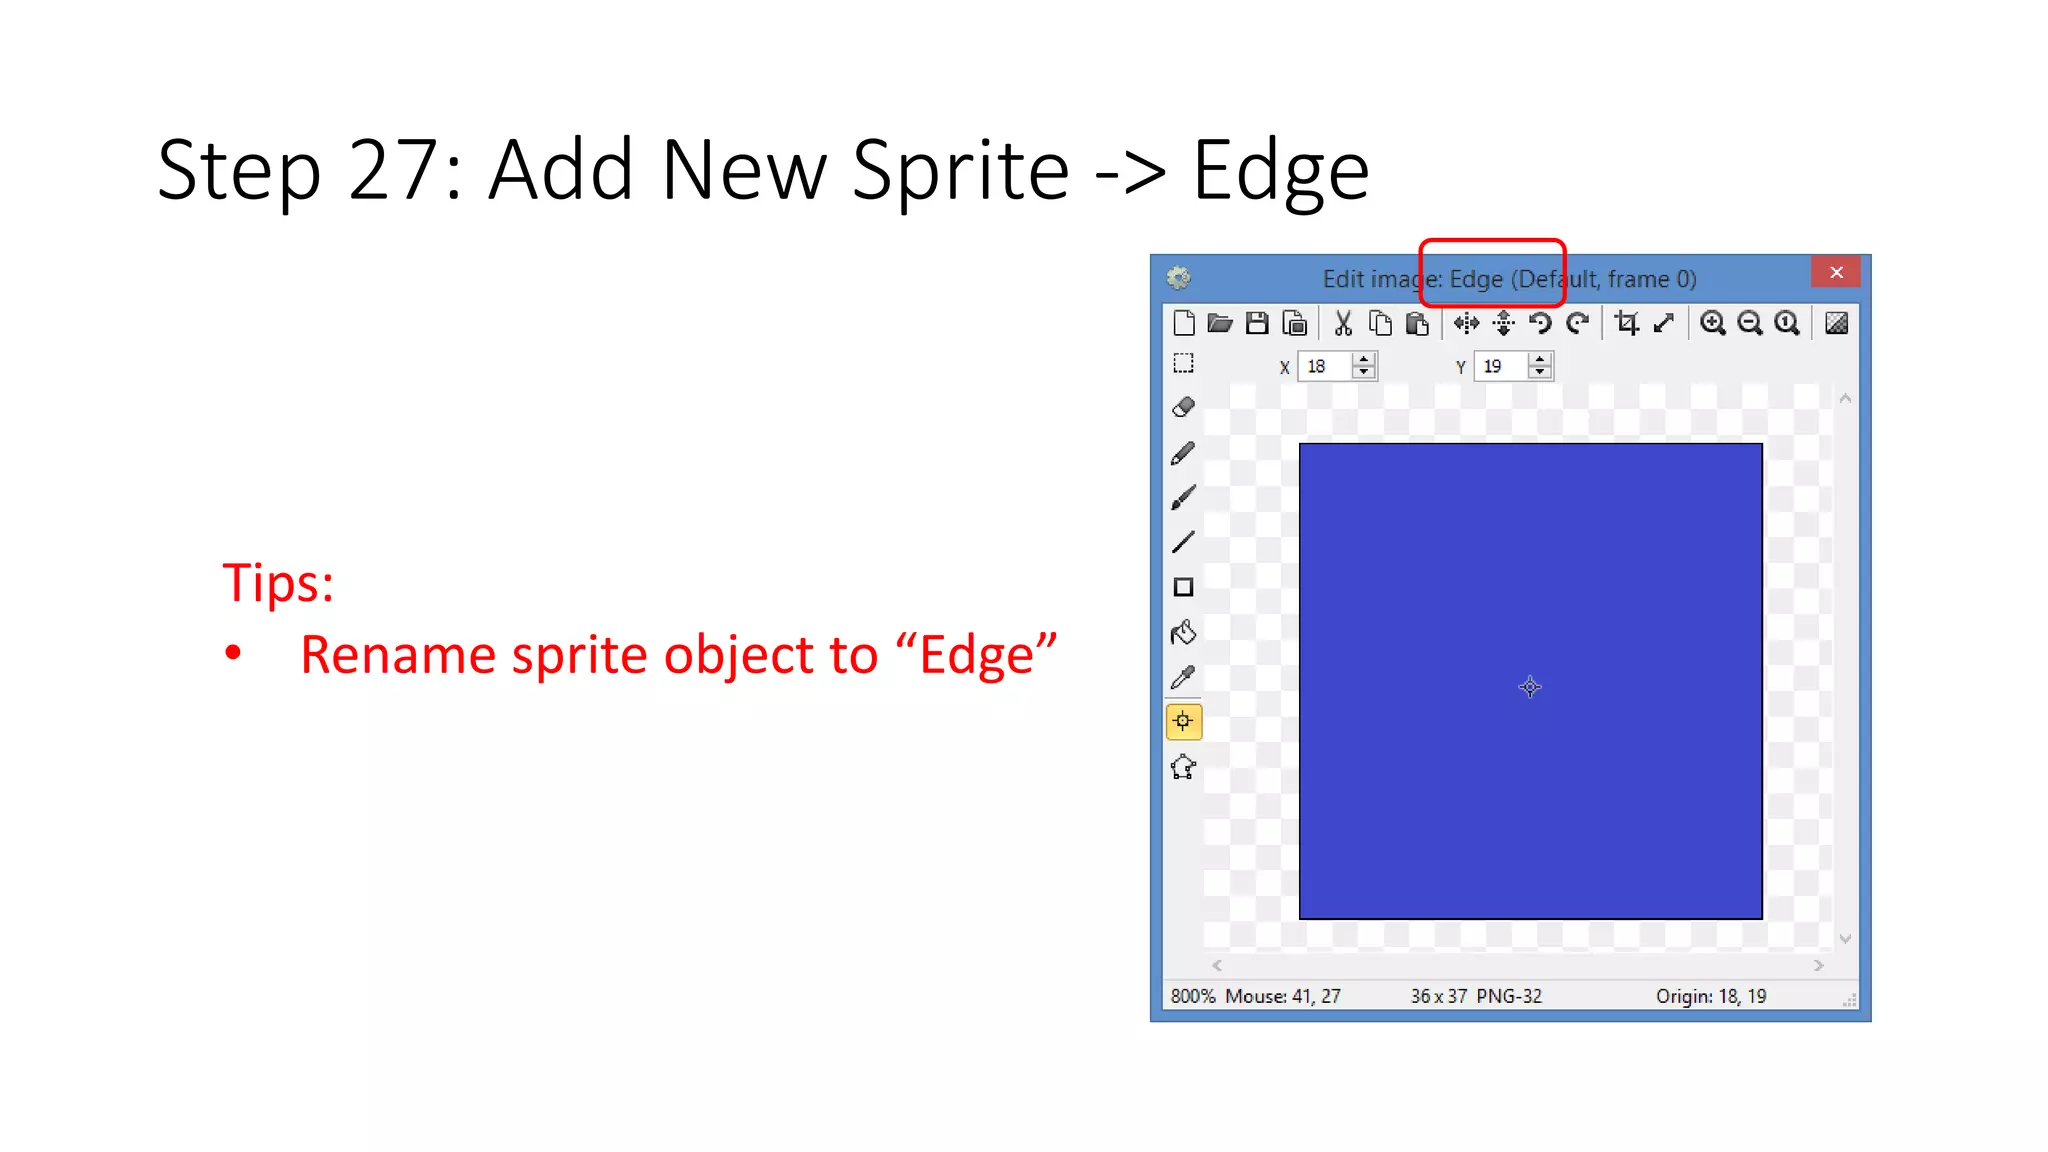
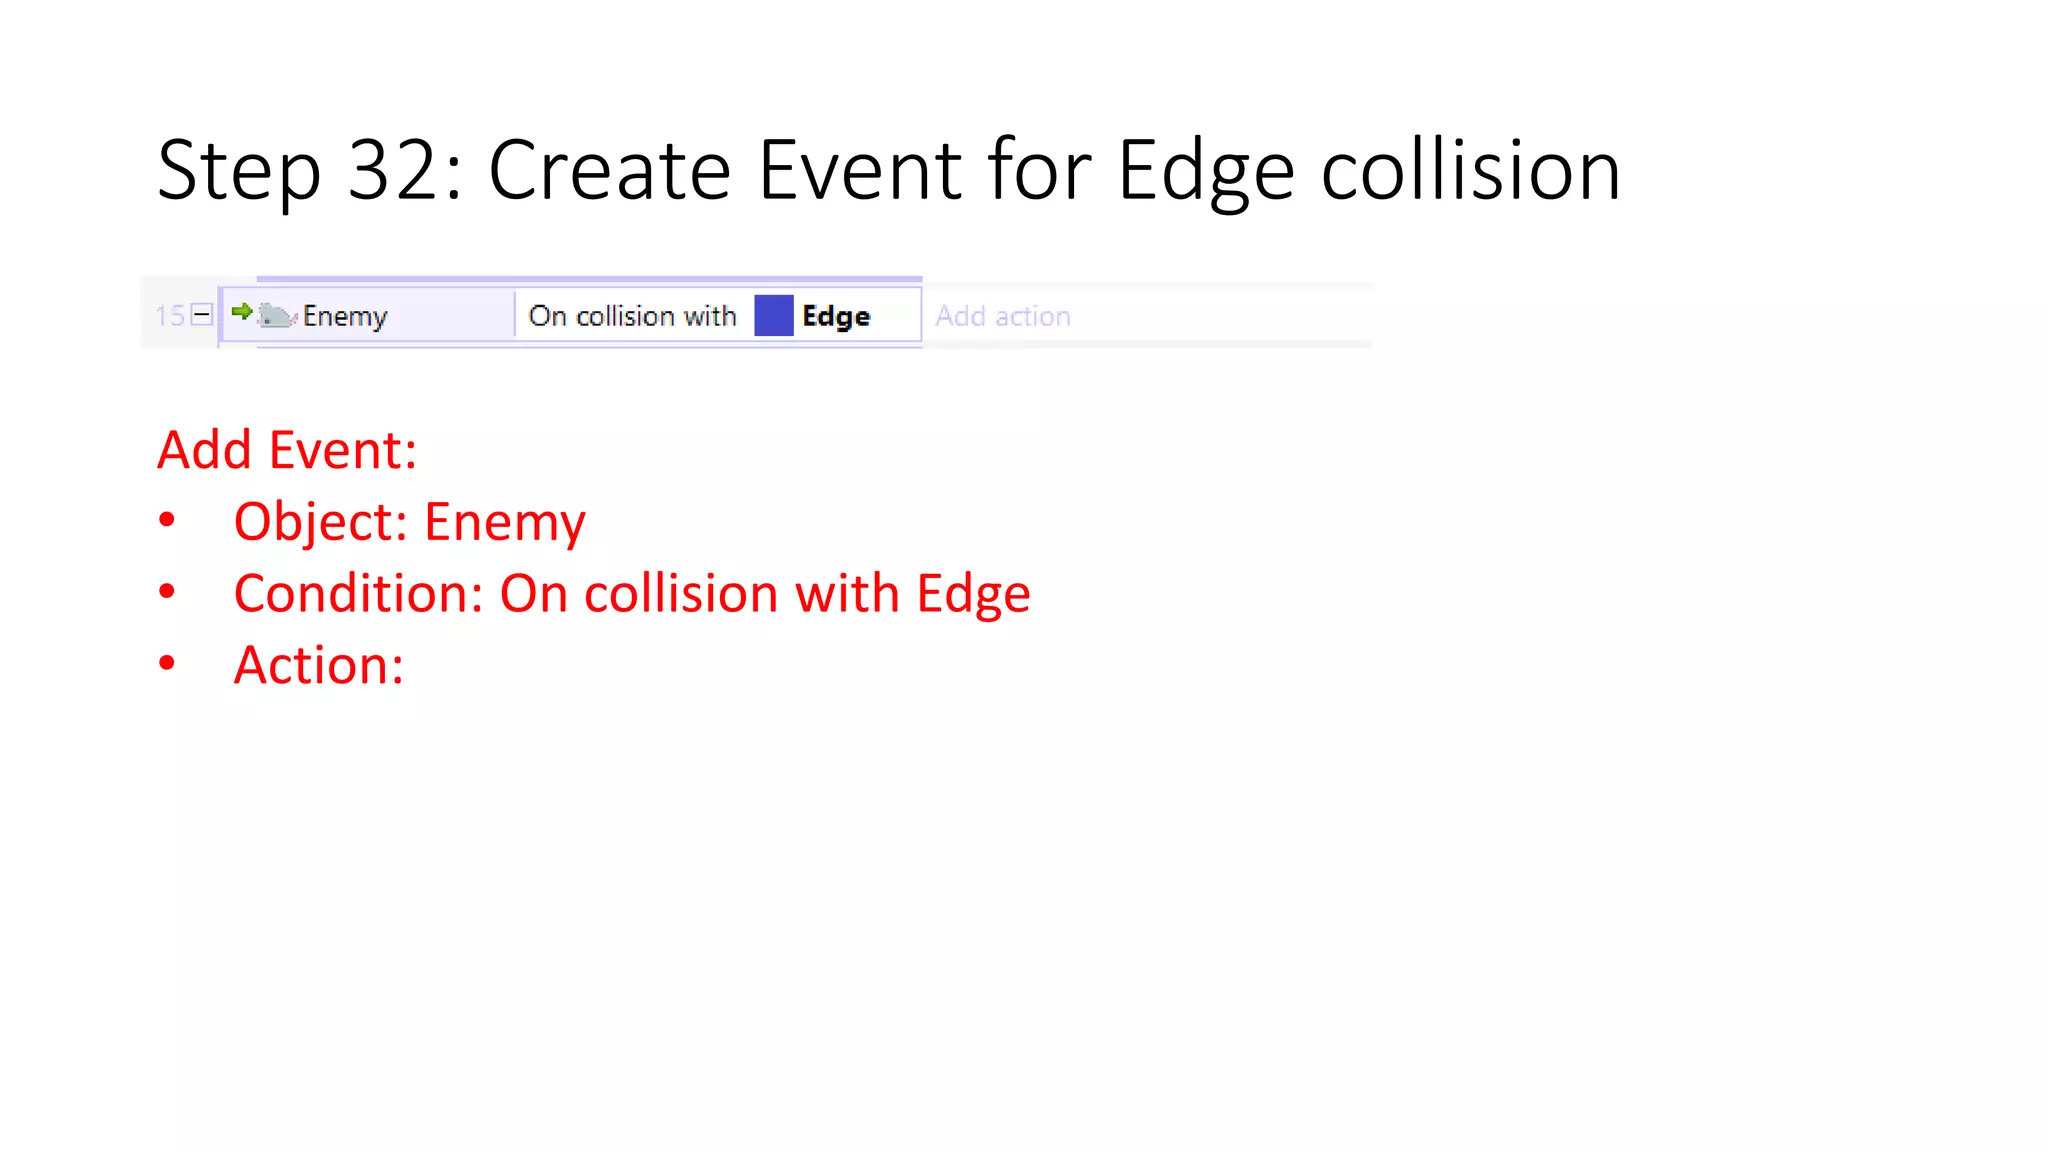
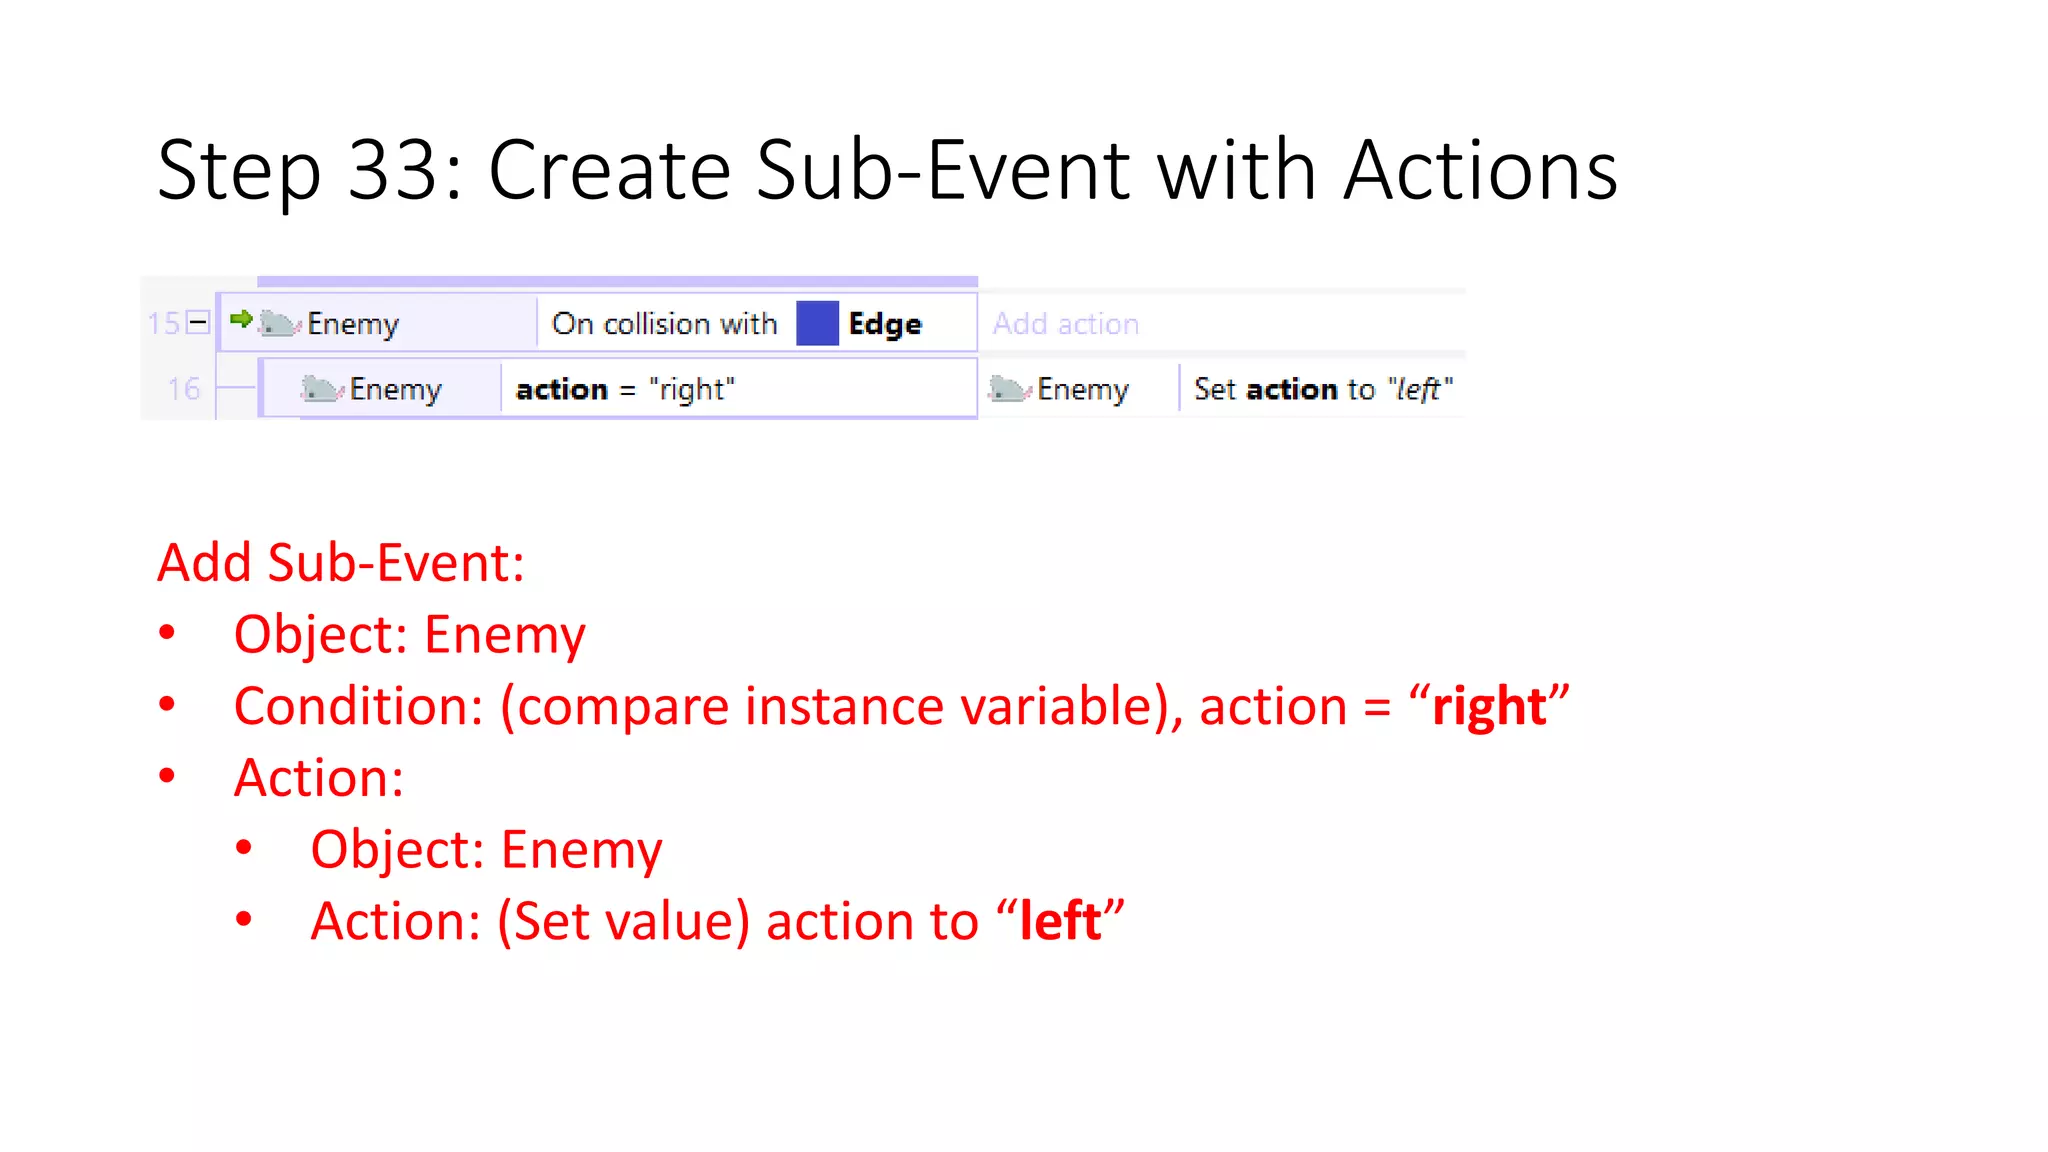

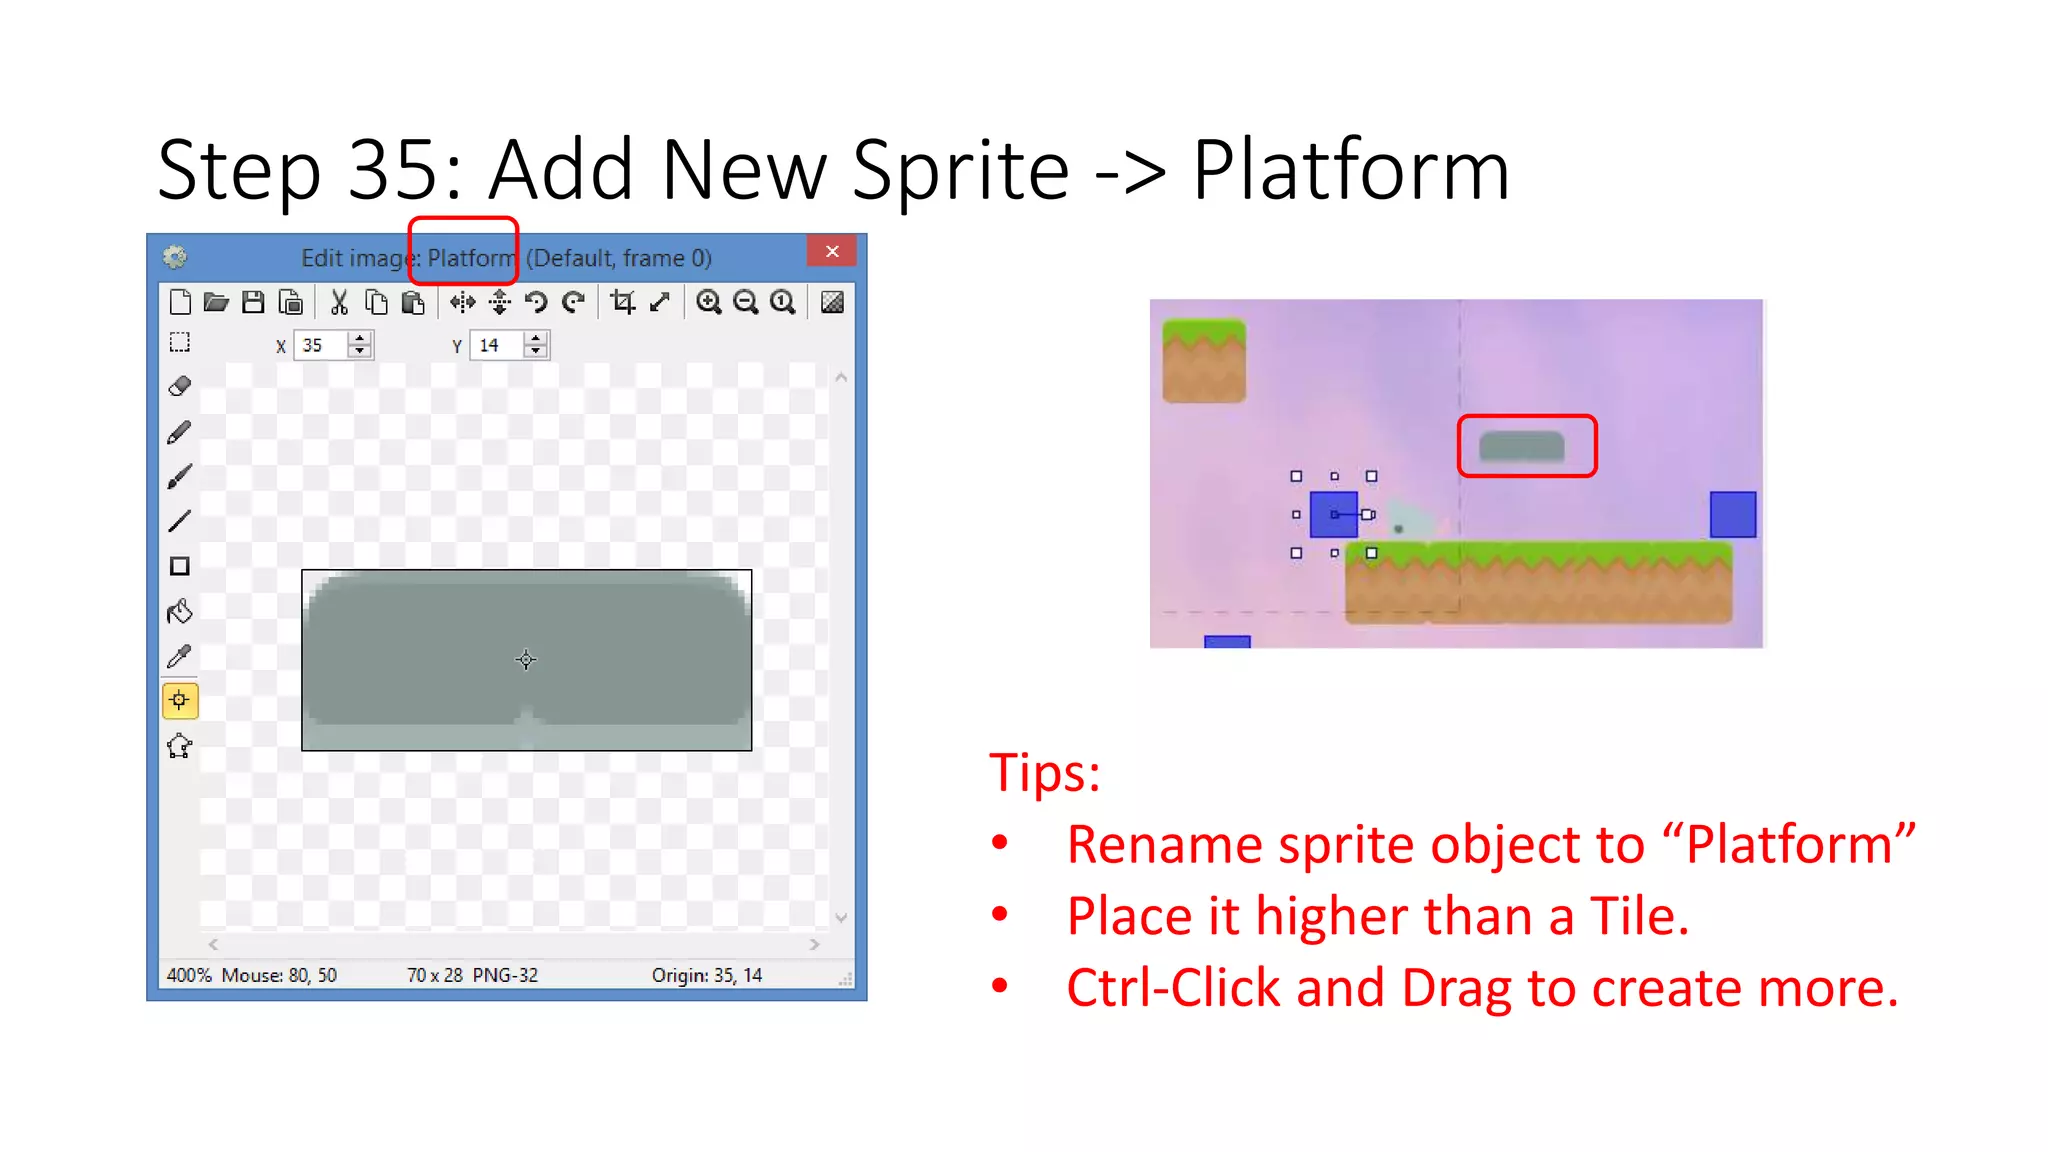
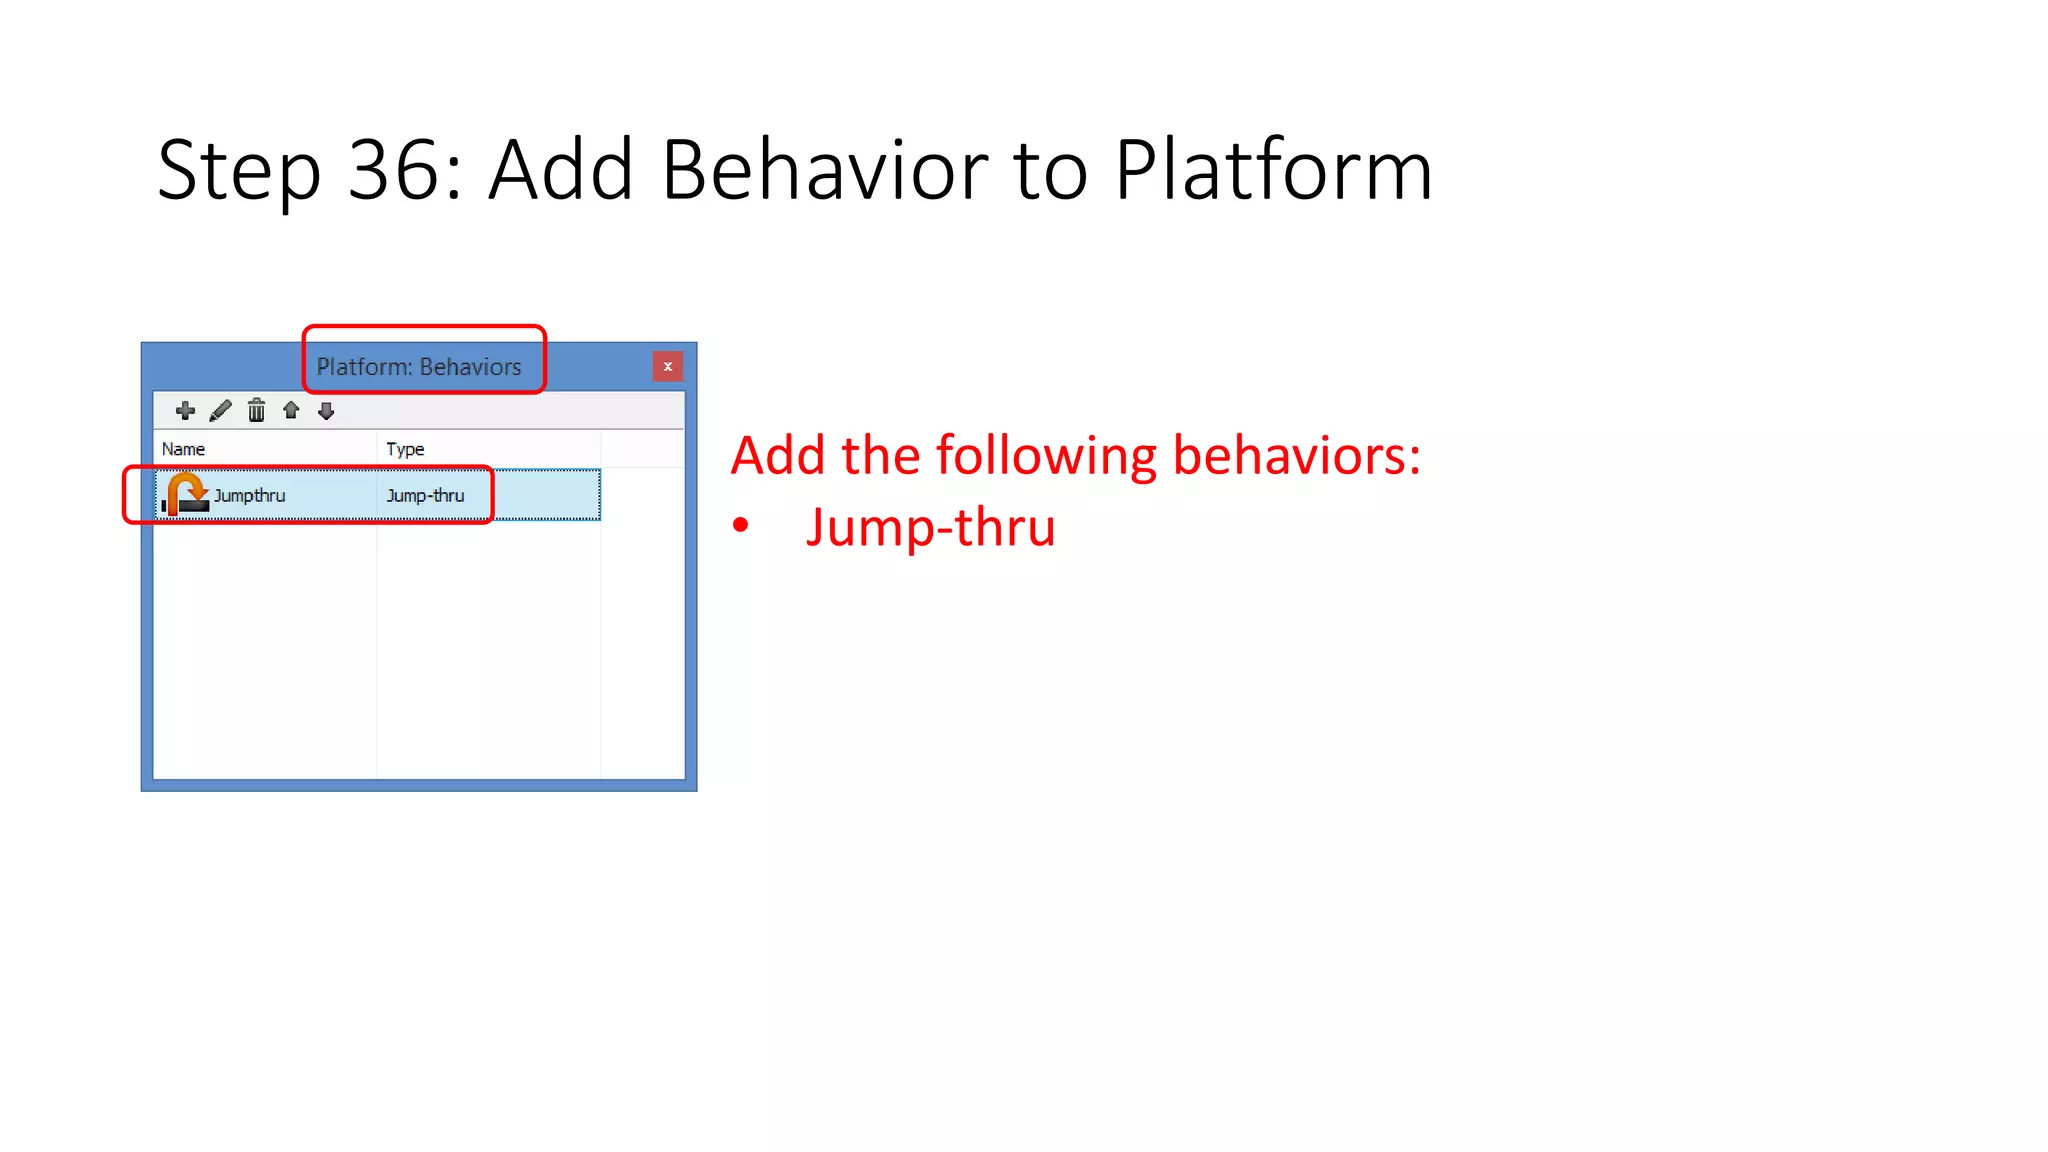
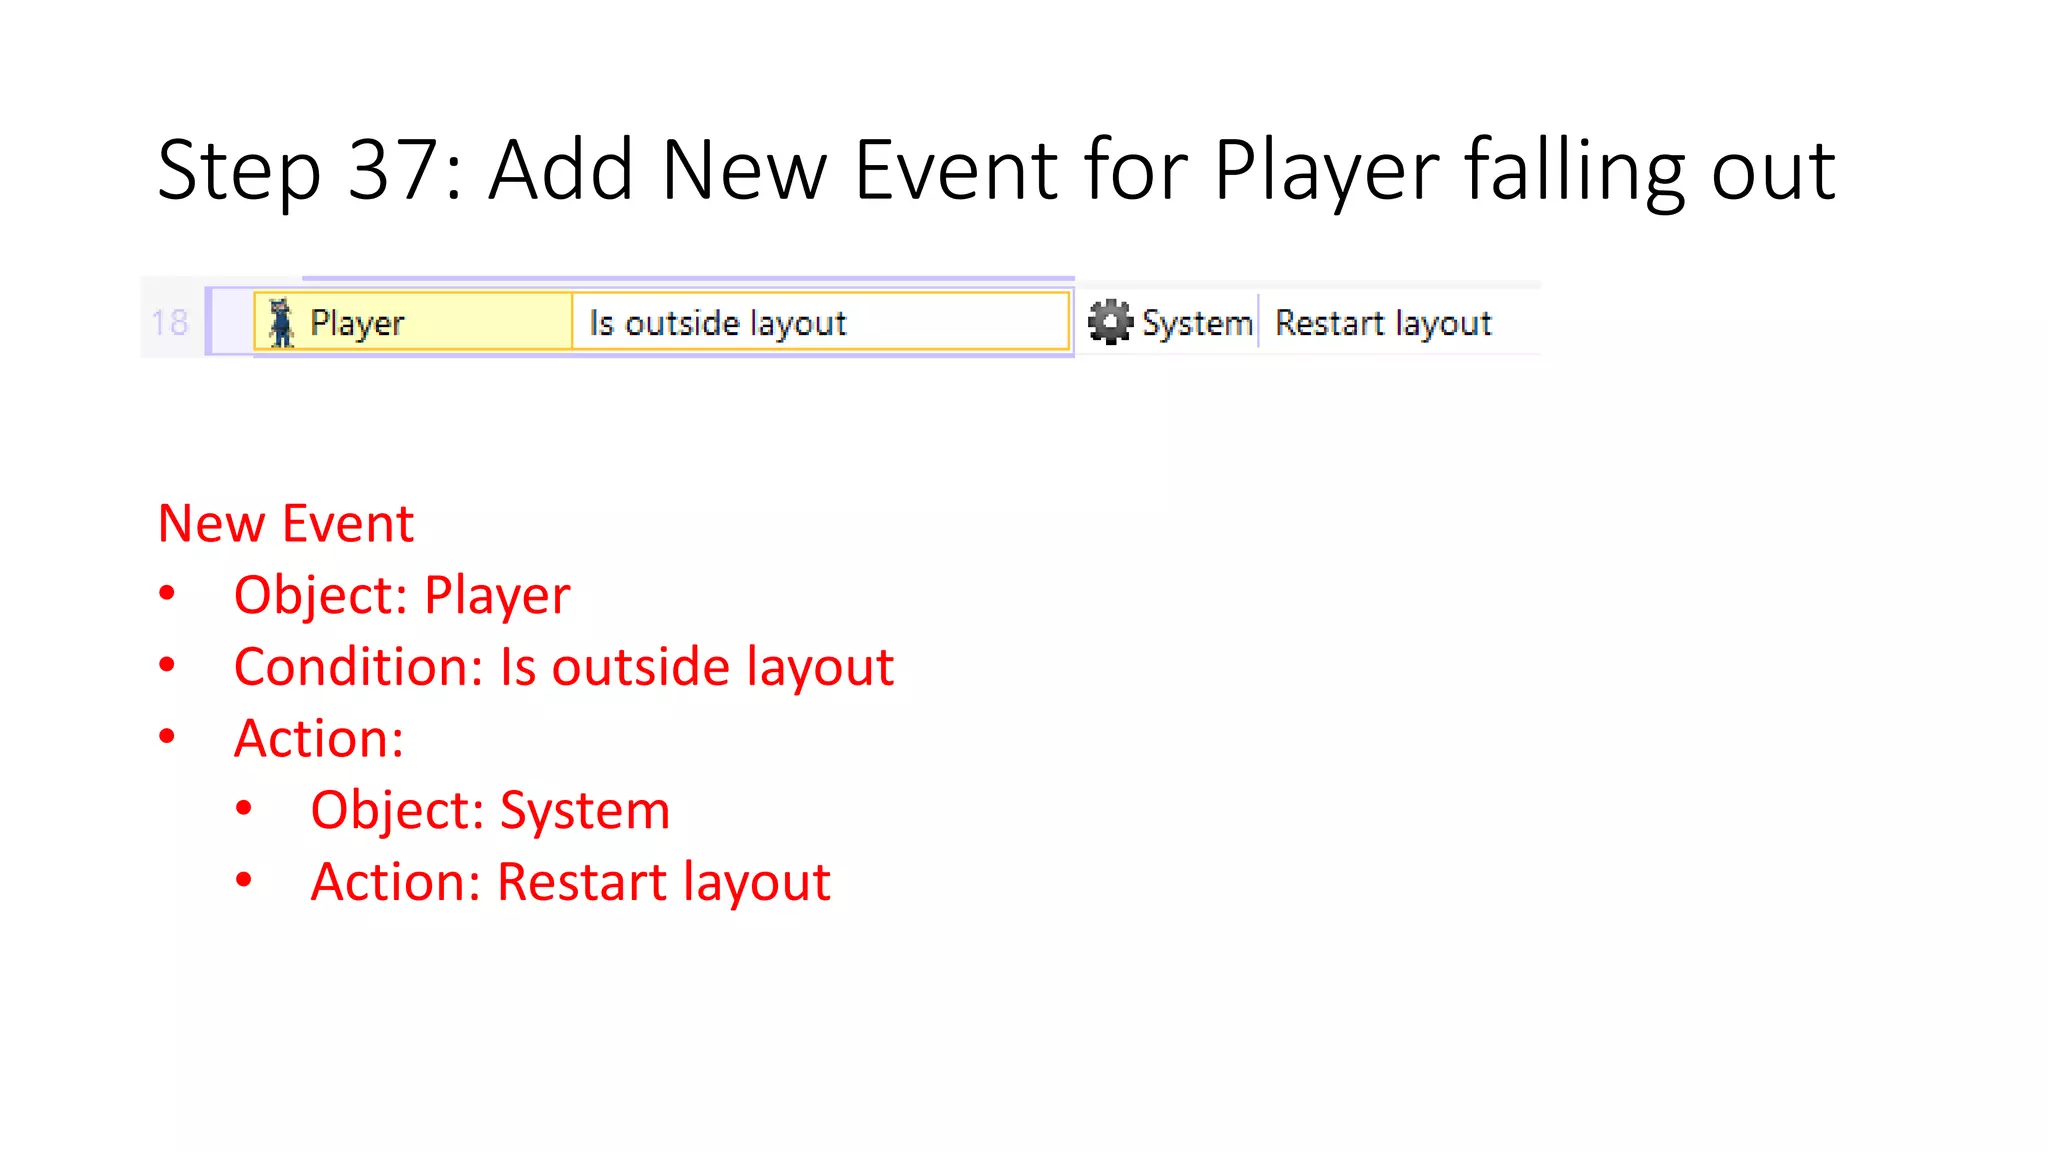
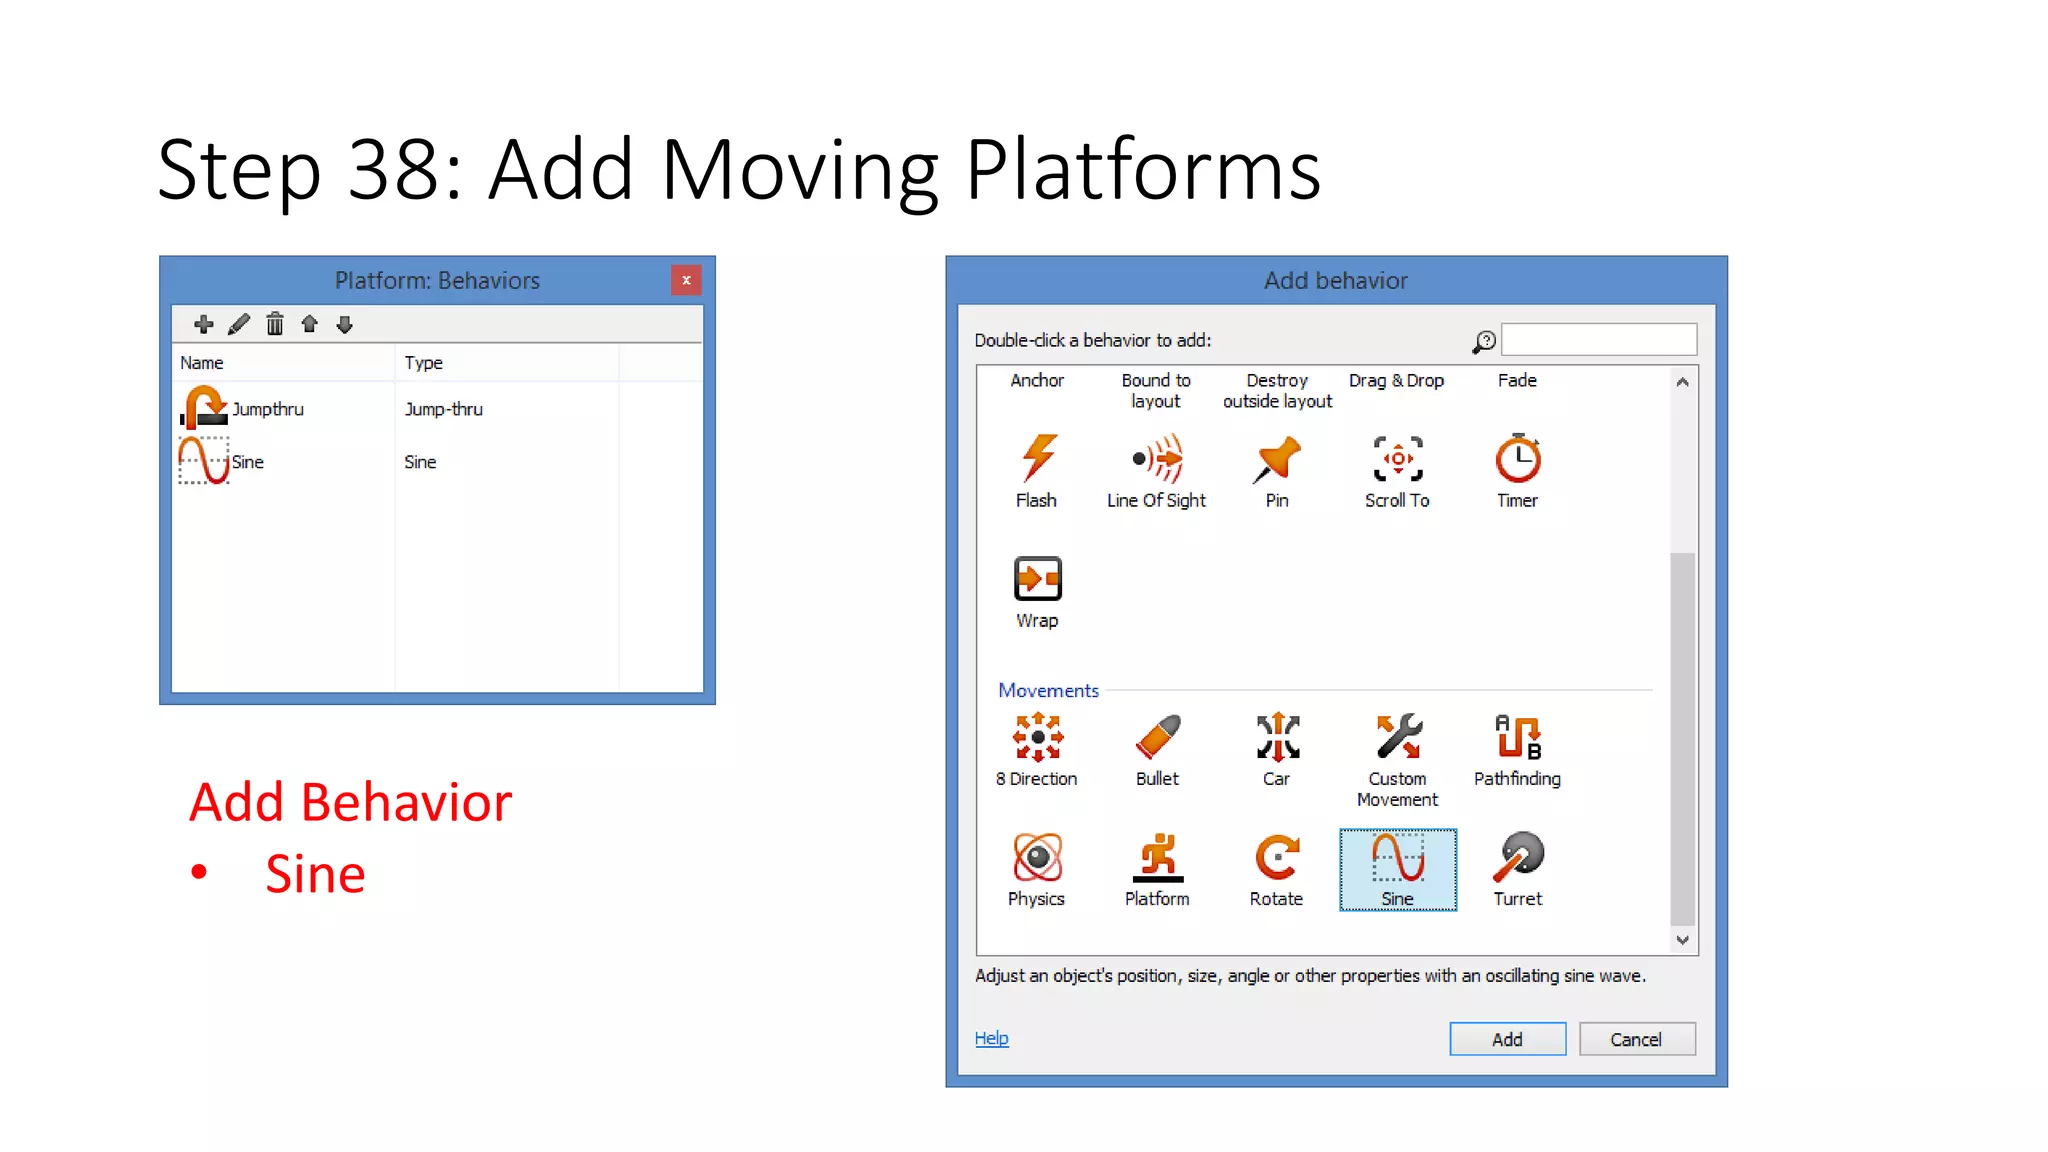
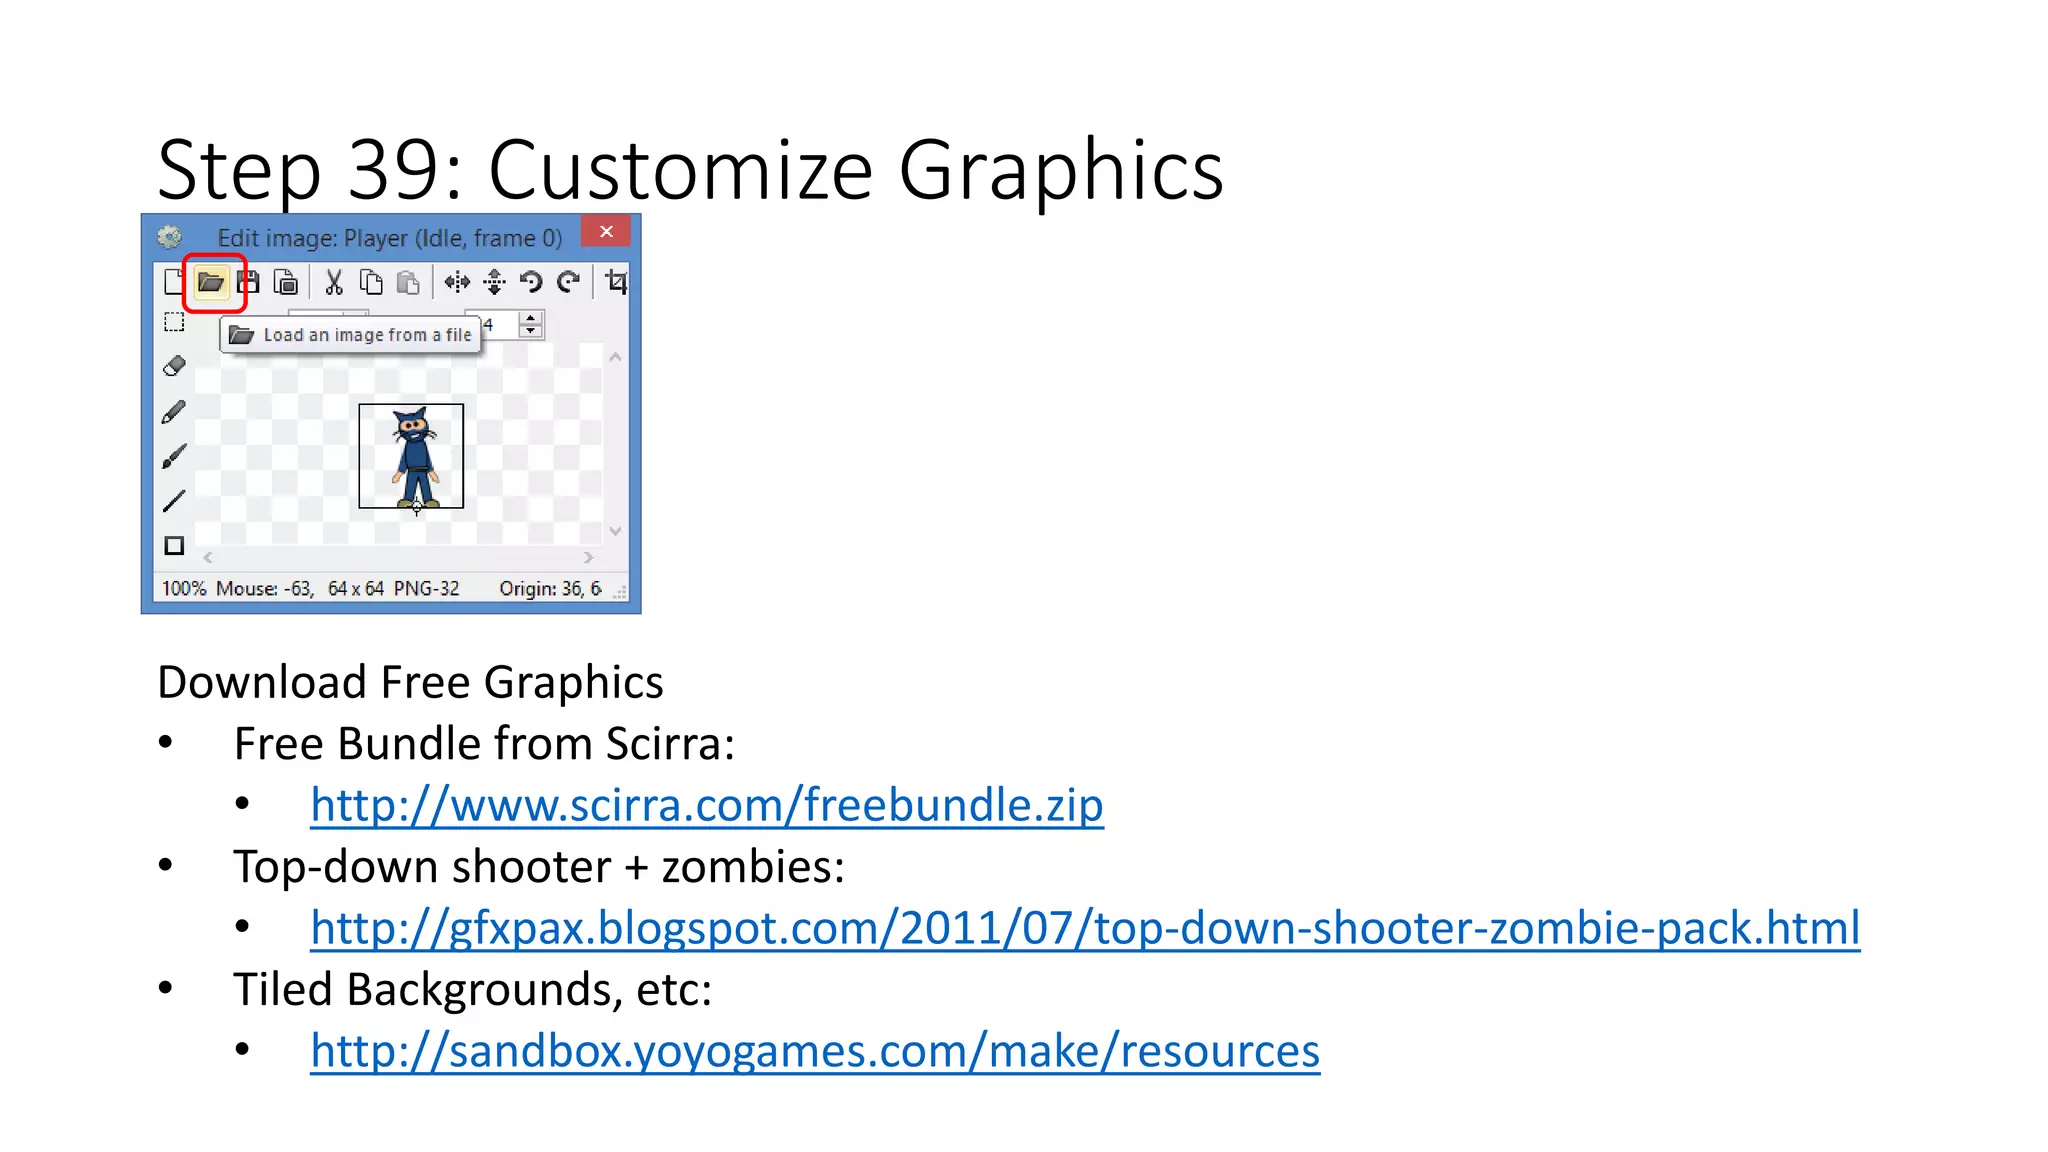
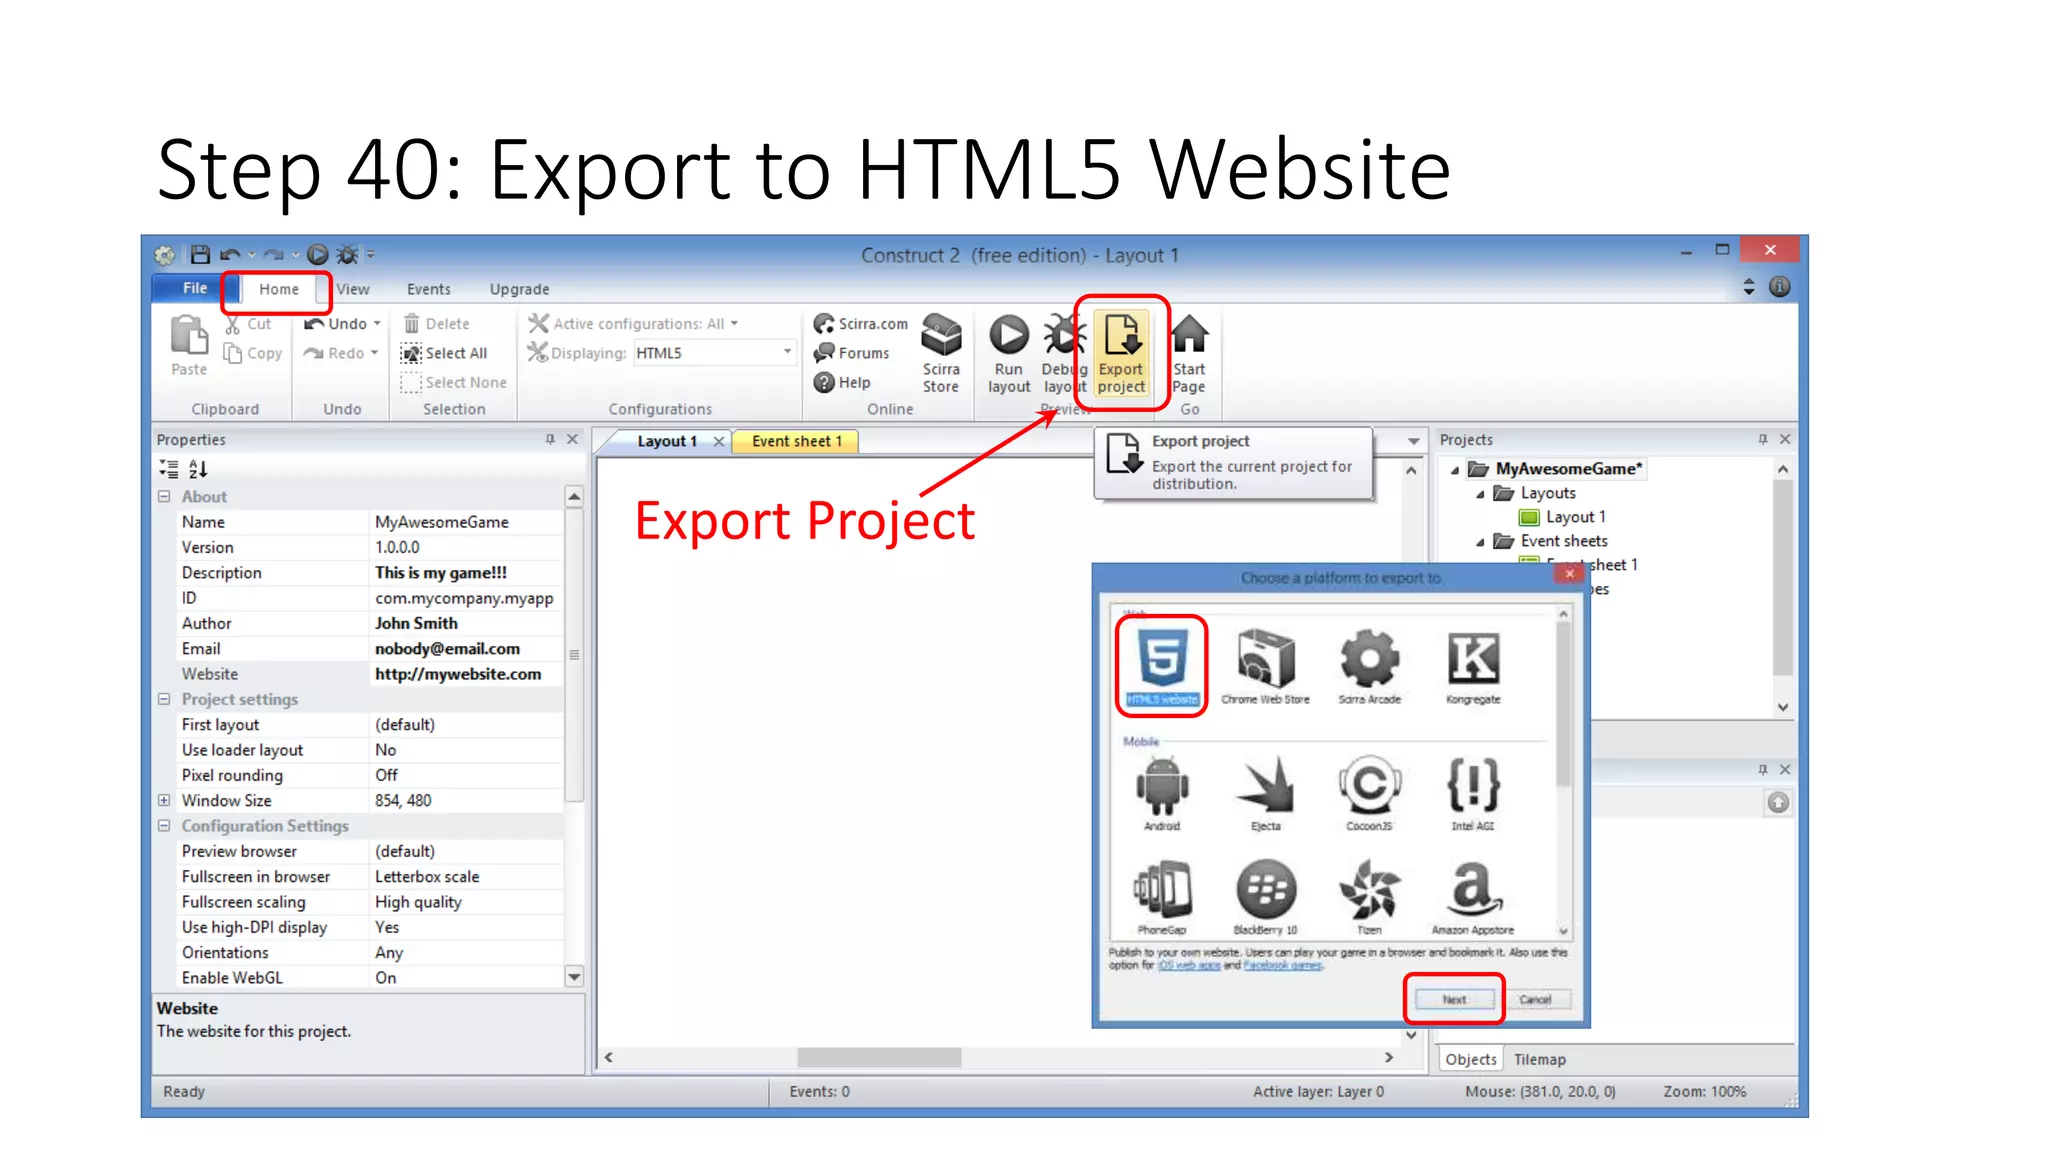
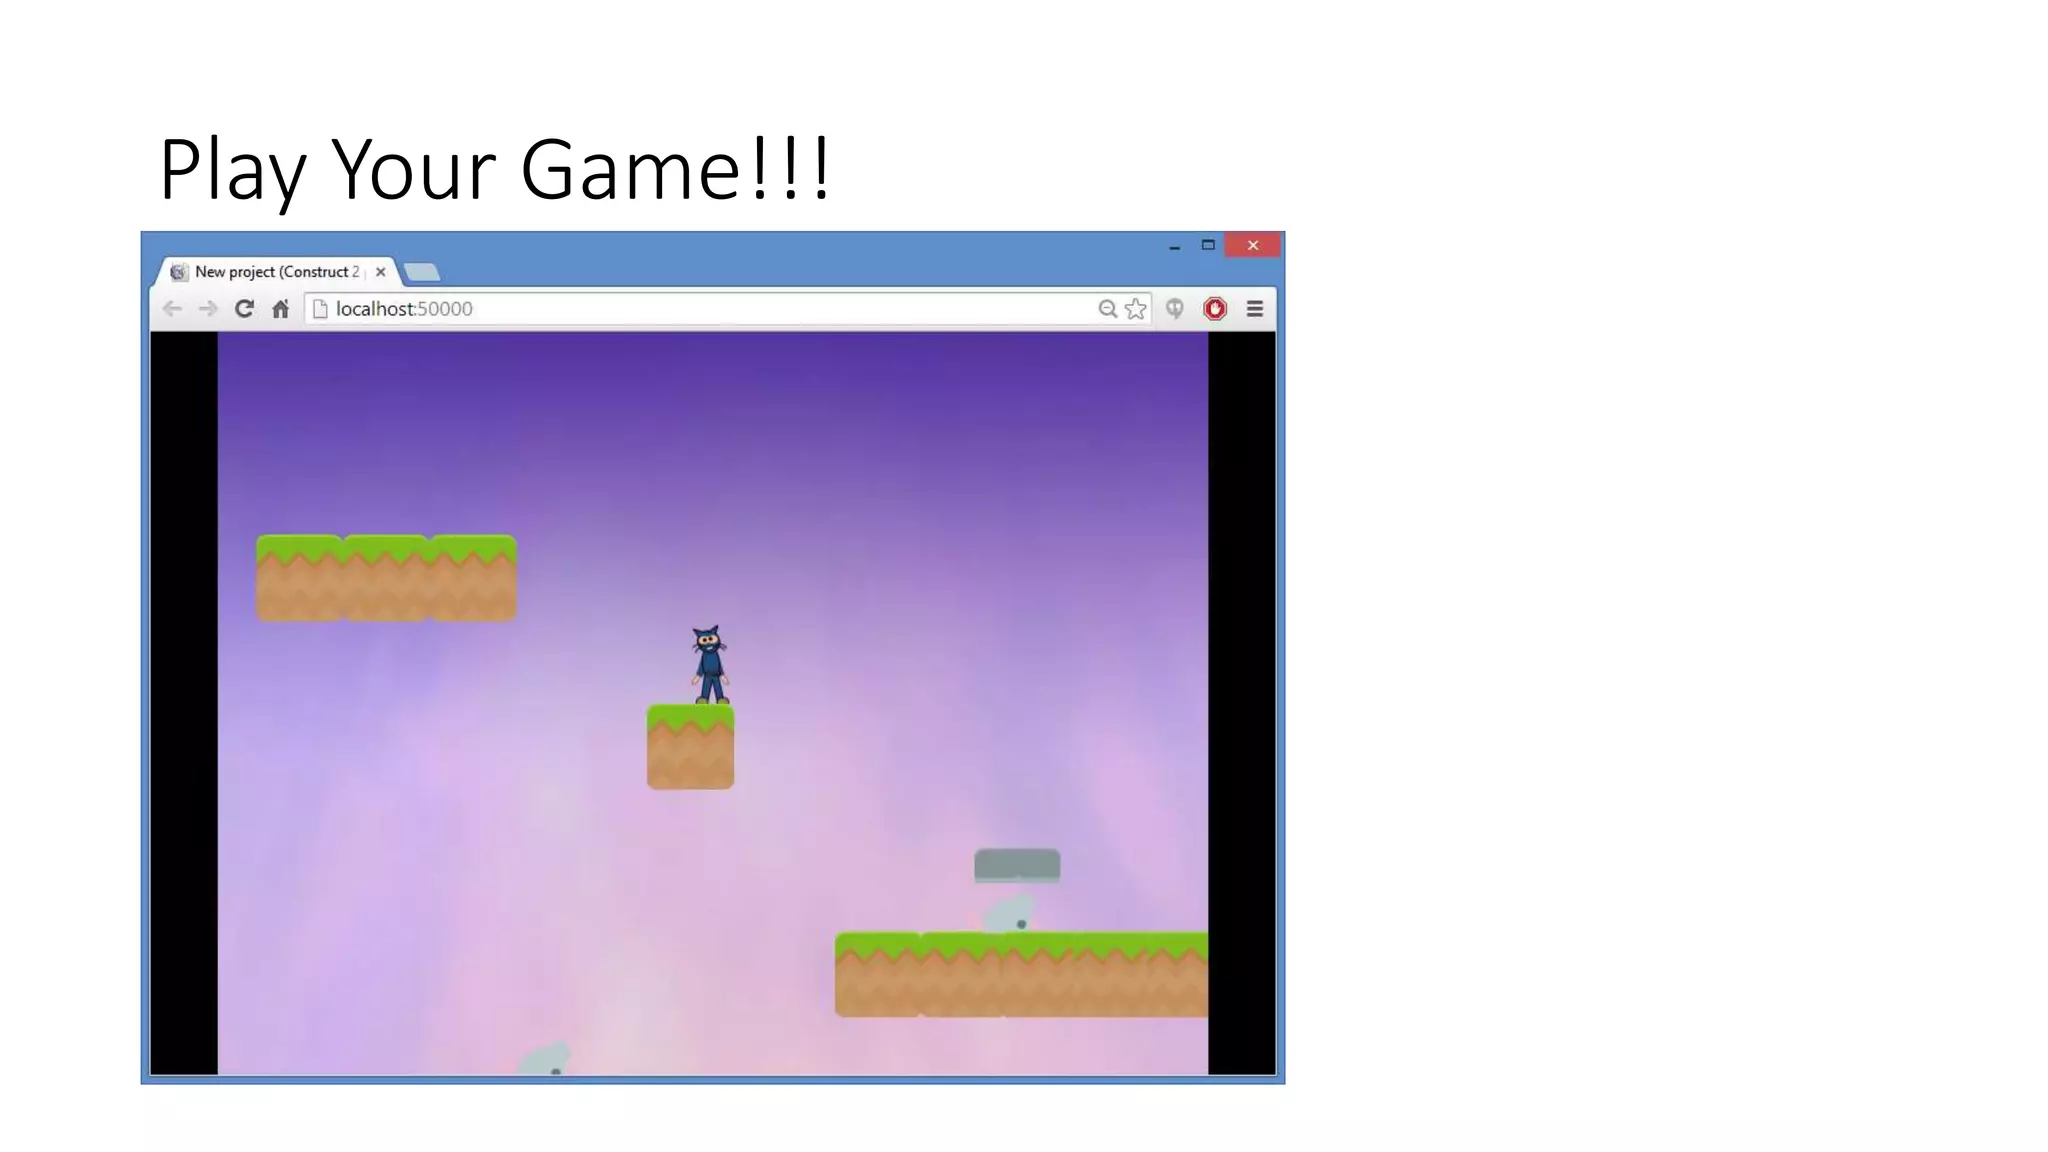

This document provides a step-by-step tutorial for creating a platformer game using Construct 2, outlining key steps such as setting up layers, adding sprites, configuring player and enemy behaviors, and implementing animations. It also includes tips for customizing graphics and exporting the project to an HTML5 website. The tutorial concludes with a reminder to play the game once completed.