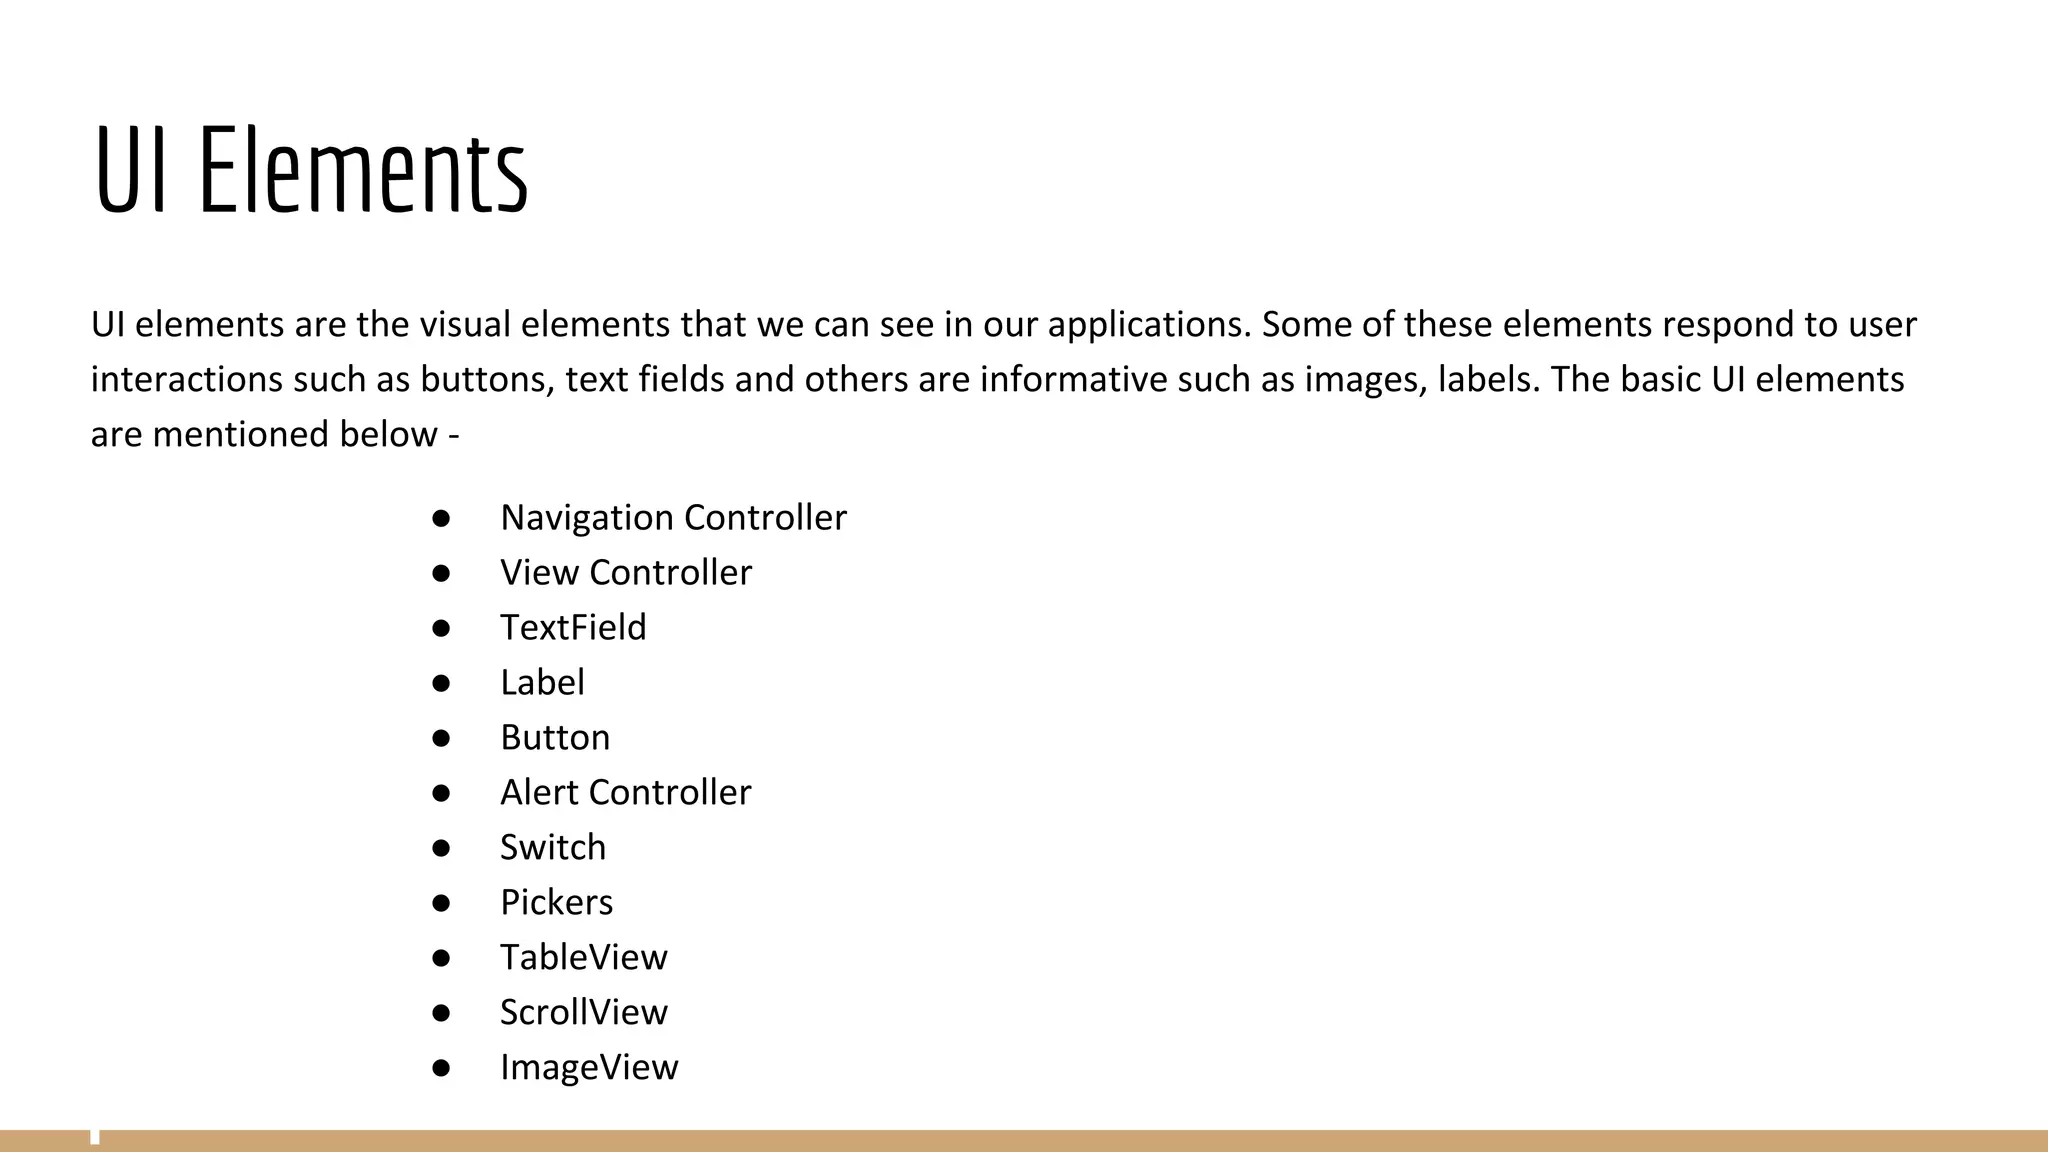
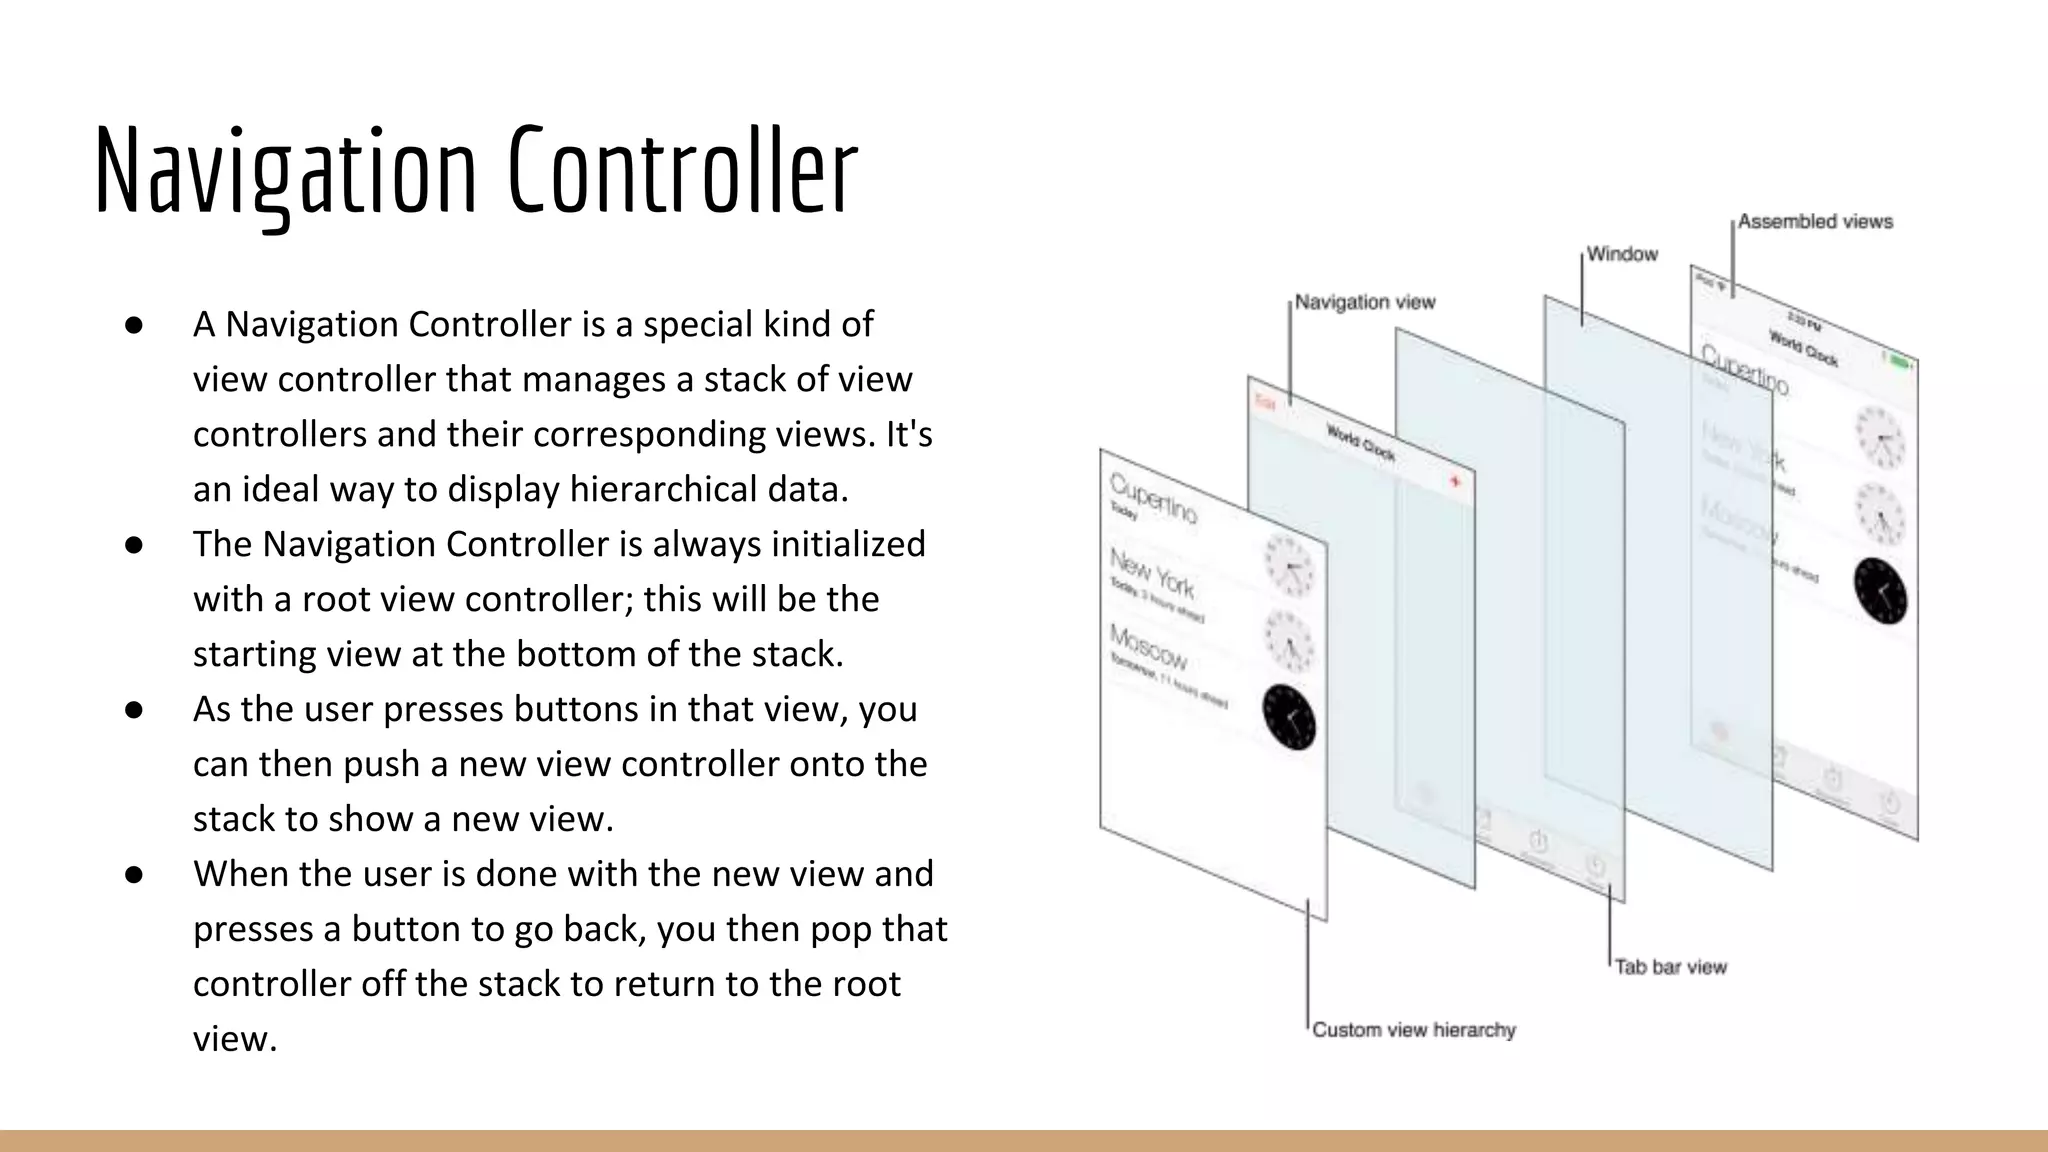
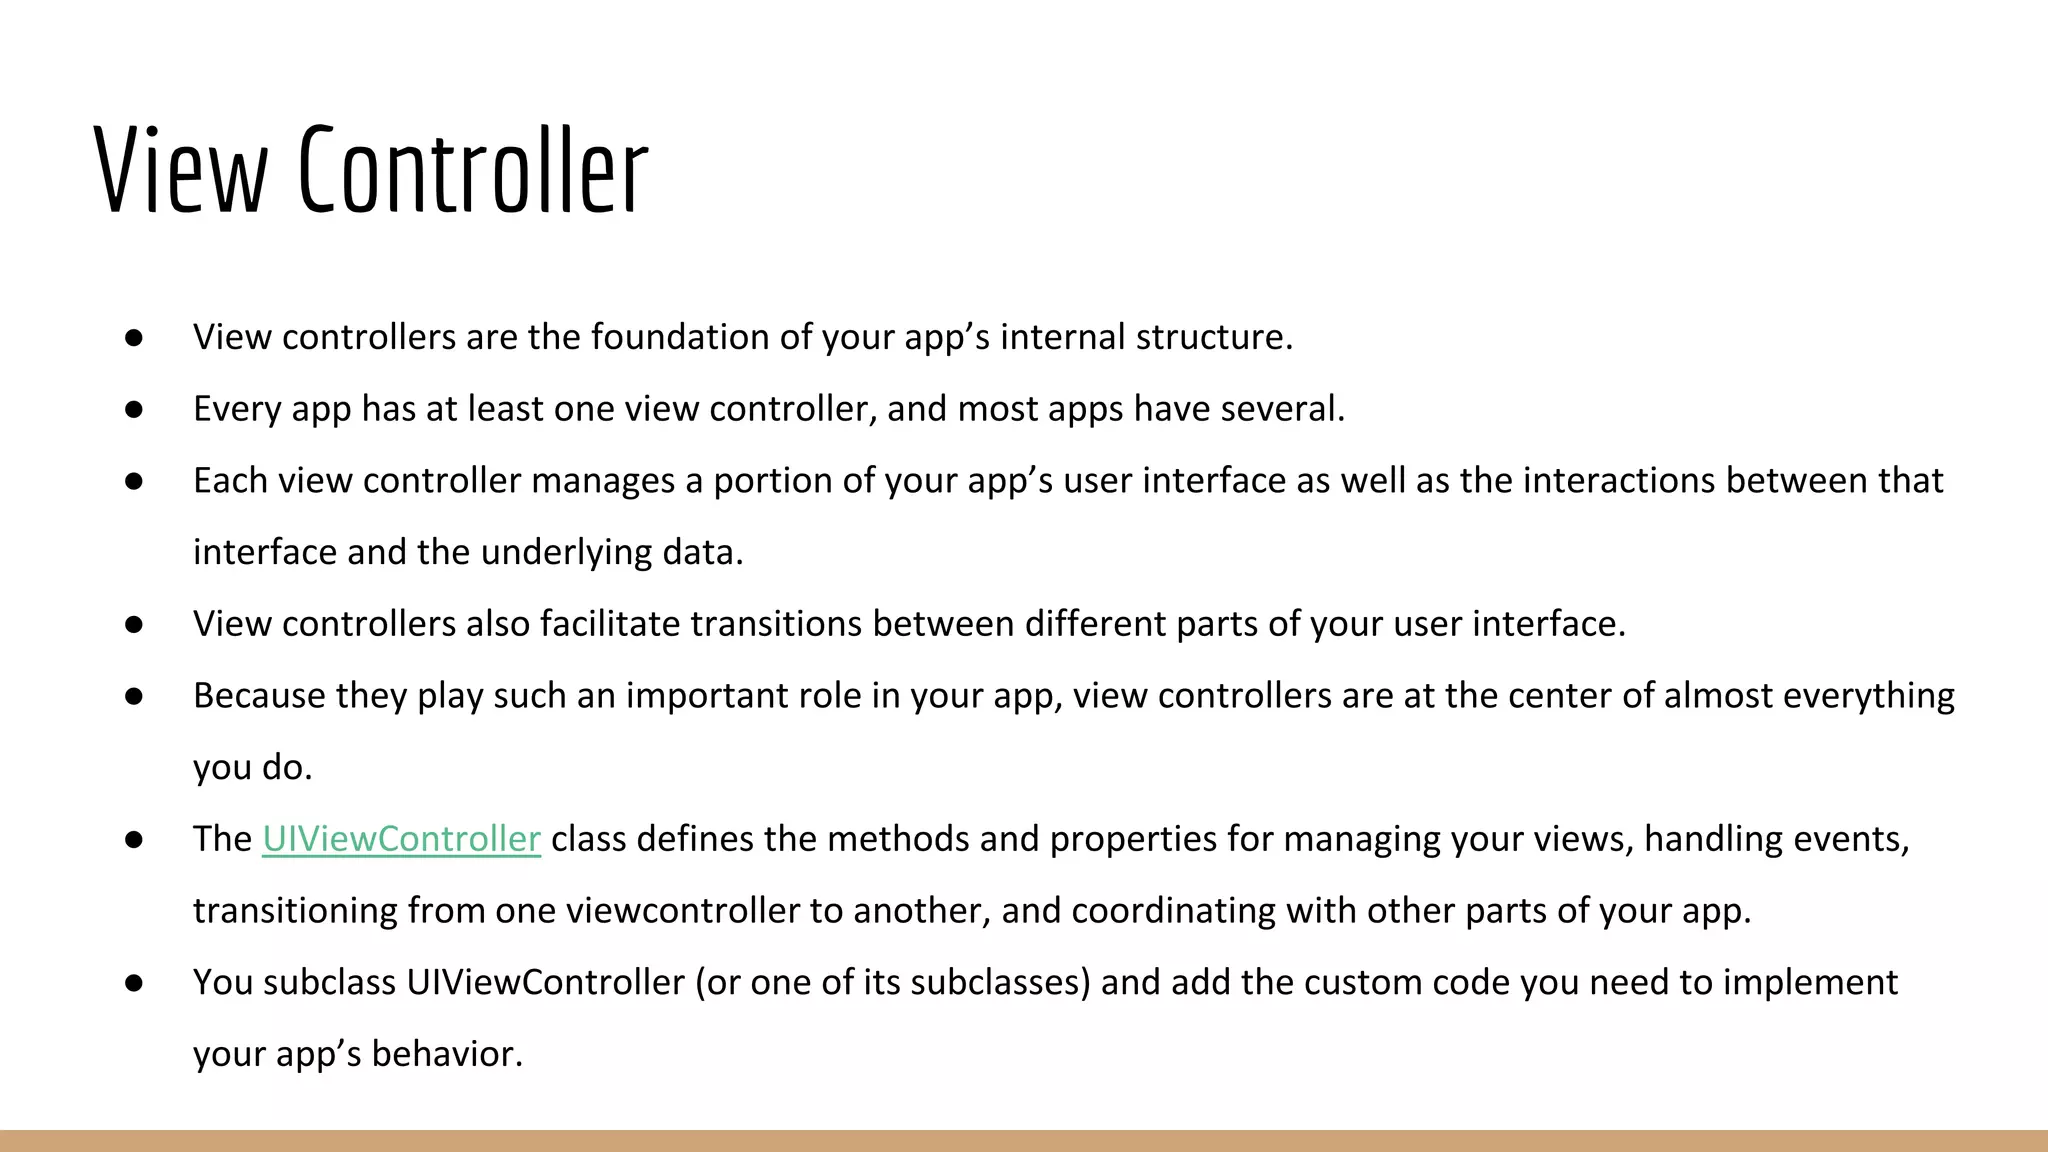
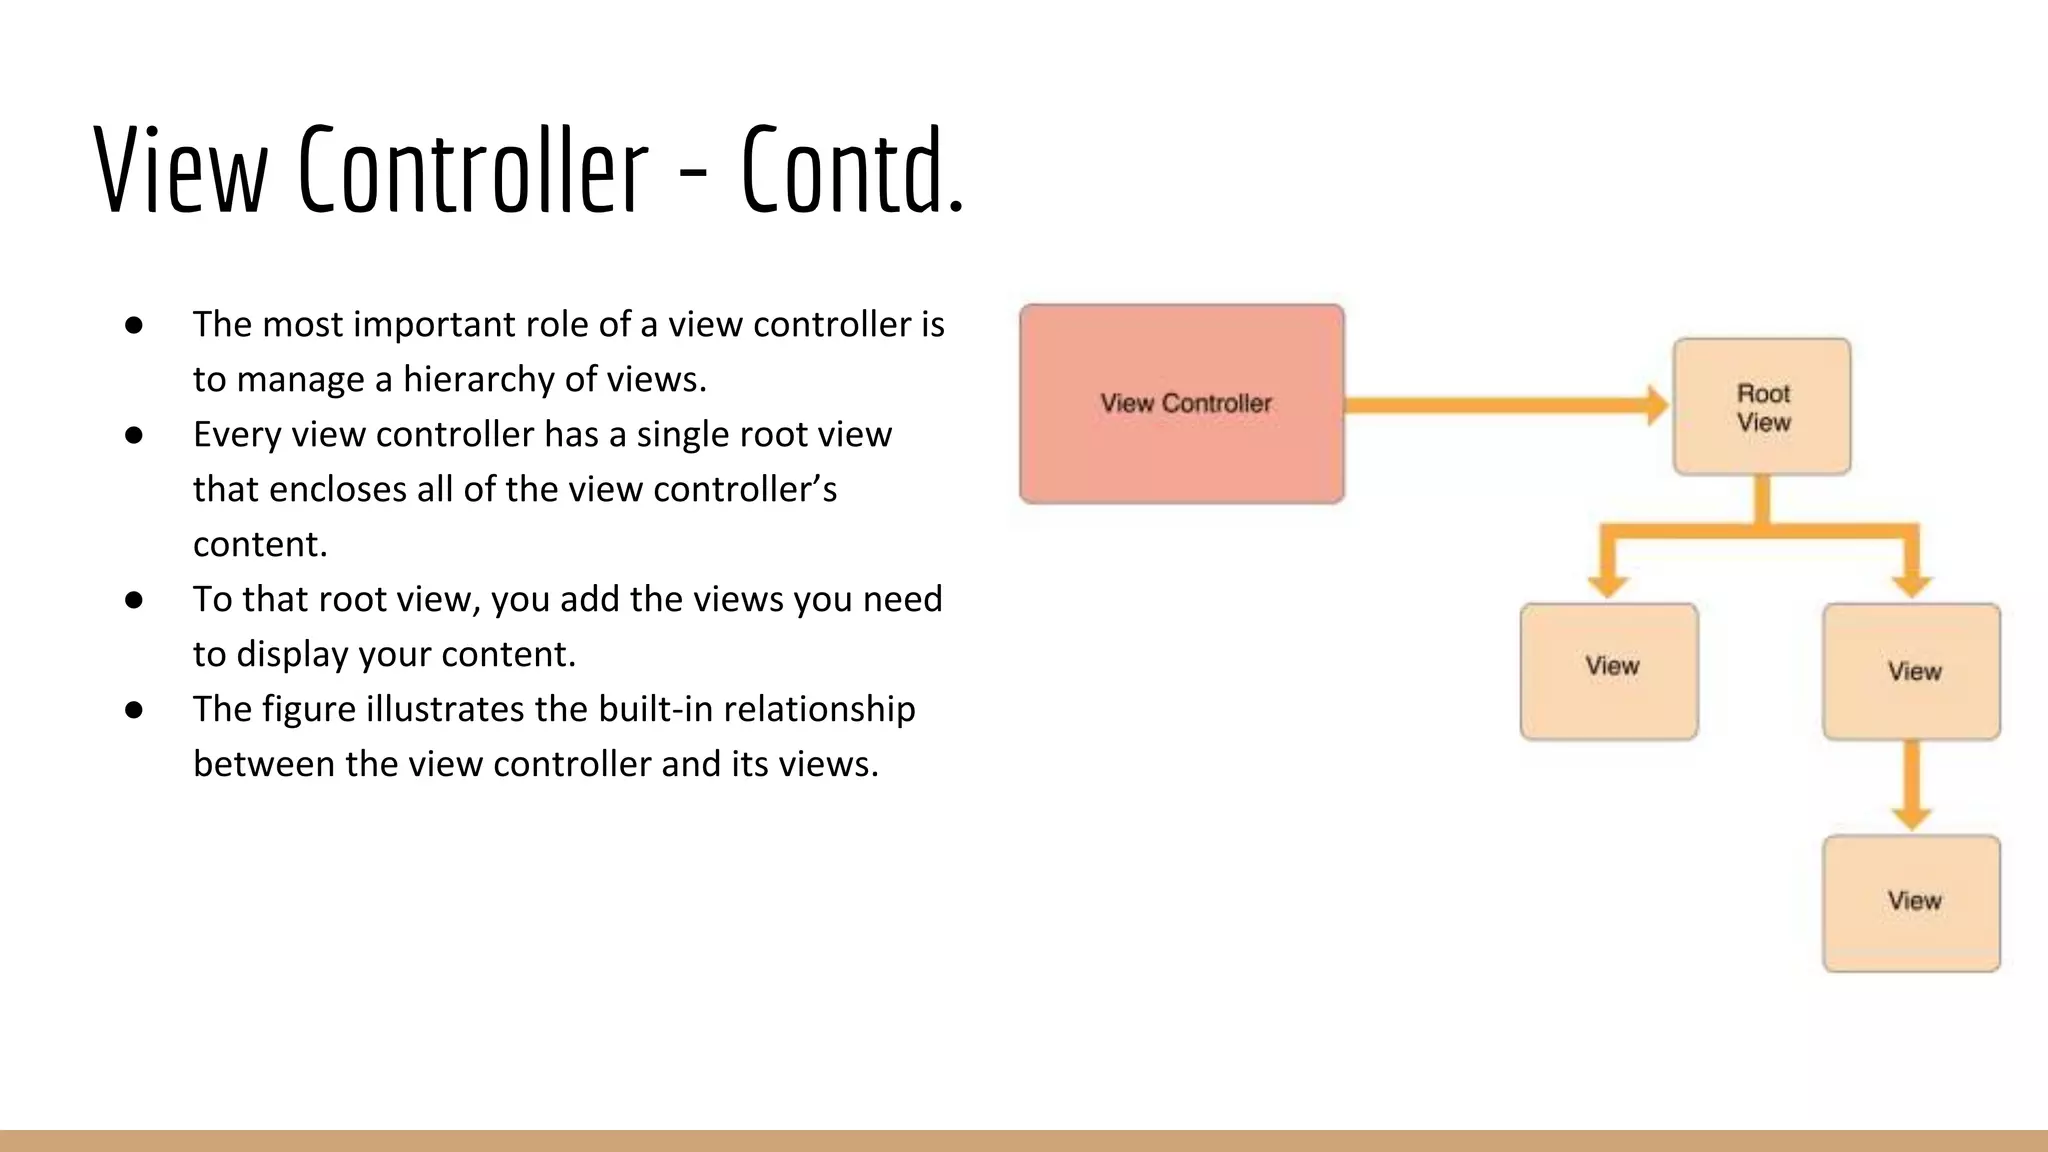
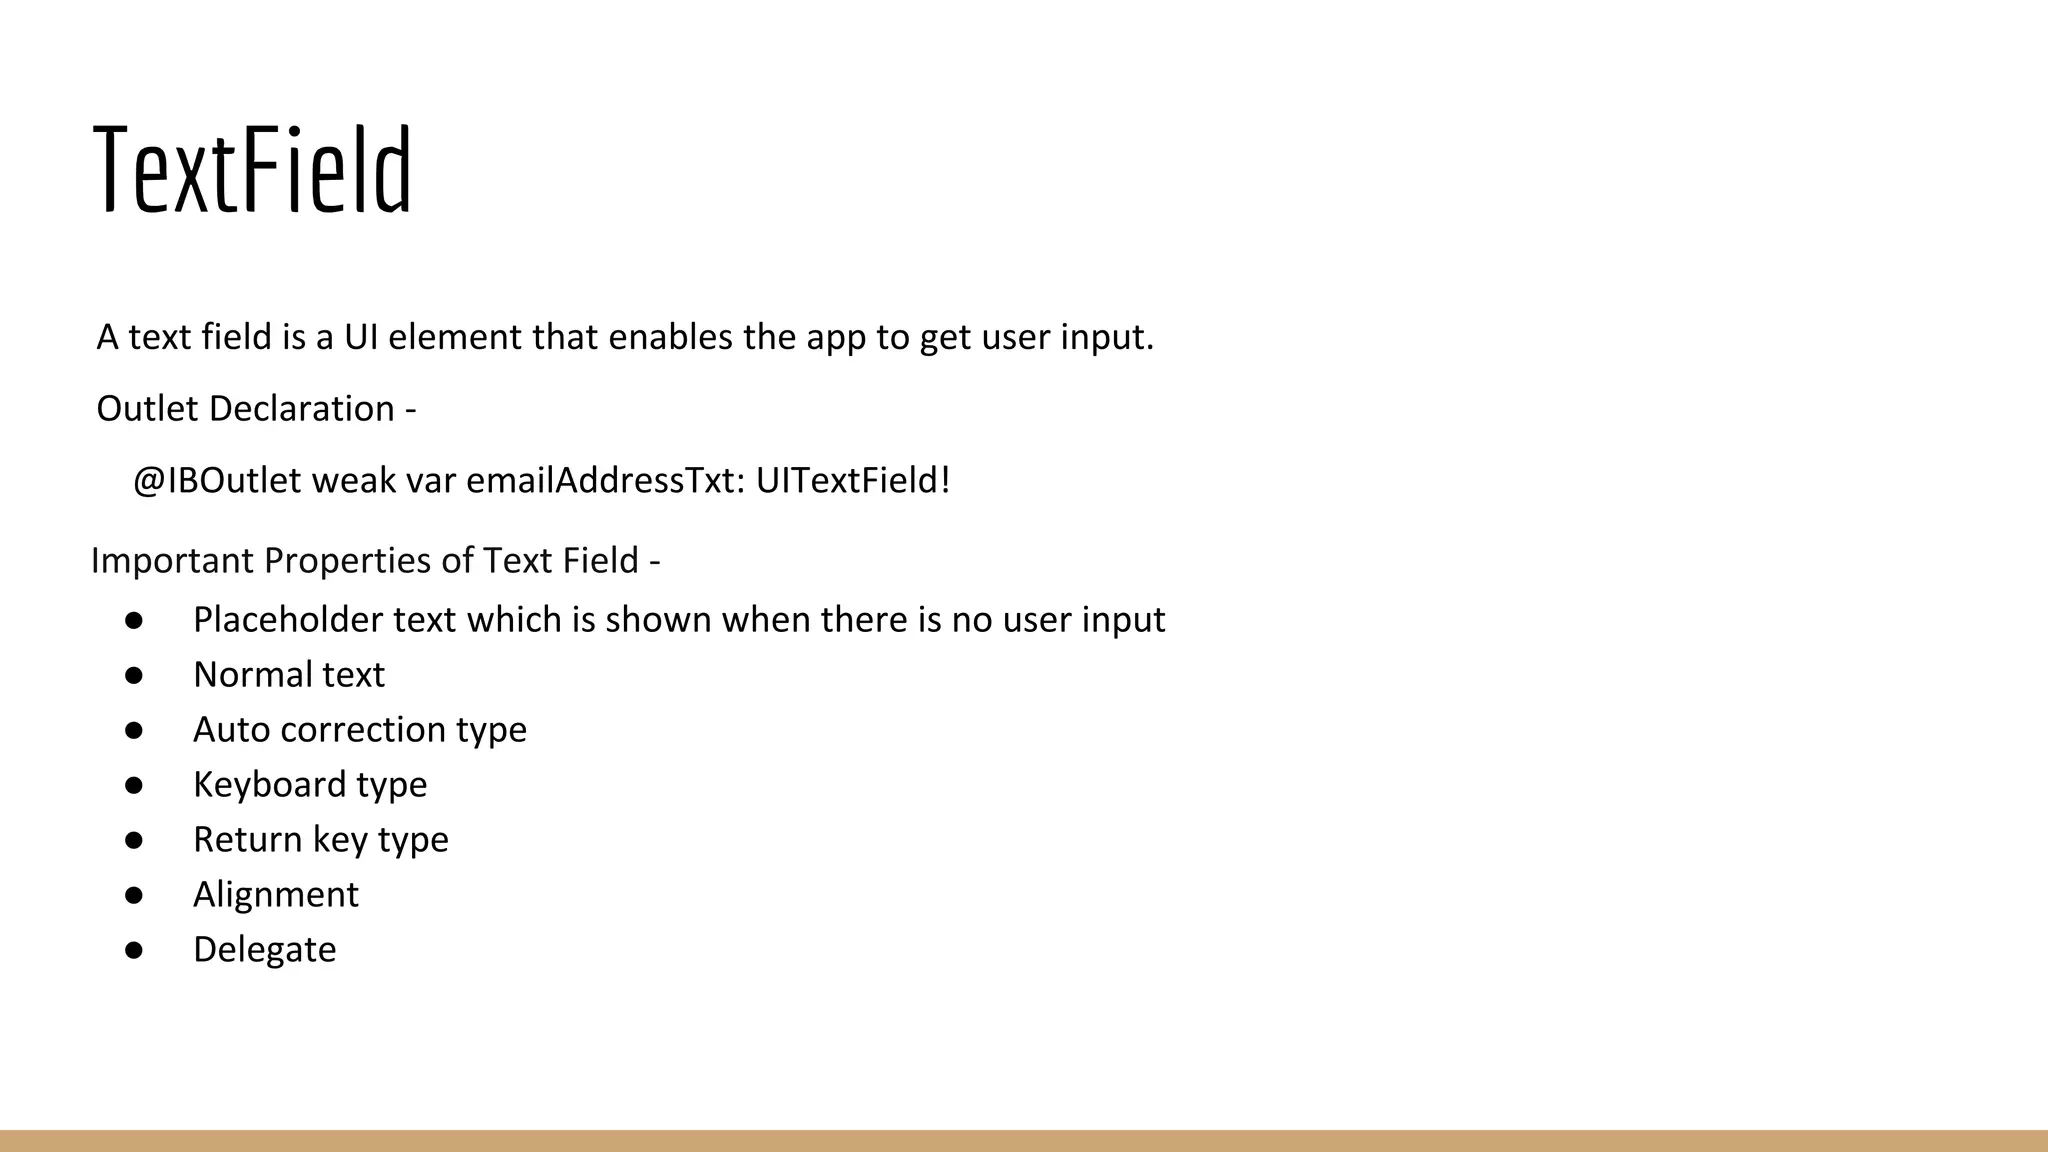
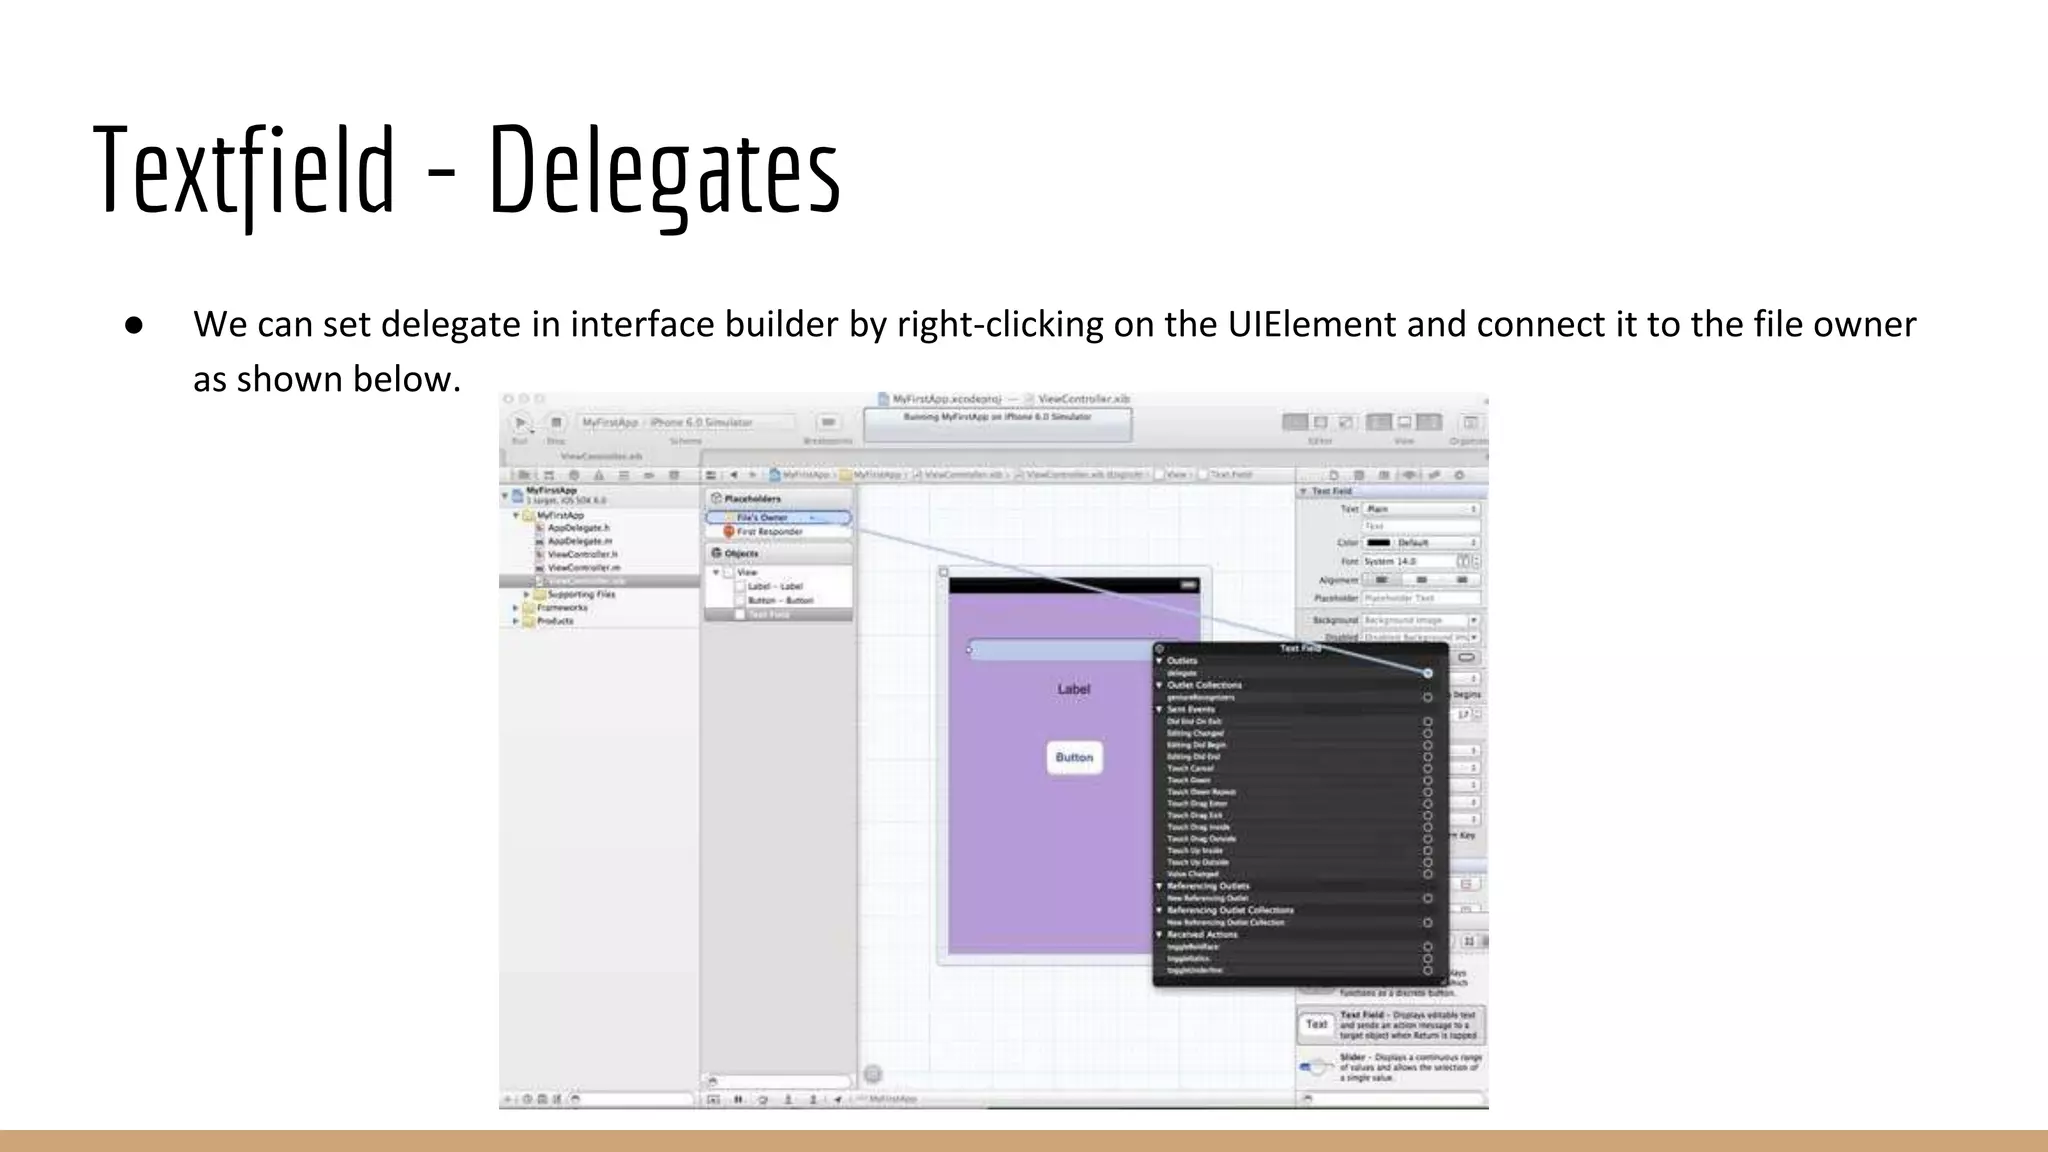
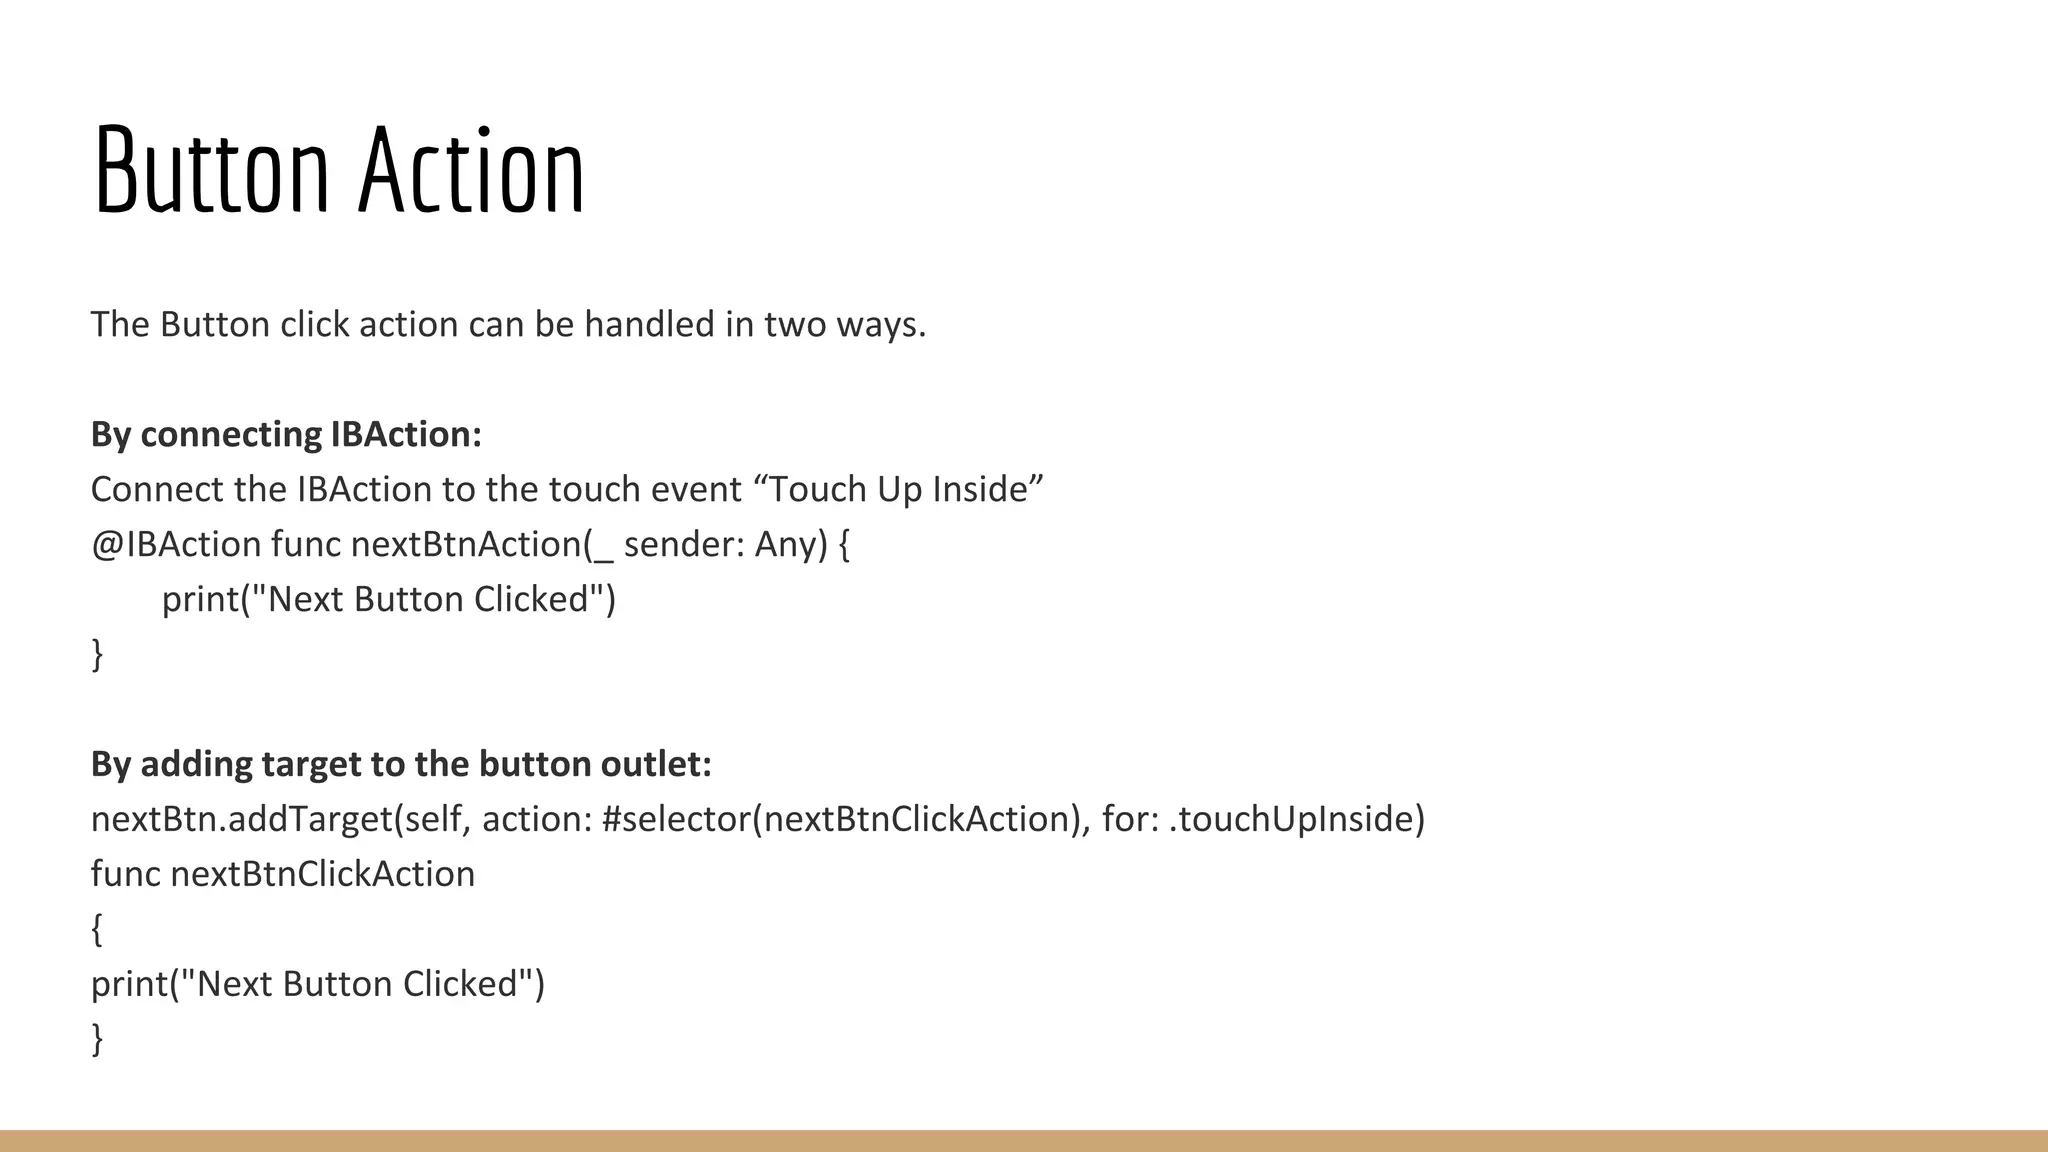
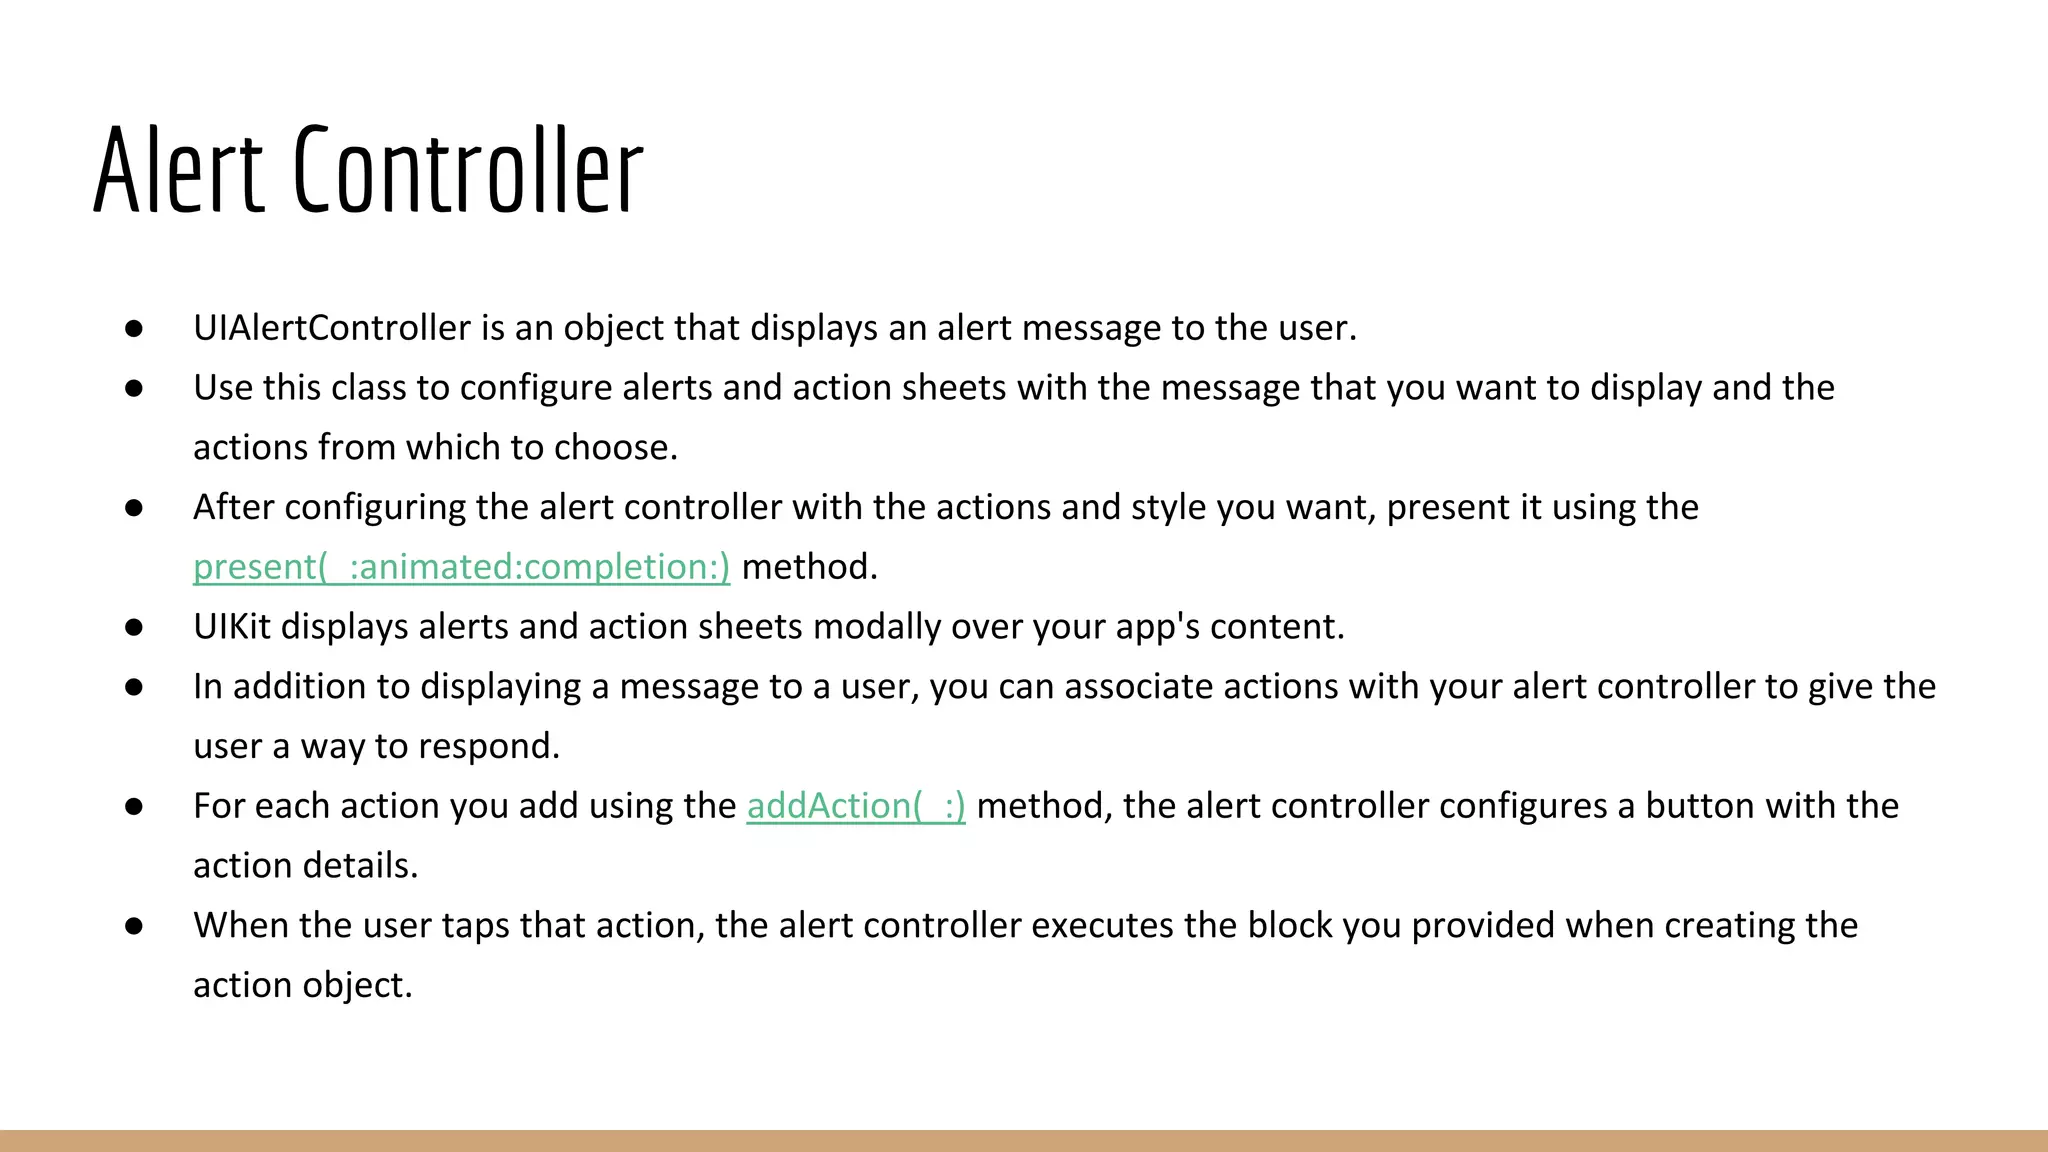
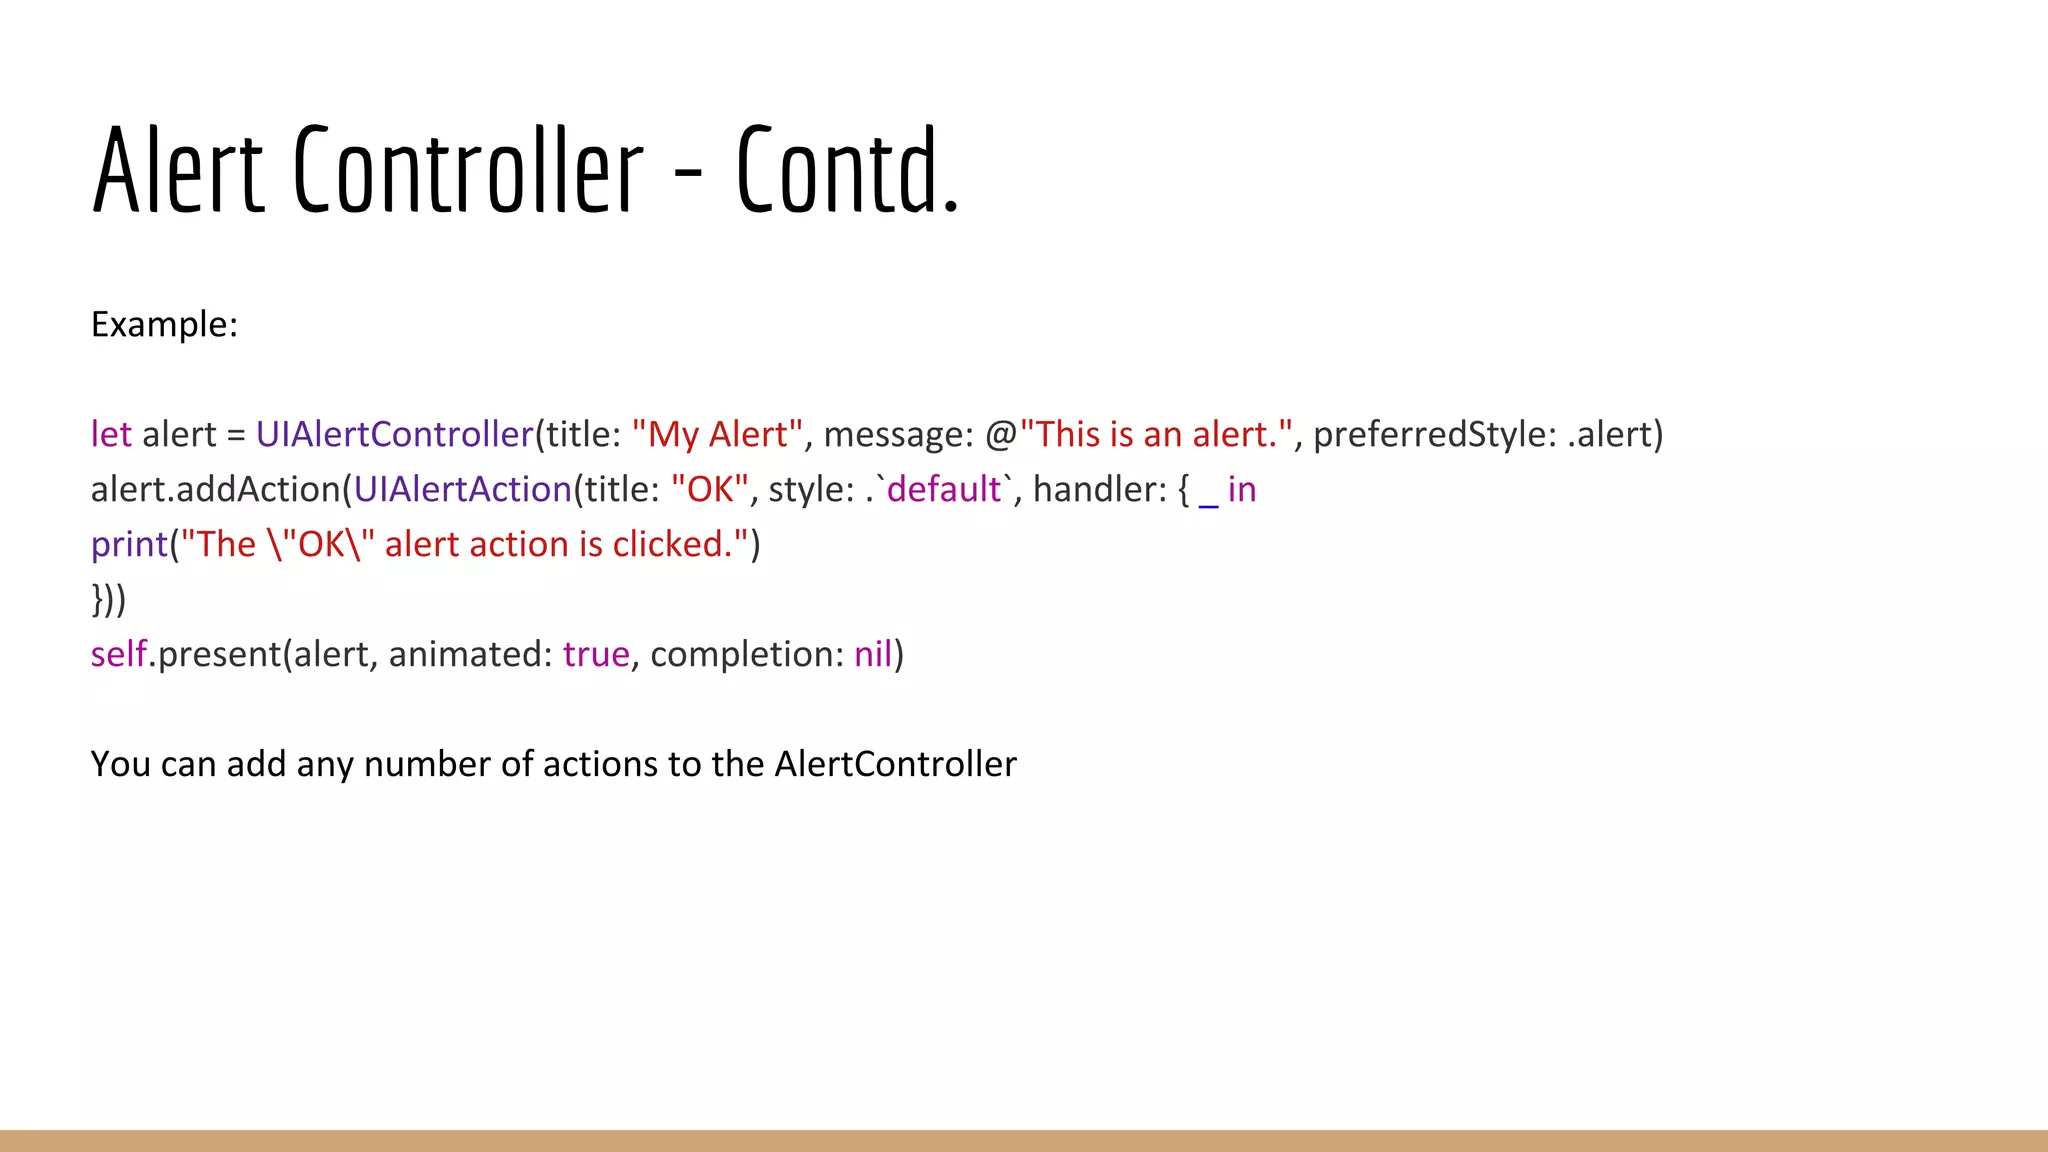
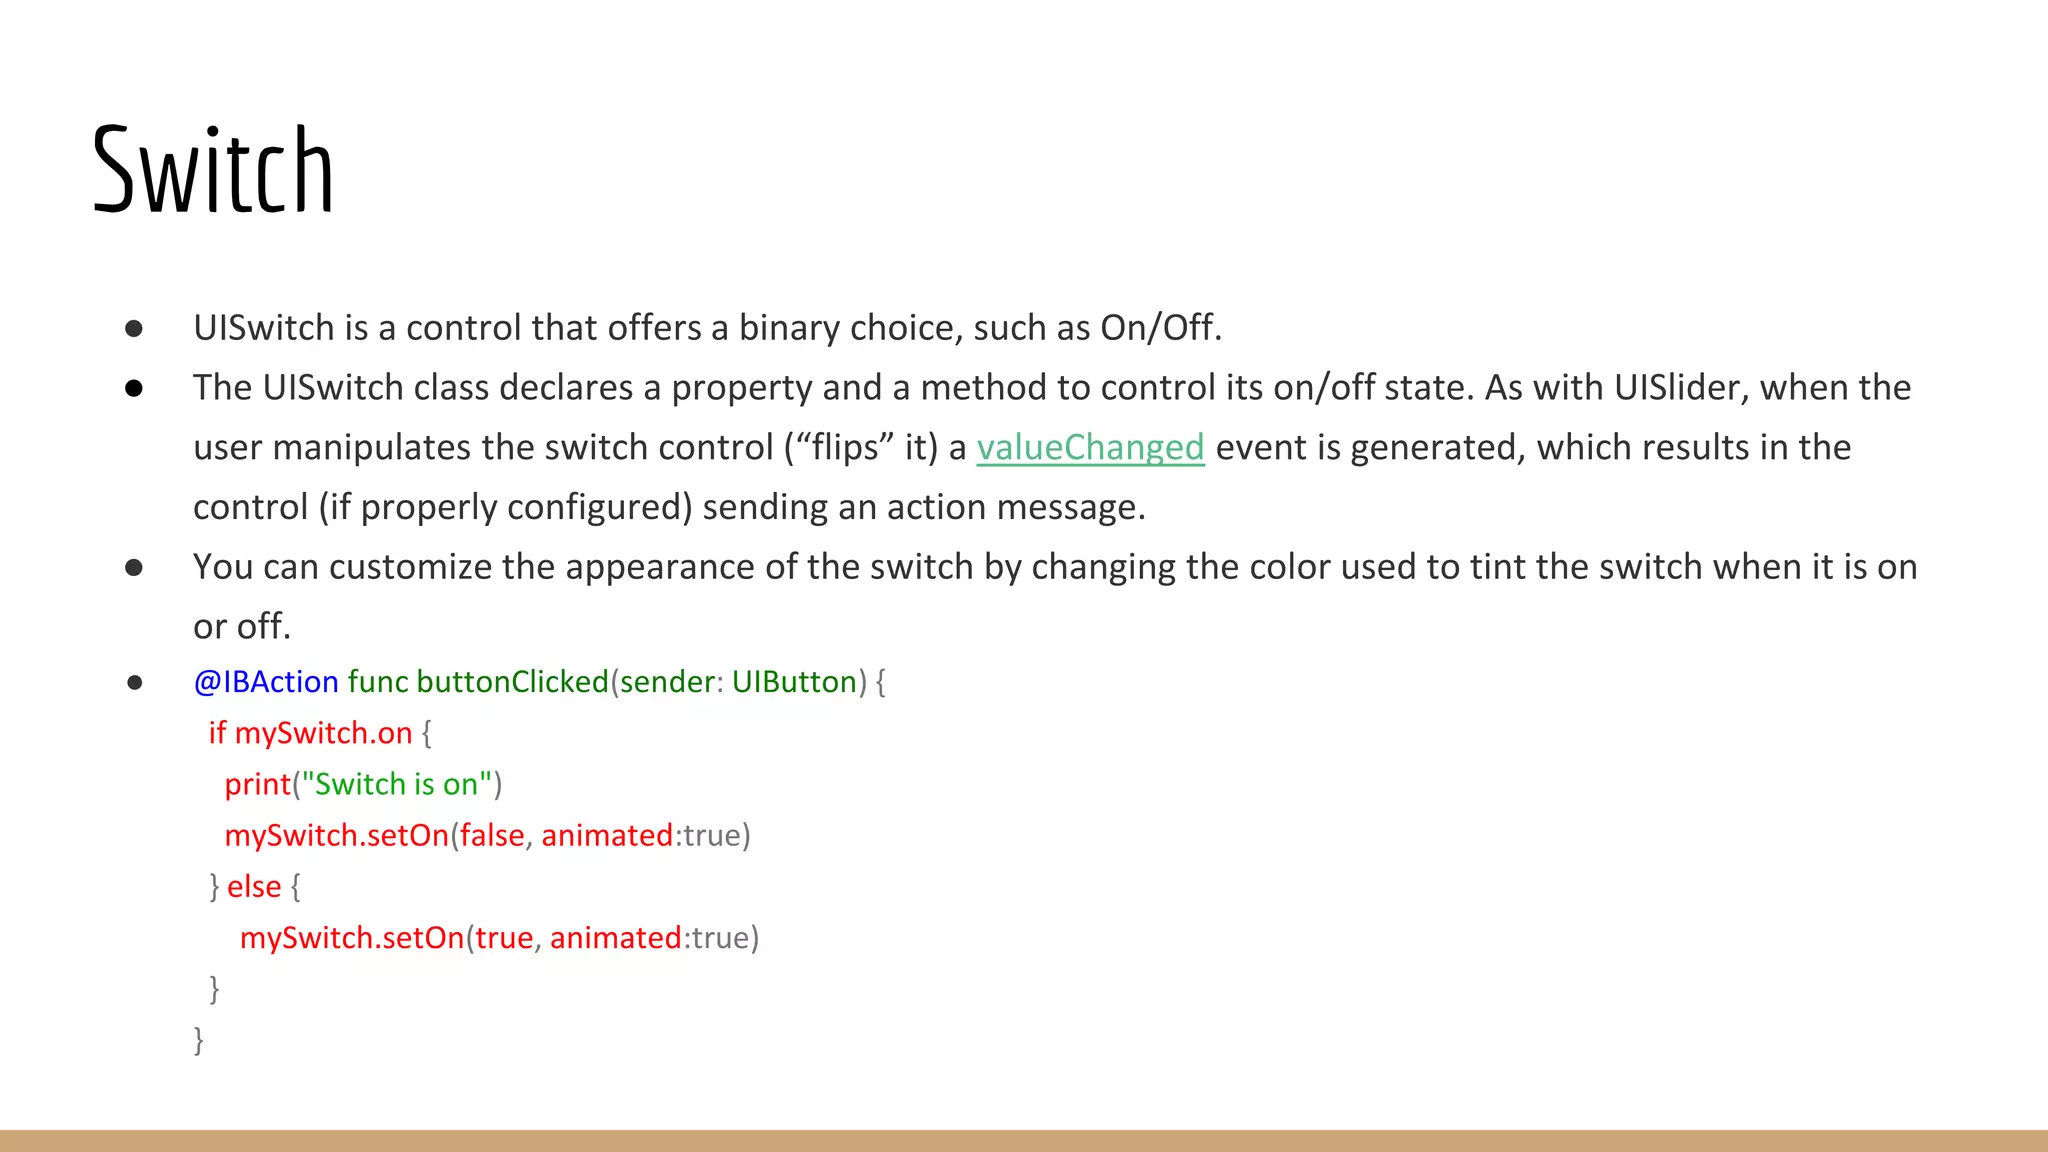
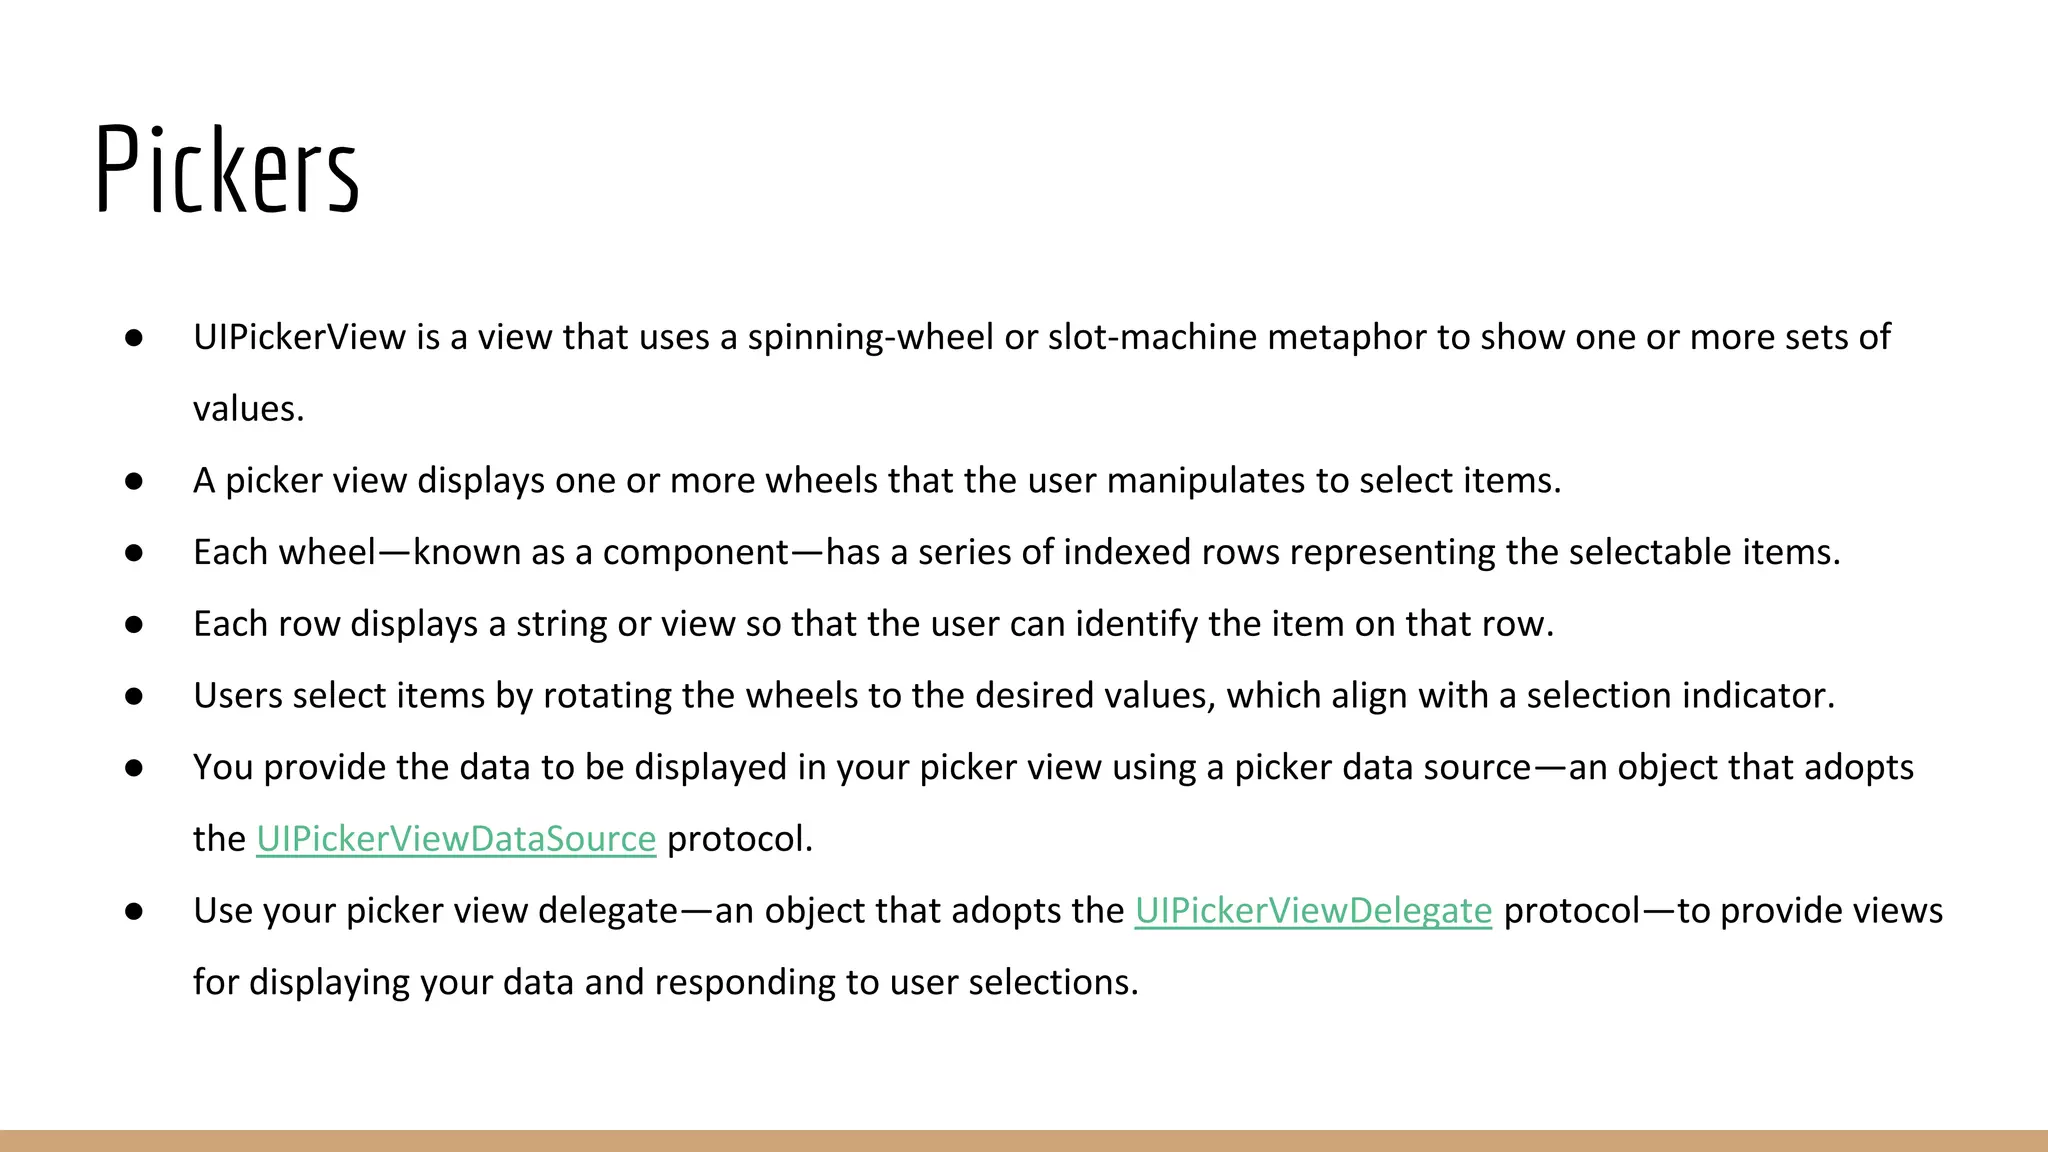
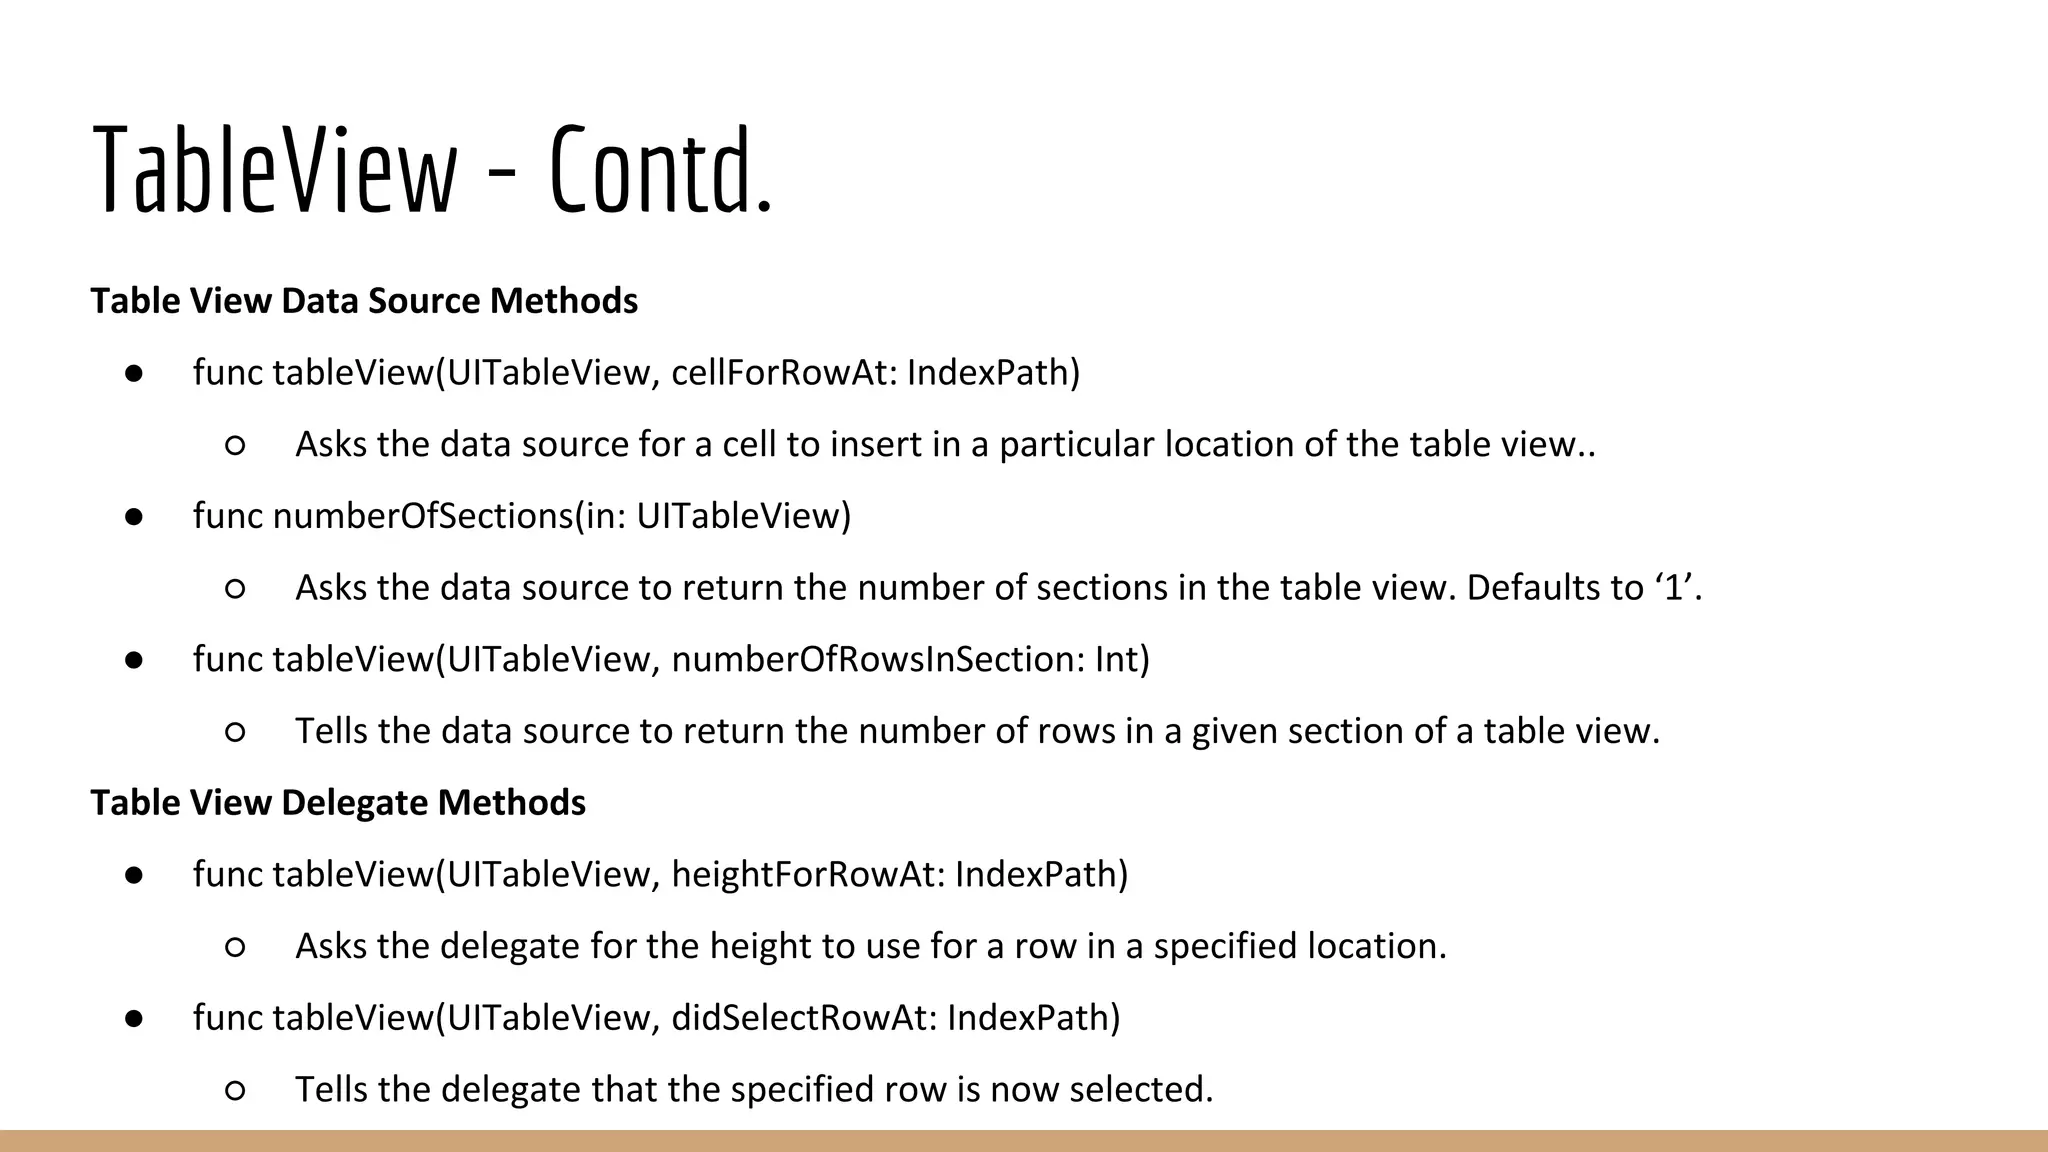
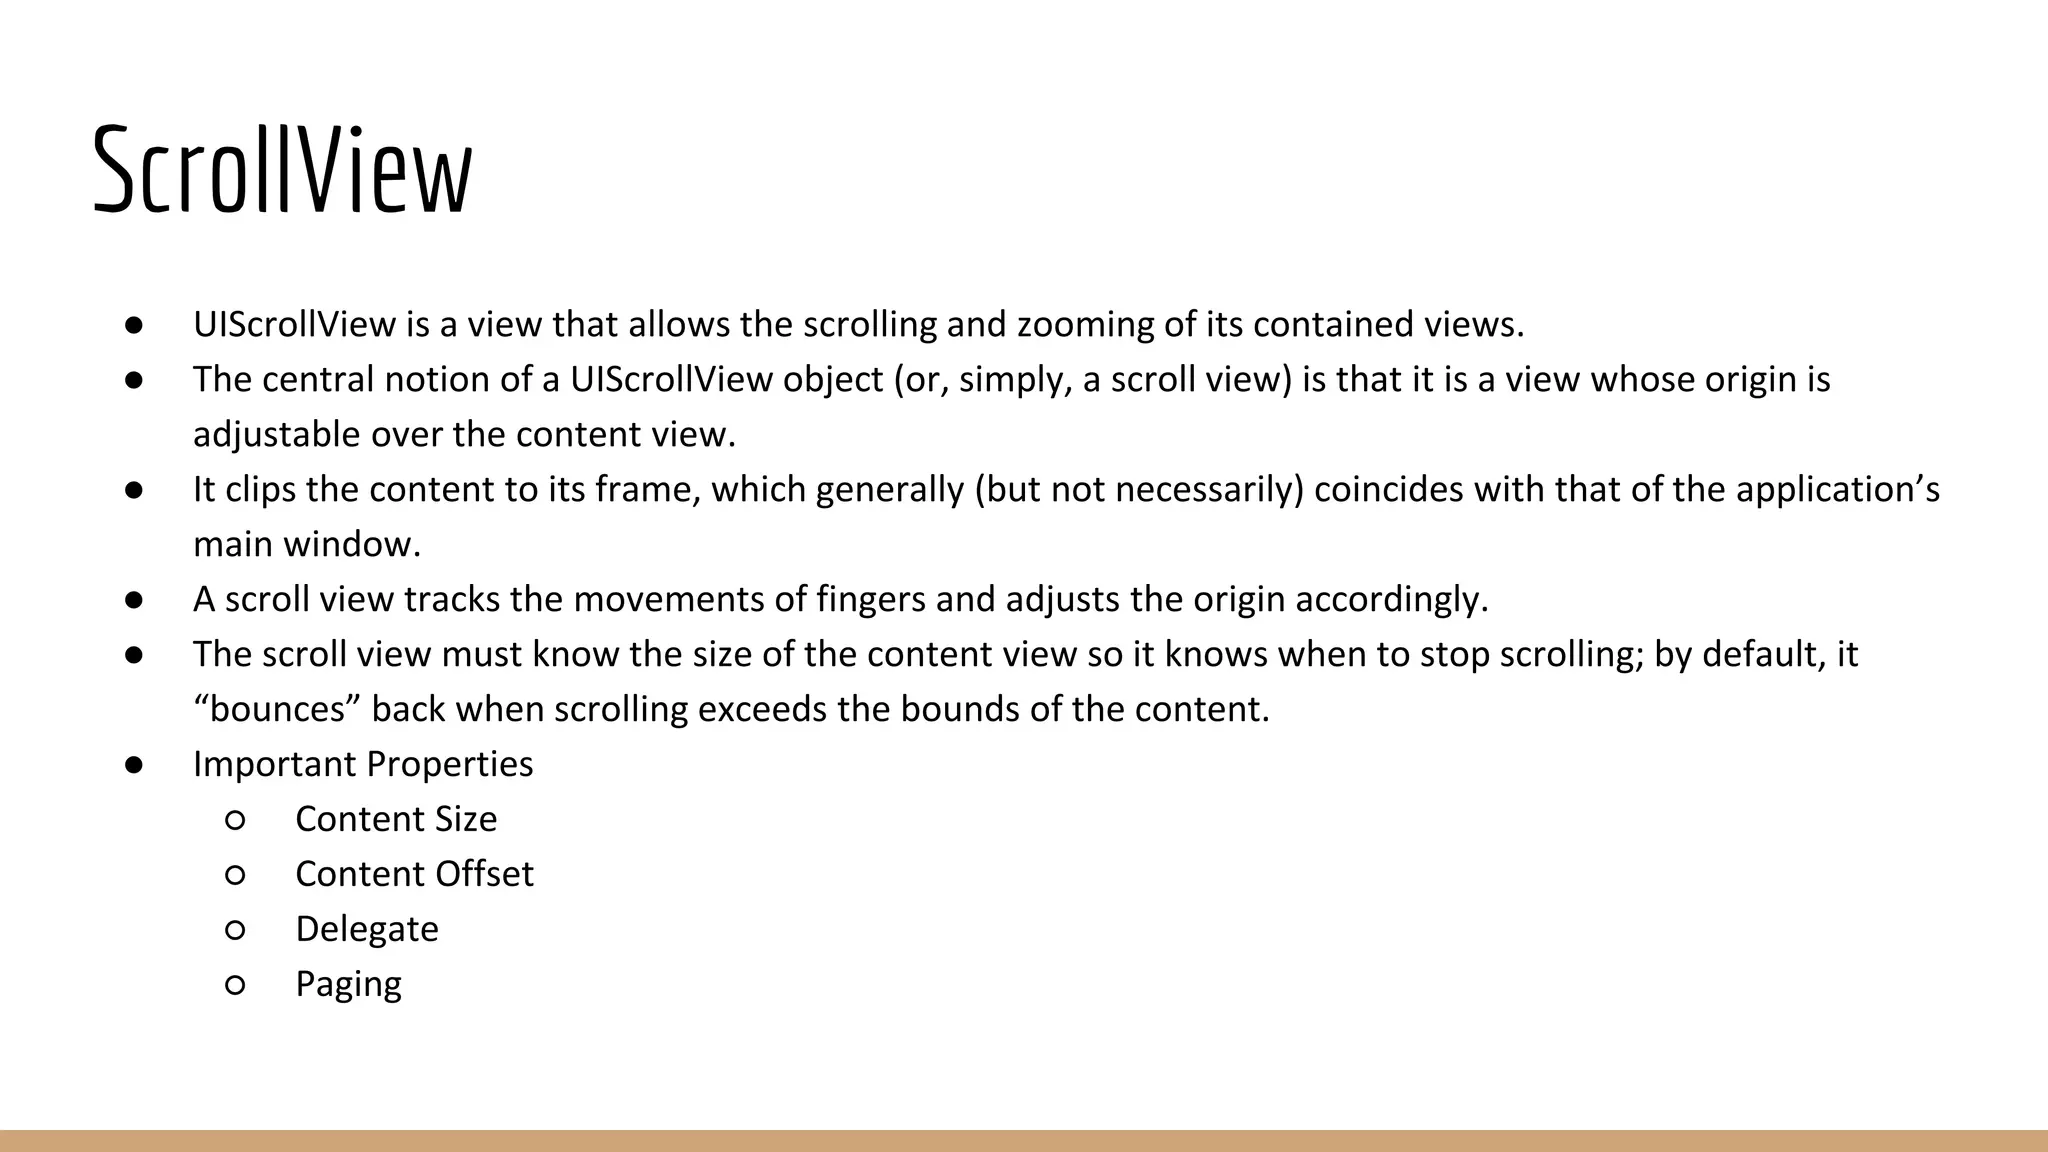
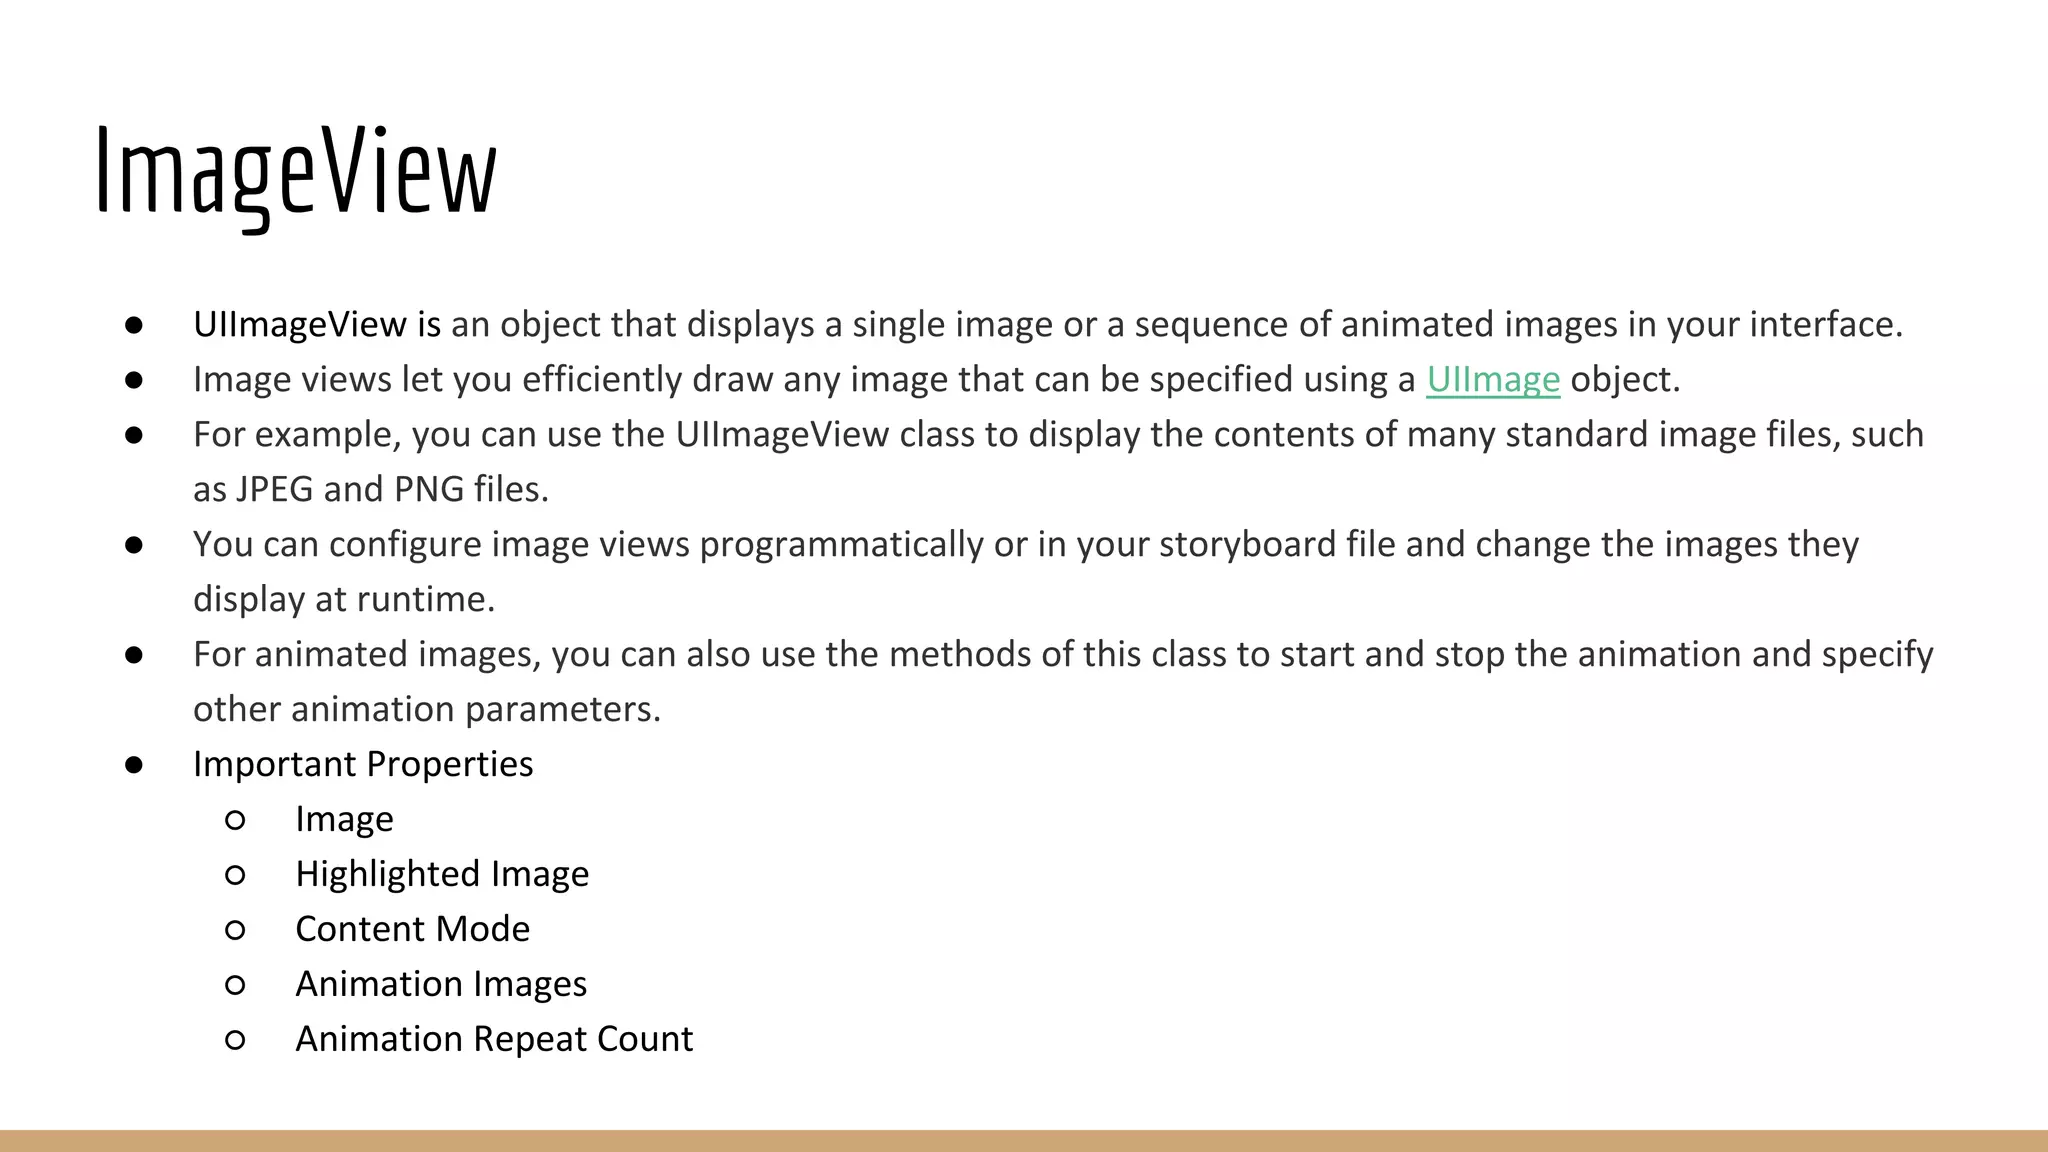
iOS Training
Day 3
UI Elements
UI elements are the visual elements that we can see in our applications. Some of these elements respond to user
interactions such as buttons, text fields and others are informative such as images, labels. The basic UI elements
are mentioned below -
● Navigation Controller
● View Controller
● TextField
● Label
● Button
● Alert Controller
● Switch
● Pickers
● TableView
● ScrollView
● ImageView
Navigation Controller
● A Navigation Controller is a special kind of
view controller that manages a stack of view
controllers and their corresponding views. It's
an ideal way to display hierarchical data.
● The Navigation Controller is always initialized
with a root view controller; this will be the
starting view at the bottom of the stack.
● As the user presses buttons in that view, you
can then push a new view controller onto the
stack to show a new view.
● When the user is done with the new view and
presses a button to go back, you then pop that
controller off the stack to return to the root
view.
View Controller
● View controllers are the foundation of your app’s internal structure.
● Every app has at least one view controller, and most apps have several.
● Each view controller manages a portion of your app’s user interface as well as the interactions between that
interface and the underlying data.
● View controllers also facilitate transitions between different parts of your user interface.
● Because they play such an important role in your app, view controllers are at the center of almost everything
you do.
● The UIViewController class defines the methods and properties for managing your views, handling events,
transitioning from one viewcontroller to another, and coordinating with other parts of your app.
● You subclass UIViewController (or one of its subclasses) and add the custom code you need to implement
your app’s behavior.
View Controller - Contd.
● The most important role of a view controller is
to manage a hierarchy of views.
● Every view controller has a single root view
that encloses all of the view controller’s
content.
● To that root view, you add the views you need
to display your content.
● The figure illustrates the built-in relationship
between the view controller and its views.
TextField
A text field is a UI element that enables the app to get user input.
Outlet Declaration -
@IBOutlet weak var emailAddressTxt: UITextField!
Important Properties of Text Field -
● Placeholder text which is shown when there is no user input
● Normal text
● Auto correction type
● Keyboard type
● Return key type
● Alignment
● Delegate
Textfield - Properties
● You can change the text field properties in xib in the attributes inspector in the utilities area (right side of
the Window).
Textfield - Delegates
● We can set delegate in interface builder by right-clicking on the UIElement and connect it to the file owner
as shown below.
Textfield - Delegates - Contd.
● Set delegate to the class it responds to as shown in the above figure.
● Implement the textField Delegates in the ViewController class, the important text field delegates are −
○ func textFieldShouldBeginEditing(_ textField: UITextField) -> Bool
Asks the delegate if editing should begin in the specified text field.
○ func textFieldDidBeginEditing(_ textField: UITextField)
Tells the delegate that editing began in the specified text field.
○ func textFieldShouldEndEditing(_ textField: UITextField) -> Bool
Asks the delegate if editing should stop in the specified text field.
○ func textFieldDidEndEditing(_ textField: UITextField)
Tells the delegate that editing stopped for the specified text field.
Textfield - Delegates - Contd.
○ func textField(_ textField: UITextField, shouldChangeCharactersIn range: NSRange, replacementString
string: String) -> Bool
Asks the delegate if the specified text should be changed.
○ func textFieldShouldReturn(_ textField: UITextField) -> Bool
Asks the delegate if the text field should process the pressing of the return button.
● Inherit the UITextFieldDelegate class in your viewcontroller for the above delegate methods to be called
during runtime.
● The delegate methods are called based on user action. See the console output to know when the delegates
are called.
Label
Labels are used for displaying static content, which consists of a single line or multiple lines.
Outlet Declaration -
@IBOutlet weak var nameLbl: UILabel!
Important Properties of Label are -
● textAlignment
● textColor
● backgroundColor
● text
● numberOflines
● lineBreakMode
Sample code:
sampleLabel.textColor = UIColor.white;
sampleLabel.backgroundColor = UIColor.clear
sampleLabel.text = "This is a sample textn of multiple lines.
here number of lines is not limited."
sampleLabel.numberOfLines = 0
sampleLabel.lineBreakMode = .byWordWrapping
Button
● Buttons are used for handling user actions. It intercepts
the touch events and sends message to the target object.
● You can change the button properties in xib in the
attributes inspector in the utilities area (right side of the
Window).
● Outlet Declaration -
○ @IBOutlet weak var signInBtn: UIButton!
● Important Properties -
○ imageView
○ titleLabel
○ backgroundColor
○ titleColor
Button Action
The Button click action can be handled in two ways.
By connecting IBAction:
Connect the IBAction to the touch event “Touch Up Inside”
@IBAction func nextBtnAction(_ sender: Any) {
print("Next Button Clicked")
}
By adding target to the button outlet:
nextBtn.addTarget(self, action: #selector(nextBtnClickAction), for: .touchUpInside)
func nextBtnClickAction
{
print("Next Button Clicked")
}
Alert Controller
● UIAlertController is an object that displays an alert message to the user.
● Use this class to configure alerts and action sheets with the message that you want to display and the
actions from which to choose.
● After configuring the alert controller with the actions and style you want, present it using the
present(_:animated:completion:) method.
● UIKit displays alerts and action sheets modally over your app's content.
● In addition to displaying a message to a user, you can associate actions with your alert controller to give the
user a way to respond.
● For each action you add using the addAction(_:) method, the alert controller configures a button with the
action details.
● When the user taps that action, the alert controller executes the block you provided when creating the
action object.
Alert Controller - Contd.
Example:
let alert = UIAlertController(title: "My Alert", message: @"This is an alert.", preferredStyle: .alert)
alert.addAction(UIAlertAction(title: "OK", style: .`default`, handler: { _ in
print("The "OK" alert action is clicked.")
}))
self.present(alert, animated: true, completion: nil)
You can add any number of actions to the AlertController
Switch
● UISwitch is a control that offers a binary choice, such as On/Off.
● The UISwitch class declares a property and a method to control its on/off state. As with UISlider, when the
user manipulates the switch control (“flips” it) a valueChanged event is generated, which results in the
control (if properly configured) sending an action message.
● You can customize the appearance of the switch by changing the color used to tint the switch when it is on
or off.
● @IBAction func buttonClicked(sender: UIButton) {
if mySwitch.on {
print("Switch is on")
mySwitch.setOn(false, animated:true)
} else {
mySwitch.setOn(true, animated:true)
}
}
Pickers
● UIPickerView is a view that uses a spinning-wheel or slot-machine metaphor to show one or more sets of
values.
● A picker view displays one or more wheels that the user manipulates to select items.
● Each wheel—known as a component—has a series of indexed rows representing the selectable items.
● Each row displays a string or view so that the user can identify the item on that row.
● Users select items by rotating the wheels to the desired values, which align with a selection indicator.
● You provide the data to be displayed in your picker view using a picker data source—an object that adopts
the UIPickerViewDataSource protocol.
● Use your picker view delegate—an object that adopts the UIPickerViewDelegate protocol—to provide views
for displaying your data and responding to user selections.
Pickers - Contd.
A pickerView can be added to the viewcontroller as follows -
Outlet Declaration -
@IBOutlet weak var cityPickerView: UIPickerView!
Important Properties of Picker View -
● Data Source
● Delegate
● Selection Indicator
● UIBarButton Items
● Reload All Components
● Select Row
Pickers - Contd.
Picker View Data Source Methods
● func numberOfComponents(in pickerView: UIPickerView) -> Int
○ Called by the picker view when it needs the number of components.
● func pickerView(_ pickerView: UIPickerView, numberOfRowsInComponent component: Int) -> Int
○ Called by the picker view when it needs the number of rows for a specified component.
Picker View Delegate Methods
● func pickerView(_ pickerView: UIPickerView, didSelectRow row: Int, inComponent component: Int)
○ Called by the picker view when it needs the number of rows for a specified component.
● func pickerView(_ pickerView: UIPickerView, titleForRow row: Int, forComponent component: Int) -> String?
○ Called by the picker view when it needs the title to use for a given row in a given component.
TableView
● UITableView is a view that presents data using rows arranged in a single column.
● A table view displays a list of items in a single column. UITableView is a subclass of UIScrollView, which
allows users to scroll through the table, although UITableView allows vertical scrolling only.
● The cells comprising the individual items of the table are UITableViewCell objects; UITableView uses these
objects to draw the visible rows of the table.
● Cells have content—titles and images—and even custom designed cells.
● A table view is made up of zero or more sections, each with its own rows.
● Sections are identified by their index number within the table view, and rows are identified by their index
number within a section.
● Many methods of UITableView take NSIndexPath objects as parameters and return values.
● UITableView declares a category on NSIndexPath that enables you to get the represented row index (row
property) and section index (section property)
TableView - Contd.
A tableView can be added to the viewcontroller as follows -
Outlet Declaration -
@IBOutlet weak var studentsTableView: UITableView!
Important Properties of Picker View -
● Data Source
● Delegate
● Table View Style
● Separator Style and Color
● Reload Data
● Allow Selection
TableView - Contd.
Table View Data Source Methods
● func tableView(UITableView, cellForRowAt: IndexPath)
○ Asks the data source for a cell to insert in a particular location of the table view..
● func numberOfSections(in: UITableView)
○ Asks the data source to return the number of sections in the table view. Defaults to ‘1’.
● func tableView(UITableView, numberOfRowsInSection: Int)
○ Tells the data source to return the number of rows in a given section of a table view.
Table View Delegate Methods
● func tableView(UITableView, heightForRowAt: IndexPath)
○ Asks the delegate for the height to use for a row in a specified location.
● func tableView(UITableView, didSelectRowAt: IndexPath)
○ Tells the delegate that the specified row is now selected.
ScrollView
● UIScrollView is a view that allows the scrolling and zooming of its contained views.
● The central notion of a UIScrollView object (or, simply, a scroll view) is that it is a view whose origin is
adjustable over the content view.
● It clips the content to its frame, which generally (but not necessarily) coincides with that of the application’s
main window.
● A scroll view tracks the movements of fingers and adjusts the origin accordingly.
● The scroll view must know the size of the content view so it knows when to stop scrolling; by default, it
“bounces” back when scrolling exceeds the bounds of the content.
● Important Properties
○ Content Size
○ Content Offset
○ Delegate
○ Paging
ImageView
● UIImageView is an object that displays a single image or a sequence of animated images in your interface.
● Image views let you efficiently draw any image that can be specified using a UIImage object.
● For example, you can use the UIImageView class to display the contents of many standard image files, such
as JPEG and PNG files.
● You can configure image views programmatically or in your storyboard file and change the images they
display at runtime.
● For animated images, you can also use the methods of this class to start and stop the animation and specify
other animation parameters.
● Important Properties
○ Image
○ Highlighted Image
○ Content Mode
○ Animation Images
○ Animation Repeat Count
Database
● A database is a collection of information organized to provide efficient retrieval.
● It is a collection of data that is organized so that it can be easily accessed, managed and updated.
● A database could be as simple as an alphabetical arrangement of names in an address book or as complex as
a database that provides information in a combination of formats.
● Commonly used mobile databases
○ Core Data
○ SQLite
○ Realm
Realm Database
● Realm is a cross-platform mobile database just released to the public in July of 2014. It’s a data persistence
solution designed specifically for mobile applications
● Realm is extremely simple to integrate in your projects and the most commonly used functions such as
querying the database consist of a single line of code!
● The Realm data storage solution is faster than SQLite and Core Data.
● Realm uses very little resources, is incredibly easy to use and lets you interact with your data faster than
SQLite and Core Data.
● Unlike regular server-side databases, you can use it directly inside your iOS apps to store and query data
locally on the device, allowing you to build apps faster and craft previously impossible experiences.
Realm Database
Reasons to choose:
● Ease of use
● Speed
● Realm Database Browser
● Free
● Well-documented
Importing Realm into the Project:
You can either use Cocoapods to import Realm or download the Realm SDK as below -
● Download the latest release of Realm and extract the zip.
● Go to your Xcode project’s “General” settings.
● Drag Realm.framework from the ios/dynamic directory to the “Embedded Binaries” section. Make sure
Copy items if needed is selected and click Finish.
Note: The Realm Framework cannot be committed to GIT. It has to be maintain locally in the Project Resource Files.
Advantages of Realm
● Realms store native objects: The Realm Database has bindings for many popular languages for mobile app
development, including Swift, Java, Objective-C, C#, and JavaScript (using React Native). The objects you
store in a Realm are the objects you work with in the rest of your code.
● Realms are zero-copy: data is not copied in and out of the database to be accessed; you’re working with the
objects directly.
● Realms implement the live objects pattern: if you have an instance of an object stored in a Realm and
something else in your application updates that object, your instance will reflect those changes.
● Realms are cross-platform: as long as you don’t store platform-specific objects in a Realm, the data can be
synced across operating systems. (In fact, the actual Realm data files can be copied between platforms.)
● Lastly, Realms are ACID-compliant.
Realm Browser
Realm Browser is used to read and edit .realm databases. It is freely available on the Mac App Store.
Realm Model/Table
Realm Database Operations
Insert Data:
let countryObj = tbl_countryList()
countryObj.Mobile_CountryId = countryObj.incrementMobile_CountryId()
countryObj.CountryId = 1
countryObj.CountryName = “India”
countryObj.CountryCode = “IND”
try! realm.write {
realm.add(countryObj)
}
Update Data:
let realmResults = realm.objects(tbl_countryList.self).filter("CountryId = 1")
if realmResults.count != 0
{
let countryObj = realmResults[0]
try! realm.write{
countryObj.CountryName = “China”
countryObj.CountryCode = “CHI”
}
}
Realm Database Operations
Fetch Data:
let realm = try! Realm()
let realmResults =
realm.objects(tbl_countryList.self).filter("CountryId = 1")
if realmResults.count > 0
{
countryName = realmResults[0].CountryName
}
Delete Data:
let realmResults = realm.objects(tbl_countryList.self)
realmResults.deleteAll()
OR
let realmResults = realm.objects(tbl_countryList.self).filter("CountryId = 1")
if realmResults.count != 0
{
try! Realm.write{
realm.delete(realmResults[0])
}
}
Realm Migration
● When working with any database, it is likely your data model will change over time.
● If there are changes in the database of a new version of the app from an older version the database has to
be migrated to the new schema.
● You define a migration and the associated schema version by setting Realm.Configuration.schemaVersion in
the AppDelegate File.
● Since data models in Realm are defined as standard Swift classes, making model changes is as easy as
changing any other Swift class.
Thank You

Basic iOS Training with SWIFT - Part 3

  • 1.
  • 2.
    UI Elements UI elementsare the visual elements that we can see in our applications. Some of these elements respond to user interactions such as buttons, text fields and others are informative such as images, labels. The basic UI elements are mentioned below - ● Navigation Controller ● View Controller ● TextField ● Label ● Button ● Alert Controller ● Switch ● Pickers ● TableView ● ScrollView ● ImageView
  • 3.
    Navigation Controller ● ANavigation Controller is a special kind of view controller that manages a stack of view controllers and their corresponding views. It's an ideal way to display hierarchical data. ● The Navigation Controller is always initialized with a root view controller; this will be the starting view at the bottom of the stack. ● As the user presses buttons in that view, you can then push a new view controller onto the stack to show a new view. ● When the user is done with the new view and presses a button to go back, you then pop that controller off the stack to return to the root view.
  • 4.
    View Controller ● Viewcontrollers are the foundation of your app’s internal structure. ● Every app has at least one view controller, and most apps have several. ● Each view controller manages a portion of your app’s user interface as well as the interactions between that interface and the underlying data. ● View controllers also facilitate transitions between different parts of your user interface. ● Because they play such an important role in your app, view controllers are at the center of almost everything you do. ● The UIViewController class defines the methods and properties for managing your views, handling events, transitioning from one viewcontroller to another, and coordinating with other parts of your app. ● You subclass UIViewController (or one of its subclasses) and add the custom code you need to implement your app’s behavior.
  • 5.
    View Controller -Contd. ● The most important role of a view controller is to manage a hierarchy of views. ● Every view controller has a single root view that encloses all of the view controller’s content. ● To that root view, you add the views you need to display your content. ● The figure illustrates the built-in relationship between the view controller and its views.
  • 6.
    TextField A text fieldis a UI element that enables the app to get user input. Outlet Declaration - @IBOutlet weak var emailAddressTxt: UITextField! Important Properties of Text Field - ● Placeholder text which is shown when there is no user input ● Normal text ● Auto correction type ● Keyboard type ● Return key type ● Alignment ● Delegate
  • 7.
    Textfield - Properties ●You can change the text field properties in xib in the attributes inspector in the utilities area (right side of the Window).
  • 8.
    Textfield - Delegates ●We can set delegate in interface builder by right-clicking on the UIElement and connect it to the file owner as shown below.
  • 9.
    Textfield - Delegates- Contd. ● Set delegate to the class it responds to as shown in the above figure. ● Implement the textField Delegates in the ViewController class, the important text field delegates are − ○ func textFieldShouldBeginEditing(_ textField: UITextField) -> Bool Asks the delegate if editing should begin in the specified text field. ○ func textFieldDidBeginEditing(_ textField: UITextField) Tells the delegate that editing began in the specified text field. ○ func textFieldShouldEndEditing(_ textField: UITextField) -> Bool Asks the delegate if editing should stop in the specified text field. ○ func textFieldDidEndEditing(_ textField: UITextField) Tells the delegate that editing stopped for the specified text field.
  • 10.
    Textfield - Delegates- Contd. ○ func textField(_ textField: UITextField, shouldChangeCharactersIn range: NSRange, replacementString string: String) -> Bool Asks the delegate if the specified text should be changed. ○ func textFieldShouldReturn(_ textField: UITextField) -> Bool Asks the delegate if the text field should process the pressing of the return button. ● Inherit the UITextFieldDelegate class in your viewcontroller for the above delegate methods to be called during runtime. ● The delegate methods are called based on user action. See the console output to know when the delegates are called.
  • 11.
    Label Labels are usedfor displaying static content, which consists of a single line or multiple lines. Outlet Declaration - @IBOutlet weak var nameLbl: UILabel! Important Properties of Label are - ● textAlignment ● textColor ● backgroundColor ● text ● numberOflines ● lineBreakMode Sample code: sampleLabel.textColor = UIColor.white; sampleLabel.backgroundColor = UIColor.clear sampleLabel.text = "This is a sample textn of multiple lines. here number of lines is not limited." sampleLabel.numberOfLines = 0 sampleLabel.lineBreakMode = .byWordWrapping
  • 12.
    Button ● Buttons areused for handling user actions. It intercepts the touch events and sends message to the target object. ● You can change the button properties in xib in the attributes inspector in the utilities area (right side of the Window). ● Outlet Declaration - ○ @IBOutlet weak var signInBtn: UIButton! ● Important Properties - ○ imageView ○ titleLabel ○ backgroundColor ○ titleColor
  • 13.
    Button Action The Buttonclick action can be handled in two ways. By connecting IBAction: Connect the IBAction to the touch event “Touch Up Inside” @IBAction func nextBtnAction(_ sender: Any) { print("Next Button Clicked") } By adding target to the button outlet: nextBtn.addTarget(self, action: #selector(nextBtnClickAction), for: .touchUpInside) func nextBtnClickAction { print("Next Button Clicked") }
  • 14.
    Alert Controller ● UIAlertControlleris an object that displays an alert message to the user. ● Use this class to configure alerts and action sheets with the message that you want to display and the actions from which to choose. ● After configuring the alert controller with the actions and style you want, present it using the present(_:animated:completion:) method. ● UIKit displays alerts and action sheets modally over your app's content. ● In addition to displaying a message to a user, you can associate actions with your alert controller to give the user a way to respond. ● For each action you add using the addAction(_:) method, the alert controller configures a button with the action details. ● When the user taps that action, the alert controller executes the block you provided when creating the action object.
  • 15.
    Alert Controller -Contd. Example: let alert = UIAlertController(title: "My Alert", message: @"This is an alert.", preferredStyle: .alert) alert.addAction(UIAlertAction(title: "OK", style: .`default`, handler: { _ in print("The "OK" alert action is clicked.") })) self.present(alert, animated: true, completion: nil) You can add any number of actions to the AlertController
  • 16.
    Switch ● UISwitch isa control that offers a binary choice, such as On/Off. ● The UISwitch class declares a property and a method to control its on/off state. As with UISlider, when the user manipulates the switch control (“flips” it) a valueChanged event is generated, which results in the control (if properly configured) sending an action message. ● You can customize the appearance of the switch by changing the color used to tint the switch when it is on or off. ● @IBAction func buttonClicked(sender: UIButton) { if mySwitch.on { print("Switch is on") mySwitch.setOn(false, animated:true) } else { mySwitch.setOn(true, animated:true) } }
  • 17.
    Pickers ● UIPickerView isa view that uses a spinning-wheel or slot-machine metaphor to show one or more sets of values. ● A picker view displays one or more wheels that the user manipulates to select items. ● Each wheel—known as a component—has a series of indexed rows representing the selectable items. ● Each row displays a string or view so that the user can identify the item on that row. ● Users select items by rotating the wheels to the desired values, which align with a selection indicator. ● You provide the data to be displayed in your picker view using a picker data source—an object that adopts the UIPickerViewDataSource protocol. ● Use your picker view delegate—an object that adopts the UIPickerViewDelegate protocol—to provide views for displaying your data and responding to user selections.
  • 18.
    Pickers - Contd. ApickerView can be added to the viewcontroller as follows - Outlet Declaration - @IBOutlet weak var cityPickerView: UIPickerView! Important Properties of Picker View - ● Data Source ● Delegate ● Selection Indicator ● UIBarButton Items ● Reload All Components ● Select Row
  • 19.
    Pickers - Contd. PickerView Data Source Methods ● func numberOfComponents(in pickerView: UIPickerView) -> Int ○ Called by the picker view when it needs the number of components. ● func pickerView(_ pickerView: UIPickerView, numberOfRowsInComponent component: Int) -> Int ○ Called by the picker view when it needs the number of rows for a specified component. Picker View Delegate Methods ● func pickerView(_ pickerView: UIPickerView, didSelectRow row: Int, inComponent component: Int) ○ Called by the picker view when it needs the number of rows for a specified component. ● func pickerView(_ pickerView: UIPickerView, titleForRow row: Int, forComponent component: Int) -> String? ○ Called by the picker view when it needs the title to use for a given row in a given component.
  • 20.
    TableView ● UITableView isa view that presents data using rows arranged in a single column. ● A table view displays a list of items in a single column. UITableView is a subclass of UIScrollView, which allows users to scroll through the table, although UITableView allows vertical scrolling only. ● The cells comprising the individual items of the table are UITableViewCell objects; UITableView uses these objects to draw the visible rows of the table. ● Cells have content—titles and images—and even custom designed cells. ● A table view is made up of zero or more sections, each with its own rows. ● Sections are identified by their index number within the table view, and rows are identified by their index number within a section. ● Many methods of UITableView take NSIndexPath objects as parameters and return values. ● UITableView declares a category on NSIndexPath that enables you to get the represented row index (row property) and section index (section property)
  • 21.
    TableView - Contd. AtableView can be added to the viewcontroller as follows - Outlet Declaration - @IBOutlet weak var studentsTableView: UITableView! Important Properties of Picker View - ● Data Source ● Delegate ● Table View Style ● Separator Style and Color ● Reload Data ● Allow Selection
  • 22.
    TableView - Contd. TableView Data Source Methods ● func tableView(UITableView, cellForRowAt: IndexPath) ○ Asks the data source for a cell to insert in a particular location of the table view.. ● func numberOfSections(in: UITableView) ○ Asks the data source to return the number of sections in the table view. Defaults to ‘1’. ● func tableView(UITableView, numberOfRowsInSection: Int) ○ Tells the data source to return the number of rows in a given section of a table view. Table View Delegate Methods ● func tableView(UITableView, heightForRowAt: IndexPath) ○ Asks the delegate for the height to use for a row in a specified location. ● func tableView(UITableView, didSelectRowAt: IndexPath) ○ Tells the delegate that the specified row is now selected.
  • 23.
    ScrollView ● UIScrollView isa view that allows the scrolling and zooming of its contained views. ● The central notion of a UIScrollView object (or, simply, a scroll view) is that it is a view whose origin is adjustable over the content view. ● It clips the content to its frame, which generally (but not necessarily) coincides with that of the application’s main window. ● A scroll view tracks the movements of fingers and adjusts the origin accordingly. ● The scroll view must know the size of the content view so it knows when to stop scrolling; by default, it “bounces” back when scrolling exceeds the bounds of the content. ● Important Properties ○ Content Size ○ Content Offset ○ Delegate ○ Paging
  • 24.
    ImageView ● UIImageView isan object that displays a single image or a sequence of animated images in your interface. ● Image views let you efficiently draw any image that can be specified using a UIImage object. ● For example, you can use the UIImageView class to display the contents of many standard image files, such as JPEG and PNG files. ● You can configure image views programmatically or in your storyboard file and change the images they display at runtime. ● For animated images, you can also use the methods of this class to start and stop the animation and specify other animation parameters. ● Important Properties ○ Image ○ Highlighted Image ○ Content Mode ○ Animation Images ○ Animation Repeat Count
  • 25.
    Database ● A databaseis a collection of information organized to provide efficient retrieval. ● It is a collection of data that is organized so that it can be easily accessed, managed and updated. ● A database could be as simple as an alphabetical arrangement of names in an address book or as complex as a database that provides information in a combination of formats. ● Commonly used mobile databases ○ Core Data ○ SQLite ○ Realm
  • 26.
    Realm Database ● Realmis a cross-platform mobile database just released to the public in July of 2014. It’s a data persistence solution designed specifically for mobile applications ● Realm is extremely simple to integrate in your projects and the most commonly used functions such as querying the database consist of a single line of code! ● The Realm data storage solution is faster than SQLite and Core Data. ● Realm uses very little resources, is incredibly easy to use and lets you interact with your data faster than SQLite and Core Data. ● Unlike regular server-side databases, you can use it directly inside your iOS apps to store and query data locally on the device, allowing you to build apps faster and craft previously impossible experiences.
  • 27.
    Realm Database Reasons tochoose: ● Ease of use ● Speed ● Realm Database Browser ● Free ● Well-documented Importing Realm into the Project: You can either use Cocoapods to import Realm or download the Realm SDK as below - ● Download the latest release of Realm and extract the zip. ● Go to your Xcode project’s “General” settings. ● Drag Realm.framework from the ios/dynamic directory to the “Embedded Binaries” section. Make sure Copy items if needed is selected and click Finish. Note: The Realm Framework cannot be committed to GIT. It has to be maintain locally in the Project Resource Files.
  • 28.
    Advantages of Realm ●Realms store native objects: The Realm Database has bindings for many popular languages for mobile app development, including Swift, Java, Objective-C, C#, and JavaScript (using React Native). The objects you store in a Realm are the objects you work with in the rest of your code. ● Realms are zero-copy: data is not copied in and out of the database to be accessed; you’re working with the objects directly. ● Realms implement the live objects pattern: if you have an instance of an object stored in a Realm and something else in your application updates that object, your instance will reflect those changes. ● Realms are cross-platform: as long as you don’t store platform-specific objects in a Realm, the data can be synced across operating systems. (In fact, the actual Realm data files can be copied between platforms.) ● Lastly, Realms are ACID-compliant.
  • 29.
    Realm Browser Realm Browseris used to read and edit .realm databases. It is freely available on the Mac App Store.
  • 30.
  • 31.
    Realm Database Operations InsertData: let countryObj = tbl_countryList() countryObj.Mobile_CountryId = countryObj.incrementMobile_CountryId() countryObj.CountryId = 1 countryObj.CountryName = “India” countryObj.CountryCode = “IND” try! realm.write { realm.add(countryObj) } Update Data: let realmResults = realm.objects(tbl_countryList.self).filter("CountryId = 1") if realmResults.count != 0 { let countryObj = realmResults[0] try! realm.write{ countryObj.CountryName = “China” countryObj.CountryCode = “CHI” } }
  • 32.
    Realm Database Operations FetchData: let realm = try! Realm() let realmResults = realm.objects(tbl_countryList.self).filter("CountryId = 1") if realmResults.count > 0 { countryName = realmResults[0].CountryName } Delete Data: let realmResults = realm.objects(tbl_countryList.self) realmResults.deleteAll() OR let realmResults = realm.objects(tbl_countryList.self).filter("CountryId = 1") if realmResults.count != 0 { try! Realm.write{ realm.delete(realmResults[0]) } }
  • 33.
    Realm Migration ● Whenworking with any database, it is likely your data model will change over time. ● If there are changes in the database of a new version of the app from an older version the database has to be migrated to the new schema. ● You define a migration and the associated schema version by setting Realm.Configuration.schemaVersion in the AppDelegate File. ● Since data models in Realm are defined as standard Swift classes, making model changes is as easy as changing any other Swift class.
  • 34.