Build a One-page WordPress Website Step by Step
A one-page WordPress website keeps all your content on a single, scrollable page instead of spreading it across multiple pages. This approach is becoming increasingly popular on WordPress, as it makes it easy for visitors to find what they need by simply scrolling through your content sections.
Creating a one-page WordPress website offers several advantages:
In this tutorial, we’ll show you how to build a one-page WordPress website using the Kadence theme and Kadence Blocks Plugin.
We’ll walk you through:
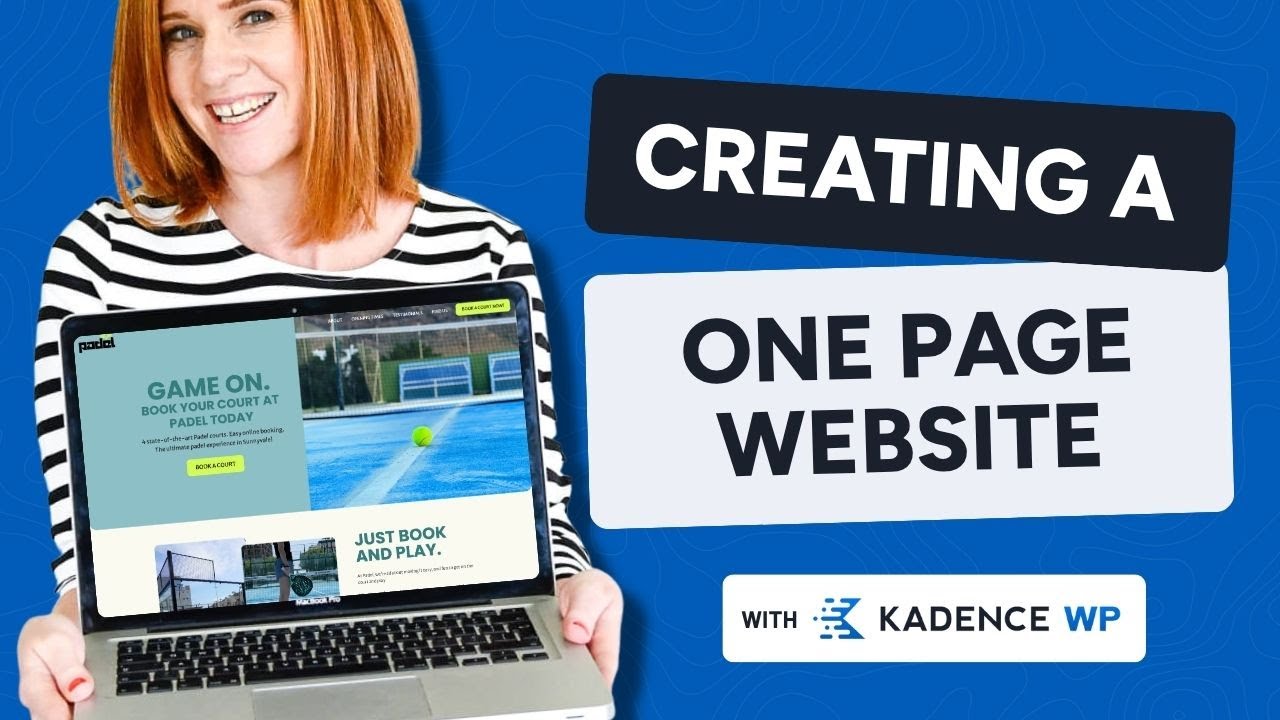
Want to follow along step-by-step? Click the video above for the full tutorial on YouTube.
The different types of one-page websites
Before we dive into building your one-page site, let’s take a quick look at what one-page websites are and why they’re so popular. They’re commonly used for all sorts of commercial purposes, each with its own layout and strategy to meet a specific goal. Some of the most common examples of single-page websites include:
Landing pages focus on converting visitors into customers. They guide people through key information and end with a clear call-to-action like “Buy Now” or “Get Started.”

Portfolio websites showcase creative work in a scrollable format. Designers, photographers, and agencies often use this style to display their best projects and make it easy for potential clients to see their capabilities.
Product launch/promo pages tell the story of a specific product or service. They typically flow from introducing the product to highlighting features, showing testimonials, and ending with purchase options.
Event pages keep all important information in one place. Whether it’s a conference, workshop, or special promotion, visitors can easily find details about dates, locations, schedules, and registration.

Whether or not you need a one-page website depends on your goals. A single page works best when you want to:
How to Build a One-Page WordPress Website Using the Kadence Theme (Step-by-Step Tutorial)
Step 1 – Install and Setup the Kadence Theme & Blocks Plugin
For the purpose of this tutorial, we’re going to assume you already have WordPress installed on your hosting account. That means we’ll be jumping straight into installing the Kadence Theme and Kadence Blocks so you can start designing your one-page website right away.
Overwhelmed by WordPress, hosting, or plugins?
Check out StellarSites — a done-for-you setup with reliable hosting and tools like Kadence already installed, so you can skip the tech stress and jump straight into building a beautiful website.


In the search bar on the top right, type “Kadence” and press Enter. Look for the plugin called “Gutenberg Blocks with AI by Kadence WP”, then click Install Now, and once it’s installed, click Activate.

Next, let’s install the Kadence Theme. Head over to Appearance in the left-hand menu and click on Themes.

Click on ‘Add Theme’
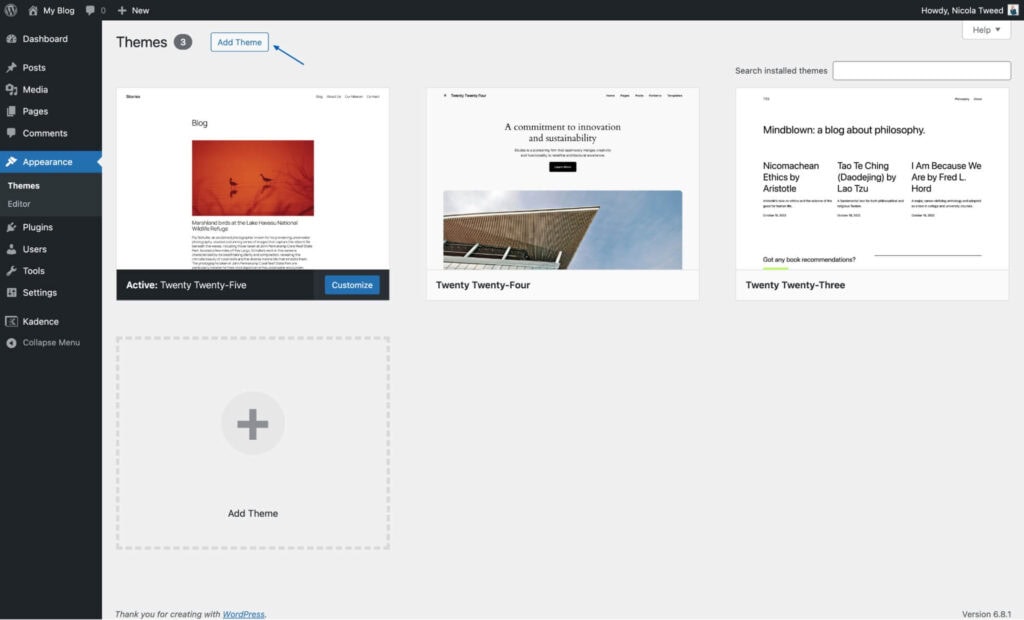
In the Search themes bar, type “Kadence”. When it appears, click Install, then click Activate to set it as your theme.

Now that the Kadence Theme is active and Kadence Blocks is installed, we’re ready for Step 2 — setting up the page for your one-page website.
Step 2 – Setting up your One-Page
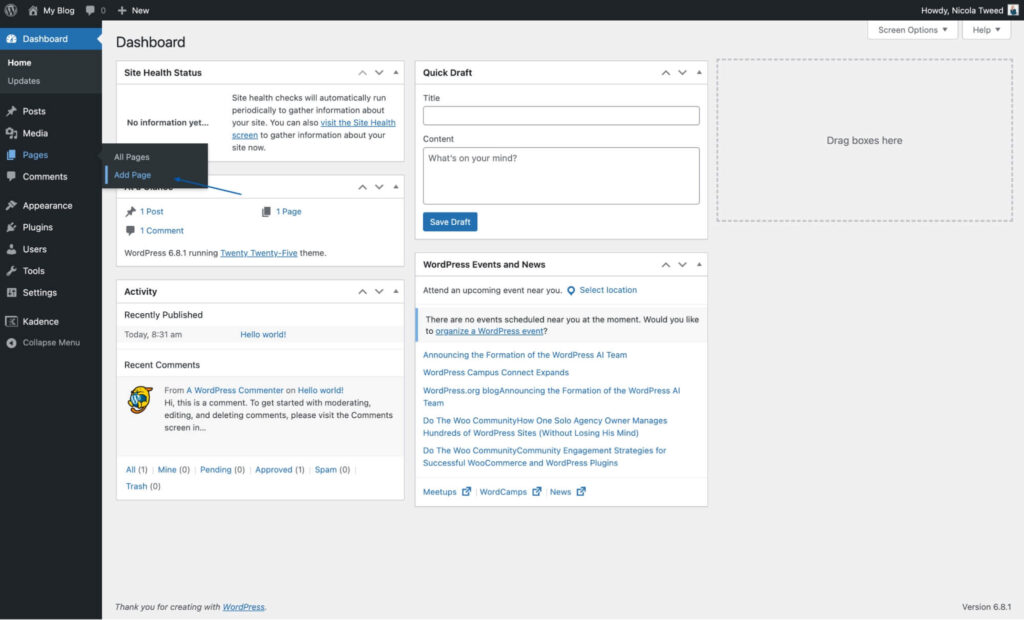
From your WordPress dashboard, go to Pages in the left-hand menu and click Add New.
Give your page a title, for this tutorial, we’ll call our page “Home”

Next, we’ll adjust a few page settings. Click on Page Settings in the top-right corner of the editor.

In the Page Settings, make the following changes:
- Disable the Page Title
- Set the Page Layout to Full Width
- Change the Content Style to Unboxed
- Disable Content Vertical Spacing
- Disable both the Header and Footer
These settings help you start with a blank canvas, perfect for building a sleek one-page layout without extra padding or distractions.

Step 3 – Customizing the Header and Navigation for a Smooth Scroll Experience
In this step, you’ll add a custom header using the Header (Adv) block, which comes with the free Kadence Blocks plugin.
Click the “+” icon to add a new block, then search for Header (Adv) and click it to insert the block into your page
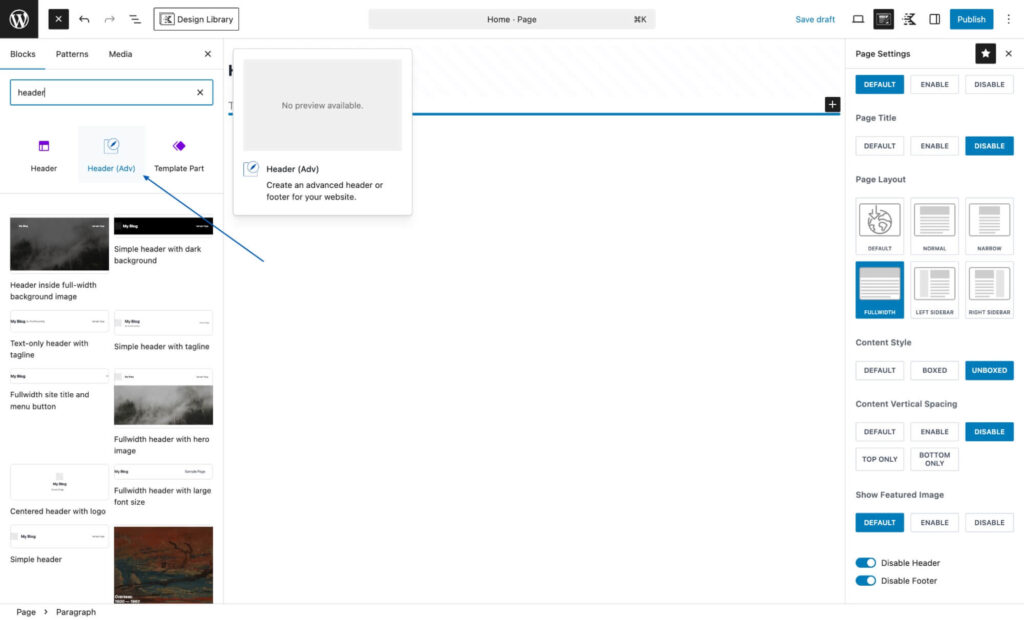
Click on ‘Create a new header’
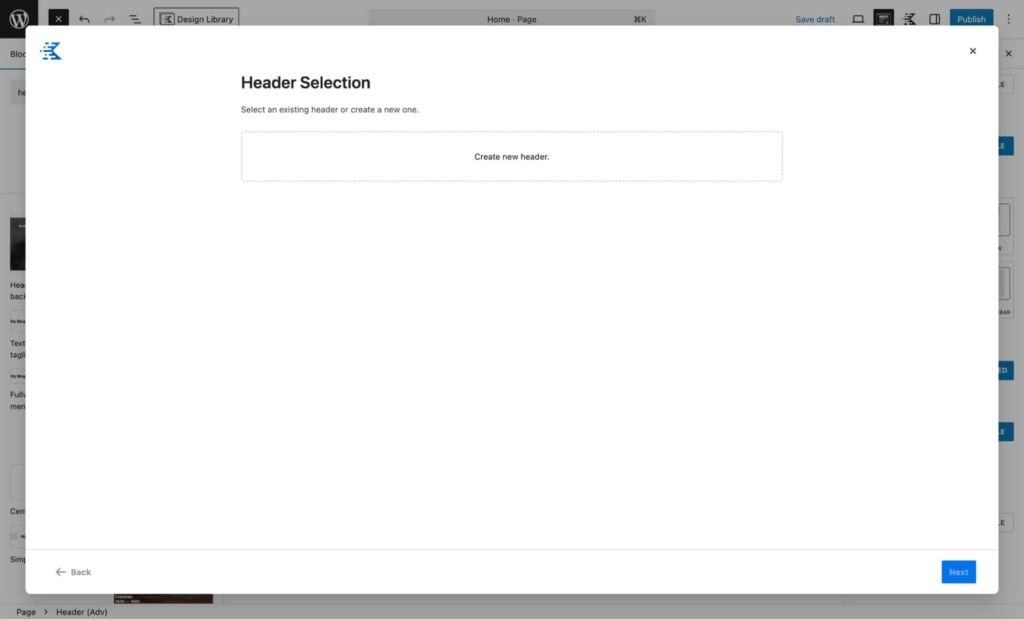
Then give your header a name and a description and click next

In the next step, you’ll choose your desktop header layout. You can pick from several preset options or start with a blank header if you want to build it from scratch. Once you have chosen your preferred Desktop header layout click next

Now choose the layout for your mobile header, then click to Finish

Use the visual builder to add your logo, navigation links, and amend the buttons.
First, add your logo in the Site Identity section. Hover over the grey placeholder and click the upload icon. This will open the media library where you can select or upload your logo.

Next, you’ll create anchor links for your one-page site.
What is an anchor link?
An anchor link is a menu link that takes visitors directly to a specific section on the same page, perfect for one-page websites where all content lives on a single page.
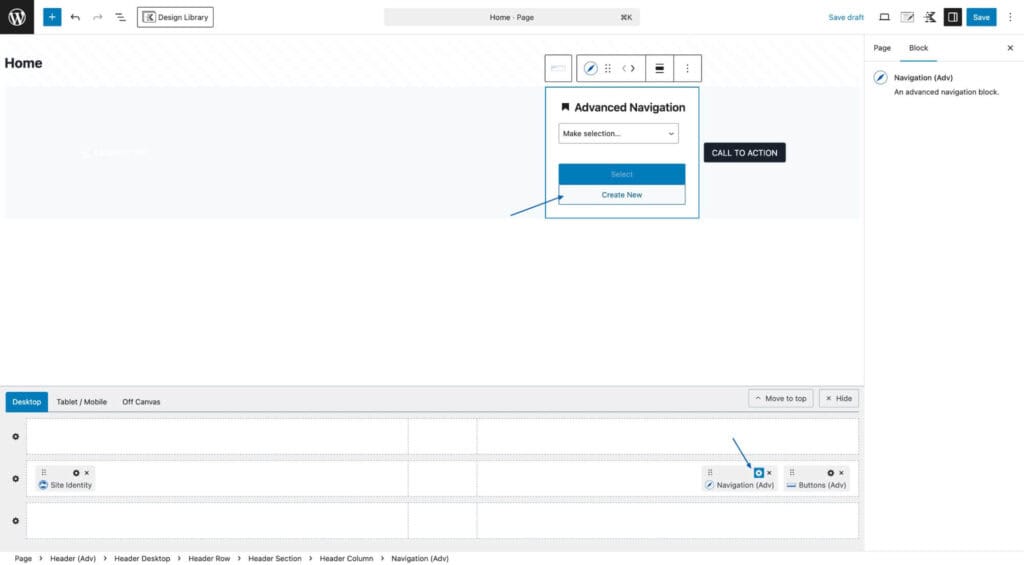
In the Navigation Builder, start by giving your navigation menu a name. Then, add custom links by clicking Custom Link at the bottom of the page.
For each link, enter a name and the URL. Since these will be anchor links, the URL should start with a # followed by the name of the section on your page. We’ll create these sections and set up the corresponding anchor names later in this tutorial. You can always come back to this step to amend your anchor links if you change the section names.
Once you are complete, click ‘Done Editing’

If your header includes a button, simply click it to change the button text with your new call to action. Then, update the button’s link in the block settings panel on the right.

If you want to customize the header background colors and other styles, start by clicking Document Overview, then select Header (Adv). Next, head to the Style tab on the right-hand side to make your changes.
You can update other elements the same way by clicking the block you want to edit and using the Style tab to customize it.

Now that we have our header and anchor links set up we can work on the content sections of our One-Pager.
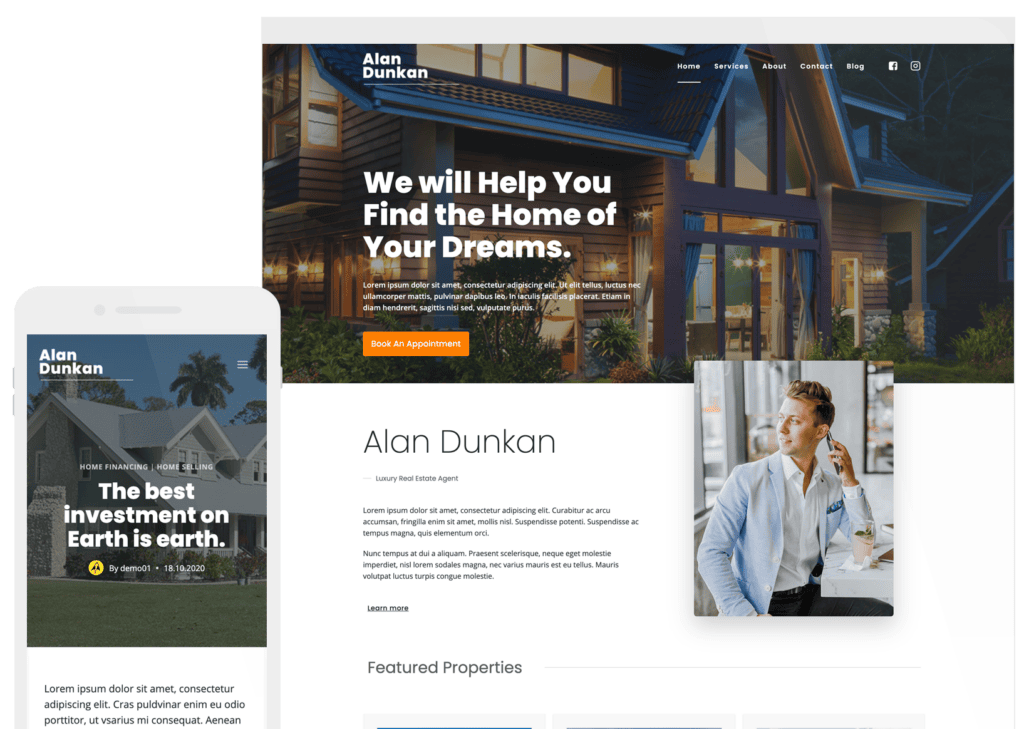
Step 4 – Create your One-page content with the Design Library
To make building your one-page website faster and easier, we’re going to use the Kadence Design Library. This is a powerful feature that lets you quickly add professionally designed sections and layouts to your page with just a few clicks. This saves you tons of time and helps ensure your site looks polished and cohesive from the start.
Click the Design Library button at the top of the editor to bring up premade design sections to use on your one-page website.

To insert a pre-made section click on the section you’d like, this will prepare the content and add it to your page


Feel free to add various sections from the Design Library to build your one-page website, or design your own sections from scratch
Here, we’ve built our one-page site using a mix of pre-made sections from both the free and Pro Design Library. While the free blocks give you a great foundation, Kadence Blocks Pro unlocks even more time-saving tools like modal blocks, advanced sliders, and dynamic content options, ideal if you want to create something more interactive or unique.
Now we can dive into each section to update the content, images, and other elements to make the site truly your own. You can also customize fonts and colors directly within the block settings if you want to override the global styles that you set in your Customizer. This gives you full control to fine-tune the look and feel of each section while maintaining overall design consistency.
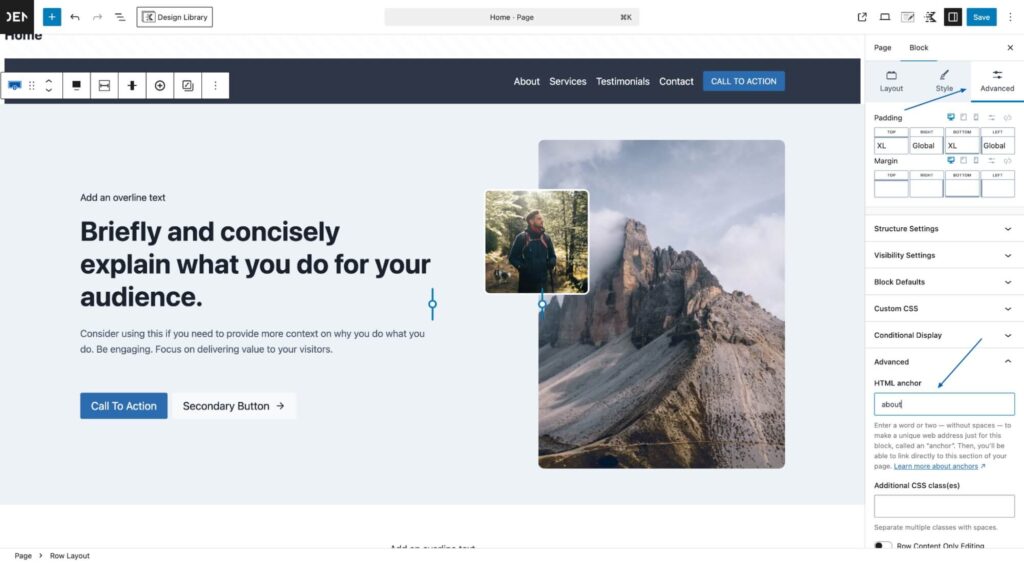
The final step is to add your anchor links to the corresponding sections on the page. Remember, you created these links earlier in Step 3, now you’ll connect each link to its matching section for smooth navigation.
Navigate to and click on the block you want to link your navigation item to – you can link to any block. Then, go to the third tab in the block settings labeled Advanced. Scroll down to the Advanced section, and under HTML Anchor, enter the custom anchor name you created in Step 3.
Finally, click Save and Publish to make your one-page website live.
Step 5 – Test and Optimize Your One-Page Website
Once published, you’ll want to take a moment to test everything. Click through your navigation menu to ensure each anchor link scrolls smoothly to the correct section. This is a great time to double-check for any typos or layout tweaks so your site looks polished and works seamlessly for visitors.
- Optimize your images:
- Compress all images you’ve added to your WordPress site
- Check that images load quickly on all devices
- Make sure images look clear but aren’t too large
- Test your site navigation:
- Click each anchor link in your menu
- Verify smooth scrolling to each section
- Check that sections align correctly when scrolling stops
- Mobile testing:
- View your site on different devices
- Test menu functionality on mobile
- Ensure content is readable on smaller screens
- Add required elements:
- Include a Privacy Policy in your footer section
- Add any necessary legal disclaimers
- Ensure contact information is visible
- Final cleanup:
- Remove any remaining demo content
- Double-check all your content
- Test all forms and interactive elements
You’re Ready to Launch Your One-Page Website
And just like that your one-page WordPress website is live!
Whether it’s a sleek landing page, a standout portfolio, or a promo site for your next big thing, you’ve now got a clean, scrollable layout that’s easy to navigate and looks amazing on any device. Remember you can hit play on the YouTube tutorial if you want a full step by step tutorial guide.
Ready to build faster with way less guesswork? With tools like Kadence, you’ve got everything you need to create beautiful, high-performing websites no coding required. And if you want to skip the tech setup and jump straight into designing, a done-for-you setup like StellarSites has all the essentials pre-installed and ready to go. No overwhelm, just a smooth start and a site you’ll be proud to share.
Happy building!
Create Your Website With KadenceWP Today!
By Nicola Tweed
Nicola is the newest member of the Kadence marketing team, stepping in with more than 10 years of hands-on web design experience. She knows exactly what it takes to create beautiful, user-friendly websites that connect with people and get real results.
Updated June 19, 2025
Create Your Website With Kadence