| deeplabcut |
|
|---|
(multi-animal-userguide)=
---
local:
depth: 3
---
This document should serve as the user guide for maDLC, and it is here to support the scientific advances presented in Lauer et al. 2022.
Note, we strongly encourage you to use the Project Manager GUI when you first start using multi-animal mode. Each tab is customized for multi-animal when you create or load a multi-animal project. As long as you follow the recommendations within the GUI, you should be good to go!
PyTorch is now available as a deep learning engine for pose estimation models, along
with new model architectures! For more information about moving from TensorFlow to
PyTorch (if you're already familiar with DeepLabCut & the TensorFlow engine),
check out [the PyTorch user guide](dlc3-user-guide). If you're just starting
out with DeepLabCut, we suggest you use the PyTorch backend.
You should think of maDLC being four parts.
- (1) Curate annotation data that allows you to learn a model to track the objects/animals of interest.
- (2) Create a high-quality pose estimation model.
- (3) Track in space and time, i.e., assemble bodyparts to detected objects/animals and link across time. This step performs assembly and tracking (comprising first local tracking and then tracklet stitching by global reasoning).
- (4) Any and all post-processing you wish to do with the output data, either within DLC or outside of it.
Thus, you should always label, train, and evaluate the pose estimation performance first. If and when that performance is high, then you should go advance to the tracking step (and video analysis). There is a natural break point for this, as you will see below.
---
name: fig-madlc-workflow
alt: Overview of the four-part multi-animal DeepLabCut workflow
width: 550px
align: center
---
Overview of the multi-animal DeepLabCut workflow.
DeepLabCut offers two equivalent interfaces: a GUI for those who prefer a visual workflow (no Python knowledge required), and a Python API for users who want scripting flexibility or to integrate DeepLabCut into a larger pipeline. All workflow steps are available in both.
We assume you have DeepLabCut installed (if not, see {ref}file:how-to-install).
Open a terminal and activate your conda environment:
conda activate DEEPLABCUTOn Windows, always open the terminal with administrator privileges: right-click and
select "Run as administrator".
Choose your interface below to launch DeepLabCut:
python -m deeplabcutEach workflow step has a corresponding tab in the Project Manager. It is useful to read the sections below so you understand what each step does.
In an interactive Python session (e.g. ipython), import DeepLabCut:
import deeplabcutDeepLabCut's full multi-animal workflow is described in steps (A)–(L) below. Every step can be completed either via the GUI or the Python API — both are fully equivalent. Code examples throughout this page use the Python API; if you are using the GUI, the same steps are available in the corresponding tabs of the Project Manager.
deeplabcut.create_new_project(
    "ProjectName",
    "YourName",
    ["/usr/FullPath/OfVideo1.avi", "/usr/FullPath/OfVideo2.avi", "/usr/FullPath/OfVideo1.avi"],
    copy_videos=True,
    multianimal=True,
)
Tip: if you want to place the project folder somewhere specific, please also pass : working_directory = "FullPathOftheworkingDirectory"
- Note, if you are a linux/macOS user the path should look like:
["/home/username/yourFolder/video1.mp4"]; if you are a Windows user, it should look like:[r"C:\username\yourFolder\video1.mp4"] - Note, you can also put
config_path =in front of the above line to create the path to the config.yaml that is used in the next step, i.e.config_path=deeplabcut.create_project(...))- If you do not, we recommend setting a variable so this can be easily used! Once you run this step, the config_path is printed for you once you run this line, so set a variable for ease of use, i.e. something like:
config_path = '/thefulloutputpath/config.yaml'- just be mindful of the formatting for Windows vs. Unix, see above.
This set of arguments will create a project directory with the name Name of the project+name of the experimenter+date of creation of the project in the Working directory and creates the symbolic links to videos in the videos directory. The project directory will have subdirectories: dlc-models, dlc-models-pytorch, labeled-data, training-datasets, and videos. All the outputs generated during the course of a project will be stored in one of these subdirectories, thus allowing each project to be curated in separation from other projects. The purpose of the subdirectories is as follows:
dlc-models and dlc-models-pytorch have a similar structure: the first contains files for the TensorFlow engine while the second contains files for the PyTorch engine. At the top level in these directories, there are directories referring to different iterations of labels refinement (see below): iteration-0, iteration-1, etc. The refinement iterations directories store shuffle directories, each shuffle directory stores model data related to a particular experiment: trained and tested on a particular training and testing sets, and with a particular model architecture. Each shuffle directory contains the subdirectories test and train, each of which holds the meta information with regard to the parameters of the feature detectors in configuration files. The configuration files are YAML files, a common human-readable data serialization language. These files can be opened and edited with standard text editors. The subdirectory train will store checkpoints (called snapshots) during training of the model. These snapshots allow the user to reload the trained model without re-training it, or to pick-up training from a particular saved checkpoint, in case the training was interrupted.
labeled-data: This directory will store the frames used to create the training dataset. Frames from different videos are stored in separate subdirectories. Each frame has a filename related to the temporal index within the corresponding video, which allows the user to trace every frame back to its origin.
training-datasets: This directory will contain the training dataset used to train the network and metadata, which contains information about how the training dataset was created.
videos: Directory of video links or videos. When copy_videos is set to False, this directory contains symbolic links to the videos. If it is set to True then the videos will be copied to this directory. The default is False. Additionally, if the user wants to add new videos to the project at any stage, the function add_new_videos can be used. This will update the list of videos in the project's configuration file. Note: you neither need to use this folder for videos, nor is it required for analyzing videos (they can be anywhere).
deeplabcut.add_new_videos(
    "Full path of the project configuration file*",
    ["full path of video 4", "full path of video 5"],
    copy_videos=True/False,
)
*Please note, Full path of the project configuration file will be referenced as config_path throughout this protocol.
You can also use annotated data from single-animal projects, by converting those files. There are docs for this: convert single to multianimal annotation data
---
name: pose-cfg-box1-multi
alt: Box 1 — multi-animal project configuration file parameter glossary
---
**Box 1.** Multi-animal project `config.yaml` parameter glossary.
---
class: dropdown
---
```{eval-rst}
.. include:: ./api/deeplabcut.create_new_project.rst
```
Next, open the config.yaml file, which was created during create_new_project. You can edit this file in any text editor. Familiarize yourself with the meaning of the parameters (Box 1). You can edit various parameters, in particular you must add the list of individuals and bodyparts (or points of interest).
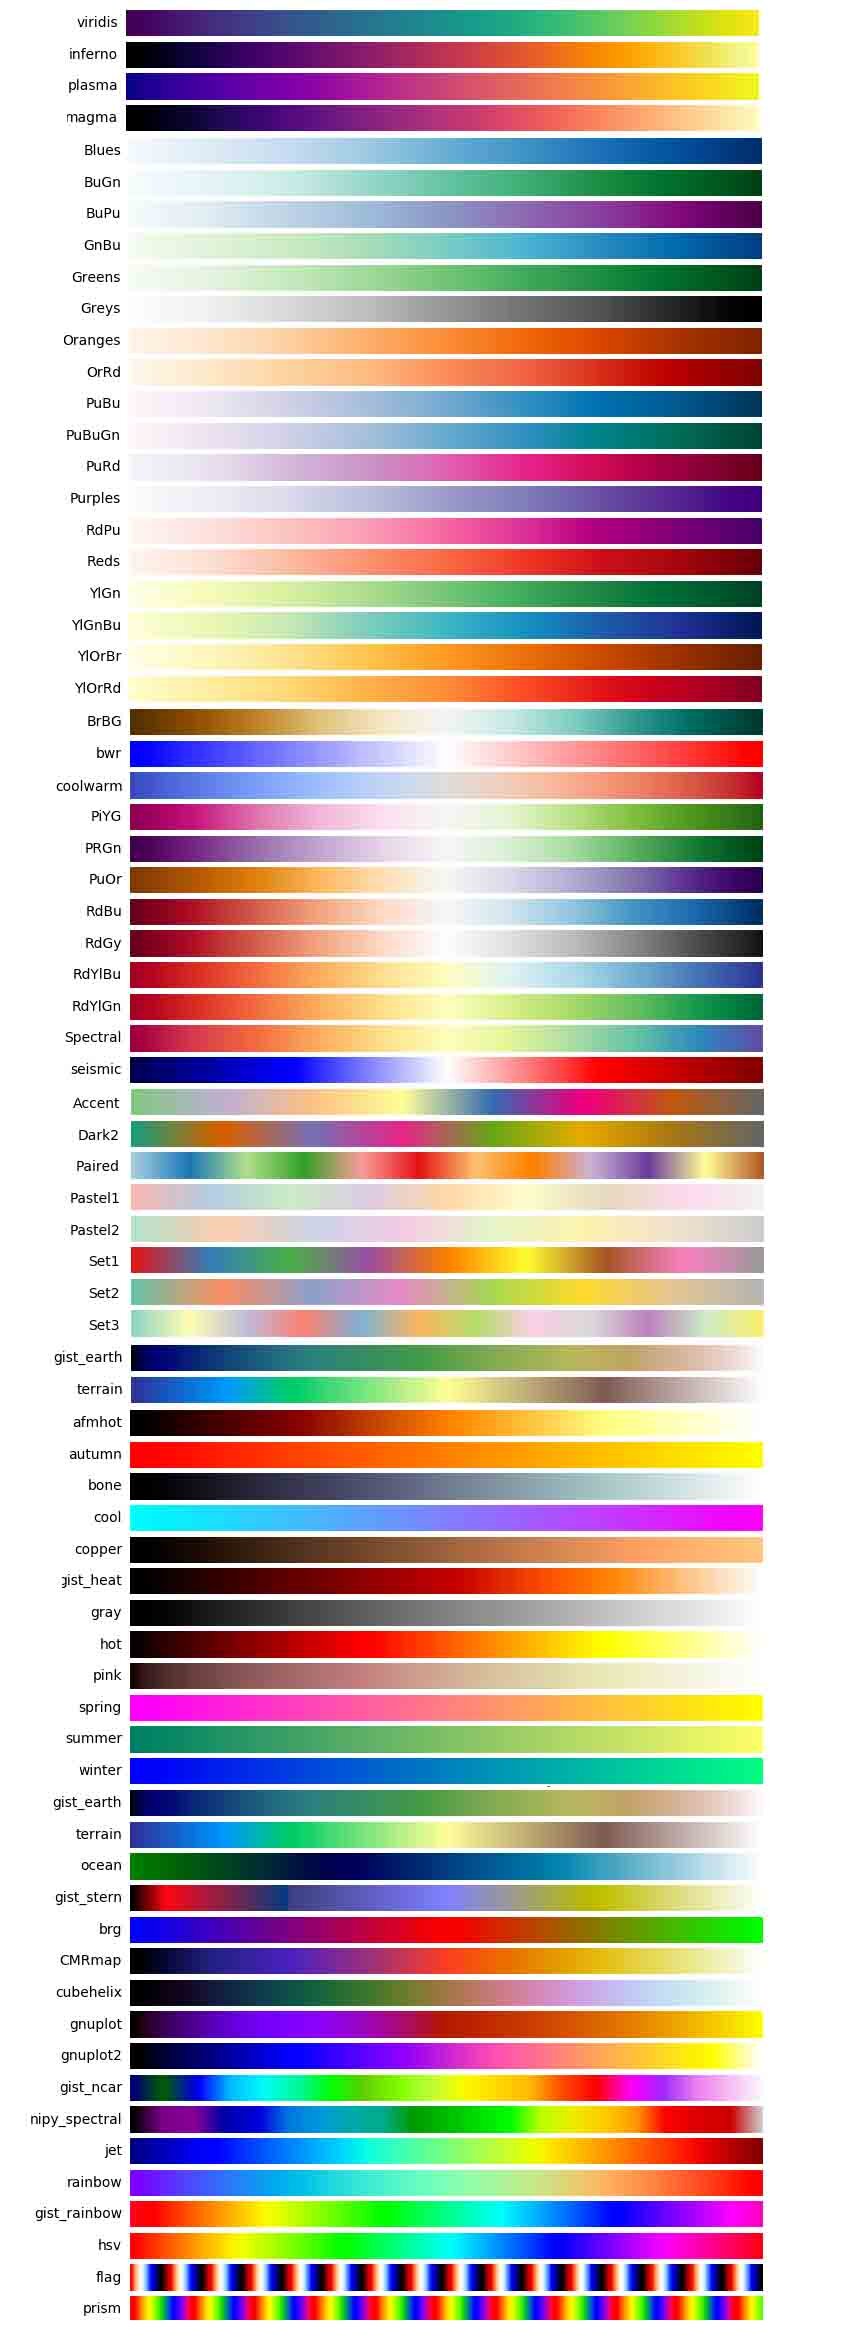
You can also set the colormap here that is used for all downstream steps (can also be edited at anytime), like labeling GUIs, videos, etc. Here any matplotlib colormaps will do!
An easy way to programmatically edit the config file at any time is to use the function edit_config, which takes the full path of the config file to edit and a dictionary of key–value pairs to overwrite.
import deeplabcut

config_path = "/path/to/project-dlc-2025-01-01/config.yaml"
edits = {
    "colormap": "summer",
    "individuals": ["mickey", "minnie", "bianca"],
    "skeleton": [["snout", "tailbase"], ["snout", "rightear"]]
}
deeplabcut.auxiliaryfunctions.edit_config(config_path, edits)
Please DO NOT have spaces in the names of bodyparts, uniquebodyparts, individuals, etc.
ATTENTION: You need to edit the config.yaml file to modify the following items which specify the animal ID, bodyparts, and any unique labels. Note, we also highly recommend that you use more bodyparts that you might be interested in for your experiment, i.e., labeling along the spine/tail for 8 bodyparts would be better than four. This will help the performance.
Modifying the config.yaml is crucial:
individuals:
- m1
- m2
- m3

uniquebodyparts:
- topleftcornerofBox
- toprightcornerofBox

multianimalbodyparts:
- snout
- leftear
- rightear
- tailbase

identity: True/False
Individuals: are names of "individuals" in the annotation dataset. These should/can be generic (e.g. mouse1, mouse2, etc.). These individuals are comprised of the same bodyparts defined by multianimalbodyparts. For annotation in the GUI and training, it is important that all individuals in each frame are labeled. Thus, keep in mind that you need to set individuals to the maximum number in your labeled-data set, .i.e., if there is (even just one frame) with 17 animals then the list should be - indv1 to - indv17. Note, once trained if you have a video with more or less animals, that is fine - you can have more or less animals during video analysis!
Identity: If you can tell the animals apart, i.e., one might have a collar, or a black marker on the tail of a mouse, then you should label these individuals consistently (i.e., always label the mouse with the black marker as "indv1", etc). If you have this scenario, please set identity: True in your config.yaml file. If you have 4 black mice, and you truly cannot tell them apart, then leave this as false.
Multianimalbodyparts: are the bodyparts of each individual (in the above list).
Uniquebodyparts: are points that you want to track, but that appear only once within each frame, i.e. they are "unique". Typically these are things like unique objects, landmarks, tools, etc. They can also be animals, e.g. in the case where one German shepherd is attending to many sheep the sheep bodyparts would be multianimalbodyparts, the shepherd parts would be uniquebodyparts and the individuals would be the list of sheep (e.g. Polly, Molly, Dolly, ...).
A good training dataset should consist of a sufficient number of frames that capture
the breadth of the behavior. Select frames from different behavioral sessions, different
lighting conditions, and different animals if those vary substantially (to train an
invariant, robust feature detector). The dataset should reflect the diversity of
postures, luminance conditions, background conditions, and animal identities in the data
to be analyzed. For simple lab behaviors such as mouse reaching, open-field behavior,
and fly behavior, 100–200 frames gave good results
([Mathis et al., 2018](https://www.nature.com/articles/s41593-018-0209-y)). However,
more or fewer frames may be needed depending on accuracy requirements, behavior
complexity, and video quality (e.g. motion blur, poor lighting). **For maDLC, make sure
you include labeled frames with closely interacting animals.**
The function extract_frames extracts frames from all the videos in the project configuration file in order to create a training dataset. The extracted frames from all the videos are stored in a separate subdirectory named after the video file’s name under the ‘labeled-data’. This function also has various parameters that might be useful based on the user’s need.
deeplabcut.extract_frames(
    config_path,
    mode='automatic/manual',
    algo='uniform/kmeans',
    userfeedback=False,
    crop=True/False,
)
Keep frame sizes small — large frames increase training and inference time and may
exceed GPU memory. When running `extract_frames` with `crop=True`, you will be asked to
draw a bounding box in the GUI (this is saved to `config.yaml`).
userfeedback allows the user to check which videos they wish to extract frames from. In this way, if you added more videos to the config.yaml file it does not, by default, extract frames (again) from every video. If you wish to disable this question, set userfeedback = True.
The provided function either selects frames from the videos in a randomly and temporally uniformly distributed way (uniform), by clustering based on visual appearance (k-means), or by manual selection. Random selection of frames works best for behaviors where the postures vary across the whole video. However, some behaviors might be sparse, as in the case of reaching where the reach and pull are very fast and the mouse is not moving much between trials (thus, we have the default set to True, as this is best for most use-cases we encounter). In such a case, the function that allows selecting frames based on k-means derived quantization would be useful. If the user chooses to use k-means as a method to cluster the frames, then this function downsamples the video and clusters the frames using k-means, where each frame is treated as a vector. Frames from different clusters are then selected. This procedure makes sure that the frames look different. However, on large and long videos, this code is slow due to computational complexity.
Extract frames from video segments that contain the behaviors of interest rather than
from the whole video. Use the `start` and `stop` parameters in `config.yaml` to limit
the extraction window, and `numframes2extract` to control the number of frames per
video.
For maDLC, **be sure you have labeled frames with closely interacting animals**!
Therefore, manually selecting some frames is a good idea if interactions are not highly
frequent in the video.
However, picking frames is highly dependent on the data and the behavior being studied. Therefore, it is hard to provide all purpose code that extracts frames to create a good training dataset for every behavior and animal. If the user feels specific frames are lacking, they can extract hand selected frames of interest using the interactive GUI provided along with the toolbox. This can be launched by using:
deeplabcut.extract_frames(config_path, 'manual')---
class: dropdown
---
```{eval-rst}
.. include:: ./api/deeplabcut.extract_frames.rst
```
deeplabcut.label_frames(config_path)The toolbox provides a function label_frames which helps the user to easily label all the extracted frames using an interactive graphical user interface (GUI). The user should have already named the bodyparts to label (points of interest) in the project’s configuration file by providing a list. The following command invokes the napari-deeplabcut labelling GUI.
HOT KEYS IN THE Labeling GUI (also see "help" in GUI):
Ctrl + C: Copy labels from previous frame.
Keyboard arrows: advance frames.
Delete key: delete label.
---
name: fig-labeling-hotkeys
alt: Keyboard shortcut reference for the DeepLabCut labeling GUI
---
Keyboard shortcuts for the labeling GUI.
**Label similar spots consistently** (e.g., on a large wrist, always click the same
sub-location). Invisible or occluded points should generally not be labeled unless you
intentionally want to teach the network to predict occluded locations — this is
possible, but may reduce accuracy. Body parts that are not visible can simply be skipped
by leaving them unlabeled.
To add new labels to an existing dataset, first append the new body parts to
`bodyparts` in `config.yaml`, then call `label_frames` again. A dialog will ask whether
to display all parts or only the new ones. Saving will append the new labels to the
existing dataset.
**Multi-animal labeling and identity:** Unless you can visually distinguish the animals,
you do not need to maintain a consistent ID across frames. For example, with a white and
a black mouse, always label white as animal 1 and black as animal 2. With two
indistinguishable black mice the ID assignment (1 or 2) may switch between frames —
just be consistent *within* each frame. If one animal always has a distinguishing
feature (e.g., an optical fiber), then label them consistently across all frames. The
goal of maDLC is to train a model that groups body parts to individuals and then links
those individuals across video frames using temporal information.
Note, we also highly recommend that you use more bodyparts that you might otherwise have (see the example below).
For more information, checkout the {ref}napari-deeplabcut docs <file:napari-gui-landing> for
more information about the labelling workflow.
Checking if the labels were created and stored correctly is beneficial for training, since labeling
is one of the most critical parts for creating the training dataset. The DeepLabCut toolbox provides a function
check_labels to do so. It is used as follows:
deeplabcut.check_labels(config_path, visualizeindividuals=True/False)maDeepLabCut: you can check and plot colors per individual or per body part, just set the flag visualizeindividuals=True/False. Note, you can run this twice in both states to see both images.
---
name: fig-check-labels-individuals
alt: Example check_labels output showing annotated individuals per frame
width: 50%
align: center
---
Example `check_labels` output with annotations shown per individual.
For each video directory in labeled-data this function creates a subdirectory with labeled as a suffix. Those directories contain the frames plotted with the annotated body parts. The user can double check if the body parts are labeled correctly. If they are not correct, the user can reload the frames (i.e. deeplabcut.label_frames), move them around, and click save again.
---
class: dropdown
---
```{eval-rst}
.. include:: ./api/deeplabcut.check_labels.rst
```
At this point, you'll need to select your neural network type.
For the PyTorch engine, please see the PyTorch Model Architectures for options.
For the TensorFlow engine, please see Lauer et al. 2021 for options. Multi-animal
models will use imgaug, ADAM optimization, our new DLCRNet, and batch training. We
suggest keeping these defaults at this time. At this step, the ImageNet pre-trained
networks (i.e. ResNet-50) weights will be downloaded. If they do not download (you will
see this downloading in the terminal, then you may not have permission to do so (
something we have seen with some Windows users - see the
WIKI troubleshooting for more help!).
Then run:
deeplabcut.create_training_dataset(config_path)-
The set of arguments in the function will shuffle the combined labeled dataset and split it to create train and test sets. The subdirectory with suffix
iteration#under the directory training-datasets stores the dataset and meta information, where the#is the value ofiterationvariable stored in the project’s configuration file (this number keeps track of how often the dataset was refined). -
To benchmark performance across multiple train/test splits, pass an integer to
num_shuffles; see the docstring for details. -
Each iteration of the creation of a training dataset will create several files, which is used by the feature detectors, and a
.picklefile that contains the meta information about the training dataset. This also creates two subdirectories within dlc-models-pytorch (dlc-models for the TensorFlow engine) calledtestandtrain, and these each have a configuration file called pose_cfg.yaml. Specifically, the user can edit the pytorch_config.yaml (pose_cfg.yaml for TensorFlow engine) within the train subdirectory before starting the training. These configuration files contain meta information with regard to the parameters of the feature detectors. Key parameters are listed in Box 2.
DATA AUGMENTATION: At this stage you can also decide what type of augmentation to
use. Once you've called create_training_dataset, you can edit the
pytorch_config.yaml file that was created (or for the
TensorFlow engine, the pose_cfg.yaml file).
- PyTorch Engine: Albumentations is used for data augmentation. Look at the pytorch_config.yaml for more information about image augmentation options.
- TensorFlow Engine: The default augmentation works well for most tasks (as shown on
www.deeplabcut.org), but there are many options, more data augmentation, intermediate
supervision, etc. Only
imgaugaugmentation is available for multi-animal projects.
A Primer on Motion Capture with Deep Learning: Principles, Pitfalls, and Perspectives, details the advantage of augmentation for a worked example (see Fig 8). TL;DR: use imgaug and use the symmetries of your data!
Importantly, image cropping as previously done with deeplabcut.cropimagesandlabels in multi-animal projects
is now part of the augmentation pipeline. In other words, image crops are no longer stored in labeled-data/..._cropped
folders. Crop size still defaults to (400, 400); if your images are very large (e.g. 2k, 4k pixels), consider increasing the crop size, but be aware unless you have a strong GPU (24 GB memory or more), you will hit memory errors. You can lower the batch size, but this may affect performance.
In addition, one can specify a crop sampling strategy: crop centers can either be taken at random over the image (uniform) or the annotated keypoints (keypoints); with a focus on regions of the scene with high body part density (density); last, combining uniform and density for a hybrid balanced strategy (this is the default strategy). Note that both parameters can be easily edited prior to training in the pose_cfg.yaml configuration file.
As a reminder, cropping images into smaller patches is a form of data augmentation that simultaneously
allows the use of batch processing even on small GPUs that could not otherwise accommodate larger images + larger batchsizes (this usually increases performance and decreasing training time).
To compare multiple model architectures on the same train/test split, select "Use an
existing data split" in the Project Manager GUI. This also lets you compare PyTorch and
TensorFlow models side by side.
You can now create new shuffles using the same train/test split as
existing shuffles with `create_training_dataset_from_existing_split`. This allows you to
compare model performance (between different architectures or when using different
training hyper-parameters) as the shuffles were trained on the same data, and evaluated
on the same test data!

Example usage - creating 3 new shuffles (with indices 10, 11 and 12) for a ResNet 50
pose estimation model, using the same data split as was used for shuffle 0:

```python
deeplabcut.create_training_dataset_from_existing_split(
    config_path,
    from_shuffle=0,
    shuffles=[10, 11, 12],
    net_type="resnet_50",
)
```
---
class: dropdown
---
```{eval-rst}
.. include:: ./api/deeplabcut.create_training_dataset.rst
```
---
class: dropdown
---
```{eval-rst}
.. include:: ./api/deeplabcut.create_training_model_comparison.rst
```
---
class: dropdown
---
```{eval-rst}
.. include:: ./api/deeplabcut.create_training_dataset_from_existing_split.rst
```
deeplabcut.train_network(config_path, shuffle=1)The set of arguments in the function starts training the network for the dataset created for one specific shuffle. Note that you can change training parameters in the pytorch_config.yaml file (or pose_cfg.yaml for TensorFlow models) of the model that you want to train (before you start training).
At user specified iterations during training checkpoints are stored in the subdirectory train under the respective iteration & shuffle directory.
---
class: dropdown
---
Example parameters that one can call:

```python
deeplabcut.train_network(
    config_path,
    shuffle=1,
    trainingsetindex=0,
    device="cuda:0",
    max_snapshots_to_keep=5,
    displayiters=100,
    save_epochs=5,
    epochs=200,
)
```

Pytorch models in DeepLabCut 3.0 are trained for a set number of epochs, instead of a
maximum number of iterations (which is what was used for TensorFlow models). An epoch
is a single pass through the training dataset, which means your model has seen each
training image exactly once. So if you have 64 training images for your network, an
epoch is 64 iterations with batch size 1 (or 32 iterations with batch size 2, 16 with
batch size 4, etc.).

By default, the pretrained networks are not in the DeepLabCut toolbox (as they can be
more than 100MB), but they get downloaded automatically before you train.

If the user wishes to restart the training at a specific checkpoint they can specify the
full path of the checkpoint to the variable ``resume_training_from`` in the [
**pytorch_config.yaml**](
dlc3-pytorch-config) file (checkout the "Restarting Training at a Specific Checkpoint"
section of the docs) under the *train* subdirectory.

```{important}
Train the network **until the loss plateaus** — depending on the dataset, model
architecture, and hyper-parameters this typically occurs after 100–250 epochs.
```

The variables ``display_iters`` and ``save_epochs`` in the [**pytorch_config.yaml**](
dlc3-pytorch-config) file allows the user to alter how often the loss is displayed
and how often the weights are stored. We suggest saving every 5 to 25 epochs.
---
class: dropdown
---
Example parameters that one can call:

```python
deeplabcut.train_network(
    config_path,
    shuffle=1,
    trainingsetindex=0,
    gputouse=None,
    max_snapshots_to_keep=5,
    autotune=False,
    displayiters=100,
    saveiters=15000,
    maxiters=30000,
    allow_growth=True,
)
```

By default, the pretrained networks are not in the DeepLabCut toolbox (as they are
around 100MB each), but they get downloaded before you train. However, if not previously
downloaded from the TensorFlow model weights, it will be downloaded and stored in a
subdirectory *pre-trained* under the subdirectory *models* in
*Pose_Estimation_Tensorflow*. At user specified iterations during training checkpoints
are stored in the subdirectory *train* under the respective iteration directory.

If the user wishes to restart the training at a specific checkpoint they can specify the
full path of the checkpoint to the variable ``init_weights`` in the **pose_cfg.yaml**
file under the *train* subdirectory (see Box 2).

```{important}
Train until the loss plateaus — typically around **500,000** iterations with batch
size 1, or **50–100K** iterations with batch size 8 (the default).
```

If you use **maDeepLabCut** the recommended training iterations is **20K-100K**
(it automatically stops at 200K!), as we use Adam and batchsize 8; if you have to reduce
 the batchsize for memory reasons then the number of iterations needs to be increased.

The variables ``display_iters`` and ``save_iters`` in the **pose_cfg.yaml** file allows
the user to alter how often the loss is displayed and how often the weights are stored.

```{important}
Multi-animal projects use different output layers, data augmentation, optimizers,
learning rates, and batch defaults compared to single-animal projects. Use a lower
`save_iters` and `maxiters`: save every 10K–15K iterations and stop training at
50K–100K iterations. Monitor the loss curve carefully to avoid overfitting. Training
time is correspondingly shorter.
```
---
class: dropdown
---
```{eval-rst}
.. include:: ./api/deeplabcut.train_network.rst
```
It is important to evaluate the performance of the trained network. This performance is measured by computing two metrics:
- Average root mean square error (RMSE) between the manual labels and the ones predicted by your trained DeepLabCut model. The RMSE is proportional to the mean average Euclidean error (MAE) between the manual labels and the ones predicted by DeepLabCut. The MAE is displayed for all pairs and only likely pairs (>p-cutoff). This helps to exclude, for example, occluded body parts. One of the strengths of DeepLabCut is that due to the probabilistic output of the scoremap, it can, if sufficiently trained, also reliably report if a body part is visible in a given frame. (see discussions of finger tips in reaching and the Drosophila legs during 3D behavior in [Mathis et al, 2018]).
- Mean Average Precision (mAP) and Mean Average Recall (mAR) for the individuals predicted by your trained DeepLabCut model. This metric describes the precision of your model, based on a considered definition of what a correct detection of an individual is. It isn't as useful for single-animal models, as RMSE does a great job of evaluating your model in that case.
---
class: dropdown
---
For multi-animal pose estimation, multiple predictions can be made for each image.
We want to get some idea of the proportion of correct predictions among all predictions
that are made.
However, the notion of "correct prediction" for pose estimation is not straightforward:
is a prediction correct if all predicted keypoints are within 5 pixels of the ground
truth? Within 2 pixels of the ground truth? What if all pixels but one match the ground
truth perfectly, but the wrong prediction is 50 pixels away? Mean average precision (
and mean average recall) estimate the precision/recall of your models by setting
different "thresholds of correctness" and averaging results. How "correct" a
prediction is can be evaluated through [object-keypoint similarity](
https://cocodataset.org/#keypoints-eval).

A good resource to get a deeper understanding of mAP is the [Stanford CS230 course](
https://cs230.stanford.edu/section/8/#object-detection-iou-ap-and-map). While it
describes mAP for object detection (where bounding boxes are predicted instead of
keypoints), the same metric can be computed for pose estimation, where similarity
between predictions and ground truth is computed through [object-keypoint similarity](
https://cocodataset.org/#keypoints-eval) instead of intersection-over-union (IoU).
It's also important to visually inspect predictions on individual frames to assess the
performance of your model. You can do this by setting plotting=True when you call
evaluate_network. The evaluation results are computed by typing:
deeplabcut.evaluate_network(config_path, Shuffles=[1], plotting=True)Setting plotting to True plots all the testing and training frames with the manual and predicted labels; these will
be colored by body part type by default. They can alternatively be colored by individual by passing plotting="individual".
The user should visually check the labeled test (and training) images that are created in the ‘evaluation-results’ directory.
Ideally, DeepLabCut labeled unseen (test images) according to the user’s required accuracy, and the average train
and test errors are comparable (good generalization). What (numerically) comprises an acceptable MAE depends on
many factors (including the size of the tracked body parts, the labeling variability, etc.). Note that the test error can
also be larger than the training error due to human variability (in labeling, see Figure 2 in Mathis et al, Nature Neuroscience 2018).
Optional parameters:
-
Shuffles: list, optional- List of integers specifying the shuffle indices of the training dataset. The default is [1] -
plotting: bool | str, optional- Plots the predictions on the train and test images. The default isFalse; if provided it must be eitherTrue,False,"bodypart", or"individual". -
show_errors: bool, optional- Display train and test errors. The default isTrue -
comparisonbodyparts: list of bodyparts, Default is all- The average error will be computed for those body parts only (Has to be a subset of the body parts). -
gputouse: int, optional- Natural number indicating the number of your GPU (see number in nvidia-smi). If you do not have a GPU, put None. See: https://nvidia.custhelp.com/app/answers/detail/a_id/3751/~/useful-nvidia-smi-queries -
pcutoff: float | list[float] | dict[str, float], optional(Only applicable when using the PyTorch engine. For TensorFlow, setpcutoffin theconfig.yamlfile.) Specifies the cutoff value(s) used to compute evaluation metrics.- If
None(default), the cutoff will be loaded from the project configuration. - To apply a single cutoff value to all bodyparts, provide a
float. - To specify different cutoffs per bodypart, provide either:
- A
list[float]: one value per bodypart, with an additional value for each unique bodypart if applicable. - A
dict[str, float]: where keys are bodypart names and values are the corresponding cutoff values. If a bodypart is not included in the provided dictionary, a defaultpcutoffof0.6will be used for that bodypart.
- A
- If
The plots can be customized by editing the config.yaml file (i.e., the colormap, scale, marker size (dotsize), and
transparency of labels (alpha-value) can be modified). By default each body part is plotted in a different color
(governed by the colormap) and the plot labels indicate their source. Note that by default the human labels are
plotted as plus (‘+’), DeepLabCut’s predictions either as ‘.’ (for confident predictions with likelihood > pcutoff) and
’x’ for (likelihood <= pcutoff).
The evaluation results for each shuffle of the training dataset are stored in a unique subdirectory in a newly created directory ‘evaluation-results-pytorch’ (or ‘evaluation-results’ for TensorFlow models) in the project directory. The user can visually inspect if the distance between the labeled and the predicted body parts are acceptable. In the event of benchmarking with different shuffles of same training dataset, the user can provide multiple shuffle indices to evaluate the corresponding network. If the generalization is not sufficient, the user might want to:
• check if the labels were imported correctly; i.e., invisible points are not labeled and the points of interest are labeled accurately
• make sure that the loss has already converged
• consider labeling additional images and make another iteration of the training data set
---
class: dropdown
---
```{eval-rst}
.. include:: ./api/deeplabcut.evaluate_network.rst
```
maDeepLabCut: (or on normal projects!)
In multi-animal projects, model evaluation is crucial as this is when the data-driven selection of the optimal skeleton is carried out. Skipping that step causes video analysis to use the redundant skeleton by default, which is not only slow but does not guarantee best performance.
You should also plot the scoremaps, locref layers, and PAFs to assess performance:
deeplabcut.extract_save_all_maps(config_path, shuffle=shuffle, Indices=[0, 5])You can drop "Indices" to run this on all training/testing images (this is very slow!)
Before moving on, make a deliberate decision about whether the pose estimation quality is sufficient. If you do not have good pose estimation evaluation metrics at this point, please revisit the original labels, add more training data and refine the model rather than proceeding with the current results.
In prior versions of DeepLabCut, pose estimation and tracking were separate procedures. From version 3.0 onward, `deeplabcut.analyze_videos` runs the **full pose estimation + tracking pipeline** by default (`auto_track=True`), producing an .h5 file ready for downstream use. To inspect raw detections before any of this is applied, pass `auto_track=False` explicitly.
To validate raw pose estimation performance on a video before committing to the tracking results, run:
videos_to_analyze = ['/fullpath/project/videos/testVideo.mp4']
deeplabcut.analyze_videos(config_path, videos_to_analyze, videotype='.mp4', auto_track=False)
deeplabcut.create_video_with_all_detections(config_path, videos_to_analyze, videotype='.mp4')
With auto_track=False, no .h5 file is produced — only a *_full.pickle file
containing the raw detections, which is what create_video_with_all_detections uses to
render all detections before any individual is assigned.
For conditional top-down (CTD) models, tracking can be performed **inside the model
during inference**, using temporal context from previous frames to condition predictions
on the current frame. This is a distinct mechanism from `auto_track`: pass
`ctd_tracking=True` to `deeplabcut.analyze_videos` when using any model whose name
starts with `ctd_`. When `ctd_tracking=True`, post-processing tracking (`auto_track`) is
skipped automatically. To learn more, see the [
`COLAB_BUCTD_and_CTD_tracking`](
https://github.com/DeepLabCut/DeepLabCut/blob/main/examples/COLAB/COLAB_BUCTD_and_CTD_tracking.ipynb)
COLAB notebook.
For models predicting part-affinity fields, another sanity check may be to
examine the distributions of edge affinity costs using deeplabcut.utils.plot_edge_affinity_distributions. Easily separable distributions
indicate that the model has learned strong links to group keypoints into distinct
individuals — likely a necessary feature for the assembly stage (note that the amount of
overlap will also depend on the amount of interactions between your animals in the
dataset). All TensorFlow multi-animal models use part-affinity fields and PyTorch models
consisting of just a backbone name (e.g. resnet_50, resnet_101) use part-affinity
fields. If you're unsure whether your PyTorch model has a one, check
the pytorch_config.yaml for a DLCRNetHead.
IF you have good clean out video, ending in ....full.mp4 (and the evaluation metrics
look good, scoremaps look good, plotted evaluation images, and affinity distributions
are far apart for most edges), then go forward!!!
If this does not look good, we recommend extracting and labeling more frames (even from more videos). Try to label close interactions of animals for best performance. Once you label more, you can create a new training set and train.
You can either:
- extract more frames manually from existing or new videos and label as when initially building the training data set, or
- let DeepLabCut find frames where keypoints were poorly detected and automatically extract those for you. All you need is to run:
deeplabcut.find_outliers_in_raw_data(config_path, pickle_file, video_file)where pickle_file is the _full.pickle one obtains after video analysis.
Flagged frames will be added to your collection of images in the corresponding labeled-data folders for you to label.
After pose estimation, now you perform assembly and tracking.
*NEW* in 2.2 is a novel data-driven way to set the optimal skeleton and assembly
metrics, so this no longer requires user input. The metrics, in case you do want to edit
them, can be found in the `inference_cfg.yaml` file.
Please note that novel videos DO NOT need to be added to the config.yaml file. You
can simply have a folder elsewhere on your computer and pass the video folder (then it
will analyze all videos of the specified type (i.e. videotype='.mp4'), or pass the
path to the folder or exact video(s) you wish to analyze:
deeplabcut.analyze_videos(config_path, ['/fullpath/project/videos/'], videotype='.mp4', auto_track=True)A new argument `auto_track=True`, was added to `deeplabcut.analyze_videos` chaining pose
estimation, tracking, and stitching in a single function call with defaults we found to
work well. Thus, you'll now get the `.h5` file you might be used to getting in standard
DLC. If `auto_track=False`, one must run `convert_detections2tracklets` and
`stitch_tracklets` manually (see below), granting more control over the last steps of
the workflow (ideal for advanced users).
You can validate the tracking parameters. Namely, you can iteratively change the
parameters, run convert_detections2tracklets then load them in the GUI
(refine_tracklets) if you want to look at the performance. If you want to edit these,
you will need to open the inference_cfg.yaml file (or click button in GUI). The
options are:
# Tracking:
#p/m pixels in width and height for increasing bounding boxes.
boundingboxslack : 0
# Intersection over Union (IoU) threshold for linking two bounding boxes
iou_threshold: .2
# maximum duration of a lost tracklet before it's considered a "new animal" (in frames)
max_age: 100
# minimum number of consecutive frames before a detection is tracked
min_hits: 3
If the network was trained with identity supervision (i.e., identity=True in
config.yaml before training), this information can be leveraged during: (i) animal
assembly, where body parts are grouped by predicted identity rather than keypoint
affinity; and (ii) tracking, where identity alone can be used in place of motion
trackers to form tracklets.
To use this ID information, simply pass:
deeplabcut.convert_detections2tracklets(..., identity_only=True)- Note: If only one individual is to be assembled and tracked, assembly and tracking are skipped, and detections are treated as in single-animal projects; i.e., it is the keypoints with highest confidence that are kept and accumulated over frames to form a single, long tracklet. No action is required from users, this is done automatically.
Animal assembly and tracking quality can be assessed via deeplabcut.utils.make_labeled_video.create_video_from_pickled_tracks. This function provides an additional diagnostic tool before moving on to refining tracklets.
If animal assemblies do not look pretty, an alternative to the outlier search described above is to pass the
_assemblies.pickle to find_outliers_in_raw_data in place of the _full.pickle.
This will focus the outlier search on unusual assemblies (i.e., animal skeletons that were oddly reconstructed). This may be a bit more sensitive with crowded scenes or frames where animals interact closely.
Note though that at that stage it is likely preferable anyway to carry on with the remaining steps, and extract outliers
from the final h5 file as was customary in single animal projects.
**Next, tracklets are stitched to form complete tracks with:
deeplabcut.stitch_tracklets(
    config_path,
    ['videofile_path'],
    videotype='mp4',
    shuffle=1,
    trainingsetindex=0,
)
Note that the base signature of the function is identical to analyze_videos and convert_detections2tracklets.
If the number of tracks to reconstruct is different from the number of individuals
originally defined in the config.yaml, n_tracks (i.e., the number of animals you have in your video)
can be directly specified as follows:
deeplabcut.stitch_tracklets(..., n_tracks=n)In such cases, file columns will default to dummy animal names (ind1, ind2, ..., up to indn).
---
class: dropdown
---
```{eval-rst}
.. include:: ./api/deeplabcut.analyze_videos.rst
```
---
class: dropdown
---
```{eval-rst}
.. include:: ./api/deeplabcut.convert_detections2tracklets.rst
```
---
class: dropdown
---
```{eval-rst}
.. include:: ./api/deeplabcut.stitch_tracklets.rst
```
In Lauer et al. 2022 we introduced a new method to do unsupervised reID of animals. Here, you can use the tracklets to learn the identity of animals to enhance your tracking performance. To use the code:
deeplabcut.transformer_reID(config, videos_to_analyze, n_tracks=None, videotype="mp4")Note you should pass the n_tracks (number of animals) you expect to see in the video.
You can also optionally refine the tracklets. You can fix both "major" ID swaps, i.e. perhaps when animals cross, and you can micro-refine the individual body points. You will load the ...trackertype.pickle or .h5' file that was created above, and then you can launch a GUI to interactively refine the data. This also has several options, so please check out the docstring. Upon saving the refined tracks you get an .h5 file (akin to what you might be used to from standard DLC. You can also load (1) filter this to take care of small jitters, and (2) load this .h5 this to refine (again) in case you find another issue, etc!
deeplabcut.refine_tracklets(config_path, pickle_or_h5_file, videofile_path, max_gap=0, min_swap_len=2, min_tracklet_len=2, trail_len=50)If you use the GUI (or otherwise), here are some settings to consider:
---
name: fig-tracklet-gui
alt: Tracklet refinement GUI showing key settings
width: 950px
align: center
---
Tracklet refinement GUI. Key settings to configure are described in the text.
*note, setting max_gap=0 can be used to fill in all frames across the video; otherwise, 1-n is the # of frames you want to fill in, i.e. maybe you want to fill in short gaps of 5 frames, but 15 frames indicates another issue, etc. You can test this in the GUI very easy by editing the value and then re-launch pop-up GUI.
If you fill in gaps, they will be associated to an ultra low probability, 0.01, so you are aware this is not the networks best estimate, this is the human-override! Thus, if you create a video, you need to set your pcutoff to 0 if you want to see these filled in frames.
Short demo:
---
name: fig-refine-tracklets-demo
alt: Animated demonstration of the tracklet refinement workflow
width: 70%
align: center
---
Short demo of the tracklet refinement workflow.
Firstly, Here are some tips for scaling up your video analysis, including looping over many folders for batch processing: https://github.com/DeepLabCut/DeepLabCut/wiki/Batch-Processing-your-Analysis
You can also filter the predicted bodyparts by:
deeplabcut.filterpredictions(config_path,['/fullpath/project/videos/reachingvideo1.avi'])Note, this creates a file with the ending filtered.h5 that you can use for further analysis. This filtering step has many parameters, so please see the full docstring by typing: deeplabcut.filterpredictions?
---
class: dropdown
---
```{eval-rst}
.. include:: ./api/deeplabcut.filterpredictions.rst
```
Before creating labeled videos, set the pcutoff threshold in config.yaml. For a
well-trained network this should be high, e.g. 0.8 or higher. If you filled in gaps,
set it to 0 to make those interpolated points visible.
You can determine a good pcutoff value by inspecting the likelihood plot produced by
plot_trajectories:
deeplabcut.plot_trajectories(config_path, ['/fullpath/project/videos/reachingvideo1.avi'], filtered=True)---
class: dropdown
---
```{eval-rst}
.. include:: ./api/deeplabcut.plot_trajectories.rst
```
There are many options for controlling video quality and display style — check the docstring for the full list. More details are also available here.
deeplabcut.create_labeled_video(
    config_path, [videos], videotype='avi', shuffle=1, trainingsetindex=0,
    filtered=False, fastmode=True, save_frames=False, keypoints_only=False,
    Frames2plot=None, displayedbodyparts='all', displayedindividuals='all',
    codec='mp4v', outputframerate=None, destfolder=None, draw_skeleton=False,
    trailpoints=0, displaycropped=False, color_by='bodypart', track_method='',
)
---
class: dropdown
---
```{eval-rst}
.. include:: ./api/deeplabcut.create_labeled_video.rst
```
While DeepLabCut typically generalizes well across datasets, one might want to optimize its performance in various, perhaps unexpected, situations. For generalization to large datasets, images with insufficient labeling performance can be extracted, manually corrected by adjusting the labels to increase the training set and iteratively improve the feature detectors. Such an active learning framework can be used to achieve a predefined level of confidence for all images with minimal labeling cost (discussed in Mathis et al 2018). Then, due to the large capacity of the neural network that underlies the feature detectors, one can continue training the network with these additional examples. One does not necessarily need to correct all errors as common errors could be eliminated by relabeling a few examples and then re-training. A priori, given that there is no ground truth data for analyzed videos, it is challenging to find putative “outlier frames”. However, one can use heuristics such as the continuity of body part trajectories, to identify images where the decoder might make large errors.
All this can be done for a specific video by typing (see other optional inputs below):
deeplabcut.extract_outlier_frames(config_path, ["videofile_path"])We provide various frame-selection methods for this purpose. In particular the user can set:
outlieralgorithm: "fitting", "jump", or "uncertain"
-
outlieralgorithm="uncertain": select frames if the likelihood of a particular or all body parts lies belowp_bound(note this could also be due to occlusions rather than errors). -
outlieralgorithm="jump": select frames where a particular body part or all body parts jumped more thanepsilonpixels from the last frame. -
outlieralgorithm="fitting": select frames if the predicted body part location deviates from a state-space model fit to the time series of individual body parts. Specifically, this method fits an Auto Regressive Integrated Moving Average (ARIMA) model to the time series for each body part. Thereby each body part detection with a likelihood smaller thanp_boundis treated as missing data. Putative outlier frames are then identified as time points, where the average body part estimates are at leastepsilonpixels away from the fits. The parameters of this method areepsilon,p_bound, the ARIMA parameters as well as the list of body parts to average over (can also beall). -
outlieralgorithm="manual": manually select outlier frames based on visual inspection from the user.
As an example:
deeplabcut.extract_outlier_frames(config_path, ["videofile_path"], outlieralgorithm="manual")In general, depending on the parameters, these methods might return many more frames than the user wants to
extract (numframes2pick). Thus, this list is then used to select outlier frames either by randomly sampling from
this list (extractionalgorithm="uniform"), by performing extractionalgorithm="kmeans" clustering on the
corresponding frames.
In the automatic configuration, before the frame selection happens, the user is informed about the amount of frames
satisfying the criteria and asked if the selection should proceed. This step allows the user to perhaps change the
parameters of the frame-selection heuristics first (i.e. to make sure that not too many frames are qualified). The user
can run the extract_outlier_frames method iteratively, and (even) extract additional frames from the same video.
Once enough outlier frames are extracted the refinement GUI can be used to adjust the labels based on user feedback
(see below).
---
class: dropdown
---
```{eval-rst}
.. include:: ./api/deeplabcut.extract_outlier_frames.rst
```
Based on the performance of DeepLabCut, four scenarios are possible:
-
(A) Visible body part with accurate DeepLabCut prediction. These labels do not need any modifications.
-
(B) Visible body part but wrong DeepLabCut prediction. Move the label’s location to the actual position of the body part.
-
(C) Invisible, occluded body part. Remove the predicted label by DeepLabCut with a middle click. Every predicted label is shown, even when DeepLabCut is uncertain. This is necessary, so that the user can potentially move the predicted label. However, to help the user to remove all invisible body parts the low-likelihood predictions are shown as open circles (rather than disks).
-
(D) Invalid images: In the unlikely event that there are any invalid images, the user should remove such an image and their corresponding predictions, if any. Here, the GUI will prompt the user to remove an image identified as invalid.
The labels for extracted putative outlier frames can be refined by opening the GUI:
deeplabcut.refine_labels(config_path)This will launch a GUI where the user can refine the labels.
Please refer to the {ref}napari-deeplabcut docs <file:napari-gui-landing> for more information about the labelling workflow.
After correcting the labels for all the frames in each of the subdirectories, the users should merge the dataset to create a new dataset. In this step the iteration parameter in the config.yaml file is automatically updated.
deeplabcut.merge_datasets(config_path)Once the dataset is merged, the user can test if the merging process was successful by plotting all the labels (Step E).
Next, with this expanded training set the user can now create a new training set and train the network as described
in Steps F and G. The training dataset will be stored in the same place as before but under a different iteration-#
subdirectory, where the # is the new value of iteration variable stored in the project’s configuration file
(this is automatically done).
Now you can run create_training_dataset, then train_network, etc. If your original labels were adjusted at all,
start from fresh weights (which is generally recommended), otherwise consider using your already trained network
weights (see {ref}Box 2 <pose-cfg-box2>).
If after training the network generalizes well to the data, proceed to analyze new videos. Otherwise, consider labeling more data.
---
class: dropdown
---
```{eval-rst}
.. include:: ./api/deeplabcut.refine_labels.rst
```
---
class: dropdown
---
```{eval-rst}
.. include:: ./api/deeplabcut.merge_datasets.rst
```
In an interactive Python session or Jupyter notebook, append ? to any function name:
deeplabcut.nameofthefunction?Or use the built-in help():
help(deeplabcut.nameofthefunction)You can always exit a conda environment and pick up where you left off:
Linux/macOS:
source activate yourdeeplabcutEnvName
ipython
import deeplabcut
config_path = '/home/yourprojectfolder/config.yaml'
Windows:
activate yourdeeplabcutEnvName
ipython
import deeplabcut
config_path = r'C:\home\yourprojectfolder\config.yaml'- Forum — for detailed usage questions or errors that are not bugs, please post on the Image.sc forum.
- Chat — for short questions:
- Social — share results or follow updates:
- Bug reports — please open an issue with a minimal reproducible example: https://github.com/DeepLabCut/DeepLabCut/issues


We are not able to provide individual support for experiment design or custom data
analysis — the volume of such requests is too large to sustain. We welcome these
discussions on the forum, where the community can benefit collectively. Please read our
[Missions & Values statement](mission-and-values) to learn more.