Welcome readers, in this tutorial, we will make an introduction to RabbitMQ and we will create a very simple HelloWorld program.
1. Introduction
Before going further in this tutorial, we will look at the RabbitMQ and the common terminology related to it.
1.1 What is RabbitMQ & When is often used?
- It is an AMQP messaging broker and is the famously easy to set up, open-source, and cross-platform message broker
- AMQP stands for Advanced Message Queuing protocol which offers features like Message Orientation, Queuing, Routing (through Point-to-Point or Publish-and-Subscribe), Reliability and Security
- It offers an easy way to exchange different platform applications (like Java and DotNet) and offers helps in communication between different Microservices
- It is a lightweight and easy to deploy application available on-premises and cloud to meet the high scalability and availability requirements
- In the present time, a single application supports multiple tasks (i.e. sending notifications, reports, etc.). So sometimes these tasks add an extra load on the application thereby increasing the maintenance cost (such as space, memory, etc) to serve more requests. Thus, RabbitMQ in such situations acts a blessing to remove some of the heavy tasks

1.2 RabbitMQ Important Concepts
- Queue: A medium through which the messages are transferred or stored until the message is delivered to the consumer or the message time-to-live has expired
- Broker: Offers a storage mechanism for the data produced from one application. Usually meant to be consumed by Consumer(s) of another application(s) that connects to this broker
- Exchange: It is an entry point to the broker as it receives messages from the publisher and routes them to an appropriate queue
- Channel: It is a lightweight connection to a broker via a singular and shared TCP connection
- Producer: Sends or pushes a message to the queue based on the given queue name
- Consumer: Receives or consume the message from the broker, and then process or use it in another process or the application
- VHost: Popularly known as the virtual host makes it possible for a single broker to host multiple isolated environments
1.3 RabbitMq Installation
Usually installing the RabbitMq is a tedious task where one must first install the Erlang and then proceed with the RabbitMq installation. But with the technology advancements, this process has become simple with the help of Docker. Readers can watch the video available at this link to understand the Docker installation on Windows OS. Open the terminal and fire the following commands to get the RabbitMQ up and running on the local machine.
// To download the RabbitMQ from Docker Hub
docker pull rabbitmq:3-management

// To start the RabbitMQ image on the Docker container
// Note: We will keep the container and application port as same for this tutorial
docker run -d -p 15672:15672 -p 5672:5672 --name myrabbitmq rabbitmq:3-management
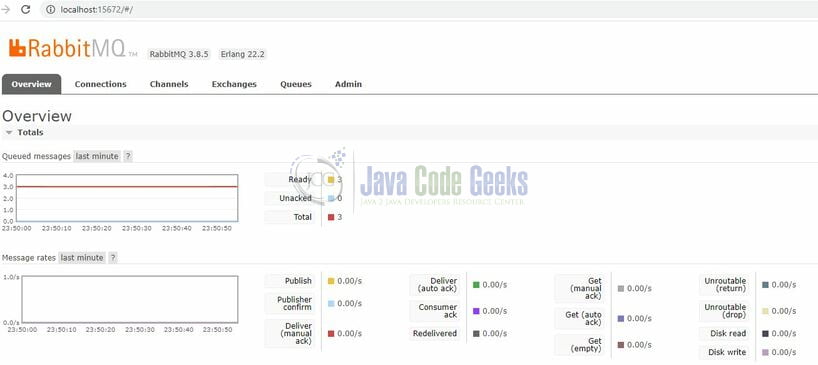
If everything goes well the RabbitMQ console would be up and running as shown in the below image. Users can log in via the default username/password (i.e. guest/guest).
1.4 RabbitMQ Exchanges
When a producer creates a message, it is first sent to the exchange, then after the routing agent reads it, it sends the message to the appropriate queue with the help of header attributes, bindings, and routing keys. Following table list the different type of exchanges that can be used to route the messages:
| # | Exchange Type | Description |
|---|---|---|
| 1 | Direct Exchange | Deliver the messages to the queues based on the message routing key. The message is routed to the queues whose binding key exactly matches with the message’s routing key |
| 2 | Fanout Exchange | Route messages to all the queues that are attached to the exchange |
| 3 | Topic Exchange | Perform a wildcard match between the routing key and the routing pattern specified in the binding to publish messages to the queue |
| 4 | Headers Exchange | Use the message header attributes for routing |
Sign up
