When Hobbies Become Hustle: How I Lost (and Found) the Joy in My Creative Projects

You Can Monetize Your Hobbies Without Destroying Them—Here’s How

“You should sell that!” If you’ve heard this phrase even once, you know the trap I’m about to describe. After years of letting hustle culture drain every ounce of joy from my creative hobbies, I finally learned the boundaries I wish I’d followed from day one. Here’s what I’ve learned: you can enjoy your hobbies without monetizing them—they don’t need validation. But you can monetize them too—just don’t let it destroy them.

Sadly, it took me years to figure this out. Let me save you the burnout.


TL;DR

  • Started with joyful hobbies: blogging, BookTube, junk journaling
  • Opened an Etsy shop after all the “you should sell this!” comments
  • Hustle culture consumed everything—every post, photo, and video became a sales pitch
  • Lost all joy, went silent on platforms, stopped creating entirely
  • Hit breaking point, closed shop for a month, and rebranded
  • Now I have clear boundaries that let me create AND earn without burnout
  • Key lesson: You can monetize hobbies—just don’t let monetization become your why
  • Practical boundaries: no checking stats, create when inspired, “so what?” to content pressure

How It Started: When Creating Was Still Fun

I started blogging about 10 years ago when blogs were in their heyday. I chatted about food, all the paper flowers I was making for our wedding, and then I started to lean more into books. I eventually started a Bookstagram and a BookTube and was having so much fun creating and exploring.

It was a creatively vibrant world full of people who were passionate about the same things as me. It was fun and felt full of possibilities.

Then Everything Changed

And with those possibilities came influencers and content creators. The online world started to change. Everything was SEO, followers, views, algorithm, yadda yadda yadda. Hustle culture took over.

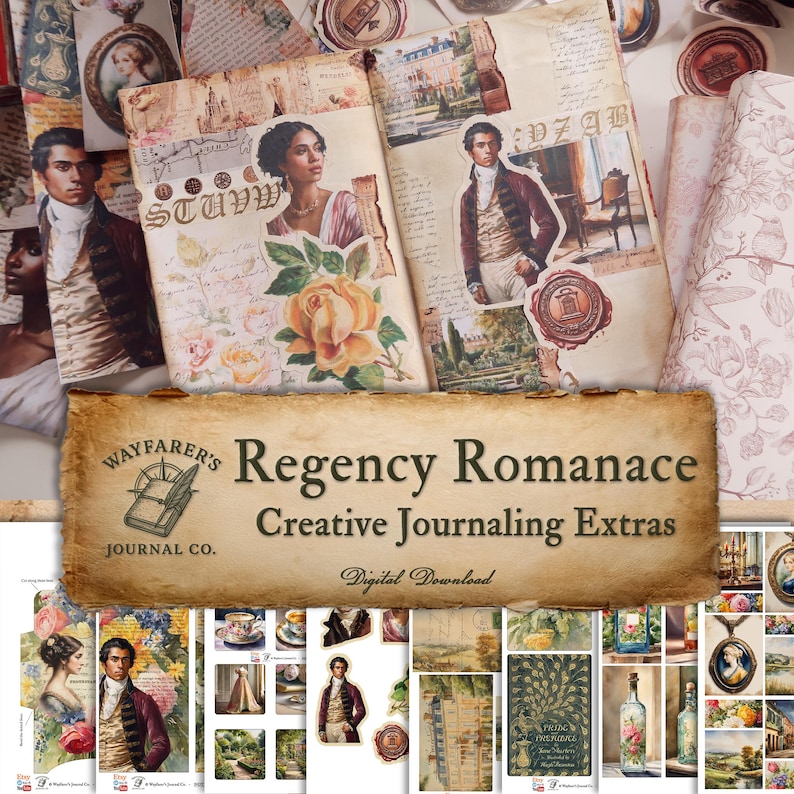
I’m a big fan of hobbies. I think they’re great for your mind. Blogging was a hobby that led to BookTube, which led to junk journaling, which led me to creating an Etsy shop. When I start something new, the first thing I do is learn about it. I look up tutorials, I read blogs, I follow creators who talk about it.

But that was where everything went wrong for me.


The “You Should Sell This” Trap

I started my Etsy shop because I really enjoyed making digital downloads to use in my journals. It wasn’t exactly that I wanted to share them with people—it was more that people always tell me I should sell the things I make.

At our wedding, when people saw all of the paper flowers I made, the first thing they said was “you should sell these!”

And I’m sure you’ve heard this yourself if you’re a crafter. If you knit socks or crochet bags, it’s likely been suggested to you that you set up a stall at a craft fair or an Etsy shop.

The Dream That Becomes a Nightmare

And it sounds so lovely, doesn’t it? I mean, why not sell your crafts? They’re lovely and they’re so much fun to make! Wouldn’t it be amazing if this was your job? You could:

  • Work from home on your own schedule
  • Only make the things you want to make
  • Work part-time until you’re able to call this your full-time job

Doesn’t it just sound lovely?

So that’s the trap I fell into. The dream of running my Etsy shop full-time, spending my days creatively, making pretty journaling supplies and engaging with other journaling enthusiasts. It sounds so pleasant and easy. So why not give it a shot?


When Everything Became Content (And Nothing Was Fun)

Well, I did give it a shot. I have an Etsy shop that sells digital downloads of junk journal and planner kits. Creating the kits was fun, but to run a shop you can’t just create, pop it on the site, and carry on your merry way.

The Hustle Culture Reality

You have to do the keyword research, the SEO stuff, have listing titles that make sense but are also stuffed with search terms. You have to hustle.

When I started my shop, I got so caught up in hustle culture I honestly did not have a clue what I was doing. Everything became about my shop:

  • If I wanted to write a blog post, I had to make sure it was relevant to what I’m selling so I could plug my shop
  • If I wanted to post on Instagram, I had to make sure something from my shop was somewhere in the photo
  • If I wanted to make a YouTube video, I might as well make it a Journal with Me using my products

I was spending my time looking up search terms and keywords and making content based on anything relevant to my products. Everything had to be productive and on-brand.

“And it sucked the joy out of everything. My hobbies were no longer my hobbies. The things I used to do for fun and my mental health became side hustles. I couldn’t even read a book without thinking about how it could become content.”


The Breaking Point: When I Went Silent

My hobbies no longer served the purpose of what a hobby is supposed to. The things I used to do for fun and my mental health became side hustles.

My Etsy shop was profitable back in my hustle culture days before my brain got completely fried and I had to stop everything. In fact, I got so caught up in the idea that everything had to lead to my Etsy shop that I stopped creating altogether.

I went silent on all platforms for quite a while.

It just wasn’t fun anymore.


The Rebrand: Separating My Shop from My Identity

This past summer, I made the decision to close my Etsy shop for a month and rebrand it completely. I didn’t want to fully close because I truly do enjoy creating the kits and running a shop. I rebranded it because I needed to separate it from my identity.

It isn’t a part of me—it’s just something I like to do, and it’s just one thing that I like to do. Closing it and changing the name is part of me trying to find the joy in my hobbies again.

The Truth About Hobbies and Money

Hobbies do not need to be monetized. There is joy in them just as they are. Even in unfinished projects, because the process—the work we do to create—is what’s really important.

I fully believe the value of having a hobby like crafting or blogging lies in the creating more than the completed piece. But I also do sell items on Etsy. I make money from advertising and affiliates on my blog. None of these things make much money, but they are monetized.

Living with the Paradox

I’m trying now to separate everything, but it’s really hard because I love my Etsy shop. It’s difficult for me to reconcile my belief that hobbies don’t need to be monetized when I’m monetizing myself!

It almost feels like I’m telling people not to try—not to reach for their dreams—because I’m trying to limit my competition! I’m not! I guess it’s kind of like an author or an artist wanting to earn money for their work. I’m not saying I’m that creative or talented, but is it wrong to want to earn a living this way?

“I’m not anti-monetization. I’m anti-letting monetization hijack your why.”


What Changed: The Boundaries That Saved My Creativity

When I first started all of this, I got bombarded by hustle culture while trying to learn. Maybe I should have just learned by doing, but I looked for help and I got content trees, growth hacks, algorithm strategies that just sucked the creativity out of me.

I still want to create content, but I don’t want to grind. I want to make things I enjoy for the joy of making them—not for the end result or for a reward.

But this doesn’t mean I’m turning off my affiliates or closing my Etsy shop (these things only make about €20 a month, to be honest), and this is where I still struggle with myself. It feels disingenuous to create for the joy of creating and write about it online and have my content monetized. But I’m learning the balance between them.

I’m not actually charging you for access to anything here. Anything I earn is just a bonus. Like a tip. And if you decide you want to create a similar project to me, well, the kit is in my Etsy shop to buy or available for free on my Ko-fi. The emphasis is still on the joy of creating.

My Boundaries Now

Here’s what actually works for me:

1. I do not check stats or analytics. This is harder than it sounds because all of these websites push your stats in your face. It’s hard not to glance at them, but I make sure not to click on the stats or analytics tabs.

2. I create what I feel like when I feel like it because that was the entire reason I started any of this!

3. I’ve learned to reply “so what?” to content pressure. I do still get the little nagging voice in my head telling me I don’t have a post for this week, but I’ve learned to reply “so what?” and just carry on with my life.

These boundaries let me keep earning passively while creating primarily for joy. That’s the difference—joy first, income second instead of the other way around.


Where I Am Now: Creating Simply and Joyfully

I don’t know if I have this all figured out. This isn’t my career. I’m making only a small amount of money from this, but I’ve come a long way from where I started.

I’m no longer being pulled by the content train.

Right now, I’m creating for the joy of creating. It may be messy, it may be pointless, it may interest no one other than me—but it will be real and it will just be. Simply and joyfully.


Where Are You in Your Creative Journey?

I wish I had some profound advice to give you about leaving hustle culture behind, but I have none. I didn’t even realise I was being influenced by it until the stress got too much.

I’m learning to find joy in how I spend my time again. I hope that’s something you already have, and if not, I hope you can find your way to it. We all deserve our little moments of joy.

Share your story in the comments—I’d love to hear where you are and what boundaries have (or haven’t) worked for you.


The Bottom Line

You don’t need validation for your hobbies. You don’t need to monetize them. You don’t need to turn every beautiful thing you make into a business. You don’t even need to complete your projects!

But if you do want to earn from your creativity, you can—just set boundaries first.

This week, create one thing with zero thought about posting, selling, or optimizing it. Make it messy. Make it just for you. Remember what it feels like to create for the pure joy of it.

That’s where the magic lives.


Thank you so much for joining me today 🩷

Elaine

Introducing Wayfarer’s Journal Co.

Hello, my friends!

Just a quick update to share some exciting news — I’m renaming my Etsy shop to Wayfarer’s Journal Co.! I’m absolutely thrilled about this change and all of the new kits I have in the works.

I’ve been wanting to refresh my shop for a while now, but I was hesitant to shake things up. However, the time feels right to fully embrace the styles I’m truly passionate about in my creative work. While I still love vintage and shabby chic, my heart lies with dark academia and gothic aesthetics. These styles may not be as popular in the junk journaling community, but they’re what speak to me — and that’s the creative direction I’m excited to pursue.

Rebranding is no small task, but it’s work I genuinely love. It’s a joy and a privilege to design these kits, and sharing them with you makes it all the more meaningful.

You’ll notice quite a few changes over the coming weeks. If there’s something you’ve had your eye on in the current shop, now’s the time to snap it up — it might not be available next week. To celebrate the upcoming transformation, I’m offering 25% off everything in Elaine Howlin Studio this weekend.

Thank you so much for being part of this journey. I hope to see you soon in Wayfarer’s Journal Co.!

All the best,

My Vintage Reading Journal Flip-Through: Junk Journal Style with Freebies & Kits | 2024 & 2025

Hello, bookish friends!

I’m delighted to share something very special with you today – a full flip-through of my reading for 2024 and 2025. This journal has been my creative sanctuary, filled with memories of the books I’ve loved, challenges I’ve tackled, and all the little moments that make reading such a joy. Designed in a junk journal style, it’s not just a way to track my reading—it’s a beautiful, tangible record of my literary journey.

Whether you’re here for inspiration, to see how I use templates and kits, or just to peek inside a fellow book lover’s reading journal, you’re in the right place. I’ve included links to freebies, my Etsy shop, and other resources I’ve used so you can create something similar if you feel inspired.

So, grab a cuppa, settle in, and let’s dive into this flip-through of my reading journal. And don’t forget to check out the video where you can see every page in more detail—it’s linked below!

Reading Journal Flip-Through: From Reading Challenges to Seasonal Wrap-Ups

I’ve divided my journal into three main sections: the Reading List, the Reading Challenges, and the Reading Diary. Each section has its own unique design and purpose, and I’ve used everything from kits in my Etsy shop to freebies you can grab on my blog or Ko-fi page. I’ve even included bits and pieces from some wonderful resources like Paperwrld, The Graphics Fairy, and the New York Public Library.

But I think it’s time to stop talking about it and start showing you! I’ve put together a flip-through video where you can see every detail of the journal up close. Check it out below:

My reading journal is a junk journal, which is slightly different from what we most often see. It’s a little more creative with plenty of layers, ephemera, and pretty details. I’ve included a mix of templates and kits that you can find on my Ko-fi, blog, and Etsy shop. Whether you’re an avid journaler or just looking for some inspiration, I hope this gives you plenty of ideas for your own reading journey!

A Peek Inside Each Section

If you’ve had a chance to watch the video, you’ll already know how much thought I’ve put into every page. But let’s break it down a bit more in case you’d like some extra details about each section.

1. Reading List

This section is where I’ve listed all the books I’ve read this year. It includes:

  • A printable Reading & Books Tracker Spreadsheet, which you can download for free from my blog.
  • A Series Tracker Booklet, perfect for keeping tabs on all those ongoing book series.
  • A Statistics Page from my spreadsheet, summarising my reading habits at a glance.
  • And a Book Bracket Section, which I’m still working on (but I’ll share it once it’s done!).

2. Reading Challenges

I love a good reading challenge, and this section is where I track my progress. It features:

  • Romance Books Bookopoly, complete with the board, challenge cards, and book covers. This printable is available on my blog.
  • My 100 Books Challenge Tracker, where I’m on track to hit my goal of 100 books in under two years!
  • Dark Cottagecore Bookopoly, a moody and magical reading challenge also available as a printable on my blog and Ko-fi.

3. Reading Diary

The diary section is probably my favourite. It’s where I document my reading wrap-ups and reflect on the stories I’ve enjoyed each season. Each booklet is decorated with kits from my Etsy shop, including:

Each booklet is filled with prompts like “Book of the Season,” “Fanfic of the Season,” and “Reading Reflections,” making it a joy to fill in as I go.

Get Creative with Your Own Journal

If my journal has inspired you to start your own, you’re in luck! Many of the templates and designs I’ve used are available for free on my Ko-fi page, while others are part of my curated kits on Etsy. Whether you’re just starting out or you’re a seasoned journaller, I hope you find something you’ll love.

Here are a few links to help you get started:


Thank you so much for taking the time to join me on this little tour of my reading journal. I hope it’s sparked some inspiration for your own journaling adventures or given you ideas for tracking your reading journey.

If you’d like to get creative with some of the templates and kits I’ve used, don’t forget to check out my Etsy shop and the freebies on my Ko-fi page. I’d love to see what you create, so please feel free to share your own journals and ideas in the comments—I’m always excited to chat with fellow book and journaling enthusiasts!

Until next time, happy journaling and happy reading!

Connect with Me

Embrace the Season: Create an Autumn Leaves Paper Rose Basket | Free Template 🍂

Hello, lovely readers!

Welcome back to my little corner of the crafting world! I’m so glad you’ve popped by today. With the leaves turning and that lovely autumn chill in the air, it’s the perfect time to get your craft supplies out and create something special.

Do you get as excited about Autumn as I do? There’s something so magical about this time of year – the golden leaves, the cosy scarves, and of course, all the crafting inspiration that comes with it. That’s why I’m absolutely thrilled to share this freebie with you!

I worked hard to create something special that captures the essence of autumn and adds a touch of handmade charm to your crafts. This kit is perfect for decorating your home, making thoughtful gifts, or just indulging in a bit of creative fun. And the best part? It’s completely free on Ko-fi!

What’s Included in the Kit?

This kit comes packed with:

  • 16 Rose Templates: Each template features a beautiful autumn leaf pattern, so you can create an array of lovely paper roses that really showcase the season’s colours.
  • 3 Backing Pages: These are perfect for adding some extra detail or contrast behind your roses. They’ll give your floral arrangements a bit more depth and make everything pop.
  • 1 Basket Template: This easy-to-assemble basket is perfect for showcasing your roses. It’s designed to be simple yet elegant, so your blooms will take centre stage.
  • 1 Bow Template: I’ve included a charming bow template to finish off your basket with a touch of flair. It’s the perfect finishing touch to complete your autumn arrangement.
How to assemble the paper roses and basket.

How to Use the Kit

Here’s a quick guide on how to cut out and assemble your Autumn Leaves Paper Rose Basket Kit:

  1. Print and Cut: Start by printing out the templates. For best results, I recommend using good-quality paper, such as Navigator Office Card 160gsm or Navigator Colour Documents 120gsmOnce printed, carefully cut out the rose templates using scissors.
  2. Assemble the Roses: To create your roses, gently curl the edges of the petals to give them a lifelike look. Layer the petals, starting from the centre and working your way out, using a bit of glue (a glue gun works best) to hold everything together. For added realism, you can lightly ink the edges or use a bit of shading.
  3. Create the Basket: Fold along the scored lines on the basket template. Glue the tabs to form the basket shape. It’s quite straightforward, and the result is a lovely, sturdy base for your roses. Add scraps of paper for basket filling.
  4. Add the Bow: Once your basket is assembled, use the bow template to create a pretty bow. Glue it onto the front of the basket for a finishing touch.
  5. Arrange Your Roses: Place your completed roses into the basket. You can arrange them however you like – perhaps in a loose, natural style, or more structured if you prefer.
Advertisements

Get Your Free Kit on Ko-fi!

I’m so excited to share this kit with you all, and I can’t wait to see what you create with it. Head over to my Ko-fi page to download your free Autumn Leaves Paper Rose Basket Kit and start crafting today!

If you enjoy the kit, I’d love to hear from you. Feel free to drop a comment or share your creations with me on social media @elainehowlin_ on Instagram. Your feedback and beautiful projects always make my day!

Autumn Leaves Flower Basket is an Autumnal version of the Jane Austen Rose Basket tidd.ly/3FlQa5P Please read the included READ ME file.

And there you have it, my crafty friends! I can’t wait to see how you bring your Autumn Leaves Paper Rose Basket Kit to life. If you enjoyed this post, I’d love to hear your thoughts! Please leave a comment below with your ideas, tips, or any questions you might have – I always love connecting with you!

If you’d like to support my work and keep the creativity flowing, consider buying me a coffee on Ko-fi. Your support helps me keep bringing you fresh and exciting crafting content. Thank you so much for being here, and happy crafting!

Connect with Me

Emma by Jane Austen Altered Book

Hello lovely readers,

In this week’s video, I’m embellishing Jane Austen’s Emma using my gorgeous Regency Romance Ephemera Kit. I was heavily inspired by the most recent season of Bridgerton with this kit though not the exact story in the show. I love how Bridgerton has brought more diversity to the Regency genre and wanted to bring that to my kits. I love Jane Austen ephemera and artwork but it does get a bit samey after a while especially when using vintage or antique supplies. That’s why I’ve used beautiful artwork and illustrations to breathe new life into the Regency world with my Regency Romance Ephemera Kit.

Using the ephemera and fussy cuts included, I have altered and embellished my Wordsworth edition of Emma by Jane Austen. It was so much fun adding that little extra bit of flair to the book. I hope you enjoy the video and maybe get some ideas for altering your own books.

Unlock exclusive content, snag freebies, and keep the blog thriving! Support me on Ko-fi today and join the inner circle of creativity.

Grab a cuppa, get comfy, and join me as we turn Emma into a beautiful keepsake. Don’t forget to like, subscribe, and hit the bell so you never miss a video! Thanks for watching 🤎

Step into the enchanting world of Regency romance with this delightful printable ephemera kit! Inspired by the timeless elegance of Jane Austen’s novels and the sumptuous visuals of Bridgerton, this kit is perfect for adding a touch of sophistication and romance to your junk journaling, scrapbooking, reading journals, art journals, and planners.

Advertisements

Connect with Me