
The Workspace
The workspace is where you actually get work done in Codeg. It puts four things on one screen — the agent's conversation, your project's files, its git changes, and a terminal — so the whole loop of prompting, reviewing, and committing happens in one place, with no tab-switching between an editor, a diff tool, and a shell.
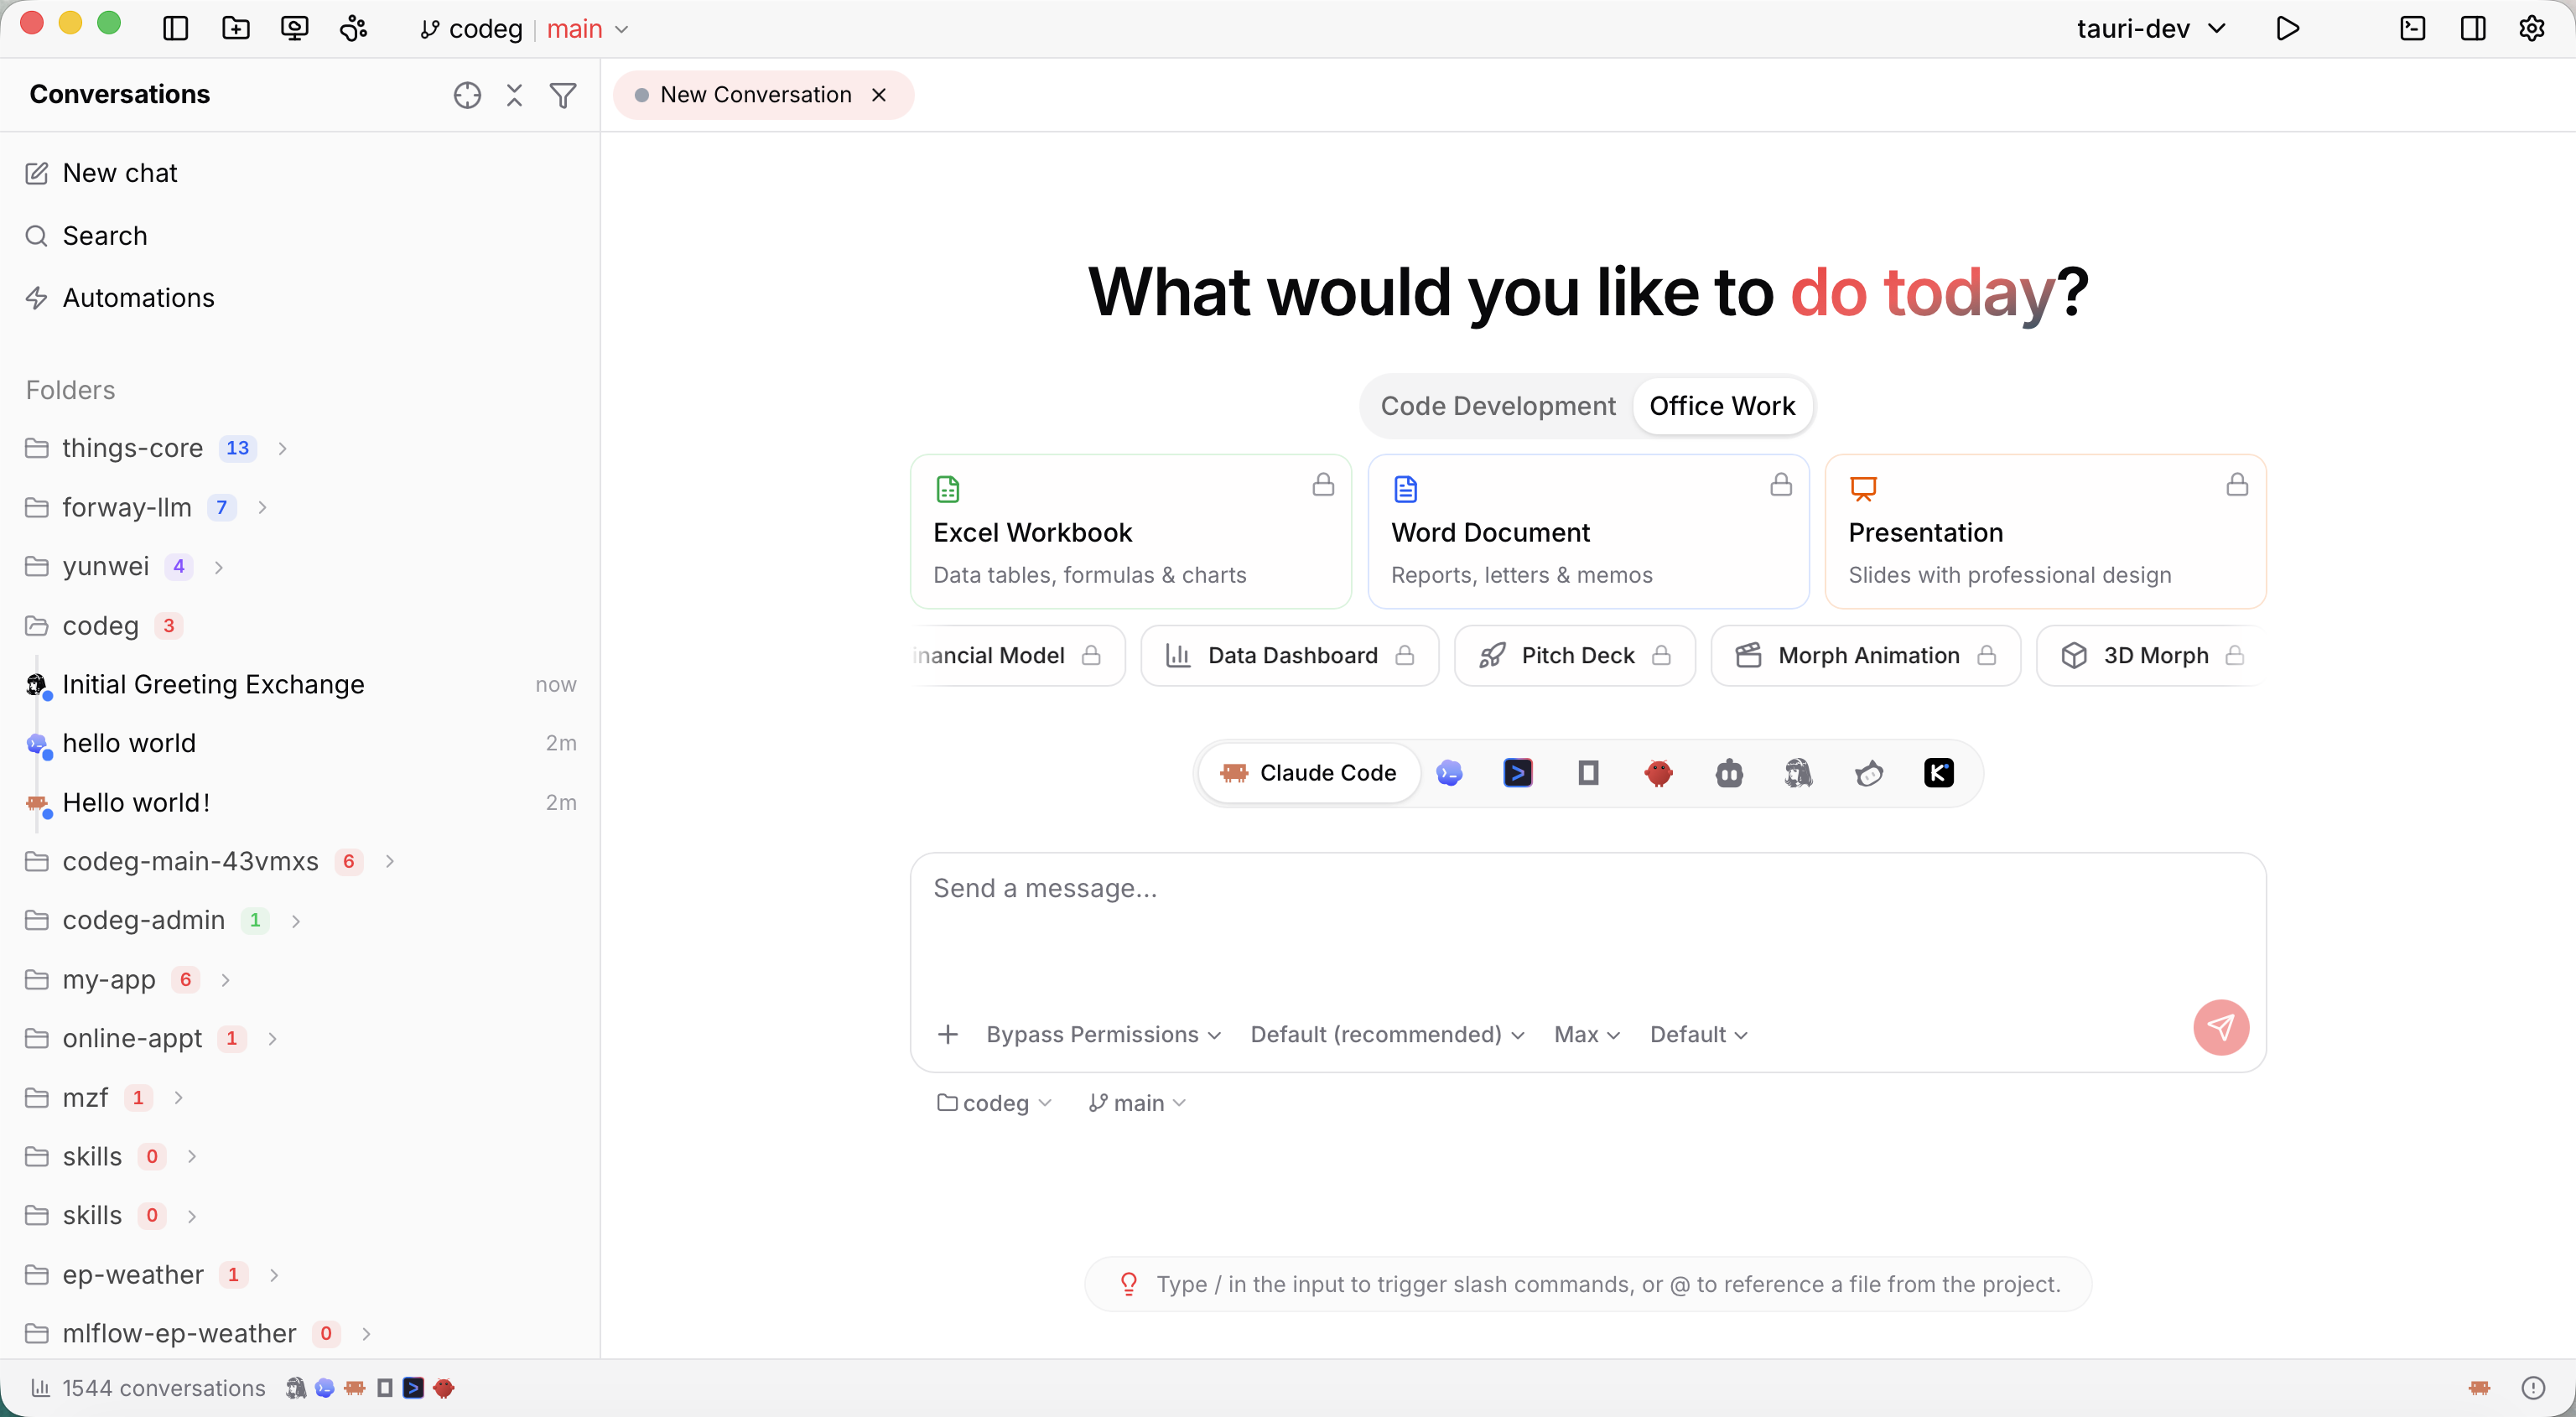
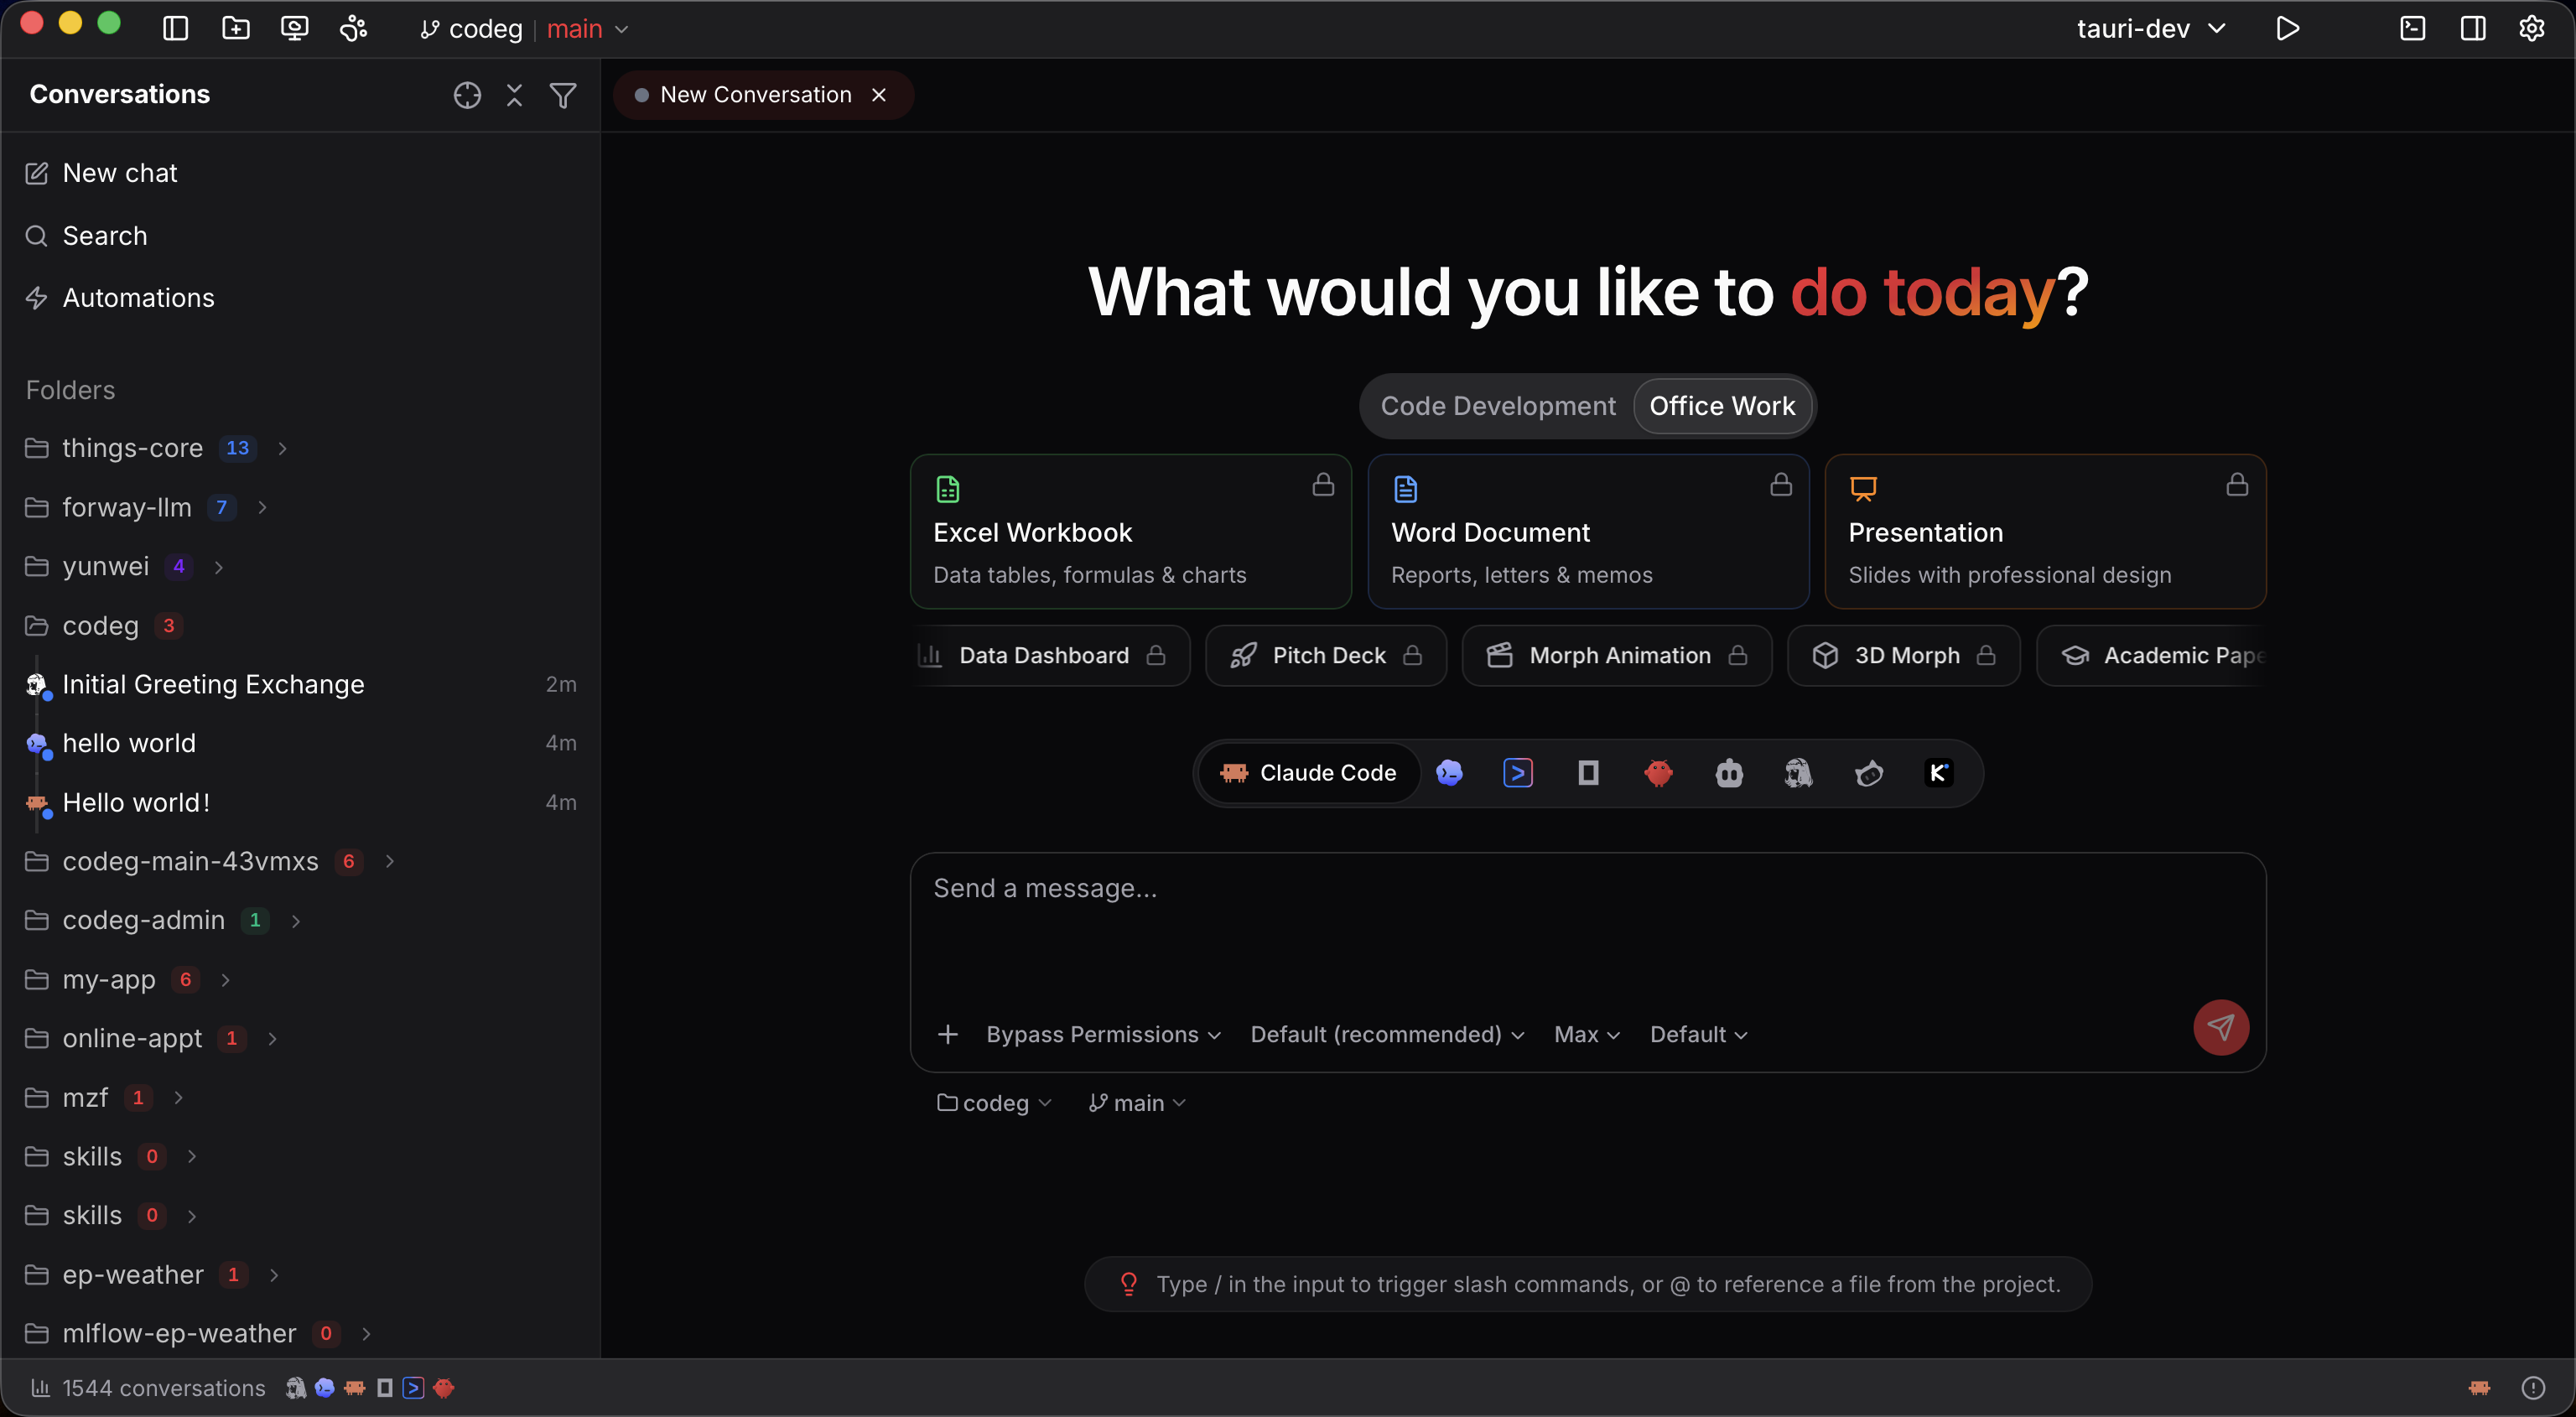
The layout
The desktop workspace is four columns side by side, each with its own header strip and divided by draggable hairlines that run from the top edge to the bottom:
- Conversations (far left). Every session across every folder you've opened — your history, and where you start new ones. They're grouped by project, each with a live status dot: In Progress, Review, Completed. The strip on top holds new chat, search, automations, To-dos, and view options. Automations and To-dos each carry their own badge — a failed run for one, a count of tasks waiting on you for the other — so a queue that needs attention says so from wherever you are.
- Conversation (center-left). The agent's transcript, with the composer docked at the bottom. Its tabs sit on top, and a slim detail header below shows the folder breadcrumb and the conversation's title.
- Files (center-right). The editor, diffs, and live previews for the files you open — right next to the conversation, so you can watch changes land as the agent makes them. It has its own tab strip and a file-path detail header.
- Aux panel (far right). A tabbed panel — Session Details · Files · Changes · Commits — holding session info, the project tree, your working-tree changes, and commit history. When the panel is narrow, the four tabs fold into a single dropdown.
The terminal opens beneath the two center columns, and a status bar along the bottom shows your conversation count, running background tasks, update notices, and the command launcher. Attached to a remote workspace, its name shows there too. Click the conversation count and it opens Token Usage — the full report of what your agents have spent, by day, folder, agent and model.
When a newer Codeg is out, the status bar says so itself rather than waiting to be found in Settings: a New v… badge appears, and clicking it opens a popover with the version, the full What's new release notes, and the buttons to act on it — the same Download → Install → Restart sequence as the settings panel, plus Later to wave it off. Dismissing a release quiets it in every open window, and leaves a plain grey icon behind so you can still get back to it; the next release lights the badge up again. → Settings → System
There's no full-width title bar — instead, the window chrome lives in two corner clusters that stay put as panels open and close: top-left toggles the sidebar and switches remote workspace, top-right holds Terminal, Auxiliary Panel, and Settings. Every panel resizes by dragging, and the side panels and terminal collapse away when you want room — ⌘B (conversations), ⌘E (aux panel), ⌘J (terminal). On a phone or a narrow browser window, the side panels become slide-in sheets.
To-dos, automations and Token Usage take over that whole area, so while one of them is open the top-right cluster swaps its terminal and panel toggles — which would have nothing to act on — for a back arrow to your conversations. It's the way out when the sidebar is collapsed and there's no conversation on screen to click, and it changes nothing else: whatever tab you were on comes back exactly as you left it. A page that has controls of its own puts them in those freed slots: To-dos, for instance, parks its view toggle and settings button there.
Folders and the sidebar
The left sidebar is your home base: every folder you've opened — a project directory — with its conversations grouped beneath it. Open a project folder to add one (⌘O). Right-click a folder's header (or click its ⋯) for everything you can do with it:
- Set default agent. Choose the agent a folder should use, and every new conversation you start there opens with it preselected. Pick No default (use global) to fall back to your global choice. It sets the agent only — model and mode still come from that agent once it connects.
- Change color. Give a folder an accent color so its section stands out when you're juggling several projects. The color tints the folder and its conversations in the sidebar; it doesn't carry into the tabs.
- Set alias. Give the folder a friendlier display name without touching anything on disk — it shows as alias [ folder ] in the sidebar and the conversation header. Leave the field empty to clear it and fall back to the plain name.
- Import local sessions. Open the import window with this project's past sessions preselected, to pull your agents' own history into the workspace — Codeg's conversation aggregation in action. → Conversation Aggregation covers what it sweeps and how it matches.
- Manage conversations. Bulk-select the folder's conversations to filter by agent or status, change their status, or delete them.
- Linked folders. Bring other directories into this workspace as subdirectories, so one agent can work across all of them. → Work across several folders
- Open in. Reveal the folder in Finder / Explorer / your file manager, or drop into a terminal there (desktop only).
- Remove from workspace. Take the folder out of Codeg — its tabs and terminals close, but nothing on disk is touched.
The folder's real name is always its on-disk directory name — that never changes — but Set alias gives it a friendlier label, and color and grouping help you tell projects apart at a glance.
Import local sessions isn't only on the folder menu. Right-click the empty space around the list for the same entry, and on a workspace with nothing in it yet the button sits right there on the empty state — next to Open folder and Project boot — since importing what you already have is usually the fastest way to make a fresh Codeg feel populated.
The number beside a folder counts what's running in it right now — sessions actively working, worktrees included — and disappears when nothing is. It's a live workload indicator, not a total, so a glance down the sidebar tells you where your agents actually are. The expand/collapse chevron only appears on hover; the folder icon already says whether it's open.
Three sections, in the order you want
The sidebar has three top-level sections:
- Folders — your projects, conversations nested under each.
- Chat — folderless conversations, the ones you started in Chat mode.
- Recent — one flat list of the conversations you can currently reach, folder-bound and chat alike, in whichever order Sort by is set to. Nothing is nested and nothing is grouped; it's the answer to "what was I just doing?" without expanding anything. It follows the same view options as the rest of the sidebar — a closed folder's conversations, a completed one while Show completed is off, and anything already in Pinned stay out of it. It shows 15 rows at a time with a Show more footer that reveals another page per click, while the section's own count badge reports the full total. Its header carries a new-conversation button, like Chat's.
All three can be reordered from the view-options menu — one row per section with move-up and move-down controls (or Alt+Arrow on the focused row) — and Recent can be switched off entirely if you'd rather not have it.
Tidy the list — view options
Two buttons at the top of the sidebar keep a long history manageable. Locate Active Conversation jumps to the session you're in, expanding whatever it's hidden behind. Beside it, a funnel opens View options:
- Show completed conversations — off by default, so finished work stays out of the way and the list is what's still live. Turn it on when you want the whole history back.
- Show worktree folders — on by default: each worktree sits under its repo as its own group, with its own count and color. Switch it off to merge them into the parent folder as a single list.
- Show Recent group — on by default.
- Sort by — Created time (the default) or Updated time.
- Section order — the reorder list described above.
The menu stays open as you pick, so flipping two settings costs one visit. On the desktop it also expands or collapses every group at once.
Work across several folders
A workspace doesn't have to be one directory. Since 0.23.1 you can link other folders in as subdirectories of it — a sibling service, a shared library, the docs repo — and the agent reads and edits across all of them from the one conversation. The file tree shows them, workspace search covers them, and @-mentions reach into them.
It takes one gesture: right-click the folder in the sidebar → Linked folders, then Add folders and pick as many as you like. (Opening a brand-new folder offers the same step right after you choose the root, so you can assemble a workspace as you create it.)
What it's for
The point isn't really "more directories." It's that the root stops having to be the project and becomes the place you assemble one — for as long as the work needs it, and no longer.
- A frontend and a backend that live in separate repos. Link
apinext toweband one turn can change an endpoint and the code that calls it, with both sides of the contract in front of the agent instead of one side and a guess. - Whichever microservices this week's change actually spans. Link the two or three involved, do the work, unlink them, link a different set next week. The workspace becomes a view over your services rather than a checkout you have to maintain.
- An empty root that owns no code at all. Make a directory purely to compose things —
~/work/current-task— and link whatever the job needs into it. Nothing to tidy up afterwards, because there was never anything there. - Code beside its documentation. Link the docs repo into the code repo and a change plus the page describing it land in the same session, in the same review. (This is how these docs are kept in step with Codeg itself.)
- A library you'd rather fix at the source. Link the shared package into the app that depends on it, and the agent can fix the bug where it actually lives instead of papering over it in the caller.
- Reference you have no intention of changing. A design-system repo, an API spec, another team's service. The agent works from the real interface rather than from what it can infer about it.
- An old repo and its replacement, side by side, while you port code across — the one case where having both trees open is the entire job.
- Sample data you deliberately keep out of the repo. Link a directory of fixtures or real-world input files so the agent can run against them without any of it being committed.
How it works underneath
The links are real filesystem links on disk, and that's a deliberate choice: agent CLIs run with their working directory set to the workspace root, so a merge that existed only in Codeg's UI would be invisible to them. Because it's a real directory entry, everything else follows — ls finds it, the agent's own file tools find it, your terminal finds it.
On macOS and Linux that's a symlink. On Windows it's a symlink too where Windows allows one, but creating one needs a privilege an ordinary process only has with Developer Mode on — so Codeg falls back to a directory junction, which needs no privilege and behaves the same for the local absolute paths it links. If both fail you'll be told to turn on Developer Mode or run Codeg as administrator.
Each linked folder appears under the name of its own directory, marked in the file tree as a linked folder. If that name is already taken in the root, Codeg disambiguates to api-2 rather than overwriting anything — case-insensitively, since macOS and Windows treat API and api as the same entry.
Manage them later
Reopen Linked folders on the same menu and each link shows its current state:
| State | What happened | What to do |
|---|---|---|
| Linked | Working normally | — |
| The link is gone from this folder | Something deleted the symlink | Recreate link |
| Another entry now uses this name | A real file or folder took the name | Rename, then recreate |
| The linked folder no longer exists | The target moved or was deleted | Re-link it at its new path |
Rename changes only how it appears inside the workspace — the directory it points at keeps its own name. Remove link deletes the symlink and nothing else; the linked folder itself is never touched.
A switch on that screen — on by default — keeps links out of git status by writing the link name into the repository's .git/info/exclude. That file is local to your clone and never committed, so nobody else's checkout learns about your linking habits.
It applies when the workspace folder is a git repository, and it's best-effort: if the rule can't be written, the only consequence is a noisier git status, never a failed link. Two gaps worth knowing — a workspace that isn't a repository has nowhere to put the rule, and renaming a link doesn't carry its rule across, so the new name will show up as untracked until you exclude it yourself.
Some picks it simply refuses, telling you which: the workspace folder itself, a folder that contains the workspace, something already inside it (no link needed — it's already reachable), and something already linked.
Only the links you made are followed
Codeg confines every file operation to the workspace root, and that guard doesn't just wave symlinks through — it consults the list of links you created. So a repository you cloned that happens to ship secrets -> ~/.ssh stays exactly as unreadable as it was before you linked anything. → Privacy & Security
What a link doesn't extend
Two things still follow the workspace root only. Live file watching — edits an agent makes inside a linked folder won't refresh the tree on their own; reopen or refresh it. And the Changes and Commits panels track the root's repository, so a linked repo's own working-tree changes and history aren't shown there. Open that repo as its own folder when you want to review and commit its changes.
Start a session — the composer
Everything begins in the composer, the input at the bottom of the conversation. Choose an agent, model, and mode, point it at a working folder, type a prompt, and send.
- Agent and model. Pick from your enabled agents and the models that agent offers. (The agent picker appears when you start a new conversation.)
- Mode, and the agent's own options. The dropdown lists the modes the connected agent provides — a plan-first mode, an accept-edits mode, and so on. Beside it sit whatever session options that agent advertises: a picker where it offers a list of values, a toggle chip where it offers a switch (Cline's auto approve, for one). All of it comes from the agent itself, so what you see depends on which one you're running — and an option whose kind this build of Codeg doesn't understand is quietly left out rather than being allowed to break the session.
- Working folder & branch. A row just below the box shows where the agent will work: a folder chip and a branch chip. The folder chip is switchable while the conversation is still a draft (its list shows folder aliases and searches them, and a pinned Chat mode row runs folderless for a quick chat); once a conversation is bound to a folder, the chip stays as a label. The branch chip is the full git menu — see Branch and run git.
- Context and connection. At the right of that same row, a small ring tracks how much of the model's context window you've used — click it for the token breakdown (input, output, cache) — and a heart icon shows the agent's connection status: connected, connecting, error, or disconnected.
- The + menu. Attach files, insert a saved quick message, leave live feedback while the agent is working, run a slash command, or drop in a skill from the Experts, Office Work, or Scientific Research packs. Where the agent supports it — Claude Code on adapter 0.65.0 or newer — live feedback reads Insert into current turn and lands in the work already running; elsewhere it's queued for the agent to pick up. → Settings → General
- Rich input. Type @ to mention a file, agent, past session, or commit; type / for slash commands — the match is fuzzy, so
rvwfindsreview. Long messages you've sent fold up with a show more toggle so the transcript stays readable. - Send, fork, stop. Enter sends (Shift+Enter makes a newline); Fork & Send branches the conversation; while the agent runs, Send turns into a red Cancel button. Type ahead and your messages queue until it's ready for them.
Approvals come from the agent
Codeg has no global "auto-approve everything" switch. How freely an agent acts is governed by the mode you pick plus the permission prompts it raises mid-task (below) — so control stays with the agent's own safety model.
Follow along — the conversation
As the agent works, its transcript streams in: replies as formatted Markdown (code, math, and diagrams included), its reasoning, and a live plan checklist for multi-step tasks. A plan long enough to bury the rest of the turn caps its height and offers show more / show less, the same way a long message you sent already does.
- Tool calls appear as collapsible cards tagged with status — Awaiting Approval, Running, Completed, Denied. Shell commands stream their output live; repeated actions fold into a single summary like "Ran 3 commands."
- A result with no card of its own — an MCP tool Codeg has never seen, say — renders as a collapsible tree rather than a wall of JSON: small payloads open fully, large ones show just their outline, and long strings fold to one line. Show raw JSON switches back to the plain text whenever you want it.
- What the agent touched is summarized at the end of each reply, in two groups: New files (shown by default) and Files changed (folded up, with a count and
+/−totals). Click a card to open that file in the editor, or use its View Diff button to see just what this reply did to it — and on the desktop, Show in file manager to reveal it on disk. Deleted files are listed too, marked Remove. - File names are live. A file the agent mentions — and any file you attached with
@— renders as a badge you can click to open in the file pane. Right-click it for the same actions the file tree offers: reveal it in Finder / Explorer / your file manager, Copy relative path, or Copy absolute path. (The reveal option is hidden where it couldn't work — in the browser, or a desktop window attached to a remote workspace — and the relative form is greyed out for a file outside the current folder.) - Permission prompts. When the agent needs the go-ahead — to run a command, apply an edit, follow a plan — a card docks just above the composer: "Agent requests permission to continue this turn." Its buttons are the agent's own choices (Allow, Reject, and the like). A separate card handles multiple-choice questions the agent asks you.
- What each option grants. Where the agent tells Codeg — Claude Code and Codex do — a panel above those buttons spells out what each choice would actually allow, and each line is tagged with how long it lasts: This run, This session, Saved to user settings, Saved to project settings, Saved to local project settings, or Saved permanently. It's the difference between waving a command through once and writing a rule into a file your teammates will inherit, said before you press anything.
- An empty reply says why. If a turn ends with nothing in it, the alert doesn't just tell you to check your configuration — it names which of three things happened: the agent genuinely produced no response, it produced output Codeg couldn't parse (usually an agent/protocol version mismatch), or it sent only status updates (plan, mode, usage) and no reply. Expand the alert for the agent's own output, captured from its error stream and scrubbed of anything that looks like a credential.
- Delegated work. When one agent hands off to another, a Sub-agents overlay tracks the delegated sessions — the heart of Multi-Agent Collaboration.
- Each turn ends with its model, token, and duration stats, and you can export a whole conversation to image, Markdown, or HTML.
- Turn a message into a task. Beside the copy button — on your own messages and on finished replies alike — sits a checklist icon: Create task from message. It takes that text over to To-dos, pre-filled with the project folder, for the follow-up you noticed but don't want to do now.
Long conversations open fast
A conversation that has been going for weeks doesn't make you wait for all of it. Codeg loads the last 120 turns — nudged back to start on one of your own messages, so a window never opens mid-exchange — and pages in another 120 as you scroll up, without the view jumping under you: the position you were reading holds while the earlier turns are prepended above it. Responses from a server or a remote workspace are compressed on the wire as well.
The window is a display concern only. Exporting still takes the whole transcript, and so does anything else that reads the conversation as a document.
A session that fails to load keeps what you can see
If loading a conversation errors, the failure now docks as a small notice above the composer with Reload and New session, instead of replacing everything with a full-page error. The transcript you already had stays on screen and stays readable.
Work with files — editor, diffs, and previews
The Files tab in the right panel is your project tree, rooted at the workspace; click any file to open it in the center file pane. Drag an entry to rearrange the project or feed the agent: drop a file or folder onto another folder (or the workspace root) to move it on disk, or drop it into the composer to attach it as a file reference for your next message — the drop target decides which, with no modifier keys. The tree also takes the keyboard: ↑/↓ move, → opens a folder or steps into it, ← closes it or jumps to the parent, Home/End go to the ends, and Enter opens a file or toggles a folder.
- Editing. Files open in a full editor. There's no Save button — Codeg saves on ⌘/Ctrl+S, when the editor loses focus, and automatically a few seconds after you stop typing; an unsaved file shows a
*in its tab. Send a file, or just a selection, to the agent with ⌘L. - Diffs. The agent's edits open as read-only diffs — side by side (HEAD ↔ Working Tree) or as an inline unified diff, one file at a time, with change counts and prev/next navigation. Diffs are for review; you commit from the git panel (below), not by accepting individual lines.
- Live previews open in the same pane: Office documents (
.docx,.xlsx,.pptx) render and refresh as the agent edits them; Markdown and HTML get a Preview ⇄ Edit Source toggle (HTML runs scripts only if you opt in); images zoom and pan. → Office Documents
Merge conflicts get their own editor
Resolving a conflict opens a three-pane merge editor — Local, Result, Remote — where you can accept changes hunk by hunk. It's the one place with per-hunk controls; everywhere else, diffs stay read-only.
Session details
The aux panel opens on Session Details — an at-a-glance readout of the conversation you're in: its title and ids, the agent and model running it, status and current git branch, and live token usage (input, output, cache, and context-window totals) with timing and timestamps. Every field has a copy button; with nothing focused it just reads No active session. It's a readout, not a control panel — the same view is available from the conversation header's ⋮ menu.
Branch and run git
The branch chip below the composer is first of all a branch picker, and there's one per conversation, so tiled sessions each show their own branch. Click it and a searchable menu opens with two halves:
- Operations, at the top — the short list that acts on the branch you're on: Pull code, Fetch remote branches, Commit code…, Push…, New branch…, and New worktree…
- Your branches, below: Local branches and Remote branches, with shared prefixes (
feature/…) folded into collapsed groups and the checked-out one marked Current. Click any other branch for its actions — Switch to this branch, Merge it into the current one, Rebase onto it, Delete branch, or Update / Push it without checking it out. A branch a worktree has checked out also offers Delete worktree and Delete worktree and branch.
The long-tail operations aren't here: stash and unstash live in the aux panel's Changes tab with the rest of the working-tree actions, and Manage Remotes in its Commits tab.
One search box filters both halves at once, so typing push finds the operation and typing part of a branch name finds the branch. In Chat mode there's no chip at all; in a folder that isn't a git repository it reads No branch and offers Initialize Git repository.
→ Git & Worktrees covers the whole workflow.
Run a saved command
The status bar carries a launcher for the commands you run over and over — a dev server, a test watcher. Codeg seeds the list from your project's package.json scripts, so it usually has something the first time you look; until then it reads Add Command. Pick one from the menu and the ▶ button runs it in a terminal, turning into ■ to stop it. Manage Commands… lets you add, edit, reorder, and delete them, and your selection is remembered per folder.
Review and commit
Two right-panel tabs put version control a glance away:
- Changes lists your working-tree edits — tracked and untracked, with per-file line counts. From here you can open a file's diff, discard an edit (Rollback), or start a commit.
- Commits is your whole history, as a timeline that loads more as you scroll. Two filter pills narrow it — Branch (every branch by default) and Author — and Codeg remembers both per project. Click a commit to expand it: the full message, the files it touched with their
+/−counts (click one for its diff), and which branches contain it. Right-click for View Diff, New branch…, Reset to Here, or Push…
The Branch pill has a HEAD entry above the branch list — follows the current branch — which is the one to pick when you're hopping between branches. Naming a branch pins the view to that branch; HEAD re-resolves on every query, so the history follows you through each checkout and keeps working even on a detached HEAD.
The Changes tab commits directly: type a message in its toolbar and press Enter for a quick commit of the tracked files, or open the full Commit window to tick exactly what you want, write a message, and choose Commit or Commit and Push. Its menu also holds pull, fetch, push, stash and unstash. Branch switching, merging and worktrees are the branch chip's job.
Parallel development with worktrees, remote accounts, and the full git workflow have their own page. → Git & Worktrees
The terminal
Press ⌘J for an integrated terminal in your working folder — a real shell, not a sandbox. Open as many as you need in tabs. It's there for the commands you'd rather run yourself: starting a dev server, inspecting output, running a one-off script alongside the agent.
Tabs and multitasking
The center area is tabbed, so several sessions stay open at once:
- Conversation tabs reorder by dragging and pin with a double-click. ⌘T opens a new conversation, ⌘W closes a tab, ⌘Tab cycles between them.
- File tabs track the files, diffs, and previews you've opened in the file pane.
- Unsent drafts survive a restart. A conversation you started but never sent comes back where it was — with whatever you'd typed in the composer still in it. Each draft keeps its own text, so two of them side by side no longer overwrite each other.
Split the conversation view into groups
One tab strip isn't always enough. Right-click any conversation tab and you can split the conversation area into tab groups — the same idea as an editor's split panes, with no fixed limit on how many:
- Split Right / Split Down — divide the current group in two. The new group opens on a fresh draft, because a conversation can't be open in two groups at once.
- Split and Move Right / Split and Move Down — same split, except this tab moves into the new group.
Every group is a complete workspace of its own: its own tab strip, its own conversation header underneath, and its own new-conversation button that inherits that group's folder. Only one conversation is active at a time — the one the composer and shortcuts act on — so splitting never leaves you guessing where a keystroke landed.
Once you're split, the same right-click menu manages the layout:
- Move to Opposite Group, or Move to Group n when there are several (each listed with the conversation it's showing).
- Change Splitter Orientation — flip a side-by-side pair into a stacked one, or back.
- Unsplit dissolves the current group into its neighbour; Unsplit All collapses everything back to one.
You can also just drag a tab across — onto another group's strip, or anywhere in its pane — and a floating chip follows the cursor while a drop indicator shows where it will land. Drag the divider between two groups to change how the space is shared. Splits mix freely: split right, then split one of those halves downward, and you get a grid.
Your layout is remembered per workspace, drafts included — reopen Codeg and the split comes back, with the same conversations in the same groups.
Two small rules keep this predictable. A draft stays in the group that spawned it (it has nothing on the server to move yet), so its move items and cross-group drag are withheld — reordering it inside its own group still works. And moving a tab between groups doesn't interrupt it: the session keeps its connection and keeps streaming while it changes home.
Tile several sessions side by side
Splitting shows one conversation per group. Tile Display does the opposite — it shows all of a group's tabs at once. Right-click a conversation tab and choose it to lay that group's conversations out next to each other: not a fixed two-up split, but one pane per open tab, side by side, scrolling horizontally when they don't all fit. This is how you run a fleet of agents at once: start a task in one, a different task in another, and watch every transcript stream in parallel without switching tabs.
- Panes are your tabs. Open another conversation (⌘T or the sidebar) to add a pane; close a tab to remove one. You need at least two conversations in the group for tiling to take effect.
- Mix projects freely. Tiled panes aren't tied to one folder — put sessions from different projects side by side.
- One pane is active. The active pane — the one the composer and shortcuts act on — is outlined with a flowing gradient border. Click any other pane to focus it.
- It's per group. Tiling and splitting compose: tile one group into a wall of transcripts and leave the group beside it on a single conversation.
- Leave anytime. Right-click → Exit Tile returns that group to the single-tab view.
Tiling is a great companion to multi-agent collaboration: tile the lead session beside the sub-agent sessions it spawns and watch the whole team work.
The welcome screen
Before a session starts, the conversation pane asks "What would you like to do today?" and offers Quick Actions in three tabs — Code Development, Office Work, and Scientific Research. Each card drops a ready-made skill (and, for Office and Research, a prompt template) into the composer with one click; anything not yet enabled for your chosen agent shows a lock that links to where you turn it on. Below it sit the agent picker and a rotating tip.
The row of skill shortcuts under the quick actions stops at its ends rather than drifting on its own: an arrow at each end moves it, and each arrow is live exactly while there's somewhere left to go.
Desktop and browser
The workspace is the same whether you run the desktop app or open codeg-server in a browser. A few things differ:
- Files. The desktop app uses native file dialogs and can Open in Finder / Explorer / terminal; in the browser you upload files or pick a file on the server instead.
- Window & extras. Custom window controls and the desktop pet are desktop-only; the browser adds a login (your access token) and a reconnect prompt if the connection drops.
- Remote workspaces. A desktop app can attach to a remote server, at which point its file operations behave like the browser's.
Keyboard shortcuts
| Shortcut | Action |
|---|---|
⌘/Ctrl B | Toggle the Conversations panel |
⌘/Ctrl E | Toggle the right (Session Details / Files / Changes / Commits) panel |
⌘/Ctrl J | Toggle the terminal |
⌘/Ctrl T | New conversation |
⌘/Ctrl K | Search conversations and files |
⌘/Ctrl W | Close the current tab |
⌘/Ctrl Tab | Cycle between tabs |
Enter / Shift+Enter | Send / newline |
⌘/Ctrl L | Add the current file or selection to the chat |
⌘/Ctrl S | Save the current file |
These are the defaults; several can be changed.
Next steps
- Working with Agents — enable an agent and run your first session in the workspace.
- Conversation Aggregation — how past sessions from every agent land in the Conversations list.
- Git & Worktrees — the full version-control workflow, including parallel development.
- Token Usage — what the conversation counter in the status bar opens.
- Multi-Agent Collaboration — delegate parts of a task to other agents.