The fastest way to get started with Appwrite in Cursor is to install the Appwrite plugin from the Cursor Marketplace. The plugin includes agent skills, MCP servers, and commands, giving Cursor's AI agents everything they need to work with your Appwrite projects.
To install the plugin:
- Visit the Appwrite plugin page on the Cursor Marketplace.
- Sign in with your Cursor account.
- Click Add to Cursor.
- The plugin will be added to your editor automatically.
Once installed, the plugin gives your AI agents access to Appwrite skills for all major SDKs, MCP servers for the Appwrite API and documentation, and commands for deploying functions and sites.
Prefer manual setup?
If you'd rather configure MCP servers individually, skip to Step 3.
Get started quickly with these pre-built prompts for common Appwrite integrations:
Browse all quick start prompts
If you installed the Appwrite plugin in Step 1, MCP servers are already configured and you can skip to Step 4.
Connect Appwrite MCP servers to Cursor for deeper integration with the Appwrite API and documentation.
Before you begin, ensure you have the following pre-requisites installed on your system:
Open the Cursor Settings page, head to the MCP tab, and click on the Add new global MCP server button. This will open an mcp.json file in your editor.
Choose which MCP server you want to configure:
Update the mcp.json file to include the API server:
{
    "mcpServers": {
        "appwrite-api": {
            "command": "uvx",
            "args": [
                "mcp-server-appwrite"
            ],
            "env": {
                "APPWRITE_API_KEY": "your-api-key",
                "APPWRITE_PROJECT_ID": "your-project-id",
                "APPWRITE_ENDPOINT": "https://<REGION>.cloud.appwrite.io/v1"
            }
        }
    }
}
Configuration:
- Replace
your-project-idwith your actual Appwrite project ID - Replace
your-api-keywith your Appwrite API key - Replace
<REGION>with your Appwrite Cloud region (e.g.,nyc,fra)
Update the mcp.json file to include the docs server:
{
  "mcpServers": {
    "appwrite-docs": {
      "command": "npx",
      "args": [
        "mcp-remote",
        "<https://mcp-for-docs.appwrite.io>"
      ]
    }
  }
}
You can also directly add the MCP servers to Cursor using the following links:


Once you save the details, Cursor will connect with the MCP server(s) and load all available tools. You may need to restart Cursor if it is unable to start the MCP server.
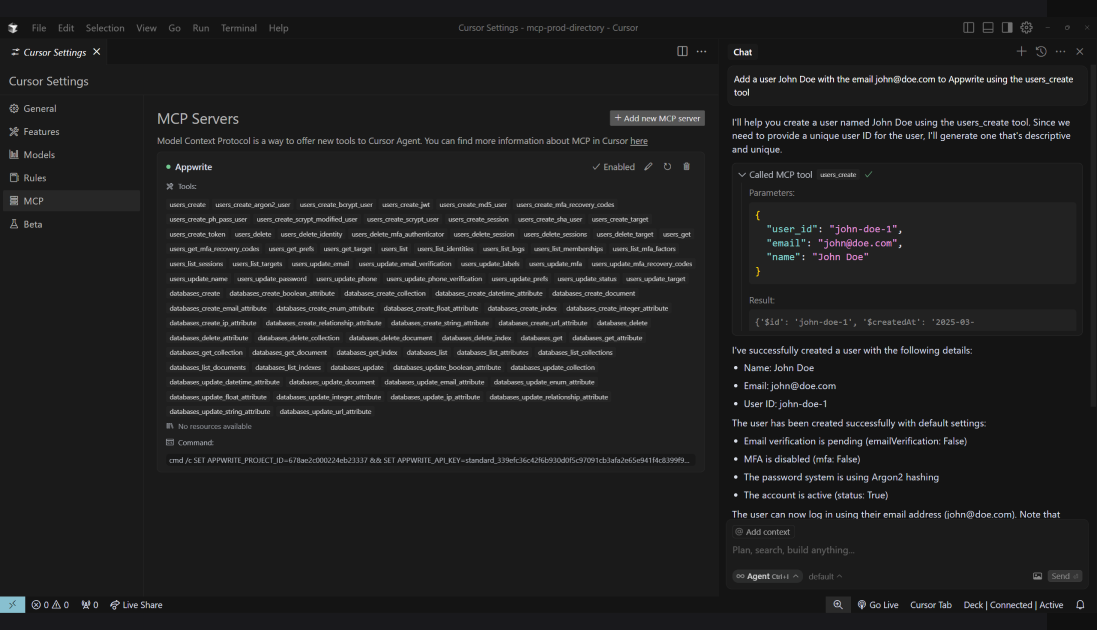
Open Cursor Agent and test your MCP integrations. You can try out the following example prompts based on the MCP server you have configured:
Example prompts:
Create a new user in my Appwrite projectList all databases in my projectShow me the tables in my databaseCreate a new row in my tableDelete a specific user by ID
Example prompts:
How do I set up real-time subscriptions in Appwrite?Show me how to authenticate users with OAuthWhat are the best practices for database queries?How do I implement file uploads with Appwrite Storage?Show me an example of using Appwrite Functions