Paths
A path Setup
To create a new path, select a bone or slot in the tree, then choose New... Path in the tree properties.
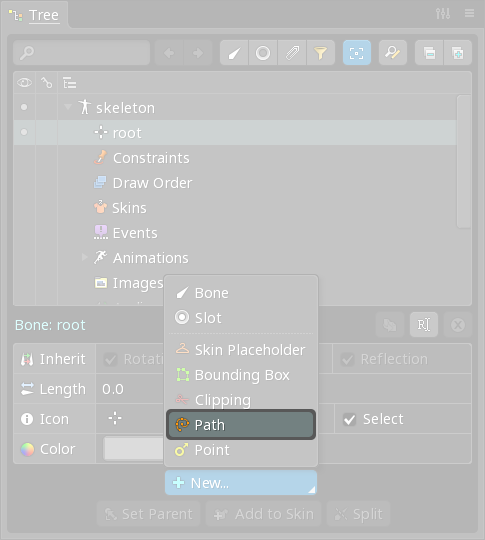
The new path appears in the tree and Properties

See the Length
The total length of the path is shown. To change the length, move the path vertices in the viewport.
Closed
When checked, the first and last knots are connected.

When unchecked, the first and last knots are not connected.
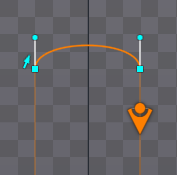
When an open path is selected, dashed lines at both ends of the path show the direction the path is pointing. This can be useful when a path constraint position is less than 0% or greater than 100%.
Constant speed
When checked, additional calculations are performed to make calculating positions along the path more accurate. When used with a Edit Path
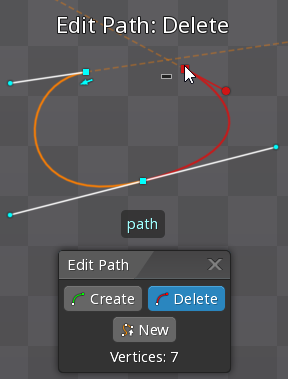
Clicking the Edit Path button enters Freeze
The Freeze button sets rotation to 0 and scale to 1 for the current vertex positions.
This is possible because a path does not really have a rotation or scale. It has only a number of vertices, each of which has a position. Spine provides rotation and scale values for convenience, to allow manipulation similar to other attachments. The rotation and scale are adjusted when the Rotate or Scale tools are used on the entire attachment.
A path doesn't have translation, either. The translation values shown are the centroid of the vertices.
Reverse
Clicking Reverse changes the direction of the path. A path constraint will go around the path in the opposite direction.
Edit mode
Edit mode allows for creating, modifying, and deleting the path's vertices.

The Create tool
The Create tool allows new knots to be created by clicking between existing knots. Drag to translate a vertex. Double click to delete a vertex.
Delete tool
The Delete tool allows vertices to be deleted by clicking. Drag to translate a vertex. Multiple vertices can be selected by holding ctrl (cmd on Mac) or dragging to box select.
New vertices mode
The New button deletes all vertices and enters the new vertices mode. This mode allows the path to be defined by clicking to create new knots. Drag to create a knot and adjust its handles. Vertices can also be translated by dragging or deleted by double clicking. To complete the path, exit the new vertices mode by clicking the first vertex to close the path or by clicking the New button again.

Transform tools
Path vertices can be moved outside of edit mode by using the transform tools. The entire path can be rotated, translated, and scaled like any other attachment.

Individual vertices can be translated with any transform tool by dragging. Multiple vertices can be selected by holding ctrl (cmd on Mac), then clicking or dragging to box select. The selected vertices can be deselected by pressing spacebar or escape, or by clicking in any empty space.
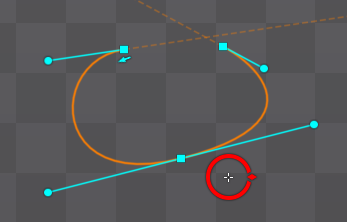
The origin used for rotation or scaling can be changed. Mouse over the small crosshair at the center of the Rotate or Scale tool until a circle appears, then drag the origin to the desired position. The origin will automatically snap to vertices.
Moving vertices in setup mode changes the path for the setup pose. Moving vertices in animate mode is done to set Angle lock
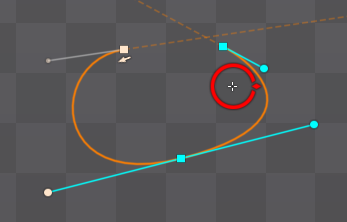
When moving a handle, shift can be held to lock the angle of the handle, so it will only move toward or away from the knot. This can be useful to adjust the curve on only one side of the knot.
Cusps
Normally when moving a handle, the handle on the opposite side of the knot also moves. By holding alt (option on Mac), a handle can be moved without affecting the other handle. This results in a cusp, where the transition from one curve to the next has a sharp turn.