
Some of our plugins require the Itthinx Updates plugin, a valid Service Key and a user account on itthinx.com to receive automatic updates. Purchases grant access for one year and must be renewed for continued access to updates.
To sum it up, do this:
- Follow the indications on your site to install and activate the Itthinx Updates plugin. Alternatively, download the .zip and install it.
- Visit the Service Key page to obtain your Service Key.
- Input your Service Key on your site under Plugins > Itthinx Updates.
We describe parts in a bit more detail next.
Installation
The Itthinx Updates plugin can be installed via a link that appears automatically on your WordPress dashboard when an extension is present that relies on it.

To install the plugin manually instead, follow the alternative instructions below. This may be necessary if conflicting plugins are present. If so, make sure to review the Troubleshooting section below.
Step 1 : Click the Please install the itthinx updates link that appears on your site to install it.
Alternatively, download the Itthinx Updates plugin – right-click this link and choose Save as …, then go to Plugins > Add New > Upload and upload the file.
Step 2 : Activate the Itthinx Updates plugin.
Step 3 : Get your Service Key from Service Key and copy it.
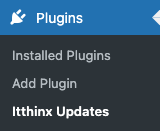
Step 4 : On your site’s dashboard, go to Plugins > Itthinx Updates.
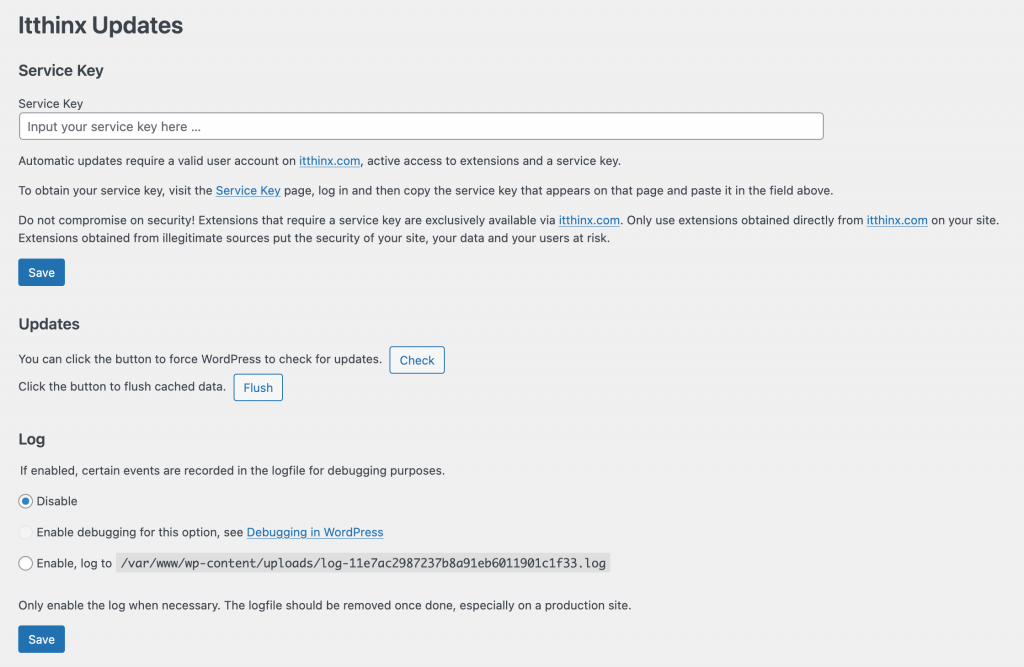
Paste the Service Key in the field provided for that purpose and hit Save.
The section provides the following features:
- The Service Key input field. Input your service key there.
- A facility to force check for updates. Click Check to force WordPress to check for updates. If any are available, a summary of available udpates will be displayed.
- The Flush button can be used to void data that the plugin holds about updates immediately. You can use Flush and then Check to make sure the latest information available about updates is used.
- If there are any issues with updates, Log options are available that provide details about the update process in a log file. You can choose to disable it (that is the default and recommended for live/production sites), have information logged to the standard debug.log or log to a particular log file. Do not leave this option enabled unless it is needed.
Updating the Itthinx Updates Plugin
To get updates for the Itthinx Updates plugin itself, it must be activated.
Troubleshooting
Conflicting Plugins
Mojo Marketplace
Some plugins like Mojo Marketplace interfere in the installation and update procedure of updaters such as our Itthinx Updates plugin. In those cases, you must either deactivate the conflicting plugin or use the manual installation process if available.
If, after clicking the installation prompt, you get this failure message …
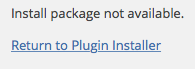
… then it is very likely that you have a conflicting plugin installed.
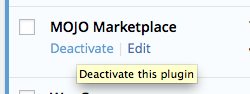
A commonly known culprit is the case of the Mojo Marketplace plugin which is automatically installed on hosts like HostGator. If you find this on your WordPress Dashboard …

… then the automatic installation procedure will not work. You must go to Plugins > Installed Plugins and deactivate this plugin:
Once the plugin has been deactivated, you can use the automatic installation procedure. If the procedure still fails, or if you have another conflict on your setup that makes it impossible to install it automatically, click here to download it or right-click the link and choose Save as …, then go to Plugins > Add New > Upload and upload the file. Then proceed to activate the Itthinx Updates plugin and enter your Service Key under Plugins > Itthinx Updates.
Visser Labs Updater
Another plugin that interferes is the Visser Labs Updater.

Proceed as indicated above and deactivate that plugin to be able to use the installation and update process normally via the Itthinx Updates plugin.
WP_HTTP_BLOCK_EXTERNAL and WP_ACCESSIBLE_HOSTS
If your site’s wp-config.php contains a line that defines the WP_HTTP_BLOCK_EXTERNAL constant, make sure to either remove the line or define it as false:
define( 'WP_HTTP_BLOCK_EXTERNAL', false );
If you need to keep WP_HTTP_BLOCK_EXTERNAL set as true, you must use the constant WP_ACCESSIBLE_HOSTS which is used to allow requests to certain hosts. You should include *.itthinx.com to allow access in your wp-config.php:
define( 'WP_ACCESSIBLE_HOSTS', '*.wordpress.org,*.itthinx.com' );
See also:
Connection and DNS Issues
If your server has problems connecting, e.g. when you find entries like this one in your debug.log:
PHP Warning: An unexpected error occurred. Something may be wrong with WordPress.org or this server's configuration.
… then this might be related to the constants explained above, or to issues with resolving hosts. Find out the IP addresses of these hosts using e.g. ping, and add them to your server’s /etc/hosts :
- api.wordpress.org
- service.itthinx.com
- itthinx.com
Add the IP addresses to your server’s /etc/hosts :
...
xxx.xxx.xxx.xxx    api.wordpress.org
xxx.xxx.xxx.xxx    service.itthinx.com
xxx.xxx.xxx.xxx    itthinx.com
...